Table of Contents
Advertisement
Quick Links
Advertisement
Table of Contents
Troubleshooting

Subscribe to Our Youtube Channel
Related Manuals for Marport TRAWL EXPLORER PRO


Summary of Contents for Marport TRAWL EXPLORER PRO
-
Page 2: Table Of Contents
Contents Configuring the Echo Sounder Legal About Time Variable Gain History About the Automatic Range Mode Copyright Applying Offsets to Measurements Disclaimer Testing Measures Memory Card Recording Saving a Configuration on Mosa2 Exporting Sensor Configuration Introduction and Importing a Sensor Configuration Presentation Introduction Safety Guidelines... - Page 3 Contents | iii Charging the Sensor with the Dock Cleaning the Sensor Maintenance Checklist Troubleshooting Warning icon on the Dock charger plug Mosa2 does not open due to error message Sensor does not connect correctly with Mosa2 when using the Configuration Cable The sensor is not running when testing out of water Support Contact...
-
Page 4: Legal
Marport is a division of Airmar Technology Corporation. Disclaimer Marport endeavors to ensure that all information in this document is correct and fairly stated, but does not accept liability for any errors or omissions. The present user guide is applicable for the following versions: •... -
Page 5: Introduction And Presentation
• Distance from the sensor to the seabed or footrope The Trawl Explorer Pro can adapt to different types of fishing methods. For example, you can fully configure the sounding modes in accordance with your fishing method to have best results. -
Page 6: Safety Guidelines
Install and use this product in accordance with this user manual. Incorrect use of the product may cause damage to the components or void the warranty. Notice: Do not open the sensor bottle. Only qualified Marport technicians can do maintenance and repairs on internal components of the sensors. -
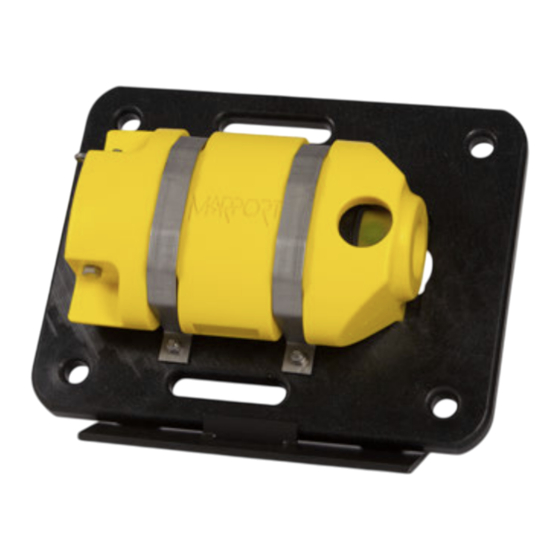
Page 7: Description
Trawl Explorer display from the trawl headrope Sea bottom Fish Target strength Trawl opening Description System Compatibility The Trawl Explorer Pro is compatible with the following versions of Marport's software and equipment. Mosa2 02.13.03 or later Scala2 02.14.00 or later Trawl Explorer Pro | V1 |... -
Page 8: Technical Specifications
2 years (Sensor & Battery) 1. Reference only, depends on functions enabled. / 2. Depends on sensor uplink power and options. / 3. Based on average charging time. / 4. Marport Standard Marine Limited Warranty Trawl Explorer Pro | V1 |... -
Page 9: Outline Dimensions
-3dB 46° 40° 30° Beamwidths for up and down pings: Beamwidth @ 125 kHz @ 160 kHz @ 200 kHz -3dB 26° 24° 22° Outline dimensions Trawl Explorer Mini Trawl Explorer Trawl Explorer Pro | V1 | Introduction and Presentation... -
Page 10: Firmware And Features
• Memory Card Log: records a log of the sensor activity. This option is useful for troubleshooting support. Measures • Battery (always activated) • Pressure (depth) • Temperature • Pitch • Roll • Height Trawl Explorer Pro | V1 | Introduction and Presentation... -
Page 11: Main Parts
• Sensor has been switched on in Starting water or with water switch. • Startup sequence: LED blinks green/off/red/off/green/red. • Then, fixed green for 1 sec. • Sensor is in water. Running • Water switch is on. Trawl Explorer Pro | V1 | Introduction and Presentation... - Page 12 • The virtual water switch is on. On deck • The sensor is locked in a low power state to not switch into running LED blinks green every 4 sec. mode. Trawl Explorer Pro | V1 | Introduction and Presentation...
-
Page 13: Sensor Configuration
To configure the sensor, you need to connect it to Mosa2 application, using either the Dock or the Configuration Cable. Using a Dock Charger Plug Tip: Refer to Dock user manual to have more details about the use of this product. Trawl Explorer Pro | V1 | Sensor Configuration... - Page 14 30 seconds. Using the Configuration Cable Connect the Configuration Cable from the computer to the sensor to display the sensor configuration page on Mosa2. Trawl Explorer Pro | V1 | Sensor Configuration...
- Page 15 > Eject Config Plug or Connect Config Plug. When ejected, you come back to the discovery page. It stays disconnected until you virtually connect to it or manually disconnect then connect it. Trawl Explorer Pro | V1 | Sensor Configuration...
-
Page 16: Battery Information
Battery Information The battery lifetime is displayed on the first page. Trawl Explorer Pro | V1 | Sensor Configuration... - Page 17 Note: When you change settings such as the uplink power or sounding range, it affects the battery consumption and remaining lifetime. The battery information will update after the sensor has been switched on and operating for 10 minutes. Trawl Explorer Pro | V1 | Sensor Configuration...
-
Page 18: About The Virtual Water Switch Option
The depth is not taken into account. We recommend to deactivate it if the sensor is operating close to the surface or if you need to test the sensor in the office. Trawl Explorer Pro | V1 | Sensor Configuration... -
Page 19: Diagnostic Information
The charger plug displays a warning icon: When the alarm appears, take the sensor out of water immediately and contact Marport support. Warning: In case of water ingress in the product, do not charge it: battery may vent or rupture, causing product or physical damage. - Page 20 2. Enter a node according to the position of the sensor on the trawl. Important: Make sure to put the same number when adding the sensor to Scala2 receiver page (on page 37). If not, change it accordingly. 3. Click Trawl Explorer Pro | V1 | Sensor Configuration...
-
Page 21: Configuring The Uplink Frequency And Power
Note: A higher level of uplink power reduces the battery lifetime. Recommended Conditions uplink powers Works for most conditions. 100% ◦ Sensor is far from vessel - e.g. more than 800 m depending on conditions, high depth ◦ High level of interferences Trawl Explorer Pro | V1 | Sensor Configuration... -
Page 22: Configuring Data Sending Sequence
User Mode > Advanced. 2. In Communications page, click in Data Sequence. 3. To add data, click then select data in the drop-down menu. The sequence begins by the top. Trawl Explorer Pro | V1 | Sensor Configuration... -
Page 23: Configuring The Echo Sounder
Down + Down2 option allows you to compare two different settings on the down sounding (for example, 2 ping lengths or 2 frequencies). The sensor will send two consecutive pings toward down direction. Trawl Explorer Pro | V1 | Sensor Configuration... - Page 24 Note: Range influences the display of echogram images. The smaller the range, the shorter the listening time and the better the quality of images. But if you set a bigger range, data arrives slower which results in poorer image quality. Trawl Explorer Pro | V1 | Sensor Configuration...
-
Page 25: About Time Variable Gain
The end result is to compensate sounding attenuation and therefore to show a same target strength for a same target at different depths. You can choose between three different TVG modes: Trawl Explorer Pro | V1 | Sensor Configuration... -
Page 26: About The Automatic Range Mode
You can activate the automatic range mode if you need to get better quality echograms when the trawl is close to the bottom. This mode is recommended when bottom trawling. Trawl Explorer Pro | V1 | Sensor Configuration... -
Page 27: Applying Offsets To Measurements
See Configuring the Echo Sounder (on page 23) for details about Mosa2 settings. Applying Offsets to Measurements You can apply offsets to temperature and depth measurements if the measured values do not correspond to the environment of the sensor. Trawl Explorer Pro | V1 | Sensor Configuration... -
Page 28: Testing Measures
You can test the sensor in water or in air. In air, the following measures will be wrong: height, conductivity. 1. Press command + A or click Menu and click User Mode > Advanced. 2. Go to the Monitoring page. Trawl Explorer Pro | V1 | Sensor Configuration... -
Page 29: Memory Card Recording
◦ Depth: place your sensor on a desk or on the ground and enter 0 in Target Depth. ◦ Temperature: enter the estimated temperature of your environment. Memory Card Recording This topic explains the memory card recording feature (this feature is optional). Trawl Explorer Pro | V1 | Sensor Configuration... - Page 30 Data recorded on the sensor memory card are in higher resolution, with a higher refreshing rate. For sensors with echograms, you can see target strength values without uplink sound transmission loss. You can see on Mosa2 main page if the memory card recording feature is activated: Trawl Explorer Pro | V1 | Sensor Configuration...
-
Page 31: Additional Settings
Note: When downloading the files, we recommend to connect the sensor to Mosa2 using the Dock or the Configuration Cable for a better transfer of data. Trawl Explorer Pro | V1 | Sensor Configuration... -
Page 32: Saving A Configuration On Mosa2
See Replaying Data Recorded on a Memory Card (on page 43) to learn how to replay these data in Scala2. Saving a Configuration on Mosa2 You can save different configurations of the sensor to be able to quickly change the configuration when you change your fishing method. Trawl Explorer Pro | V1 | Sensor Configuration... - Page 33 The wheel icon becomes orange and the name of the configuration is displayed underneath. 3. To create another configuration, for example this time to use the sensor in deep waters, change the settings of the sensor on Mosa2. Trawl Explorer Pro | V1 | Sensor Configuration...
-
Page 34: Exporting Sensor Configuration
Exporting Sensor Configuration You can export the sensor settings you configured on Mosa2 on a file. You can afterward use this file when configuring a similar sensor. • You are finished configuring the sensor. Trawl Explorer Pro | V1 | Sensor Configuration... -
Page 35: Importing A Sensor Configuration
(virtual water switch, simulation mode), uplink level and frequency, echo sounder settings. Important: If the new configuration changes the echo sounder settings, you must re- calibrate the sensor for target strength value. Trawl Explorer Pro | V1 | Sensor Configuration... - Page 36 1. Press command + A or click Menu and click User Mode > Advanced 2. Click Menu > Import. 3. From the window that appears, select the *.A2C or XML configuration file. The configuration is loaded into the sensor. Trawl Explorer Pro | V1 | Sensor Configuration...
-
Page 37: System Configuration And Display
2. Right-click the IP address of the receiver at the bottom of the page, then click Configure Receiver. 3. From the left side of the receiver page, click Sensors. 4. From the page Add Sensor Product, select the options corresponding to your type of sensor: Trawl Explorer Pro | V1 | System Configuration and Display... -
Page 38: Configuring Sensor Settings
The sensor is added to the receiver and displayed on the left side of the screen. The configuration page is displayed. Configuring Sensor Settings You need to complete communication settings when you add the sensor to the receiver. Trawl Explorer Pro | V1 | System Configuration and Display... - Page 39 This setting also helps detecting the sensor signal. Leave default setting at Synchro 1. Enter the same frequency as the one entered for the uplink frequency in Mosa2. Trawl Explorer Pro | V1 | System Configuration and Display...
-
Page 40: Configuring Data Display In Scala2
2. Open the control panels and go to the Mx tab. Note: Data displayed (e.g. depth, temperature, pitch & roll) depends on the sensor's features that are enabled. Trawl Explorer Pro | V1 | System Configuration and Display... - Page 41 20 meters (1). This way, the echogram displays better quality images when the distance to the bottom is shorter. Echogram images will be displayed like the example below: Trawl Explorer Pro | V1 | System Configuration and Display...
- Page 42 8. Drag the lines around the blocks of data to resize them. 9. Right-click the title or the values of the data to display customization options. Example of a Trawl Explorer data page: 10. To save the changes you made: Trawl Explorer Pro | V1 | System Configuration and Display...
-
Page 43: Replaying Data Recorded On A Memory Card
2. Right-click the timeline and click Change Directory to choose the source directory where the files are stored. In the replay bar, the recording period of the files in high definition is displayed in green. Trawl Explorer Pro | V1 | System Configuration and Display... - Page 44 SD card is displayed in the A2S Data panel. 3. Go to the control panels, then click and drag data from the A2S Data panel to a page. Trawl Explorer Pro | V1 | System Configuration and Display...
-
Page 45: Installation
3. Buoys (4) on either sides provide a level platform for the unit during trawling operations. 4. Buoys ensure that down-looking transducer beam (5) is vertical for footrope (6) detection. 5. The signal is oriented toward the vessel (7). Trawl Explorer Pro | V1 | Installation... - Page 46 The safety line should be a steel wire with fitted small shackles at either end. Important: Sensors not properly secured may be lost during fishing operations. Trawl Explorer Pro | V1 | Installation...
-
Page 47: Maintenance And Troubleshooting
Maintenance and Troubleshooting Read this section for troubleshooting and maintenance information. Important: Only an approved Marport dealer can access the internal unit. Warranty will become void if anyone other than an approved dealer tries to do internal maintenance duties on the product. -
Page 48: Cleaning The Sensor
• Use Isopropyl alcohol to clean the end cap and transducer. Use a steel wool pencil to clean the shoulder bolts, and very fine sandpaper (180 grit) to clean between them. Trawl Explorer Pro | V1 | Maintenance and Troubleshooting... -
Page 49: Maintenance Checklist
• Make sure the sensors on the end cap are in good condition and clean. • Connect the sensor to a charger and check the charging status. Trawl Explorer Pro | V1 | Maintenance and Troubleshooting... -
Page 50: Troubleshooting
• If there is an alarm or if the sensor is not detected by Mosa2, disconnect it from the Dock and do not charge it until it is inspected by a technician. • Send the sensor back for servicing to a Marport office. Trawl Explorer Pro | V1 |... -
Page 51: Mosa2 Does Not Open Due To Error Message
Important: Only Marport technicians can open the sensor to access the internal components. CAUTION: In case of water ingress into the sensor, battery may vent or rupture, causing product or physical damage. Mosa2 does not open due to error message Mosa2 displays an error message saying it cannot be opened. - Page 52 • Check that you see Marport Captain icon in the desktop taskbar. If you do not see it: close, then open Mosa2. The icon should appear in the taskbar. Note: Marport Captain is a program running in the background. It allows Mosa2 automatic opening and displays shortcuts to Mosa2 and Scala2 applications installed on the computer.
-
Page 53: The Sensor Is Not Running When Testing Out Of
1. Connect the sensor to Mosa2 and check if there is an orange warning sign at the top of the window. If yes, it means the virtual water switch is on. 2. Go to Communications page, then in Options, click Trawl Explorer Pro | V1 | Maintenance and Troubleshooting... - Page 54 3. Deactivate the Virtual water switch option. Trawl Explorer Pro | V1 | Maintenance and Troubleshooting...
-
Page 55: Support Contact
Support Contact You can contact your local dealer if you need maintenance on your Marport products. You can also ask us at the following contact details: FRANCE ICELAND Marport France SAS Marport EHF 8, rue Maurice Le Léon Tónahvarf 7... -
Page 56: Appendix
42833 C-1/CH2 41548 C-1/CH3 41852 C-1/CH4 40810 C-1/CH5 42500 C-1/CH6 43200 C-2/CH1 42631 C-2/CH2 41417 C-2/CH3 41690 C-2/CH4 40886 C-2/CH5 42300 C-2/CH6 43100 C-3/CH1 42429 C-3/CH2 41285 C-3/CH3 41548 C-3/CH4 40970 C-3/CH5 42100 Trawl Explorer Pro | V1 | Appendix... - Page 57 41690 C-5/CH3 41285 C-5/CH4 41060 C-5/CH5 42900 C-5/CH6 43400 C-6/CH1 39062 C-6/CH2 39375 C-6/CH3 39688 C-6/CH4 40000 C-6/CH5 40312 C-6/CH6 40625 C-7/CH1 38906 C-7/CH2 39219 C-7/CH3 39531 C-7/CH4 39844 C-7/CH5 40156 C-7/CH6 40469 Trawl Explorer Pro | V1 | Appendix...
- Page 58 Frequencies and intervals The diagrams below show the bandwidth of the different types of Marport sensors and intervals you must respect when adding other sensors. PRP sensors (e.g. Catch sensor, Trawl Speed, Spread sensor...) Example: If the frequency of the sensor is 40kHz, there should be no sensors between 39.9 and 40.1kHz.
- Page 59 • We recommend to allocate frequencies between 34 and 56 kHz for wideband hydrophones and between 41 kHz and 44 kHz for narrowband hydrophones. • Echosounders are usually placed around 38 kHz, make sure to allow enough distance with them. Trawl Explorer Pro | V1 | Appendix...
- Page 60 Example of a system with Spread, Catch, Trawl Speed sensors and Speed Explorer, Catch Explorer, HDTE and Door Sounder. Example of a system with Spread sensors with positioning, Catch sensors, Trawl Explorer and Catch Explorer. Trawl Explorer Pro | V1 | Appendix...
- Page 61 Example of a system for purse seining, with a Seine Explorer and depth Seine sensors. Bandwidth Mandatory distance with other sensors Avoid allocating frequencies between 37 and 39 kHz because this range is generally used by echosounders. Trawl Explorer Pro | V1 | Appendix...
- Page 62 Index Connecting to Mosa2 13 Alarms Concept 19 Automatic range 26 Echo sounder 23 Echogram Autorange 40 Display 40 Battery Target strength 40 Lifetime 16 Examples of applications 6 Beamwidth 8 Boat code 56 Features 10 Firmware 10 Channel code 56 Frequency plan 56 Charging 47 Cleaning 48 Configuration Cable 13 Troubleshooting 51 Contact 55 Installation On headrope 45 Diagnostic 19 Dimensions 8 Dock Maintenance Charging 47...
- Page 63 Downloading firmware file 10 Compatibility 37 Measurement sending sequence 22 Compatible firmware 37 Measures 28 Sensor settings 38 Memory card Replay Downloading data 29 A2S files 43 Recording 29 Replaying 43 Time synchronization 29 Mosa2 Cannot start 51 Scala Error message 51 Displaying in 40 Opening 13 Sensor location 45 Mosa2 configuration Sounding Change 32 Down 23 Delete 32 Frequency 23 Export 34 Length 23...
- Page 64 Power 21 Virtual water switch 18, 53 Warning 19 Water ingress 6...
Need help?
Do you have a question about the TRAWL EXPLORER PRO and is the answer not in the manual?
Questions and answers