
Related Manuals for Prowinch PWRX


Summary of Contents for Prowinch PWRX
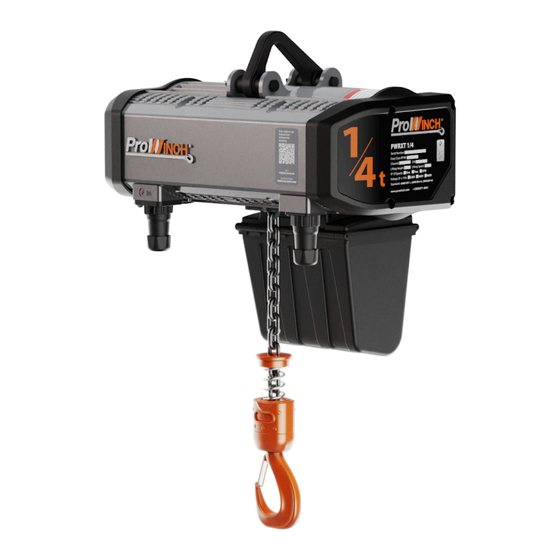
- Page 1 PWRX Powered Electric Chain Hoist User Manual/ Manual de usuario Safety Warnings/ Advertencias de Seguridad...
-
Page 2: Table Of Contents
Table of Contents ProWinch® Disclaimers ..............................3 PWRX Configuration ............................... 4 Safety Bulletin ................................. 7 Safety Precautions ................................ 1 1 Specifications ................................. 18 Main Specification ................................19 Safety Features ................................... 20 Pendant control operation instructions .......................... 22 Load Level And Service Life ............................... 27 Oil &... -
Page 3: Prowinch® Disclaimers
For purposes of enforcing the warranty of the product purchased, Prowinch® LLC, will only be liable for damage when proven the user has followed each one of the warnings contained in the User Manual and Safety It is the sole responsibility of the Client / User to verify Prowinch®... -
Page 4: Pwrx Configuration
PWRX Configuration Fixed Units PWRXF0.25 PWRXF0.5 PWRXF1 0.25 ton Electric Hoist 0.5 ton Electric Hoist 1 ton Electric Hoist PWRXF2 PWRXF3 PWRXF5 2 ton Electric Hoist 3 ton Electric Hoist 5 ton Electric Hoist PWRXF7 PWRXF10 PWRXF20 7.5 ton Electric Hoist... - Page 5 PWRX Configurations Units with trolley PWRXT0.25 PWRXT0.5 PWRXT1 0.25 ton Electric hoist with trolley 0.5 ton Electric hoist with trolley 1 ton Electric hoist with trolley PWRXT2 PWRXT3 PWRXT5 2 tonElectric hoist with trolley 3 tonElectric hoist with trolley 5 ton Electric hoist with trolley...
-
Page 6: Safety Bulletin
To ensure safety and installation requirements, Prowinch requires load tests before using all hoists, winches, cranes, and other components. Not fulfilling this requirement can be hazardous, lead to equipment failure, and automatically void the warranty. - Page 7 Safety Bulletin Be sure to follow the safety standards (B30) The B30 Standard is intended to: Prevent or minimize injury to workers, and otherwise provide for the protection of life, limb, and property by prescribing safety requirements. Provide direction to manufacturers, owners, employers, users, and others concerned with, or responsible for, its application.
- Page 8 Safety Bulletin Failure to read, understand and follow the information in the corresponding ASME B30 Standard for your hoist and lifting equipment may result in severe INJURY DEATH . It is YOUR RESPONSIBILITY to consider all risk factors and follow all the equipment related ASME B30 standards, which comprise the following: ASME B30 standards include: B30.1 Jacks, Industrial Rollers, Air Casters, and B30.15 Mobile Hydraulic Cranes.
- Page 9 Safety Bulletin DailyChecklist Tagged hoist: Ensure the crane or hoist is not tagged out Chain: Check chains for corrosion, wear, elongation, twist, of order. nicks, or gouges. Keep chain/wire rope clean and lubricated. Control Devices: Conduct a test run. Ensure all motions agree with control device markings.
-
Page 10: Safety Precautions
User Manual. Please respect and follow all warnings for the safety of personnel and others. Improper operation may cause severe injuries to personnel or damage equipment. Read and understand this User Manual carefully before installing and operating any Prowinch equipment. Always keep this User Manual in an accessible location for quick reference. - Page 11 Safety Precautions WARNING: DANGER: This symbol indicates a dangerous This symbol indicates a dangerous situation which if not avoided may situation which if not avoided may cause minor or moderate wounds. It is cause severe injuries or death. also used for indicating unsafe practices. Read and understand the contents of this User Manual thoroughly before handling the product.
- Page 12 Safety Precautions Before using equipment: •Read and understand instructions in this User Manual and all the labels associated with the hoist before operating equipment. • Wear appropriate clothing: Do not wear jewelry or loose-fitting clothing as they can get caught by the wire rope or hook.
- Page 13 Safety Precautions Have a Qualified Person to install the Have Qualified Person to connect the Have a Qualified Person to certify the structure and anchoring points. electrical and commissioning. commissioning and load test. Do not overload. Do not transport humans or animals. Do not stand under load.
- Page 14 Safety Precautions General Environmental Precautions Do not exceed the operating temperatures for Avoid contact with gasses or explosive materials. which the hoist is designed for. This is stated in this Exposure to water, sand, corrosive environment and manual and may vary depending on the model. other harmful substances may damage the unit.
- Page 15 Below is a sample Ingress Protection (IP) index. Please refer to your plate for the rating of your unit. I P00 The first number means your ingress protection against solids. Prowinch units have the following ingress protection against solids. Protection against solids...
- Page 16 Safety Precautions Hanging Pendant Control Properly attach the provided strain relief cable. Installing the strain relief cable will protect the main pendant cable from unnecessary strain, pulling, tugging, or the cable sheathing itself. Danger: Do not install the pendant control cable without the strain relief cable (steel cord).
-
Page 17: Operation Method
Safety Precautions Correct method of hoisting load As the hook hanging method shown in the figure below is very dangerous, DO NOT operate like that. How to control load shaking If the load shakes, it becomes increasingly challenging for the trolley to move, posing potential dangers. As a principle, DO NOT shake the load laterally and follow the operational guidelines below. -
Page 18: Specifications
Specifications... -
Page 19: Product Code
Specifications Product code Main Specification The specifications in the following table are applicable to all electric chain hoists. Item Specification Duty Class -20℃℃ to 40℃ Operating temperature range Hoist IP54 Protection grade Pendant control IP55 Power supply (standard specification) Three-phase, 380V, 50HZ Single-speed hoist ≤65db Noise level... -
Page 20: Safety Features
Notes 1. When your required working voltage, temperature and humidity range exceed the above table, request relevant information from authorized Prowinch® LLC personnel. 2. Expected form of use: This hoist is designed for vertical hoisting and falling under normal atmospheric conditions and working environment. - Page 21 Specifications Specifications of electric chain hoist Type 0.125T 0.25T 0.5T 0.75T Load 0.125T 0.25T 0.5T 0.75T 7.5T Model 0.125-1 0.25-01 0.5-01 01-02 0.75-1 01-01 02-02 03-03 02-01 03-02 03-01 05-02 7.5-03 Chain diameter 11.2 11.2 11.2 (mm) Hoisting Single 10.6 4.8D 6.7C speed...
-
Page 22: Pendant Control Operation Instructions
Specifications Pendant control operation instructions Prohibition DO NOT hang the controller cable on other objects or forcibly pull the cable. ● DO NOT use the pendant controller if it does not function smoothly. ● In order to adjust the length of the button cable, DO NOT twist or bundle. ●... - Page 23 Specifications 3-point pendant control The 3-point pendant control features locking emergency stop buttons, as well as hoisting and lowering buttons. Additionally, the hoisting and lowering buttons are equipped with double-speed configuration, providing two-stage pendant controls.
- Page 24 Specifications 5-point pendant control The 5-point pendant control is equipped with a locking emergency stop button and an operation button. The operation button is a 2-stage key switch. Please refer to the corresponding specifications for the operating method. The operating instructions of the pendant control designate the lateral moving direction as the east-west direction.
- Page 25 Specifications 7-point pendant control The 7-point pendant control is equipped with a locking emergency stop button and an operation button, which is a 2-stage key switch. Please refer to the corresponding specifications for the operation method. The operating instructions of the pendant control are recorded with the lateral moving direction as the east-west direction and the crane (longitudinal) moving direction as the south-north direction.
- Page 26 Specifications Selection of engines for lifting equipment Operational Time Ratings at K-0.65 Group Uniformly Distributed Work Periods Infrequent Work Periods Max. On Time Max. On Time from CMAA F.E.M Max. Nº Starts /hr Max. Nº Starts /hr min/hr Cold Start min/hr 1 Cm 7.5 min(12.5%) 15 min...
-
Page 27: Load Level And Service Life
Specifications Load Level And Service Life Service Load Time Maintenance Normal <65% <25% 6~12 (months) Heavy >65% >25% 3~6 (months) Servere Abnormal Conditions 1~3 (months) Environmental, Geographical & Risky <100% < Duty cycle limit Oil & Lubricant Recommendations Lubricant greatly increases the life of the load chain. Weekly lubrication and cleaning is satisfactory, but under hot, dirty, and extreme conditions it may be necessary to clean the chain at least once a day and lubricate it several times between cleaning. -
Page 28: Inspections & Maintenance
Specifications Inspections & Maintenance Refer to ASME B30.16 and B30.17 standards for frequency and the types of inspections. Resolution to Items Inspection Method Standards Deviation Proceed with cleaning, Marks such as nameplates, repairing and replacing. labels etc. Record serial number for No peeling and replacing clear marks... - Page 29 Specifications Resolution to Items Inspection Method Standards Deviation Rust and corrosion Visual check No remarkable rust and corrosion Replace load chains Distortion Visual check Correct distortion distortion due the bottom block roll over of double chain models. Adequate supply of oil Oil supply Visual check Oiling...
- Page 30 Specifications Resolution to Items Inspection Method Standards Deviation Check the brake by lifting a Brake small load with a couple of links Length of spring Chain Visual inspection and Standard Limits Chain spring Replace chain spring measure dimensions ⌀7.1 Replace hook safety block 500kg models: 34mm Check by visual and vernier Load hook...
- Page 31 Specifications During deviation Item Inspection method Criteria from criteria Caution - During checking, please use gloves and be careful not to squeeze fingers. - Personal injury may be caused Inspection of active idle pulley - Flexible rotation x If the bearing is damaged or the pulley shaft deforms, the rotation is not flexible.
- Page 32 Specifications Peripheral component of the machine During deviation Item Inspection method Criteria from criteria Chain spring Visual inspection No obvious shrinkage or compression Inspection item of "chain spring" for annual inspection (P57) Rubber gasket Visual inspection -No obvious shrinkage or compression - Rubber Replace rubber gasket parts shall be free from peeling, cracking and deformation...
- Page 33 Specifications Daily inspection of motor-driven carrier Appearance ● During deviation Item Inspection method Criteria from criteria Confirm whether there is Visual inspection There is no obvious unauthorized transformation Return to original state unauthorized transformation Marking of nameplates Visual inspection No peeling, and clear label Implement cleaning, and labels maintenance and...
- Page 34 "electromagnetic brake" / by-pass brake (P39) Monthly inspection of electric chain hoist (PWRX type) ● Load chain Please check the load chain after the dirt is cleaned. During measurement of the sum and the diameter of pitch, please use a cuspidal vernier caliper (measuring point vernier caliper).
- Page 35 (P55)) Sum of 5 pitches (mm) Load chain diameter D (mm) Not exceed the threshold Type Rated load Load chain diameter Not exceed the threshold value value Criteria criteria PWRX-010SD φ7.1x1 109.2 PWRX-015SD 1.5t PWRX-020LD φ10.0x1 153.2 PWRX-020SD PWRX-030SD φ10.0x2 PWRX-025SD 2.5t...
- Page 36 Dimension Although the nominal standard values are attached in the table below, as the hook is forged and heat-treated, there will be dimensional errors. Please forgive me. PWRX hook use limit and criteria (Not exceed the threshold value) b Dimension...
- Page 37 Specifications ● Button switch During deviation Item Inspection method Criteria from criteria Visual inspection and inspection by Button switch operation - No breakage, deformation or screw loosening, etc. Replace button switch - Switch can be operated smoothly - Operation and releasing of the emergency stop button can be conducted Install the button cable and protective rope...
- Page 38 Specifications ● Power supply During deviation Item Inspection method Criteria from criteria Replace the power Power cable Visual inspection - There is affluence in length cable - No damage - Stably installed Cable hanger - No damage Reinstall, so that it will Visual inspection and inspection by hand not obstruct movement movement...
- Page 39 Specifications Monthly inspection of motor-driven carrier (PWRX type) ● Appearance During deviation Item Inspection method Criteria from criteria Inspect in accordance Rail of lateral movement Visual inspection No obvious deformation or damage with the items of "Rail of lateral Movement"...
- Page 40 Specifications During Item Inspection method Criteria deviation from criteria Confirm whether there is Visual inspection No unauthorized transformation Return to original unauthorized transformation state State of planet joint surface - Uncover for visual inspection - No rust Remove the rust and clean - Measure the gap with a caliper - Cleanup...
- Page 41 Specifications During deviation Item Inspection method Criteria from criteria Moving part of the limit shaft Disassembly for inspection The shaft diameter of the lever pin of the Replace limit lever pin limit lever shall not be smaller than and sleeve (Both shall be 15.95mm replaced if anyone of them fails to meet the...
-
Page 42: Inspections
Specifications ● Drive Part During deviation Item Inspection method Criteria from criteria Hub joint part Visual inspection - No obvious deformation or wear Replace hub and electromagnetic brake - Hub spring does not fall off Bearing Visual inspection and manual rotation - No obvious wear, damage, breakage and Replace the bearing inspection... - Page 43 Wear and damage of idle - Conduct visual inspection after Wall thickness Replace the idle Rated pulley disassembly (mm) pulley Type load - Measure the wall thickness with a Criteria vernier caliper PWRX-010SD PWRX-015SD PWRX-020LD PWRX-020SD PWRX-030SD PWRX-025SD PWRX-050SD...
- Page 44 Specifications Oil seal and encapsulating Visual inspection - No deformation or cracks, etc. Replace oil seal encapsulating - No oil leakage ● Electrical mounting subassembly During deviation Item Inspection method Criteria from criteria Electrical mounting subassembly Remove the controller cover for visual - No breakage or burning loss, etc.
- Page 45 Specifications ● Electrical characteristics test During deviation Item Inspection method Criteria from criteria - During operation under the rated load, Supply appropriate Power voltage - Measure with multimeter the power receiving part of the main power body is supplied with a voltage within 10% of the rated voltage Caution Please pay attention to prevent...
- Page 46 Replace Clearance - Measure with a clearance gauge brake electromagnetic brake (Not exceed the threshold value) ER Type Threshold value Type (mm) PWRX-010SD PWRX-015SD PWRX-020LD PWRX-020SD 0.70 PWRX-030SD PWRX-025SD PWRX-050SD Danger - Do not adjust or disassemble the friction clutch Serious accidents of death or serious injury, etc.
- Page 47 Specifications ● By-pass magnet brake During deviation Item Inspection method Criteria from criteria - Conduct visual inspection after - Brake drum and motor cover are free Appearance Replace parts disassembly from deformation and breakage, etc. - The brake spring is free from Replace the brake deformation and breakage spring...
- Page 48 Specifications Annual inspection of motor-driven carrier During deviation Item Inspection method Criteria from criteria Suspension shaft - Visual inspection - No obvious deformation or wear Replace suspension - Measure shaft diameter and pore - Obvious visible deformation is diameter with a vernier caliper regarded as reaching the use limit Shaft - Wear limit is 5% of shaft diameter...
- Page 49 Specifications Annual inspection of handcart ● Component part During Item Inspection method Criteria deviation from criteria Wheel - Visual inspection - No obvious deformation or damage Replace tire - Wear limit of wheels - Measure D and t dimensions with a vernier caliper ( No smaller than the threshold value) Flange...
-
Page 50: Installation
Installation Before Installation Procedure Before installing, removing, inspecting or performing any maintenance on the hoist, the main switch shall be de-energized and locked out and tagged out. Do not use this equipment in hazardous locations. Before installing, make sure your electrical supply meets the minimal requirements for the unit and check the gauge wire calculator using the QR code below. -
Page 51: Supply Voltage
• Never bypass limit switches, remove limit switch stops, or alter limit switch devices. • Check the electric installation and wire gauge selection at www.prowinch.com and follow these simple steps). • If the unit has three phase, do not alter or bypass the phase (shifter, need to confirm the term). - Page 52 Installation Chain Bag Assembly To make sure the chains form a natural pattern and avoid distortion of the chains, you must follow the steps below for the chain bag assembly. Lower all the chains Then install the chain bag Feed all the chains up Switch on power supply to hoist and have a professional operate push button.
- Page 53 Step 2 : Measure the width between the trolley wheels W The max width for the trolley wheels is 6 inches. Contact ProWinch if you have a wider beam. Step 3 : Calculate the difference between W . Then estimate the numbers of washers will make up the width difference.
- Page 54 Installation Qualified Operator Hoist operators are required to read and fully understand the operation section of this manual, all warnings contained in the manual, and labels attached to the equipment. Operator training must be provided to ensure proper operation of equipment in compliance with instructions provided by the equipment manufacturer and the provisions of ASME B30, and proper rigging procedures for the attachment of loads to the hoist.
-
Page 55: Operational Testing
Installation Operational Testing Press the button to lower the unloaded hook down. Carefully press the limit switch with a tool before the last chain link touches the limit switch. Check if the chain movement is stopped when the limited switch is pressed and the chain movement resumes when the limit switch is released. -
Page 56: Prowinch® Warranty
PROWINCH disclaims any implied warranties, including, without limitation, any implied warranty of merchantability or fitness for a particular use or purpose. -
Page 57: Troubleshooting
Troubleshooting Abnormality or troubles Possible reasons Counter-measures Improper connection of power supply Properly make connection of R-S-T line lines of power source. Master switch on the switch cabinet is Check the switch cabinet and turn on The motor does not work turned off. - Page 58 Troubleshooting Abnormality or troubles Possible reasons Counter-measures The power has shortage phase Check the power supply and Wrong-phase power supply circuit. Too lower voltage and contactor Exchange the power phase. does not work The motor of the hoist can't rotate. Work after voltage stable.
-
Page 59: Technical Specs
Technical Specs Specification and dimension electric chain hoist (PWRXF) Hoisting 3-phase lifting motor Length Diameter speed Weight 380V (220V) Rated L of Repeated of load Test (m/min) Standard with each load Type button rating chain Grade load weight lift (m) extra 1m Output power (kW) 50Hz... - Page 60 Technical Specs PWRXF0.25-0.5 PWRXF1-5 PWRXF7 PWRXF10...
-
Page 61: Specification And Dimension Of Electric Chain Hoist With Trolley (Pwrxt)
Technical Specs PWRXF20 Specification and dimension of electric chain hoist with trolley (PWRXT) 3-phase lifting motor Hoisting speed (m/min) Applicable Minimum 380V (220V) Repeated Rated load Standard track width rotating Output power (kW) 50Hz Type rating lift (m) radius (%ED) Single-speed Double-spee (mm) - Page 62 Technical Specs Dimension (mm) Minimum distance Rated load from the Type bottom of the track to the bottom hook: H 0.25-0.5 PWRXT0.25-0.5 0.25-0.5 PWRXT0.25-0.5-VS PWRXT1 704.5 406.5 PWRXT1-VS-110V PWRXT2 3500· PWRXT3 5500 PWRXT2-3-VS-110V PWRXT5 1020 PWRXT7 1045 PWRXT10 1300 1246 PWRXT20 PWRXT0.25-0.5 PWRXT1-5...
- Page 63 Technical Specs PWRXT7 PWRXT10 PWRXT20 V.06.18.24[XW]...
- Page 64 Technical Specs Product structure and the name of the parts (de-energized brake) PWRXF/PWRXT 1 - 20t Hoist Exploded View...
- Page 65 Technical Specs PWRXF/PWRXT 1 - 20 t Hoist Part List Remar Parts code Part name Materials Parts code Part name Qty Materials Remarks GB/T 6170 Bolt M6x35 GB/T 7244 Spring gasket d=10 GB/T 861-2 Flat gasket GB/T 9877.1 Oil seal 45x68x10 DCTP-1.02-08 Motor rear cover HPA-66...
- Page 66 Technical Specs Remar Parts code Part name Materials Parts code Part name Qty Materials Remarks DCT-1.01-07 Gear box ADC12 GB/T 6170 Bolt M6x100 DCT-1.01-17 Socket HPA-66 GB/T 6186 Locknut Screw plug assembly DCT-1.01-20 Chain bag upper HPA-66 GB/T 9877.1 Oil seal 15x30x7 Hard lead wire D=2.5 GB/T 6170...
- Page 67 Technical Specs Product structure and the name of the parts (de-energized brake) 1-20t Electric Moving Trolley Exploded View V.06.18.24[XW]...
- Page 68 Technical Specs 1-20t Electric Moving Trolley Part List Material Remark Materi Remark Parts code Part name Parts code Part name GB/T 6170 Bolt M6x35 M5x20 DCPC-1.01-14 Moving trolley shaft washer DCPC-1.04-0 Electrical box cover GB6178 Locknut DCPC-1.04-0 Electrical box paper DCPC-1.01-15 Motherboard brushing DCPC-1.04-0...
- Page 69 Technical Specs Material Remark Materi Remark Parts code Part name Parts code Part name Type A key 5x5x15 Brake components GB/T 276 Bearing 6203 O-ring DCPC-1.02-1 Motor cover DCPC-1.02-12 Motor rear cover Hexagon socket GB/T 6170 GB/T 6170 Hexagon socket head cap screw head cap screw 1-20t Electric Moving Trolley Part List V.06.18.24[XW]...
- Page 70 Technical Specs Product structure and the name of the parts (de-energized brake) PWRXF/PWRXT 0.25 - 0.50t Hoist Exploded View...
- Page 71 Technical Specs PWRXF/PWRXT 0.25 - 0.50t Hoist Part List Parts code Part name Qty Materials Remarks Parts code Part name Qty Materials Remarks GB/T 6170 Bolt M6x35 GB/T 7244 Spring gasket Cycloid case rear DCK-05.02-07 DCK-05.01-04 Bearing plate C cover Rear cover sealing DCK-05.02-13 HPA-66...
- Page 72 Technical Specs Parts code Part name Qty Materials Remarks Parts code Part name Qty Materials Remarks Bearing DCK-05.04-03 Front cover DCK-05.03-12 Plane bearing 51103 Socket assembly DCK-05.03-09 Rotor Cross recessed round head screw Graphite copper DCK-05.03-03 Aviation plug assembly sleeve rotor sleeve DCK-05.03-04 Clutch disc Cross recessed round head screw...
- Page 73 Technical Specs Product structure and the name of the parts (de-energized brake) 0.25-0.5t Electric Moving Trolley Exploded View V.06.18.24[XW]...
- Page 74 Technical Specs 0.25-0.5t Electric Moving Trolley Part List Parts code Part name Qty Materials Remarks Parts code Part name Qty Materials Remarks Hexagon socket head GB/T 6170 M5x20 cap screw DCPC-1.04-01 Radiator cover Paper pads for DCPC-1.04-03 electrical boxes Wire holder DCPC-1.04-02 Assemblies Cross tapping screws...
- Page 75 Technical Specs Parts code Part name Qty Materials Remarks Parts code Part name Qty Materials Remarks Motor cover O-ring Hexagon socket M6X20 Motor back cover cheese head screws Brake assembly Hexagon socket cheese head screws M6x35 0.25-0.5t Electric Moving Trolley Part List V.06.18.24[XW]...
-
Page 76: Inspection List
If any abnormality is found during daily inspection or regular inspection, please immediately stop using ● and mark it as "failure", and ask the maintenance manager for repair or consult ProWinch. Use of abnormal products may lead to serious accidents of death or serious injury, etc. - Page 77 Inspection List MM/DD/YYYY for Inspection Inspection inspection/results of inspection Distinction Criteria item method Visual Cleaning No excessive dust and dust accumulated inspection Pitch Visual expansion inspection No significant extension Wear of chain Visual link diameter inspection No significant wear Deformation and damage Visual No significant deformation, damage or entanglement...
- Page 78 Inspection List MM/DD/YYYY for Inspection Inspection inspection/results of inspection Distinction Criteria item method Hoist/lower In case of braking, the bottom hook stops immediately (the amount of Actuator under no movement of the load chain shall be 1-3 segments) load Friction clutch Hoist/lower with under no...
- Page 79 Inspection List MM/DD/YYYY for Inspection Inspection Distinction Criteria inspection/results of item method inspection Executed by Examined by Examination Head of maintenance manager Monthly inspection and checklist of electric chain hoist Rated Your Setting of month Setting of Check card No. and Model Lot No.
- Page 80 Oil supply movement Sufficient oil supply under no load Refer to checklist of electric chain hoist (PWRX) for electrical mounting subassembly/Pendant control/power supply/electric characteristics/pressure container with an explosion-proof structure Executed by Examined by Examination Head of maintenance manager If any abnormality is found during monthly inspection or regular inspection, please immediately stop using ●...
- Page 81 Inspection List Please determine the inspection items suitable for the use environment and conditions of the customers. ● Annual inspection and checklist of electric chain hoist Rated Your Setting of month Setting of Check card No. and Model Lot No. load management No.
- Page 82 If any abnormality is found during annual inspection or regular inspection, please immediately stop using ● and mark as "failure", and ask the maintenance manager for repair or consult ProWinch. Use of abnormal products may lead to serious accidents of death or serious injury, etc.
- Page 83 Inspection List Annual inspection of electric chain hoist (PWRXF/PWRXT) (2/2) Example of records of inspection result: O=good, Δ=replace (adjust) in the next time, ×=replace (adjust) due to abnormality. MM/DD/YYYY for inspection/results Inspection Inspection of inspection Distinction Criteria item method Visual Bearing ·...
- Page 84 Appearance No deformation or damage, and stably installed cable inspection Refer to checklist of electric chain hoist (PWRX) for electrical mounting subassembly/power supply/electric characteristics/pressure container with an explosion-proof structure Visual inspection/Me After checking the function and performance items of daily inspection...
- Page 85 If any abnormality is found during annual inspection or regular inspection, please immediately stop using ● and mark as "failure", and ask the maintenance manager for repair or consult ProWinch. Use of abnormal products may lead to serious accidents of death or serious injury, etc.
Need help?
Do you have a question about the PWRX and is the answer not in the manual?
Questions and answers
How to check oil supply level on Prowinch PWRX
To check the oil supply level on a Prowinch PWRX, perform a lateral movement of the hoist under no load and ensure there is sufficient oil supply.
This answer is automatically generated