
Related Manuals for Prowinch PWH


Summary of Contents for Prowinch PWH
- Page 1 Powered Electric Chain Hoist User’s Manual / Manual de usuario Safety Warnings / Advertencias de Seguridad...
- Page 2 User Manual and Security Warnings corresponding to the unit purchased. In this sense, Prowinch® LLC will not be liable for accidents and / or damages to persons and / or property resulting from the negligent use of the product. In no case does Prowinch® LLC assume any liability arising from the use of these voluntary rec- ommendations, and does not offer any guarantee in relation to them.
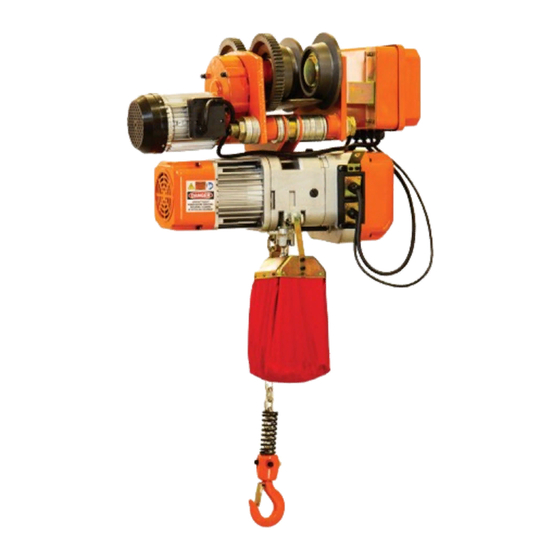
- Page 3 PWHC1000u PWHF1000i PWHF1000iW PWHF1000u PWHF1000uW PWHC1000i PWHC1000iW PWHC1000uW 1 Ton Electric Chain 1 Ton Electric Chain Hoist 1 Ton Electric Chain 1 Ton Electric Chain Hoist 1 Ton Electric Chain Hoist 1 Ton Electric Chain 1 Ton Electric Chain Hoist 1 Ton Electric Chain Hoist 20 ft G80 Chain 20 ft.
-
Page 4: Safety Precautions
Safety Precautions Safety Precautions Thank you for purchasing our Prowinch® Electric Chain Hoist. This User Manual provides im- portant information for personnel involved with installation, operation, and maintenance of this product. Read this User Manual before installing, operating, or maintaining product. -
Page 5: During Operation
• • Refer to maximum load capacity displayed on ID plate of hoist, not capacity of hook. Use only original Prowinch® parts. The use of any other part immediately voids warranty. • • Stop operation immediately if unauthorized personnel enter working area. - Page 6 Safety Precautions Safety Precautions GENERAL ENVIRONMENTAL PRECAUTIONS Do not exceed the operating temperatures for which the hoist is designed. This is stated in this manual and may vary depending on the model. Do not overload Check the quality of the elec- Periodically check the chain trical and keep it lubricated.
- Page 7 Safety Precautions Safety Precautions Hanging Pendant Control Hanging Pendant Control DANGER: Make sure to connect both cables. Do not install the pendant control cable without the strain relief cable (steel cord). | 12 | | 13 | Version 1.0 Version 1.0...
-
Page 8: Specifications
Specifications Specifications 6. Reverse Phase Protector 1. Electric Trolley The range of flange width is adjustable. It’s the special electrical installation of con- Motor include disc type brakes. Side trolling the circuit not work in case of wirring guide are to promote the trolley motion error in the power supply. -
Page 9: Main Specifications
Load Level And Service Life Unique guide structure Limit switch for upper and lower: 20° lifting angle allowance Guarantee of service life and safety for Prowinch® Electric Chain Hoists depends on proper installation, mainte- nance, and operation. Self-lock contactor Our electric chain hoists are designed to meet 1Bm, 1Am and 2M Load Level in FEM standards FEM 9.51, depending Safety clutch on the model. - Page 10 Specifications Specifications Selection of engines for lifting equipment LOAD LEVEL DEFINITION CUBIC VALUE AVERAGE DAILY OPERATION HOURS Mechanism and parts Group Intermittent Service Short-Term Service are frequently under light load, and there is F.E.M. Cycles/h Starts/h (ED%) Operation period min 1 (light) under light load, and K ≤...
- Page 11 Specifications Specifications Speed Capacity Motor Min. Radius Beam (50HZ) (ton) (Kw) of turn Range m/min nov-21 52 - 145 nov-21 82 - 185 nov-21 0.75 100 - 185 nov-21 0.75 100 - 220 For dusty environments, it is acceptable to substitute a dry lubricant. •...
- Page 12 Specifications Specifications INSPECTION Resolutions ITEMS STANDARDS METHODS to Deviations Attrition of chain Check by chain No peeling and Proceed with cleaning, di-am-eters measurement tool clear marks Marks such as name- repairing and replacing. plates, Visual check Record serial number labels etc. replacing •...
- Page 13 Specifications Specifications No remarkable opening or attrition Check by visual and Operate until upper and vernier caliper Replace limit switch, LOAD Check by lower limit cause Limit switch disassemble and 0.3 -0.5 pushing button automatic motor clean limit lever Replace hook safety shutdown block Attrition and opening...
-
Page 14: Installation Process
Never bypass limit switches, remove limit switch stops, or alter limit switch devices. • Check the electric installation and wire gauge selection at www.prowinch.com and follow these simple steps) Chain Bag Assembly Switch on power supply to hoist and have professional operate push button. -
Page 15: Operation
Installation Installation Install Trolley Into Beam (models with trolley) Unpacking Install trolley at end side of beam and slip trolley which has already been connected with hoist to the appropriate place. This is the preferred method. Hoist should be carefully inspected upon delivery for damage which may have occurred during shipment or If first method is unavailable: handling. - Page 16 Installation Installation Handling Precautions • Position hoist in vertical position to load. Before moving trolley, make sure path of hook is free from any obstacle. ALWAYS: • Lower hook near master link to hoist load and make final adjustments to secure a 90º vertical lift operation •...
-
Page 17: Troubleshooting
Installation Installation • 3 Phase • Frequency • Single or double voltage DANGER MAINTENANCE AND REPAIR P m= OOM s = L= P UM s P m= OOM s = L= QQM s P m= OP M s = L= QS M s TO BE PERFORMED BY AUTHORIZED PERSONNEL ONLY... - Page 18 Within this period, PROWINCH will only repair or replace free of charge any part on a product, after examination, is determined by PROWINCH to be defective in material or workmanship and...
-
Page 19: Troubleshoooting
Troubleshoooting Troubleshoooting Faults, Cause, and Correction Faults, Cause, and Correction Faults Major Cause Check Items Remarks Faults Major Cause Check Items Remarks Excessive voltage Power Rail declining Trolley movement Power supply Electric trolley /manual trolley Inclined pull (wheel is lifting) Trolley movement Does not move Electric trolley /manual trolley... - Page 20 Troubleshoooting Troubleshoooting Issues & Measures Faults, Cause, and Correction Power supply Faults Major Cause Check Items Remarks Condition Reason Action Cause Correction Rail declining Trolley movement No operation Power supply Improper power supply Check power supply regularly Abnormal supply voltage Electric trolley /manual trolley Inclined pull (wheel is lifting) Trolley movement Does not move...
- Page 21 Troubleshoooting Troubleshoooting Motor Brake Condition Reason Action Cause Correction Condition Reason Action Cause Correction Excessive current Excessive current caused Operate under rated voltage caused by high or low Operate under rated voltage by high or low voltage voltage Excessive current caused Operate under rated voltage Measure phase resistance by overload...
- Page 22 Troubleshoooting Troubleshoooting Inside Wiring Contactor & Electric Reply Condition Reason Action Cause Correction Condition Reason Action Cause Correction Avoid excessive bumping Vibration, drop Change contactor if Do not over-operate in usage Check cable, repair continuous Excessive voltage if wire break Leading wire Operate under rated voltage Change motor coil...
- Page 23 Troubleshoooting Troubleshoooting Electric Shock Operate limit switch. Check continuity of Limit switch used fre- Contact fused Avoid overuse of limit switch contactor,replace if can quently Condition Reason Action Cause Correction not stop Improper ground wire Check movable parts Firmly connect ground wire Motor did not connection such as limit lever.
- Page 24 Troubleshoooting Troubleshoooting Load Chain Chain Wheel Condition Reason Action Cause Correction Condition Reason Action Cause Correction Bottom hook rotation Check hook state before Bottom hook upturned Reset hook Long-term operation with during usage operation Apply lubricating oil regularly insufficient lubrication Chain twist Check wear degree on Chain twist in machinery...
- Page 25 Troubleshoooting Troubleshoooting Bearing Electric Trolley Condition Reason Action Cause Correction Condition Reason Action Cause Correction Unable to lift loads Breakage Replace bearing High temperature or Avoid use at high temperatures Open motor cover remove Brake gelling Usage environment Inspect regularly Wheels stopped high frequency or high frequency...
-
Page 26: Technical Specs
Technical Specs Technical Specs PWHC iW Part List SINGLE SPEED Code PWHC1000i PWHC1000iW PWHC1000u PWHC1000uW Capacity 2200 2200 2200 2200 Lifting Height 20 ft / 6m 20 ft / 6m 20 ft / 6m 20 ft / 6m Motor Power 0.65 kW Voltage 220~240V 50/60Hz 1 Phase... - Page 27 Technical Specs Technical Specs PWHCi /W Part List SINGLE SPEED Code PWHC500i PWHC500u PWHC500uW Capacity 1100 1100 1100 Lifting Height 20 ft / 6 m 20 ft / 6 m 20 ft / 6 m Motor Power 0.65 kW 0.65 kW 0.65 kW Voltage Motor Speed...
- Page 28 Technical Specs Technical Specs PWHFi / iW Part List SINGLE SPEED Code PWHF1000i PWHF1000iW PWHF1000u PWHF1000uW Capacity 2200 2200 2200 2200 Lifting Speed Ft/Min 8 ft / 2.5 m 8 ft / 2.5 m 8 ft / 2.5 m 8 ft / 2.5 m Lifting Height 20 ft / 6 m 20 ft / 6 m...
- Page 29 Technical Specs Technical Specs PWHFi / uW Part List SINGLE SPEED PWHF500i PWHF500u PWHF500uW Code Capacity 1100 1100 2200 Lifting Speed Ft/Min 16,4 16,4 16,4 Lifting Height 20 ft / 6 m 20 ft / 6 m Motor Power 0.65 kW Voltage 110 / 60 hz Motor Speed...
- Page 30 Index Index PROWINCH® DISCLAIMER...........3 SAFETY PRECAUTIONS............6 Mandatory Use Of............6 Safety Operation............7 General Environmental Precautions.....10 Safety Installation............11 Hanging Pendant Control..........12 SPECIFICATIONS..............14 Advantages..............16 Oil and lubricant recommendations.....20 Inspection and maintenance........21 Installation Process............26 Unpacking...............27 Handling precautions..........29 Warranty................35 Troubleshooting............36 PWHC...................50 Technical parameters..........50 - 51 W W W.PROWI NCH.COM...
- Page 31 2264-1100 ® ® Lima, Peru ® www.prowinch.pe ® +51 935402797 ® ® ® EQUIPOS DE IZAJE PROWINCH CHILE SPA PROWINCH COLOMBIA SAS www.prowinch.cl www.prowinch.co Parque Riesco 3407, Recoleta, Cl. 163a #20-28, Región Metropolitana, Chile Bogotá Colombia (+57) 1 7034035 +56-2-26218989...
Need help?
Do you have a question about the PWH and is the answer not in the manual?
Questions and answers