Advertisement

Quick Links

Contents
1 Preparing for installation ·········································································· 1-1
Safety recommendations ································································································································ 1-1
Safety symbols ········································································································································ 1-1
General safety recommendations ··········································································································· 1-1
Electricity safety ······································································································································ 1-1
Examining the installation site ························································································································· 1-2
Temperature and humidity ······················································································································ 1-2
Cleanliness ·············································································································································· 1-2
Cooling ···················································································································································· 1-3
ESD prevention ······································································································································· 1-3
EMI ·························································································································································· 1-4
Lightning protection ································································································································· 1-4
Installation tools and accessories ··················································································································· 1-4
Installation tools ······································································································································ 1-4
Installation accessories ··························································································································· 1-6
Pre-installation checklist·································································································································· 1-8
2 Installing the router ·················································································· 2-1
Installation prerequisites ································································································································· 2-1
Installation flowchart········································································································································ 2-1
Installing the router·········································································································································· 2-2
Mounting the router in a 19-inch rack ······································································································ 2-2
Mounting the router on a workbench ······································································································· 2-4
Mounting the router on a DIN rail ············································································································ 2-4
Mounting the router on a wall ·················································································································· 2-5
Grounding the router ······································································································································· 2-8
Installing a micro SIM card ······························································································································ 2-9
Restrictions and guidelines ····················································································································· 2-9
Procedure ················································································································································ 2-9
Installing a 4G/5G stick antenna ··················································································································· 2-10
Installing a 4G/5G antenna extension cable (with a magnetic antenna mount base) ··································· 2-11
Connecting the power adapter or power cord ······························································································· 2-12
Connecting the power adapter ·············································································································· 2-13
Connecting the power cord ··················································································································· 2-13
Connecting Ethernet interface cables ··········································································································· 2-14
Connecting the console cable and setting terminal parameters ··································································· 2-14
Console cables ······································································································································ 2-14
Connecting a DB9-to-RJ45 console cable ···························································································· 2-15
Connecting a USB-to-RJ45 console cable ···························································································· 2-16
Setting configuration terminal parameters ···························································································· 2-17
Verifying the installation ································································································································ 2-17
Accessing the router for the first time············································································································ 2-18
3 Troubleshooting ······················································································· 3-1
Power supply failure ········································································································································ 3-1
No display on the configuration terminal ········································································································· 3-1
Garbled display on the configuration terminal ································································································· 3-2
No response from the serial port ····················································································································· 3-2
Micro SIM card and antenna failures ·············································································································· 3-2
Restoring the factory settings ························································································································· 3-3
Scenario 1 ··············································································································································· 3-3
Scenario 2 ··············································································································································· 3-3
Scenario 3 ··············································································································································· 3-3
Reset button usage guidelines ················································································································ 3-3
i

Advertisement

Table of Contents
loading
Need help?

Need help?

Do you have a question about the MSR1000 Series and is the answer not in the manual?

Questions and answers

Summary of Contents for H3C MSR1000 Series

  • Page 1: Table Of Contents

    Contents 1 Preparing for installation ·········································································· 1-1 Safety recommendations ································································································································ 1-1 Safety symbols ········································································································································ 1-1 General safety recommendations ··········································································································· 1-1 Electricity safety ······································································································································ 1-1 Examining the installation site ························································································································· 1-2 Temperature and humidity ······················································································································ 1-2 Cleanliness ·············································································································································· 1-2 Cooling ···················································································································································· 1-3 ESD prevention ·······································································································································...
  • Page 2: Preparing For Installation

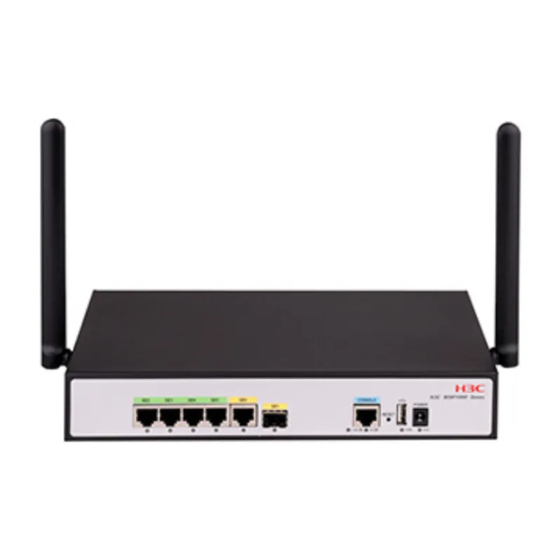
    Preparing for installation H3C MSR1000 router series includes the models in Table1-1. Table1-1 H3C MSR1000 router series models Identifier (marked on the front panel) Product code RT-MSR1008 RT-MSR1004-G RT-MSR1004S-5G RT-MSR1004S-5G-CN H3C MSR1000 Series RT-MSR1004S-5G-GL RT-MSR1104S-W RT-MSR1104S-W-CAT6 RT-MSR1104S-5G-CN RT-MSR1104S-W-5G-CN NOTE: Installation of the router is subject to the actual environment.
  • Page 3: Examining The Installation Site

    • Make sure the router is reliably grounded. • Connect the interface cables correctly. • Use an uninterrupted power supply (UPS). • Always make sure the power has been disconnected during installation or replacement. Examining the installation site The router can only be used indoors. To ensure correct operation and a long lifespan for your router, the installation site must meet the requirements in this section.
  • Page 4: Cooling

    Table1-3 Router requirement for cleanliness Substance Particle diameter Concentration limit ≥ 0.5 µm ≤ 1.8 × 10 Dust particles particles/m Corrosive gases can accelerate corrosion and aging of metal components. Make sure the corrosive gases do not exceed the concentration limits as shown in Table1-4. Table1-4 Corrosive gas concentration limits Average concentration (mg/m Maximum concentration (mg/m...
  • Page 5: Emi

    Lock the wrist strap tight around your wrist to maintain good contact with the skin. Secure the wrist strap lock and the alligator clip lock together. Attach the alligator clip to the rack or workbench where the router is mounted. All electromagnetic interference (EMI) sources, from outside or inside of the router and application system, adversely affect the router in the following ways: •...
  • Page 6 Figure1-1 Installation tools and equipment...
  • Page 7: Installation Accessories

    Installation accessories Figure1-2 Installation accessories...
  • Page 9: Pre-Installation Checklist

    IMPORTANT: To wall-mount the router, you must prepare screw anchors and screws. Make sure the screw anchors and screws meet the following requirements: • The screw length is no less than 16 mm (0.63 in). • The screw thread diameter is between 3 mm and 3.5 mm (0.12 in to 0.14 in). •...
  • Page 10 Item Requirements Result • The router is far away from any sources of heat or moisture. Safety • The emergency power switch in the equipment room is identified and precautions accessible. • Installation accessories supplied with the router are ready. Tools •...
  • Page 11: Installing The Router

    • Keep the tamper-proof seal on a mounting screw on the chassis cover intact, and if you want to open the chassis, contact H3C for permission. Otherwise, H3C shall not be liable for any consequence.
  • Page 12: Installing The Router

    Figure2-1 Installation flowchart Start In a 19-inch rack On a workbench Mount the router On a DIN rail On a wall Ground the router Install micro SIM cards Install 4G/5G stick antennas Install 4G/5G antenna extension cables (each with a magnetic antenna mount base) Connect the power cord Install cables Verify the installation...
  • Page 13 Figure2-2 Installing cage nuts Attach mounting brackets to the two sides of the router, as shown in Figure2-3. Figure2-3 Attaching mounting brackets to the router Use M6 screws to attach the mounting brackets on the router to the rack, as shown in Figure2-4.
  • Page 14: Mounting The Router On A Workbench

    Mounting the router on a workbench You can mount an MSR1004S-5G, MSR1004S-5G-GL, MSR1004S-5G-CN, MSR1104S-5G-CN, or MSR1104S-W-5G-CN router on a workbench without using rubber feet. Restrictions and guidelines To mount the router on a workbench, follow these restrictions and guidelines: • Make sure the workbench is clean, stable, and reliably grounded.
  • Page 15: Mounting The Router On A Wall

    Installation accessories Figure2-6 DIN rail mounting racket and DIN rail (1) Metal spring (2) Screw hole (3) DIN rail To mount the router on a DIN rail: Press the DIN rail against the spring on the DIN rail mounting bracket. Press the DIN rail upward to for its bottom to fit onto the bottom flange of the DIN rail mounting bracket.
  • Page 16 Figure2-8 Installing screw anchors Remove the DIN rail mounting bracket attached to the router real panel. Keep the removed DIN rail mounting bracket and the four mounting screws secure. Figure2-9 Removing the DIN rail mounting bracket from the router Use the four mounting screws used for the DIN rail mounting bracket to secure the router mounting bracket to the rear panel of the router.
  • Page 17 Figure2-11 Securing the router to the wall Mounting an MSR1004-G/MSR1104S-W/MSR1104S-W-CAT6/MSR1104S-5G-CN/MSR1104S- W-5G-CN on a wall Mark two wall-mount screw hole locations on the wall. Drill holes with a minimum depth of 22 mm (0.87 in) in the marked locations. Make sure the holes are horizontally apart.
  • Page 18: Grounding The Router

    Figure2-12 Mounting a router on a wall (MSR1104S-W) Grounding the router CAUTION: • Correctly connecting the grounding cable is crucial to lightning protection and EMI protection. When you install and use the router, first ground the router reliably. • Ensure a minimum resistance of 5 ohms between the router and the ground. To connect the grounding cable to the router: Remove the grounding screw from the grounding hole in the chassis.
  • Page 19: Installing A Micro Sim Card

    Use the grounding screw to attach the ring terminal of the grounding cable to the grounding hole and fasten the screw. Remove the nut from a grounding post on the grounding strip. Use needle-nose pliers to bend a hook with the bear metal part of the grounding cable. Then attach the hook to the grounding post and fasten the nut.
  • Page 20: Installing A 4G/5G Stick Antenna

    Reinstall the cover and then fasten the screw on the cover. Figure2-14 Installing a micro SIM card Installing a 4G/5G stick antenna Only the MSR1004S-5G, MSR1004S-5G-GL, MSR1004S-5G-CN, MSR1104S-5G-CN, and MSR1104S-W-5G-CN routers support 5G stick antennas. Only the MSR1104S-W-CAT6 router supports 4G stick antennas. A 5G antenna can also be used as a GNSS antenna.
  • Page 21: Installing A 4G/5G Antenna Extension Cable (With A Magnetic Antenna Mount Base)

    Figure2-15 Installing a 5G stick antenna Installing a 4G/5G antenna extension cable (with a magnetic antenna mount base) Only the MSR1004S-5G, MSR1004S-5G-GL, MSR1004S-5G-CN, MSR1104S-5G-CN, and MSR1104S-W-5G-CN routers support 5G antenna extension cables (each with a magnetic antenna mount base). Only the MSR1104S-W-CAT6 router supports 4G antenna extension cables (each with a magnetic antenna mount base).
  • Page 22: Connecting The Power Adapter Or Power Cord

    Figure2-16 Installing 5G antenna extension cables (each with a magnetic antenna mount base) for MSR1004S-5G/MSR1004S-5G-GL Figure2-17 Installing 5G antenna extension cables (each with a magnetic antenna mount base) for MSR1004S-5G-CN/MSR1104S-5G-CN/MSR1104S-W-5G-CN Connecting the power adapter or power cord CAUTION: Before connecting power to the router, make sure the building power has been reliably grounded. The MSR1004-G, MSR1004S-5G, MSR1004S-5G-GL, MSR1004S-5G-CN, MSR1104S-W, MSR1104S-W-CAT6, MSR1104S-5G-CN, and MSR1104S-W-5G-CN routers use a power adapter for power input.
  • Page 23: Connecting The Power Adapter

    Connecting the power adapter CAUTION: To avoid power adapter damage, use the power adapter provided with the router. To connect the power adapter: Make sure the router is reliably grounded. Connect the power adapter to the AC receptacle. Connect the DC output plug of the power adapter to the power adapter receptacle on the router.
  • Page 24: Connecting Ethernet Interface Cables

    Connect one end of the cable to an Ethernet port on the router. Connect the other end of the cable to the Ethernet port on a host. Examine the port LEDs on the router. For more information about the LEDs, see H3C MSR1000 Routers Hardware Information and Specifications.
  • Page 25: Connecting A Db9-To-Rj45 Console Cable

    Table2-2 Console cables for connecting the console port Configuration Console cable Router-side Connection Console cable view terminal-side type connector method connector Connecting a DB9-to-RJ45 DB-9 female RJ-45 DB9-to-RJ45 console cable connector console cable Connecting a USB-to-RJ45 RJ-45 USB-to-RJ45 console cable console cable Connecting a DB9-to-RJ45 console cable CAUTION:...
  • Page 26: Connecting A Usb-To-Rj45 Console Cable

    USB-to-RJ45 console driver on the configuration terminal, and then connect the USB-to-RJ45 console cable to the configuration terminal. To download the USB-to- RJ45 console driver, access the H3C official website or scan the QR code on the cable package.
  • Page 27: Setting Configuration Terminal Parameters

    Figure2-23 Finishing the driver installation Connect the standard USB connector of the cable to the USB port of the configuration terminal. Connect the RJ-45 connector of the cable to the console port of the router. Setting configuration terminal parameters To access the router from the console port, you must run a terminal emulator program (HyperTerminal, PuTTY, or Tera Term) on the configuration terminal.
  • Page 28: Accessing The Router For The First Time

    During the booting process, verify the following items: The LEDs on the front panel indicate normal operation. For more information about the  LEDs, see H3C MSR1000 Routers Hardware Information and Specifications. The configuration terminal displays information correctly.  The router first initializes its memory at startup and then runs BootWare.
  • Page 29 System image is starting... Line con0 is available. Press ENTER to get started. Press Enter. The router is ready to configure when you see the following prompt: <Sysname> Configure basic settings for the router. For information about configuring basic setting for the router, see the configuration guides and command references for the router.
  • Page 30: Troubleshooting

    • Keep the tamper-proof seal on a mounting screw on the chassis cover intact, and if you want to open the chassis, contact H3C for permission. Otherwise, H3C shall not be liable for any consequence.
  • Page 31: Garbled Display On The Configuration Terminal

    Parity—None.  Stop bits—1.  Flow control—None.  If the issue persists, contact H3C Support. No response from the serial port Symptom The serial port on the router does not respond Solution To resolve the issue: Verify that the serial cable is in good condition and the serial port settings are correct.
  • Page 32: Restoring The Factory Settings

    Restoring the factory settings Scenario 1 Symptom When you replace the router, the router password is lost. As a result, you cannot log in to the router and do not know the router configuration. Solution Because the router is replaced, you do not need to save the configuration of the router. In this case, you can press and hold the RESET button to reboot the router and restore the factory settings.

Table of Contents