
Related Manuals for Elite XIW20


Summary of Contents for Elite XIW20
- Page 1 Manual de usuario Lea este manual detenidamente, contiene información de seguridad importante. LLAVE DE IMPACTO INALÁMBRICA XIW20 Keep Working...
-
Page 2: Table Of Contents
CONTENIDO Descripción Especificación Cartucho de batería y cargador disponibles Ruido Vibración Advertencias de seguridad Instrucciones de seguridad importantes para el cartucho de batería Descripcion funcional Montaje Operación Mantenimiento Accesorios Opcionales Garantía Keep Working... -
Page 3: Descripción
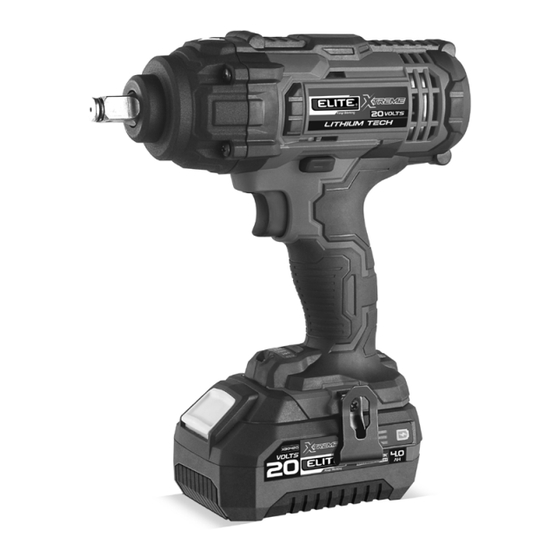
10. Luz indicadora de ajuste de Velocidad/Torque 11. Gancho Conformidad con la declaración CE Solo para países europeos Elite declara que las siguientes Máquinas: Designación de la máquina: llave de impacto inalámbrica Cumple con las siguientes directivas europeas: 2006/42/EC EN 62841-1... -
Page 4: Especificación
ESPECIFICACION 1/2’’ Mecanismo rectangular Cabeza de impacto Perno estándar M12 - M22 Capacidad de Ajuste Perno de alta resistencia M12 - M16 Modo de impacto máximo 0 - 2.300 min-1 Modo de impacto duro 0 - 2.000 min-1 Velocidad en reposo Modo de impacto medio 0 - 1.900 min-1 Modo de impacto menor... -
Page 5: Cartucho De Batería Y Cargador Disponibles
Cartucho de batería y cargador disponibles cartucho de batería XB0420 4.0 Ah cargador de baterías XCB20 2.4 Ah Es posible que algunos de los cartuchos de batería y cargadores enumerados anteriormente no estén disponibles dependiendo de su país de residencia. ADVERTENCIA: Utilice únicamente los cartuchos de batería y los cargadores indicados anteriormente. -
Page 6: Vibración
Vibración El valor total de la vibración (suma del vector triaxial) se determina según la norma EN62841-2-2: Modo de trabajo: ajuste por impacto de las piezas de fijación con la máxima capacidad de la herramienta. Emisión de vibraciones (ah) : 11,9m/s 2 Incertidumbre (K) : 1,5 m/s2 NOTA: El valor de emisión de vibraciones declarado se ha medido de acuerdo con el método de prueba estándar y puede utilizarse para comparar una herramienta con otra. - Page 7 3. No exponga las herramientas eléctricas a la lluvia o a condiciones de humedad. La entrada de agua en una herramienta eléctrica aumentará el riesgo de descarga eléctrica. 4. No abuse del cable. Nunca utilice el cable para transportar, tirar o desenchufar la herramienta eléctrica.
- Page 8 Es responsabilidad del empresario hacer cumplir el uso de los equipos protección seguridad adecuados parte operadores de las herramientas y de otras personas en la zona de trabajo. Uso y cuidado de las herramientas eléctricas 1. No fuerce la herramienta eléctrica. Utilice la herramienta eléctrica correcta para su aplicación. La herramienta eléctrica correcta hará...
-
Page 9: Instrucciones De Seguridad Importantes Para El Cartucho De Batería
4. En condiciones extremas, puede salir líquido de la batería; evite el contacto. Si se produce un contacto accidental, enjuague con agua. Si el líquido entra en contacto con los ojos, busque ayuda médica. El líquido expulsado de la batería puede causar irritación o quemaduras. 5. -
Page 10: Guardar Estas Instrucciones
Guardar estas instrucciones PRECAUCIÓN: Utilice únicamente baterías originales de elite. El uso de baterías no genuinas de elite, o de baterías que hayan sido alteradas, puede hacer que la batería estalle causando incendios, lesiones personales y daños. También anulará la garantía de ELITE para la herramienta y el cargador de ELITE. -
Page 11: Descripción Del Funcionamiento
DESCRIPCIÓN DEL FUNCIONAMIENTO PRECAUCIÓN: Asegúrese siempre de que la herramienta esté apagada y que el cartucho de la batería haya sido retirado antes de ajustar o verificar el funcionamiento de la herramienta. Instalación o Extracción del cartucho de la batería PRECAUCIÓN: Apague siempre la herramienta antes de instalar o retirar el cartucho de la batería. - Page 12 Luces indicadoras Capacidad restante Iluminado Apagado 75% to100% Verde Naranja Rojo 25% to50% Naranja Rojo 10% to25% Rojo NOTA: Según las condiciones de uso y la temperatura ambiente, la indicación puede diferir ligeramente de la capacidad real. Sistema de protección de la batería La herramienta está...
- Page 13 PRECAUCIÓN: Antes de instalar el cartucho de batería en la herramienta, verifique siempre que el gatillo del interruptor acciona correctamente y regresa a la posición "OFF" cuando se suelta. iluminación de la lámpara frontal Apriete el gatillo del interruptor para encender la lámpara. La lámpara se mantiene encendida mientras se aprieta el gatillo del interruptor.
- Page 14 Cambio de Velocidad/ Torque 1. Indicador luminoso de ajuste de velocidad/torque 2. Botón de ajuste de velocidad/torque 1. Mediante el cambio de velocidad se puede obtener la fuerza de impacto (torque) en cinco grados: modo máximo, duro, medio, menor y suave con el correspondiente torque de 400Nm,300Nm, 200Nm, 150Nm y 100Nm.
-
Page 15: Montaje
MONTAJE PRECAUCIÓN: Asegúrese siempre de que la herramienta esté apagada y el cartucho de la batería se ha retirado antes de realizar cualquier trabajo en la herramienta. Selección de la correcta Utilice siempre el tamaño correcto de la copa para pernos y tuercas. Una copa de tamaño incorrecto dará lugar a un torque inexacto e inconsistente que provocará... -
Page 16: Operación
OPERACIÓN PRECAUCIÓN: Inserte siempre el cartucho de la batería hasta que quede ajustado. Si no lo hace, puede caerse accidentalmente de la herramienta, causándole lesiones personales a usted o a alguien a su alrededor. Fijación de Pernos Para la fijación de pernos, sujete la herramienta con firmeza y coloque el perno de copa sobre el perno o la tuerca. -
Page 17: Mantenimiento
El uso de cualquier otro accesorio o aditamentos podría ocasionar riesgo de lesiones a las personas. Utilice sólo el accesorio o complemento para la finalidad indicada. Si necesita ayuda para obtener más detalles sobre estos accesorios, consulte a su Centro de Servicios ELITE:. ●... -
Page 18: Garantía
TIEMPOS DE GARANTÍA Si este producto Elite falla debido a un defecto de material o de fabricación dentro del plazo de un año a partir de la fecha de compra, devuélvalo a cualquier tienda de distribución autorizada Elite, Centros de Servicio Corporativo, Autorizado u otro punto de venta Elite para que sea reparado gratuitamente (o reemplazado si la reparación resulta imposible). -
Page 20: Cordless Impact Wrench
User manual Please read this manual carefully, contains important safety information. CORDLESS IMPACT WRENCH XIW20 www.ELITETOOLS.co Keep Working... - Page 21 CONTENT Identification Specifications Applicable battery cartridge and charger Noise Vibration Safety warnings Important safety instructions for battery cartridge Functional description Assembly Operation Maintenance Optional accessories Warranty www.ELITETOOLS.co Keep Working...
-
Page 22: Identification
8. Button of Battery Cartridge 9. Battery Cartridge 10. Speed/Torque Adjust Indicator Lamp 11. Hook EC Declaration Conformity For European countries only Elite declares that the following Machine(s): Designation of Machine: Cordless Impact Wrench Conforms to the following European Directives: 2006/42/EC EN 62841-1 2014/30/EU... -
Page 23: Specifications
SPECIFICATIONS 1/2’’ Square drive Impact head Standard bolt M12 - M22 Fastening capacities High tensile bolt M12 - M16 Max impact mode 0 - 2.300 min-1 Hard impact mode 0 - 2.000 min-1 No load speed Medium impact mode 0 - 1.900 min-1 Minor impact mode 0 - 1.700 min-1 Soft impact mode... -
Page 24: Applicable Battery Cartridge And Charger
Applicable battery cartridge and charger battery cartridge XB0420 4.0 Ah battery charger XCB20 2.4 Ah Some of the battery cartridges and chargers listed above may not be available depending on your region of residence. WARNING: Only use the battery cartridges and chargers listed above. Use of any other battery cartridges and chargers may cause injury and/or fire. -
Page 25: Vibration
Vibration The vibration total value (tri-axial vector sum) determined according to EN62841-2-2: Work mode: impact tightening of fasteners of the maximum capacity of the tool Vibration emission (ah) : 11.9 m/s Uncertainty (K) : 1.5 m/s2 NOTE: The declared vibration emission value has been measured in accordance with the standard test method and may be used for comparing one tool with another. - Page 26 Keep cord away from heat, oil, sharp edges or moving parts. Damaged or entangled cords increase the risk of electric shock. 5. When operating a power tool outdoors, use an extension cord suitable for outdoor use. Use of a cord suitable for outdoor use reduces the risk of electric shock.
- Page 27 Power tool use and care 1. Do not force the power tool. Use the correct power tool for your application. The correct power tool will do the job better and safer at the rate for which it was designed. 2. Do not use the power tool if the switch does not turn it on and off. Any power tool that cannot be controlled with the switch is dangerous and must be repaired.
-
Page 28: Important Safety Instructions For Battery Cartridge
Service 1. Have your power tool serviced by a qualified repair person using only identical replacement parts. This will ensure that the safety of the power tool is maintained. 2. Never service damaged battery packs. Service of battery packs should only be performed by the manufacturer or authorized service providers. - Page 29 CAUTION: Only use genuine Elite batteries. Use of non-genuine Elite batteries, or batteries that have been altered, may result in the battery bursting causing fires, personal injury and damage. It will also void the Elite warranty for the Elite tool and charger.
-
Page 30: Functional Description
FUNCTIONAL DESCRIPTION CAUTION: Always be sure that the tool is switched off and the battery cartridge is removed before adjusting or checking function on the tool Installing or removing battery cartridge CAUTION: Always switch off the tool before installing or removing of the battery cartridge. CAUTION: Hold the tool and the battery cartridge firmly when installing or removing battery cartridge. - Page 31 Indicator lamps Remaining capacity Lighted 75% to100% 25% to50% 10% to25% NOTE: Depending on the conditions of use and the ambient temperature, the indication may differ slightly from the actual capacity. Tool / battery protection system The tool is equipped with a tool/battery protection system. This system automatically cuts off power to the motor to extend tool and battery life.
- Page 32 CAUTION: Before installing the battery cartridge into the tool, always check to see that the switch trigger actuates properly and returns to the "OFF" position when released. Lighting up the front lamp Pull the switch trigger to light up the lamp. The lamp keeps on lighting while the switch trigger is being pulled.
- Page 33 Speed/torque change 1. Speed/Torque adjust indicator lamp 2. Speed/Torque adjust button 1. Through changing the speed you can get the impact force(torque) in five grades: max, hard, medium, minor and soft mode with the corresponding torque of 400Nm,300Nm, 200Nm, 150Nm and 100Nm. This allows a tightening suitable to the various work.
-
Page 34: Assembly
ASSEMBLY CAUTION: Always be sure that the tool is switched off and the battery cartridge is removed before carrying out any work on the tool. Selecting correct impact socket Always use the correct size impact socket for bolts and nuts. An incorrect size impact socket will result in inaccurate and inconsistent fastening torque and/or damage to the bolt or nut Installing or removing impact socket 1. -
Page 35: Operation
● OPERATION CAUTION: Always insert the battery cartridge all the way until it locks in place. If not, it may accidentally fall out of the tool, causing injury to you or someone around you. Fastening Hold the tool firmly and place the impact socket over the bolt or nut. Turn the tool on and fasten for the proper fastening time. -
Page 36: Maintenance
The use of any other accessories or attachments might present a risk of injury to persons. Only use accessory or attachment for its stated purpose. If you need any assistance for more details regarding these accessories, ask your local ELITE Service Center. ● Impact socket ●... -
Page 37: Warranty
WARRANTY TIMES If this Elite product fails due to a material or manufacturing defect within one year from the date of purchase, return it to any authorized Elite distribution store, Corporate Service Centers, Authorized or other Elite point of sale for It is repaired free of charge (or replaced if repair is impossible).
Need help?
Do you have a question about the XIW20 and is the answer not in the manual?
Questions and answers