Table of Contents
Advertisement
Quick Links
Advertisement
Table of Contents

Related Manuals for Farberware FMO09BLKSS


Summary of Contents for Farberware FMO09BLKSS
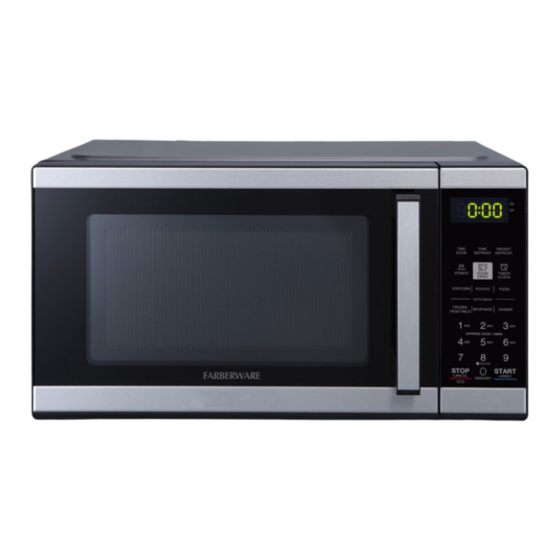
- Page 1 MICROWAVE OVEN INSTRUCTION MANUAL Model: FMO09BLKSS Read these instructions carefully before using your microwave oven. If you follow the instructions, your oven will provide you with many years of good service. SAVE THESE INSTRUCTIONS CAREFULLY (rev. 5/30/2024 MD)
- Page 2 Farberware is a registered trademark of Farberware Licensing Company, LLC Manufactured and sold pursuant to a license from Farberware Licensing Company, LLC © 2024 Farberware Licensing Company, LLC. All rights reserved.
-
Page 3: Table Of Contents
Table of Contents PRECAUTIONS ..............4 SPECIFICATIONS ..............4 SAFETY ................4 GROUNDING ..............6 UTENSILS ................8 SETTING UP YOUR OVEN ..........10 CONTROL PANEL .............. 12 OPERATION ..............13 MAINTENANCE ..............19 WARRANTY INFORMATION ..........20... -
Page 4: Precautions
2. HINGEST AND LATCHES (broken or loosened) 3. DOOR SEALS AND SEALING SURFACES The oven should not be adjusted or repaired by anyone except properly qualified service personnel. SPECIFICATIONS Model: FMO09BLKSS Rated Voltage: 120V~60Hz Rated Input Power(Microwave): 1400W Rated Output Power(Microwave):... -
Page 5: Important Safety Instructions
IMPORTANT SAFETY INSTRUCTIONS When usuing electrical appliances basic safety precautions should be followed, including the following: WARNING - To reduce the risk of burns, electric shock, fire, injury to persons or exposure to excessive microwave energy: 1. Read all instructions before using the appliance. 2. -
Page 6: Grounding Instructions
17. Liquids, such as water, coffee, or tea are able to be overheated beyond the boiling point without appearing to be boiling. Visible bubbling or boiling when the container is removed from the microwave oven is not always present. THIS COULD RESULT IN VERY HOT LIQUID SUDDENLY BOILING OVER WHEN THE CONTAINER IS DISTURBED OR A UTENSIL IS INSERTED INTO THE LIQUID. -
Page 7: Radio Interference
WARNING - Electric Shock Hazard: Improper use of the grounding can result in electric shock. Do not plug into an outlet until appliance is properly installed and grounded. 1. A short power-supply cord is provided to reduce the risks resulting from becoming entangled in or tripping over a longer cord. -
Page 8: Utensils
UTENSILS CAUTION - Personal Injury Hazard Tightly-closed utensils could explode. Closed containers should be opened and plastic pouches should be pierced before cooking. See the instructions on “Materials you can use in microwave oven.” or “Materials cannot be used in microwave oven.” There may be certain non-metallic utensils that are not safe to use for microwaving. -
Page 9: Materials You Can Use In Microwave Oven
MATERIALS YOU CAN USE IN MICROWAVE OVEN Utensils Remarks Browning Dish Follow manufacturer* instructions. The bottom of browning dish must be at least 3/16 inch (5mm) above the turntable. Incorrect usage may cause the turntable to break. Dinnerware Microwave-safe only. Follow manufacturer’s instructions. Do not use cracked or chipped dishes. -
Page 10: Materials To Be Avoided In Microwave Oven
MATERIALS TO BE AVOIDED IN MICROWAVE OVEN Utensils Remarks Aluminum tray May cause arcing. Transfer food into microwave-safe dish. Food carton with metal handle May cause arcing. Transfer food into microwave-safe dish. Metal or metal-trimmed utensils Metal shields the food from microwave energy. Metal trim may cause arcing. -
Page 11: Setting Up Your Oven
SETTING UP YOUR OVEN Names of Oven Parts and Accessories (In case of any differences between the appliance and the pictures in this manual, the product shall prevail.) Remove the oven and all materials from the carton and oven cavity. Your oven comes with the following accessories: Glass Tray Turntable Ring Assembly... - Page 12 Turntable Installation Cleaning the cooking compartment and putting the turntable in place. For new installations, make sure all packaging and shipping tape has been removed from the turntable shaft. Before using the appliance to prepare food for the first time, you will need to put the turntable in place correctly. You must clean the cooking compartment and accessories.
- Page 13 Countertop Installation Remove all packing material and accessories. Cabinet: Remove any protective film found Examine the oven for any damage such as on the microwave oven cabinet surface. Do dents or broken door. Do not install if oven is not remove the light brown Mica cover that damaged.
-
Page 14: Control Panel
CONTROL PANEL 1. Time Cook 2. Time Defrost 3. Weight Defrost 4. Power (10 power levels available) 5. Door Open 6. Timer/Clock 7. Auto Cook Menu (Popcorn, Potato, Pizza, Frozen Vegetable, Beverage, Dinner Plate) 8. Number Pad (0-9) 9. Express Cook (Number Pad 1-6) 10. -
Page 15: Operation
OPERATION 1. SAFETY LOCK 1. How the safety lock works Initiating a cooking process triggers the door lock, and it also engages if the door remains unlocked for additional 30 minutes following the completion of the cooking. Safety Lock is active by default. It will only be deactivated if the user chooses to do so manually. Even in the event of a power disconnection, the oven will preserve the state of the safety lock, whether it is activated or deactivated. -
Page 16: Setting The Kitchen Timer
3. SETTING THE KITCHEN TIMER 1. Press once, the screen will display “00:00”. 2. Press the number keys to set the desired time. The maximum time value is “99:99”. 3. Press to confirm. The timer starts counting down. NOTE: The kitchen timer is a timer. 4. -
Page 17: Speedy Cooking
5. SPEEDY COOKING 1. In standby mode, pressing the number keys 1 to 6 lets you quickly select a cooking time from 1 to 6 minutes. Then you can press to increase the cooking time. The maximum time value is “99:99”. -
Page 18: Multi-Stage Cooking
8. MULTI-STAGE COOKING NOTE: 1. Two cooking stages can be set in multi-stage cooking. 2. If you set the defrost function, it will work automatically in the first stage. 3. The auto menu cannot be set as one of the multi-stage. Example: Defrost food for 5 minutes and then cook with 80% microwave power for 7 minutes 1. -
Page 19: Auto Menu Chart
AUTO MENU CHART Menu Weight Display Power 1.75Oz 1.75 3.2Oz 3.2ˉ PL10 3.5Oz 3.5ˉ 1 (8Oz) 2 (16Oz) PL10 3 (24Oz) 4.0Oz 4.0ˉ 8.0Oz 8.0ˉ 14.0Oz 14.0ˉ 4.0Oz 4.0ˉ PL10 8.0Oz 8.0ˉ 16.0Oz 16.0ˉ 1 Cup (120ml) PL10 2 Cups (240ml) 3 Cups (360ml) 9.0Oz 9.0ˉ... -
Page 20: Memory Function
10. MEMORY FUNCTION You can save the settings for a dish in the memory and call it up again. 1. Press repeatedly to select the memory 1-3 procedure. “1”, “2” and “3” will display in order. 2. If the procedure has been set, press to start working. -
Page 21: Eco Function
13. ECO FUNCTION To enter ECO mode: In standby mode, and the oven door is closed, press once. The screen will turn off. To cancel ECO mode: In ECO mode, pressing any key, or opening the door will cancel it. 14. -
Page 22: Maintenance
MAINTENANCE Troubleshooting Check your problem by using the chart below and try the solutions for each problem. If the microwave oven still does not work properly, contact the nearest authorized service center. Trouble Possible Cause Possible Remedy Oven will not start a. -
Page 24: One-Year Limited Warranty
ONE YEAR LIMITED WARRANTY This warranty applies to products purchased and used in the U.S and Canada. This is the only express warranty for this product and is in lieu of any other warranty or condition. This product is warranted to be free from defects in material and workmanship for a period of one (1) year from the date of original purchase.
Need help?
Do you have a question about the FMO09BLKSS and is the answer not in the manual?
Questions and answers