Table of Contents
Advertisement
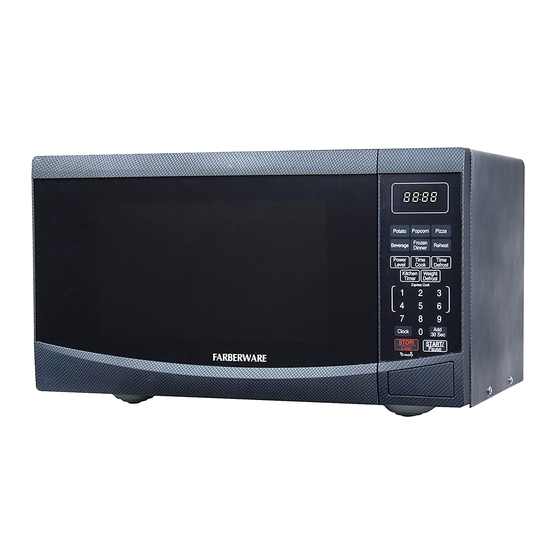
MICROWAVE OVEN
INSTRUCTION MANUAL
MODEL: FMO09BBTCFA, FMO09BBTDMA,
FMO09BBTWDA, FMO09BBTWMA
Read these instruction carefully before using your
microwave oven and to maintain its upkeep. If you
follow the instructions, your oven will provide you
with many years of good service.
KEEP INSTRUCTIONS IN A SAFE AREA
Advertisement
Table of Contents

Related Manuals for Farberware FMO09BBTCFA


Summary of Contents for Farberware FMO09BBTCFA
- Page 1 MICROWAVE OVEN INSTRUCTION MANUAL MODEL: FMO09BBTCFA, FMO09BBTDMA, FMO09BBTWDA, FMO09BBTWMA Read these instruction carefully before using your microwave oven and to maintain its upkeep. If you follow the instructions, your oven will provide you with many years of good service. KEEP INSTRUCTIONS IN A SAFE AREA...
- Page 2 Farberware is a registered trademark of Farberware Licensing Company, LLC Manufactured and sold pursuant to a license from Farberware Licensing Company, LLC © 2015 Farberware Licensing Company, LLC. All rights reserved.
-
Page 3: Table Of Contents
Tables of Contents PRECAUTIONS....………………………………………….……….. 4 SPECIFICATIONS……………………………………………………..…..… 4 SAFETY………………………………………………………………………..…. 4 GROUNDING………………………………………………………….……..6 UTENSILS………………………..............8 SETTING UP YOUR OVEN……………............10 CONTROL PANEL………………………………......... 12 OPERATION………………………………..........13 MAINTENANCE……………………………………………………………….. 19 WARRANTY INFORMATION.……………………………………………….. 20... -
Page 4: Precautions
DOOR SEALS AND SEALING SURFACES (Do not use if the door seal or sealing surfaces are damaged.) The oven should not be adjusted or repaired by anyone except properly service personnel SPECIFICATIONS FMO09BBTCFA, FMO09BBTDMA, Model: FMO09BBTWDA, FMO09BBTWMA Rated Voltage: 120V~60Hz... - Page 5 2. Read and follow the “PRECAUTIONS TO AVOID POSSIBLE EXPOSURE TO EXCESSIVE MICROWAVE ENERGY” found on page 4. 3. This appliance must be grounded. Connect only to properly grounded outlet. See “GROUNDING INSTRUCTIONS” found on page . 6 4. Install or locate this appliance only in accordance with the provided installation instructions.
-
Page 6: Grounding
To reduce the risk of injury to persons: 1) Do not overheat the liquid. 2) Stir the liquid both before and halfway through heating it. 3) Do not use straight-sided containers with narrow necks. 4) After heating, allow the container to stand in the microwave oven for a short time before removing the container. -
Page 7: Safety
3. If a long cord or extension cord is used: 1) The marked electrical rating of the cord set or extension cord should be at least as great as the electrical rating of the appliance. 2) The extension cord must be a grounding-type 3-wire cord. 3) The longer cord should be arranged so that it will not drape over the counter top or tabletop where it can be pulled on by children or tripped over unintentionally. -
Page 8: Utensils
Do not heat narrow-necked containers, such as syrup bottles. Do not attempt to deep-fry in your microwave oven. Do not attempt home canning in this microwave oven, as it is impossible to be sure all contents of the jar have reached boiling temperature. Do not use this microwave oven for commercial purpose. - Page 9 MATERIALS YOU CAN USE IN MICROWAVE OVEN Utensils Remarks Aluminum foil Shielding only. Small smooth pieces can be used to cover thin parts of meat or poultry to prevent overcooking. Arcing can occur if foil is too close to oven walls. The foil should be at least 1 inch (2.5cm) away from oven walls.
-
Page 10: Setting Up Your Oven
MATERIALS TO BE AVOIDED IN MICROWAVE OVEN Utensils Remarks Aluminum tray May cause arcing. Transfer food into microwave-safe dish. Food carton with metal handle May cause arcing. Transfer food into microwave-safe dish. Metal or metal-trimmed utensils Metal shields the food from microwave energy. Metal trim may cause arcing. -
Page 11: Turntable Installation
Turntable Installation a. Never place the glass tray upside down. Hub (underside) The glass tray should never be restricted. b. Both glass tray and turntable ring assembly Glass tray must always be used during cooking. c. All food and containers of food are always placed on the glass tray for cooking. -
Page 12: Control Panel
CONTROL PANEL Time Cook Time Defrost Weight Defrost Power Level (10 power levels available) Clock (10) Kitchen Timer Auto Cook Menu (Potato, (12) (11) Popcorn, Pizza, Beverage, Frozen Dinner, Reheat) Number Pad (0-9) Express Cook (Number Pad 1-6) (10) Add 30Sec (Add time to cook) (11) STOP/Clear (Clear all previous settings before cooking;... -
Page 13: Operation
OPERATION 1. CLOCK SETTING (1) Touch CLOCK once (for 12 hour clock) or twice (for 24 hour). (2) Use the number pads to enter correct time. (3) Touch CLOCK again. Note: This is a 12 or 24 hour clock. During the cooking program, the current time can be seen by touching the CLOCK pad. -
Page 14: Time Cook
4. ADD 30 SEC. Touch to set cooking time to add 30 seconds each. (1) Touch once and cooking will start immediately for 30 seconds. Touching this button repeatedly with add 30 seconds each time. (2) During the TIME COOK and TIME DEFROST, you can add 30 seconds for each push. 5. - Page 15 6. SETTING “TIME DEFROST” (1) Touch TIME DEFROST pad. (2) Enter desired defrosting time by touching correct number pads. The longest time you can set is 99 min. 99 sec. (3) Touch START/PAUSE pad. 7. SETTING “WEIGHT DEFROST” (1) Touch WEIGHT DEFROST pad. (2) Use the number pad to enter food weight “LB”.
- Page 16 1) Baked Potato Each potato about 3.5-5.3oz. (1) Touch BAKED POTATO once for each potato to be cooked. 1 potato 6 min 2 potatoes 8 min 3 potatoes 10 min 4 potatoes 12 min (2) Touch START/PAUSE pad 2) Popcorn For microwave popcorn: (1) Touch POPCORN.
- Page 17 4) Beverage Each cup about 250ml: (1) Touch BEVERAGE once for each cup to be heated. 1 cup. 50sec 2 cups. 2 min 3 cups. 2 min. 50sec 4 cups. 3 min. 40sec (2) Touch START/PAUSE pad 5) Frozen Dinner For frozen dinners: (1) Touch FROZEN DINNER pad.
-
Page 18: Setting Child Lock
9. TWO-STAGE COOKING Use for multi-stage cooking enable cooking at multiple power and time settings automatically. SET STAGE1: (1) Place food into oven and close it. Touch TIME COOK pad. (2) Use the number pads to set a cooking time. (3) Touch POWER LEVEL pad. -
Page 19: Maintenance
MAINTENANCE Troubleshooting Check your problem by using the chart below and try the solutions for each problem. If the microwave oven still does not work properly, contact the nearest authorized service center. Trouble Possible Cause Possible Remedy Oven will not a.
Need help?
Do you have a question about the FMO09BBTCFA and is the answer not in the manual?
Questions and answers