Advertisement
Quick Links
GAS
ONE
CHARCOAL GRILL OPERATION MANUAL
MODEL NO# CG-16H
SOCIAL MEDIA
www.gasone.com
/gasoneusa
@gasoneusa
FOR CALIFORNIA CONSUMERS ONLY:
WARNING
!
Cancer and Reproducive Harm.
to www.P65Warnings.ca.gov
Commerce, CA 90040
support@gasone.com
Toll Free: 1.800.698.5070
Customer Service Hours:
M - F: 9 am - 5 pm (PST)
Advertisement

Related Manuals for GAS ONE CG-16H


Summary of Contents for GAS ONE CG-16H
- Page 1 CHARCOAL GRILL OPERATION MANUAL MODEL NO# CG-16H SOCIAL MEDIA www.gasone.com /gasoneusa @gasoneusa FOR CALIFORNIA CONSUMERS ONLY: WARNING Cancer and Reproducive Harm. to www.P65Warnings.ca.gov Commerce, CA 90040 support@gasone.com Toll Free: 1.800.698.5070 Customer Service Hours: M - F: 9 am - 5 pm (PST)
-
Page 2: Important Safety Information
IMPORTANT SAFETY INFORMATION THIS MANUAL MUST REMAIN WITH THE PRODUCT AT ALL TIMES FOR OUTDOOR USE ONLY CAUTION: SHARP EDGES. WEAR GLOVES WHEN ASSEMBLING YOUR GRILL. CAUTION: READ AND FOLLOW ALL SAFETY STATEMENTS, ASSEMBLY INSTRUCTIONS, AND USE AND CARE DIRECTIONS BEFORE ATTEMPTING TO ASSEMBLE AND COOK. WARNING: FALIURE TO FOLLOW ALL OF THE MANUFACTURER’S INSTRUCTIONS COULD RESULT IN HAZARDOUS FIRES, EXPLOSIONS, PROPERTY DAMAGE, PERSONAL INJURY OR EVEN DEATH. -
Page 3: Cleaning And Care
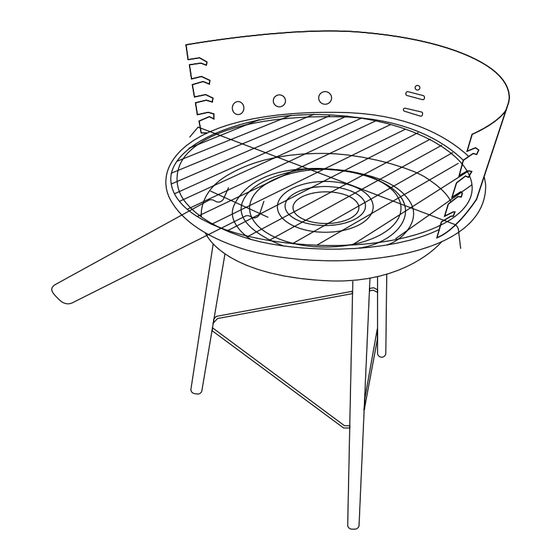
THIS APPLIANCE IS DESIGN FOR USE ONLY WITH CHARCOAL BRIQUETTES LUMP CHARCOAL AND COOKING WOOD. ATTENTION: THIS GRILL WILL BECOME VERY HOT. DO NOT MOVE IT DURING OPERATION. DO NOT USE IT INDOORS! CAUTION: DO NOT USE SPIRIT, PETROL, OR ANY COMPARABLE FLUIDS FOR LIGHTING OR RE-LIGHTING. - Page 4 ASSEMBLY Assemble the two parts of the windbreak using 2 screws (F) and 2 nuts (H). Insert the windguard securely onto the to the base of the grill by locating the slats and insert them into the rim of firebowl (C).
- Page 5 Screw the legs securely to the base of the grill using 2 screws (F) and 2 nuts (H) per leg. Screw the brace securely between the legs of the grill using 1 nut (G) and 1 screw (H) for each leg.
- Page 6 PARTS & PIECES...
- Page 7 Securely hook the rack onto the grill. Tighten any loose screws and nuts if necessary. The grill is now ready for use.
Need help?
Do you have a question about the CG-16H and is the answer not in the manual?
Questions and answers