Table of Contents
Advertisement
Quick Links
KA01724F/00/EN/01.24-00
71671399
2024-09-01
Products
Brief Operating Instructions
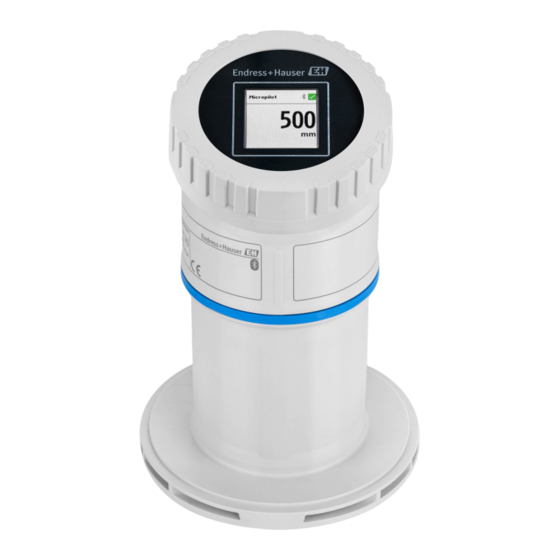
Micropilot FMR30B
Free-space radar
HART
These Instructions are Brief Operating Instructions; they are
not a substitute for the Operating Instructions pertaining to
the device.
Detailed information about the device can be found in the
Operating Instructions and the other documentation:
Available for all device versions via:
• Internet:
www.endress.com/deviceviewer
• Smart phone/tablet: Endress+Hauser Operations App
Solutions
Services
Advertisement
Table of Contents

Subscribe to Our Youtube Channel
Related Manuals for Endress+Hauser HART Micropilot FMR30B


Summary of Contents for Endress+Hauser HART Micropilot FMR30B
- Page 1 Operating Instructions pertaining to the device. Detailed information about the device can be found in the Operating Instructions and the other documentation: Available for all device versions via: • Internet: www.endress.com/deviceviewer • Smart phone/tablet: Endress+Hauser Operations App...
-
Page 2: Associated Documentation
Associated documentation Order code: XXXXX-XXXXXX Ser. no.: XXXXXXXXXXXX Ext. ord. cd.: XXX.XXXX.XX Serial number www.endress.com/deviceviewer Endress+Hauser Operations App A0023555 About this document Document function The Brief Operating Instructions contain all the essential information from incoming acceptance to initial commissioning. Endress+Hauser... - Page 3 2.2.2 Communication-specific symbols Bluetooth®: Wireless data transmission between devices over a short distance. 2.2.3 Symbols for certain types of Information Permitted: Procedures, processes or actions that are permitted. Forbidden: Procedures, processes or actions that are forbidden. Endress+Hauser...
-
Page 4: Basic Safety Instructions
For an overview of the scope of the associated Technical Documentation, refer to the following: • Device Viewer (www.endress.com/deviceviewer): Enter the serial number from the nameplate • Endress+Hauser Operations app: Enter serial number from nameplate or scan matrix code on nameplate. Basic safety instructions Requirements for the personnel The personnel must fulfill the following requirements for its tasks: ‣... -
Page 5: Workplace Safety
Do not touch or clean device surfaces with pointed or hard objects. Clarification of borderline cases: ‣ For special fluids and fluids for cleaning, Endress+Hauser is glad to provide assistance in verifying the corrosion resistance of fluid-wetted materials, but does not accept any warranty or liability. -
Page 6: Product Security
The device fulfills general safety requirements and legal requirements. It also complies with the EU directives listed in the device-specific EU Declaration of Conformity. Endress+Hauser confirms this fact by affixing the CE mark to the device. Incoming acceptance and product identification... -
Page 7: Product Identification
• Approval-related information, reference to Safety Instructions (XA) • DataMatrix code (information about the device) Compare the data on the nameplate with your order. 4.2.2 Manufacturer address Endress+Hauser SE+Co. KG Hauptstraße 1 79689 Maulburg, Germany Place of manufacture: See nameplate. Storage and transport 4.3.1... -
Page 8: Mounting Requirements
5.1.3 Operating height Up to 5 000 m (16 404 ft) above sea level 5.1.4 Degree of protection Test as per IEC 60529 Edition 2.2 2013-08/DIN EN 60529 2014-09 and NEMA 250-2014: • IP66, NEMA Type 4X • IP67 Endress+Hauser... -
Page 9: Mounting Location
Micropilot FMR30B HART Mounting 5.1.5 Mounting location A0055811 Use of a weather protection cover; protection from direct sunlight or rain Installation not centered: Interferences can lead to incorrect signal analysis Do not install above the filling curtain Endress+Hauser... -
Page 10: General Instructions
Pay attention to the beam angle α. 5.1.7 Aligning the antenna axes See Operating Instructions. General instructions WARNING Loss of protection rating if the device is opened in a wet environment. ‣ Only open the device in a dry environment! Endress+Hauser... -
Page 11: Mounting The Device
• For devices with an 80 mm antenna, installation is only possible with a UNI slip-on flange. 5.3.2 Installation instructions The interior of the nozzle must be smooth and must not contain any edges or welded joints. If possible, round the nozzle edge. Endress+Hauser... - Page 12 • Optimal readability of the onsite display A0055932 5.3.4 Weather protective cover A weather protective cover is recommended for outdoor use. The weather protective cover can be ordered as an accessory or together with the device via the product structure "Accessory enclosed". Endress+Hauser...
- Page 13 There is no conductive connection between the mounting bracket and transmitter housing. Electrostatic charging possible. ‣ Integrate the mounting bracket in the local potential equalization system. 5.3.6 Cantilever installation, with pivot The cantilever, wall bracket and mounting frame can be ordered as accessories. Endress+Hauser...
-
Page 14: Post-Mounting Check
Is the device properly secured? Does the device comply with the measuring point specifications? For example: Process temperature Process pressure Ambient temperature Measuring range Electrical connection Connecting the device 6.1.1 Potential equalization No special measures for potential equalization are required. Endress+Hauser... - Page 15 Function diagram of HART device, connection with RIA15, display only without operation, without communication resistor The RIA15 remote display can be ordered together with the device. Alternatively available as an accessory, for details see Technical Information TI01043K and Operating Instructions BA01170K Endress+Hauser...
- Page 16 • and an additional 2.9 V if display light is used Connection of the HART device and RIA15 without backlighting A0019567 7 Function diagram of HART device with RIA15 process indicator without light Device with HART communication Power supply HART resistor Endress+Hauser...
- Page 17 Operating Instructions BA01170K Connection of the HART communication resistor module, RIA15 without backlighting A0020839 9 Function diagram of HART device, RIA15 without light, HART communication resistor module HART communication resistor module Device with HART communication Power supply Endress+Hauser...
- Page 18 IEC/DIN EN 61326-1: Test level for DC power supply lines and IO lines: 1 000 V wire to ground. Overvoltage category In accordance with IEC/DIN EN 61010-1, the device is intended for use in networks with overvoltage protection category II. Endress+Hauser...
- Page 19 Unscrew the cover (clicks when opening). Guide the cables into the cable glands or cable entries. Connect the cable. Tighten the cable glands or cable entries so that they are leak-tight. Screw the cover securely back onto the connection compartment (clicks when closing). Endress+Hauser...
-
Page 20: Ensuring The Degree Of Protection
Is the screw connection properly mounted? Does the supply voltage match the specifications on the nameplate? No reverse polarity, terminal assignment correct? If supply voltage is present, is the device operational and does a screen appear? Operation options See Operating Instructions. Endress+Hauser... -
Page 21: Installation And Function Check
• Commissioning with the SmartBlue app • Commissioning via FieldCare/DeviceCare/Field Xpert • Commissioning via additional operating tools (AMS, PDM, etc.) Commissioning via onsite display If necessary, enable operation (see section "Onsite display, locking or unlocking procedure" > "Unlocking procedure"). Endress+Hauser... - Page 22 8.5.2 SmartBlue App Scan the QR code or enter "SmartBlue" in the search field of the App Store. A0039186 12 Download link Start SmartBlue. Select device from livelist displayed. Endress+Hauser...
- Page 23 Commubox FXA195 (USB) Field Xpert SMT70/SMT77, smartphone or computer with operating tool (e.g. DeviceCare/FieldCare , AMS Device View, SIMATIC PDM) Bluetooth modem with connecting cable (e.g. VIATOR) Transmitter Commissioning via additional operating tools (AMS, PDM, etc.) Download the device-specific drivers: https://www.endress.com/en/downloads Endress+Hauser...
- Page 24 Configuring the device address via software See "HART address" parameter Enter the address to exchange data via the HART protocol. • Guidance → Commissioning → HART address • Application → HART output → Configuration → HART address • Default HART address: 0 Endress+Hauser...
-
Page 25: Configuring The Device
A0056187 A0056188 ‣ Select the Language button. 8.10.2 Operating tool Set display language System → Display → Language 8.11 Configuring the device Commissioning via the Commissioning wizard is recommended. "Commissioning with SmartBlue" section "Commissioning via FieldCare/DeviceCare" section Endress+Hauser... - Page 26 (lower than level C). Reduced accuracy must be expected in this range. If this is not acceptable, the zero point should be positioned at a distance C above the tank floor for these applications (see figure). Endress+Hauser...
- Page 27 • Position the sensor in the center of the channel or weir • Align the sensor so that it is perpendicular to the surface of the water • Use a weather protection cover to protect the device from sunshine and rain Endress+Hauser...
- Page 28 16 Configuration parameters for the flow measurement of liquids Distance Flow rate at measuring weirs or channels (calculated from the level using linearization) Flow measurement configuration A0055934 17 Example: Khafagi-Venturi flume Empty calibration (= zero point) Distance Level Endress+Hauser...
- Page 29 The metrological properties of the device may vary, depending on the mode set. The specified metrological properties refer to the device as supplied to the customer (Mode 2 option). 8.11.5 "Simulation" submenu Process variables and diagnostic events can be simulated with the Simulation submenu. Navigation: Diagnostics → Simulation Endress+Hauser...
-
Page 30: Protecting Settings From Unauthorized Access
After entering the password, you can enable parameter configuration of the device as an Operator option with the password. The user role then changes to the Maintenance option. If necessary, the password can be deleted in User management: System → User management Endress+Hauser... - Page 32 *71671399* 71671399 www.addresses.endress.com...
Need help?
Do you have a question about the HART Micropilot FMR30B and is the answer not in the manual?
Questions and answers