Table of Contents
Advertisement
Quick Links
Advertisement
Table of Contents

Subscribe to Our Youtube Channel
Related Manuals for Panasonic QUICKDRAW MC-V7572


Summary of Contents for Panasonic QUICKDRAW MC-V7572
- Page 1 This Owner's Manual is provided and hosted by Appliance Factory Parts. PANASONIC MC-V7572 Owner's Manual Shop genuine replacement parts for PANASONIC MC-V7572 Find Your PANASONIC Vacuum Cleaner Parts - Select From 605 Models -------- Manual continues below --------...
-
Page 2: Vacuum Cleaner
VACUUM CLEANER Aspirateur Aspiradora MC-V7572 Operating Instructions Manuel d’utilisation Instrucciones de operación Before operating your vacuum cleaner, please read these instructions completely. Avant d’utiliser l’appareil, il est recommandé de lire attentivement ce manuel. Antes de usar su aspiradora, lea completamente estas instrucciones por favor. -
Page 3: Consumer Information
Panasonic Canada Inc. garantit cet appareil contre tout vice toute défectuosité pendant la période indiquée ci-dessous e We are very pleased to welcome you to the Panasonic family of products. Thank you for purchasing this product. Our intent is that you become one of our many satisfied customers. -
Page 4: Important Safety Instructions
THIS VACUUM CLEANER IS INTENDED FOR HOUSEHOLD USE ONLY Note: Before you plug in your Panasonic vacuum cleaner, make sure that the voltage indicated on the rating plate located at the back of the vacuum cleaner is the same as your local supply. -
Page 5: Table Of Contents
BEFORE REQUE TABLE OF CONTENTS CONSUMER INFORMATION....................IMPORTANT SAFETY INSTRUCTIONS ................WARNING PARTS IDENTIFICATION..................... 10 Electrica ASSEMBLY........................... 12 Disconnect the electrical supply before ser Attaching Handle ......................12 could result in electrical shock or persona Power Cord ........................14 Tool Storage........................14 Review this chart to find do-it-yoursel problems. -
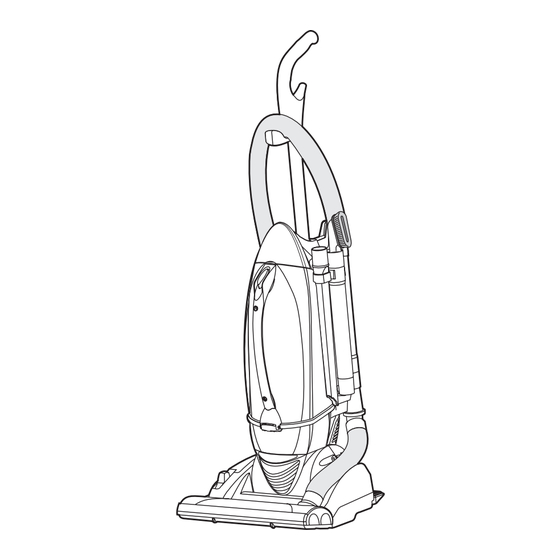
Page 6: Parts Identification
PARTS IDENTIFICATION Dégagement des obstructions Nomenclature En cas d'obstructions : Identificación de piezas ➢ ➢ S’assurer que l’interrupteur est à la position « OFF ». ➢ ➢ Débrancher le cordon d'alimentation de la prise d'alimentation. ➢ ➢ Pour nettoyer, abaisser le couvercle de l'entrée d'aspiration. -
Page 7: Feature Chart
FEATURE CHART Motor POWER Cord Length Protector Bare Floor Tool Caddy Headlight 25 ft. (7.6 m) 120 V. AC (60Hz) 12.0 A Tableau des caractéristiques Longueur Protecteur Position Porte- Dispositif Alimentation du cordon du moteur plancher accessoires d’éclairage 7,6 m (25 pi) 120 V c.a. -
Page 8: Assembly
ASSEMBLY Nettoyage des agitateurs ➢ ➢ S’assurer que l’interrupteur est à la Attaching Handle position « OFF ». ➢ ➢ Débrancher le cordon d'alimentation de la ➢ ➢ Remove the dust bin from the Handle Tube Tube du manche prise d'alimentation. vacuum cleaner body (see page 32 Tubo de la manija for Dust Bin Cleaning). -
Page 9: Remplacement De L'ampoule De La Lampe
Remplacement de l’ampoule de la Power Cord lampe ➢ ➢ S’assurer que l’interrupteur est à la ➢ ➢ Wrap power cord around cord hooks. Retainer (Plug Head) position « OFF ». Agrafe (fiche du cordon) ➢ ➢ Secure retainer (plug head) to power Cord Hooks Clavija ➢... -
Page 10: Features
➢ ➢ Régler le sélecteur tapis/plancher à la position « CARPET ». Automatic Self Adjusting Nozzle ➢ ➢ Retirer le couvercle de la courroie en ➢ ➢ The nozzle of your Panasonic upright appuyant sur la languette et en le soulevant. vacuum cleaner automatically adjusts to any carpet pile height. -
Page 11: Thermal Protector
Thermal Protector Changement et nettoyage du filtre ➢ ➢ Vérifier fréquemment le filtre primaire et ➢ ➢ If a clog prevents the normal flow of air to the motor, the thermal protector turns the nettoyer lorsqu'il est sale. motor off automatically to allow the motor to cool in order to prevent possible damage to the vacuum. -
Page 12: Carpet-Bare Floor Selector
Carpet-Bare Floor Selector Nettoyage du bac à poussière ➢ ➢ Selector should be placed in BARE ➢ ➢ Toujours vider le bac lorsque le niveau Carpet-Bare arrive à la ligne "FULL CUP". FLOOR (TOOLS) position when using Floor Selector cleaner on bare floors and when Sélecteur tapis-plancher AVERTISSEMENT: Ne jamais... -
Page 13: Remplacement Du Filtre D'évacuation
Remplacement du filtre d’évacuation TO OPERATE CLEANER HEPA ➢ ➢ Ce filtre HEPA a pour but d'épurer l'air Power Cord recyclé de la poussière. ➢ ➢ Vérifier le filtre lorsque le bac à NOTE: To reduce the risk of electrical shock, this vacuum has a polarized plug, one poussière est vidé. -
Page 14: Entretien De L'aspirateur
Entretien de l’aspirateur ON-OFF Switch Les tâches décrites ci-dessous vous permettront de tirer un rendement optimal ➢ ➢ Ensure ON-OFF switch is OFF. de votre aspirateur de longues années durant. Se reporter au “Guide de dépannage” pour les mesures à prendre en ➢... -
Page 15: Using Tools
Using Tools Utilisation des accessoires ➢ ➢ Always place carpet-bare floor ➢ ➢ Toujours mettre le sélecteur Carpet-Bare Floor Selector selector in BARE FLOOR (TOOLS) tapis/plancher à la position « BARE Sélecteur tapis/plancher position when using tools. FLOOR (TOOLS) » lors de l’utilisation Selector Carpet-Bare Floor d’accessoires. -
Page 16: Routine Care Of Cleaner
ROUTINE CARE OF CLEANER Interrupteur ➢ ➢ S’assurer que l’interrupteur est à la Performing the following tasks will keep your new Panasonic vacuum cleaner operating at peak performance levels and will ensure these high levels for years to position « OFF ». -
Page 17: Replacing Hepa Exhaust Filter
Replacing HEPA Exhaust Filter Fonctionnement ➢ ➢ The HEPA exhaust filter removes dirt from recirculated air. Cordon d’alimentation Pull Here Tirer ici ➢ ➢ Check filter after emptying dust bin. Tire aquí Remarque : Afin de prévenir tout risque de Replace when dirty. -
Page 18: Dust Bin Cleaning
Dust Bin Cleaning Sélecteur tapis/plancher ➢ ➢ Le sélecteur doit être à la position ➢ ➢ Always empty the dust bin when dirt Release Button « BARE FLOOR (TOOLS) » lors de Bouton de dégagement level reaches the “FULL CUP” line. Release Button l’utilisation sur les planchers ou des CAUTION: Never carry the vacuum... -
Page 19: Filter Changing/Cleaning
Filter Changing/Cleaning Protecteur thermique ➢ ➢ Check primary filter frequently and ➢ ➢ Si une obstruction empêche clean when dirty. l'écoulement normal de l'air au moteur, le protecteur thermique coupe ➢ ➢ Remove the dust bin assembly as Primary Filter automatiquement le moteur afin de lui Filtre primaire outlined in the DUST BIN CLEANING... -
Page 20: Replacing Belt
CARPET position. Tête d’aspiration autoréglable ➢ ➢ Remove belt cover by pressing on ➢ ➢ Cet aspirateur Panasonic incorpore un tab and lifting off belt cover. dispositif qui règle automatiquement la hauteur de la brosse selon la longueur ➢... -
Page 21: Replacing Headlight Bulb
Replacing Headlight Bulb Cordon d’alimentation ➢ ➢ Ensure ON-OFF switch is OFF. ➢ ➢ Enrouler le cordon autour des crochets. Slots ➢ ➢ Fixer la fiche au cordon d’alimentation à Fentes ➢ ➢ Disconnect power cord from electrical Ranuras l’aide de son agrafe. outlet. -
Page 22: Cleaning Agitators
Cleaning Agitators Assemblage ➢ ➢ Ensure ON-OFF switch is OFF. Montage du manche ➢ ➢ Retirer le bac à poussière de ➢ ➢ Disconnect power cord from electrical l'aspirateur (voir la section Nettoyage outlet. du bac à poussière à la page 33). ➢... -
Page 23: Removing Clogs
FEATUR Removing Clogs If the vacuum should become clogged: Motor POWER Cord Length Protector ➢ ➢ Ensure ON-OFF switch is OFF. 25 ft. (7.6 m) 120 V. AC (60Hz) Suction ➢ ➢ Disconnect power cord from electrical 12.0 A Inlet Cover outlet. -
Page 24: Before Requesting Service
BEFORE REQUESTING SERVICE WARNING Electrical Shock or Personal Injury Hazard. Disconnect the electrical supply before servicing or cleaning the unit. Failure to do so could result in electrical shock or personal injury from cleaner suddenly starting. Review this chart to find do-it-yourself solutions for minor performance problems. -
Page 25: Warranty
1-800-211-PANA (7262) to locate a PASC Authorized Servicenter. Carry-in or mail-in 3. DO NOT allow to be used as a toy. C service in Puerto Rico can be obtained during the warranty period by calling the local Panasonic Sales Company telephone number listed in the Servicenter Directory. - Page 26 PANASONIC PRODUCT - LIMITED WARRANTY À NOTRE C Panasonic Canada Inc. warrants this product to be free from defects in material and workmanship and agrees to remedy any such defect for a period as stated below from the date of original purchase.
-
Page 27: What To Do When Service Is Needed
WHAT TO DO WHEN SERVICE IS NEEDED If your Panasonic Vacuum Cleaner needs service, look in the yellow pages of the telephone book under HOME APPLIANCE SERVICE for your nearest Panasonic Services Company (“PASC”) Factory Servicenter, or PASC authorized Servicenter, or call, 1-800-211-PANA (7262) toll free to find a convenient servicenter. DO NOT send the product to the Executive or Regional Sales offices.
Need help?
Do you have a question about the QUICKDRAW MC-V7572 and is the answer not in the manual?
Questions and answers