Advertisement
Quick Links
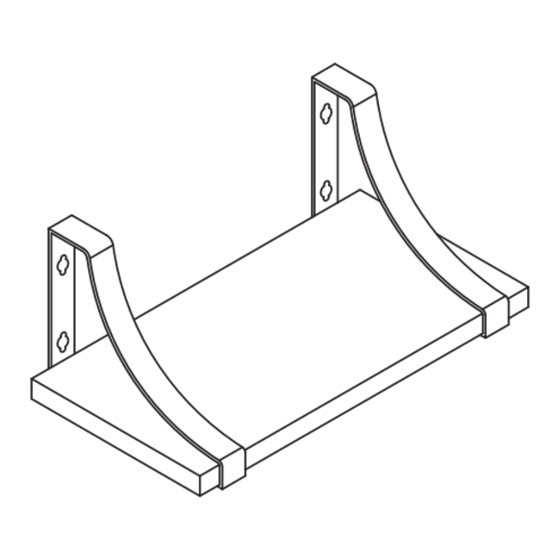
Wall Shelf Instruction Manual
Manuel d'instructions du
Model/Modèle : AMFS03B1/AMFS03Y/AMFS03W
/AMFS03V/AMFS03B/AMFS02/AMFS03
Thank you for choosing this AMADA product! At AMADA, we strive to provide you
with the best quality products and services in the industry. Should you have any
issues, please don't hesitate to contact us at
Merci d'avoir choisi ce produit AMADA! Chez AMADA, nous nous efforçons de
vous fournir les meilleurs produits et services de qualité de l'industrie. Si vous
rencontrez des problèmes, n'hésitez pas à nous contacter au
support@amadahome.com.
tablette
support@amadahome.com.
(D)
Advertisement

Related Manuals for Amada AMFS03B1


Summary of Contents for Amada AMFS03B1
- Page 1 Model/Modèle : AMFS03B1/AMFS03Y/AMFS03W /AMFS03V/AMFS03B/AMFS02/AMFS03 Thank you for choosing this AMADA product! At AMADA, we strive to provide you with the best quality products and services in the industry. Should you have any support@amadahome.com. issues, please don't hesitate to contact us at Merci d'avoir choisi ce produit AMADA! Chez AMADA, nous nous efforçons de...
- Page 2 • Check package contents against supplied parts and hardware list to assure that all components were received undamaged. Do not use damaged or defective parts. If you require replacement parts, please contact amada customer service at support@amadahome.com. • Carefully read all instructions before attempting installation. If you do not understand the instructions or have any concerns or questions, please contact at support@amadahome.com.
- Page 3 • For drywall mounting, please use the wall anchors [C]. • For wood stud mounting, the wall anchors [C] and [D] are not necessary. • For solid concrete, and concrete block walls, please use the wall anchors [D]. Secure the Metal Frames [02] to the Wall Shelf [01] Using the Four Short Screws [03]...
- Page 4 Secure the Metal Frame with Wall Shelf to the Wall Before the installation, please identify your wall type. For wood stud installation, follow the step 2A. For drywall installation, follow the step 2B. For solid concrete and concrete block walls installatior follow the step 2C. Installation width for each shelf: ”...
- Page 5 ” For wood stud mounting, the wall ” anchors [C] and [D] are not necessary. Note The wall shelf will be easier to fall off for pulling tension if you install the wall shelf up side down. Note The wall shelf will be easier to fall off...
- Page 6 Press and screw the wall anchors [C] clockwise into the drywall using a screwdriver (not included), making sure that wall anchors [C] are flush with the wall. Note The wall shelf will be easier to fall off for pulling tension if you install the wall shelf up side down.
- Page 7 Note The wall shelf will be easier to fall off for pulling tension if you install the wall shelf up side down. Insert the short lag screws [B] into the wall anchors [C], tighten the short lag screws [B] until the they are pulled firmly against the metal fraes.
- Page 8 1 3/8” ” Drill 4 pilot holes using a 1/4 ” (6mm) diameter drill bit. Make sure the depth is not less than 1 3/8 (35mm). Never drill into the mortar between the blocks. ” Use the hammer to knock the wall anchors [D] into the wall. Be sure the anchors [D] are seated flush with the concrete surface.
- Page 9 Note The wall shelf will be easier to fall off for pulling tension if you install the wall shelf up side down. Note The wall shelf will be easier to fall off for pulling tension if you install the wall shelf up side down.
- Page 10 support@amadahome.com. support@amadahome.com.
- Page 13 Remarque : Si vous installez l'tablette à l'envers, il sera plus facile de la faire tomber pour tirer la tension. Remarque : Si vous installez l'tablette à l'envers, il sera plus facile de la faire tomber pour tirer la tension.
- Page 14 Positionnez le cadre métallique avec l'tablette à la hauteur souhaitée et assurez-vous que le cadre métallique avec l'étagère est de niveau et affleure le mur. Marquez les trous pour les ancrages muraux [C]. Remarque : Si vous installez l'tablette à l'envers, il sera plus facile de la faire tomber pour tirer la tension.
- Page 15 Remarque : Si vous installez l'tablette à l'envers, il sera plus facile de la faire tomber pour tirer la tension. Positionnez le cadre métallique avec l'Tablette [01] à la hauteur souhaitée et assurez-vous que le cadre métallique avec l'étagère [01] est de niveau et affleure les murs massifs en béton et en blocs de béton.
- Page 16 1 3/8 Percez 4 trous pilotes à l'aide d'un foret de 1/4 po (6 mm) de diamètre. Assurez-vous que la profondeur n'est pas inférieure à 1 3/8 po (35 mm). Ne jamais percer dans le mortier entre les blocs.
- Page 17 Remarque : Si vous installez l'tablette à l'envers, il sera plus facile de la faire tomber pour tirer la tension. Remarque : Si vous installez l'tablette à l'envers, il sera plus facile de la faire tomber pour tirer la tension. Installez le cadre métallique avec l'tablette [01] à...
- Page 20 Thank you again for choosing this AMADA product! OR /Ou Alors 860-00227-00 Rev00...
Need help?
Do you have a question about the AMFS03B1 and is the answer not in the manual?
Questions and answers