Amada AMFS02 Instruction Manual
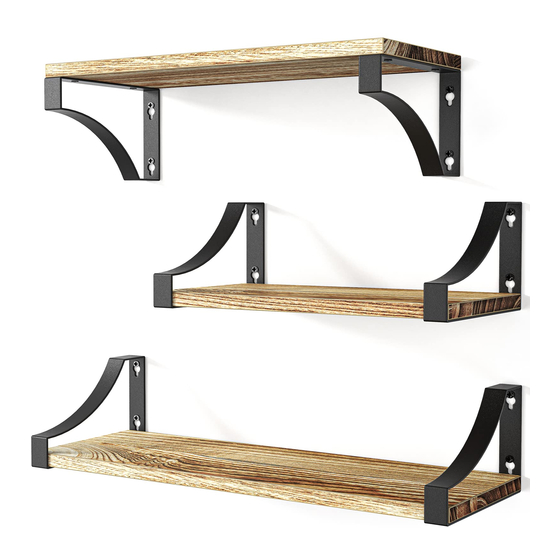
Floating shelf
Hide thumbs
Also See for AMFS02:
- Installation instructions manual (8 pages) ,
- Instruction manual (20 pages)
Advertisement
Quick Links
Floating Shelf Instruction Manual
V3.0
OR
Model: AMFS02/AMFS03
Thank you for choosing this AMADA product! At AMADA we
strive to provide you with the best quality products and services
in the industry. Should you have any issues, please don't hesitate
to contact us at amada_supportus@163.com.
Advertisement

Related Manuals for Amada AMFS02


Summary of Contents for Amada AMFS02
- Page 1 Floating Shelf Instruction Manual V3.0 Model: AMFS02/AMFS03 Thank you for choosing this AMADA product! At AMADA we strive to provide you with the best quality products and services in the industry. Should you have any issues, please don't hesitate to contact us at amada_supportus@163.com.
- Page 2 • Check package contents against supplied parts and hardware list to assure that all components were received undamaged. Do not use damaged or defective parts. lf you require replacement parts, please contact amada customer service at amada_supportus@163.com. • Carefully read all instructions before attempting installation. If you do not understand the instructions or have any concerns or questions, please contact customer service at amada_supportus@163.com.
- Page 3 NOTE: • For drywall mounting, use wall anchors [C]. • For wood stud mounting, wall anchors [C] and [D] are not necessary. • For solid concrete, and concrete block walls, please use wall anchors [D] Secure the Metal Frames [02] to Floaing Shelf [01] Using Step 1 Four Short Screws [03] Option A:...
- Page 4 Step 2 Secure Metal Frame with Floating Shelf to Wall Before installation, please identify your wall type. For wood stud installation, follow the step 2A. For drywall installation, follow the step 2B. For solid concrete and concrete block walls installation, follow the step 2C Step 2A For Wood Stud Maximum inatallation width for the floating...
- Page 5 2 in.(50mm) WARNING: For wood stud mounting, [Not Included] ø5/64 in.(ø2mm) wall anchors [C] and [D] are not necessary. For Long Lag Screw Option A [Optional] Note: The floating shelf will be easier to falling off for pulling tension if you install the floating shelf up side down Option B Note:...
- Page 6 Step 2B For Drywall Position the metal frame with floating shelf at your desired height and make sure the metal frame with shelf is level and flush to the wall. Mark the holes for the wall anchors [C]. Press and screw the wall anchors [C] into the drywall using a screwdriver(not Included) and turn clockwise, making sure that wall anchors [C] are flush with the wall.
- Page 7 Option B Note: The floating shelf will be easier to falling off for pulling tension if you install the floating shelf up side down Insert short lag screws [B] into wall anchors [C], tighten short lag screws [B] until the they are pulled firmly against the metal fames.
- Page 8 For Short Lag Screw 1.4 in.(35mm) ø15/64 in.(ø6mm) Drill 4 pilot holes using a 15/64 in.(6mm) diameter drill bit. Make sure the depth is not less than 1.4 in.(35mm). Never drill into the mortar between blocks. Use the hammer to knock wall anchors [D] into the wall. Be sure the anchors [D] are seated flush with the concrete surface.
- Page 9 Option A Note: The floating shelf will be easier to falling off for pulling tension if you install the floating shelf up side down Option B Note: The floating shelf will be easier to falling off for pulling tension if you install the floating shelf up side down Install the metal frame with floating shelf [01] using short lag screws [B] and wall anchors [D], tighten short lag screws [B] until they are pulled firmly against the metal...
- Page 12 Thank you again for choosing this AMADA product! Thank you for choosing this AMADA product! At AMADA we strive to provide you with the best quality products and services in the industry. Should you have any issues, please don't hesitate to contact us at amada_supportus@163.com.
Need help?
Do you have a question about the AMFS02 and is the answer not in the manual?
Questions and answers