Table of Contents
Advertisement
Quick Links
Advertisement
Table of Contents

Related Manuals for ActronAir WC-03


Summary of Contents for ActronAir WC-03
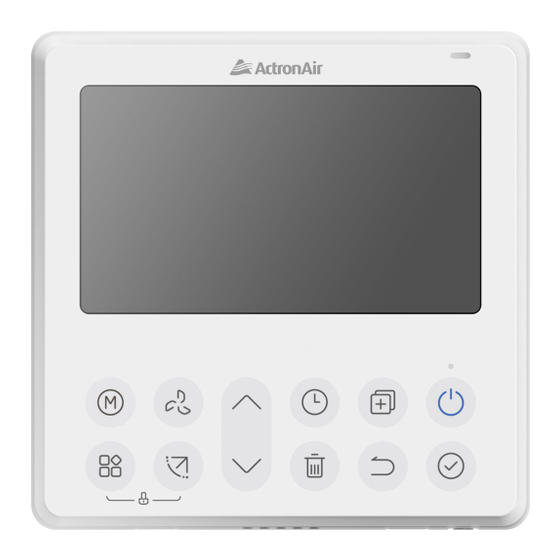
- Page 1 INSTALLATION AND OWNER’S MANUAL Universal Wired Remote Controller Model Number: WC-03 IMPORTANT NOTE: Please read this manual carefully before installing or operating your wired remote controller. Make sure to save this manual for future reference.
-
Page 2: Table Of Contents
Installation Guide and Owner’s Manual Wired Remote Controller Table of Contents 01. Safety Precautions ........................3 02. Installation Accessory ......................6 03. Installation Method ......................6 04. Specification ........................12 05. Feature and Function of the Wired Controller ..............12 06. Name on the LCD of the Wired Controller ................13 07. -
Page 3: Safety Precautions
CAUTION This manual is a controlled document which contains confidential and proprietary information. Distribution, modification, copying and/or reproduction are prohibited without written consent from ActronAir Product design and specifications are subject to change without prior notice for product improvement. Installation Guide and Owner’s Manual - Wired Remote Controller... - Page 4 Installation Guide and Owner’s Manual Wired Remote Controller WARNING • Carefully read the Safety Precautions before installation. • Adhere to this installation manual. • Ensure installation is performed by qualified technician only. • Improper installation by unqualified individuals may result in faulty installation, electric shock, or fire hazard. •...
- Page 5 Installation Guide and Owner’s Manual Wired Remote Controller WARNING • Remove and immediately recycle or dispose of used batteries according to local regulations and keep away from children. • Do NOT dispose of batteries in household trash or incinerate. • Even used batteries may cause severe injury or death. •...
-
Page 6: Installation Accessory
Installation Guide and Owner’s Manual Wired Remote Controller 02. Installation Accessory Select the installation location Don’t install in a place covered with heavy oil, vapor or sulfureted gas, otherwise, this product could become deformed that would lead to system malfunction. Preparation before the installation Please confirm that all the following parts you have been supply. - Page 7 Installation Guide and Owner’s Manual Wired Remote Controller 2. Remove the upper part of the back of the wired controller Insert a at head screwdriver into the slots in the lower part of the wired controller (2 places), and remove the upper part of the wired controller.
- Page 8 Installation Guide and Owner’s Manual Wired Remote Controller 4. Wire with the indoor unit Wiring hole Fig. 3-5 • Connect the wire from the display panel of the indoor unit to a connecting cable. Then connect the other side of the connecting cable to the remote control.
- Page 9 Installation Guide and Owner’s Manual Wired Remote Controller Wiring connection diagram for Wall Splits • Open the front panel , identify the multi function box (See Fig. 3-7). When connecting to 4-core wired controller: 12V = Red E = Black Y = Yellow X = Brown Fig.
- Page 10 Installation Guide and Owner’s Manual Wired Remote Controller 5. Battery installation Fig. 3-9 • Please contact professional technical after-sales service if the battery needs to be replaced. • Put the battery into the installation site and make sure the positive side of the battery is in accordance with the positive side of installation site.
- Page 11 Installation Guide and Owner’s Manual Wired Remote Controller 3. From the Top 4. Notch the part for the wiring to pass through with a nipper tool. Silicone Loop NOTE Silicone Silicone DO NOT allow water to enter the remote control. Use a water loop and silicone to seal the wires.
-
Page 12: Specification
Installation Guide and Owner’s Manual Wired Remote Controller 04. Specification Input Voltage DC 12V Ambient Temperature 0~43°C Ambient Humidity RH40%~RH90% Wiring specifications Wiring Type Size Total Length 0.75mm ≤ 20m Shielded PVC or cable 1.5mm ≤ 50m NOTE If extension is needed, please purchase the EXT12M. 05. -
Page 13: Name On The Lcd Of The Wired Controller
Installation Guide and Owner’s Manual Wired Remote Controller 06. Name on the LCD of the Wired Controller °C / °F display MODE display Temperature display Room temperature display Displays the current mode,including: Relative humidity display Lock display Wireless control feature display Follow me feature display Breeze away display... -
Page 14: Preparatory Operation
Installation Guide and Owner’s Manual Wired Remote Controller 08. Preparatory Operation Set The Current Day And Time. Press the TIMER button for 2 seconds or more. The timer display will flash. Press the button to set the day. The selected day will ash. Press the TIMER button to confirm the day (will also confirm after 10 seconds if no button pressed). - Page 15 Installation Guide and Owner’s Manual Wired Remote Controller Room Temperature Setting Press the button to set the room temperature. Indoor Setting Temperature Range : 10/16/17~30°C or 20~28°C (Model dependent) °C and °F scale selection (on some models). Press the button for 3 seconds will alternate the temperature display between the °C and °F scale.
- Page 16 Installation Guide and Owner’s Manual Wired Remote Controller • For the units with four Up-Down louvers, it can be operated individually. 1. Press the SWING button to activate the UP-DOWN adjusting louver function. mark will flash.(Not applicable to all the models) 2.
-
Page 17: Time Functions
Installation Guide and Owner’s Manual Wired Remote Controller Filter reset Function When the indoor unit indicates that the filter usage time has been reached, the filter cleaning prompt icon will light up. To reset the filter screen time, press the function key to select the filter cleaning prompt icon, then press the OK key. The filter cleaning reminder icon will turn off. -
Page 18: Weekly Timer 1
Installation Guide and Owner’s Manual Wired Remote Controller To Set the On or Off TIMER Press the TIMER button to select the Press the CONFIRM button and the Timer display is flashing. ex. Off timer set at 18:00 Press the button to set the time. - Page 19 Installation Guide and Owner’s Manual Wired Remote Controller 3. ON Timer Setting of Timer Setting 1 Press the button to set the time of On timer, and then press the CONFIRM button to confirm the setting. ex. Tuesday time scale 1 You can save up to 4 timer settings for each day of the week.
- Page 20 Installation Guide and Owner’s Manual Wired Remote Controller To turn off the air conditioner during the weekly timer • If you press the POWER button once quickly, the air conditioner will turn off temporarily. It will turn back on automatically at the time set by the On timer. For example, if you press the POWER button once quickly at 10:00, the air conditioner will turn off temporarily and then automatically turn on at 14:00.
-
Page 21: Weekly Timer 2
Installation Guide and Owner’s Manual Wired Remote Controller Copy out the setting in one day into the other day (Suitable for Week 1 and Week 2. A reservation made once can be copied to another day of the week. The entire reservation for the selected day will be copied. Using the copy mode effectively makes it easier to set up reservations. - Page 22 Installation Guide and Owner’s Manual Wired Remote Controller 3. ON Timer Setting of Timer Setting 1 Press the button to select the setting time. The setting time, mode, temperature and fan speed appear on the LCD. Press CONFIRM button to enter the setting time process. IMPORTANT: Up to 8 scheduled events can be set on one day.
- Page 23 Installation Guide and Owner’s Manual Wired Remote Controller To Cancel Press the POWER button for 2 seconds to cancel the timer mode. The TIMER mode can also be canceled by changing the TIMER mode using Timer. To Set the DAY OFF (for a holiday) After setting the weekly timer, press CONFIRM button.
-
Page 24: Fault Alarm Handing
Installation Guide and Owner’s Manual Wired Remote Controller 13. Fault Alarm Handing If the system does not operate properly, except in the cases mentioned above, or if the mentioned malfunctions are evident, investigate the system according to the following procedures. Error Code Description Display Digital Tube Error of communication between wired controller and indoor unit... - Page 25 Installation Guide and Owner’s Manual Wired Remote Controller Set the highest and lowest temperature values When the air conditioning unit is off, enter the QUERY function by pressing the button select . Press the CONFIRM button into setting state, press the button to select the temperature, then press CONFIRM button to complete it.
-
Page 26: Download And Install The Easyconnect App
Installation Guide and Owner’s Manual Wired Remote Controller Wireless Safety Strategy Smart kit only support WPA-PSK/WPA2-PSK encryption and none encryption. WPA-PSK/WPA2-PSK encryption is recommended. CAUTION • Please Check The Service Website For More Information. • Smart Phone camera needs to be 5 million pixels or above to make sure scan QR code well. •... - Page 27 Installation Guide and Owner’s Manual Wired Remote Controller 4. Tap on the search tool on the top 5. Search for “Easyconnect” skill. 6. Select “Easyconnect” from the right hand corner. results list. Click Here 7. Once you have selected EasyConnect 8.
-
Page 28: Google Home
Installation Guide and Owner’s Manual Wired Remote Controller 17.02. Google Home 1. Download the latest version of Easyconnect App and add the smart device. 2. Download and open Google Home 3. Select ”Works with Google”, and 4. Choose “easyconnect” and jump App, tap “Set up device”- enter to search “easyconnect”. -
Page 29: Smart Device (Easyconnect)
Installation Guide and Owner’s Manual Wired Remote Controller 17.03. Smart Device (Easyconnect) Network Configuration CAUTION • It is necessary to forget any other around network and make sure the Android or IOS device just connect to the Wireless Network you want to configure. •... - Page 30 • Increase the separation between the equipment and receiver. • Connect the equipment into an outlet on a circuit different from that to which the receiver is connected. • Contact ActronAir Service Department on 1800 119 229. CAUTIONS: Only operate the device in accordance with the instructions supplied.
- Page 31 ©Copyright 2024 Actron Engineering Pty Limited ABN 34 002767240. ®Registered Trade Marks of Actron Engineering Pty Limited. ActronAir is constantly seeking ways to improve the design of its products. Therefore, specifications are subject to change without notice. Installation Guide and Owner’s Manual - Wired Remote Controller...
Need help?
Do you have a question about the WC-03 and is the answer not in the manual?
Questions and answers