Table of Contents
Advertisement
Quick Links
Advertisement
Table of Contents

Subscribe to Our Youtube Channel
Related Manuals for Aiwa TV-2010


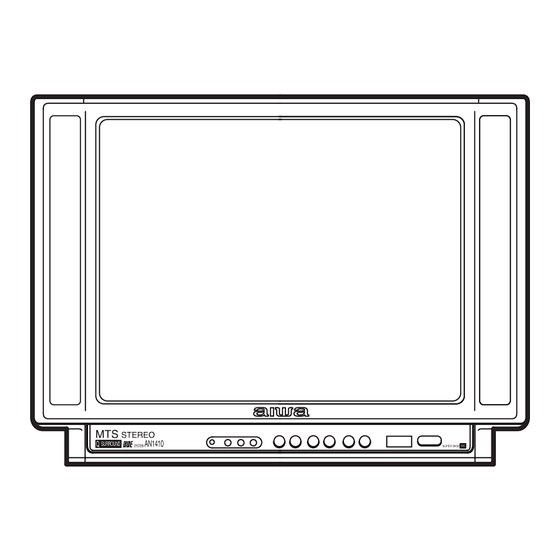
Summary of Contents for Aiwa TV-2010
- Page 1 TV-2010 SERVICE MANUAL COLOR TEREVISION MODEL CODE : 86HR8-0117(B) 86HR8-1111(W) 86HR8-4444(L) 86HR8-8888(ST) このサービスマニュアルはシンプル版です。改定版発行時に差し替えて使用してください。 • Replace this Service Manual with ”Revision Publishing” when it is issued. S/M Code No. 09-003-340-3T1...
-
Page 2: Electrical Main Parts List
ELECTRICAL MAIN PARTS LIST -1 REF. NO. PART NO. KANRI DESCRIPTION REF. NO. PART NO. KANRI DESCRIPTION 87-016-633-080 CAP,E 1-50 SSL 87-018-131-080 CAP, CER 1000P-50V 87-A20-364-010 IC,KIA7809PI 87-018-128-080 CAP, CERA-SOL SS 560P 87-027-666-010 IC,TC4052BP 87-016-629-080 CAP,E 0.1-50 SSL 87-A20-312-010 IC,M62420SP 87-018-115-080 CAP, CER 47P-50V 87-070-237-010... - Page 3 ELECTRICAL MAIN PARTS LIST -2 REF. NO. PART NO. KANRI DESCRIPTION REF. NO. PART NO. KANRI DESCRIPTION !C611 87-010-974-080 CAP,CER 220P-500 B C612 87-016-624-080 CAP,E 10-16 SSL C344 87-A11-080-080 CAP,TC U 47P-50 J CH C346 87-016-622-080 CAP,E 470-10 SSL C615 87-016-215-080 CAP,E 1-160 M TWSS C348...
- Page 4 ELECTRICAL MAIN PARTS LIST -3 REF. NO. PART NO. KANRI DESCRIPTION REF. NO. PART NO. KANRI DESCRIPTION L401 87-005-507-080 COIL,22UH FL0606 J C907 87-016-577-080 CAP,E 470-16 SSL L402 87-005-507-080 COIL,22UH FL0606 J C908 87-016-627-080 CAP,E 47-16 SSL L403 87-005-610-080 COIL,47UH LAV35 J CN901 87-049-469-010 CONN,4P V...
-
Page 5: Mechanical Parts List
MECHANICAL PARTS LIST - 1 REF. NO. PART NO. KANRI DESCRIPTION REF. NO. PART NO. KANRI DESCRIPTION 87-054-086-010 BADGE,AIWA 52.5 87-A90-332-010 HLDR,SF-2001 HV CABLE 8Z-JAK-003-010 PANEL,MAIN AN2010 NH 8Z-JB5-007-010 BTN,POWER SH 8Z-JBR-005-010 LENS,RC 84-LB3-216-010 HLDR,LED 8Z-JBR-006-010 LENS,LED 87-067-680-010 BVI T3+3-10... -
Page 6: Accessories List
ACCESSORIES LIST-1 REF. NO. PART NO. KANRI DESCRIPTION REF. NO. PART NO. KANRI DESCRIPTION 8Z-JAK-901-010 IB,NH (E) -AN2110/ 2010/1410 8Z-JAE-951-010 RC UNIT,RC-ZVT18 87-A90-702-010 ANT ASSY,TV 5 SEC (NTSC) 87-A91-015-010 PLUG,CONVERSION JT-0475A... - Page 7 2-11, IKENOHATA 1-CHOME, TAITO-KU, TOKYO 110-8710, JAPAN TEL:03 (3827) 3111 Printed in Singapore 737004...
- Page 8 TV-2010 SERVICE MANUAL COLOR TELEVISION S/M Code No. 09-003-340-3R1...
-
Page 9: Notices Before Repairing
NOTICES BEFORE REPAIRING To make the best use of this equipment, make sure to obey the following items when repairing (or mending). 1. Do not damage or melt the tunicate of the leading Insulation resistance: 7.0 to 9.5 MΩ (500 V/s) wire on the AC1 side, including the power supply Voltage-withstand: 1.0 kV for 1 minute. -
Page 10: Specifications
SPECIFICATIONS Tuner System Frequency synthesized tuner TV System NTSC-M Channel Coverage VHF: 2 to 13 UHF: 14 to 69 CATV: 5A, A-1 to A-5, A to W, W+1 to W+84 Program Memory Antenna Input 75 ohms, unbalanced Picture Tube 20’’ Screen Size 404 (W) x 303 (H) mm (16 x 12 in.) 480 mm (Visible diagonal) (19 in.) - Page 11 DISASSEMBLY INSTRUCTIONS 1. REAR CABINET REMOVAL (1) Remove four screws 1 and three screws 2, then remove Front cabinet the rear cabinet in the direction of the arrow. (See Figure1- Rear cabinet Figure 1-1 2. HIGH-VOLTAGE CAP (ANODE CAP) REMOVAL 2-1.
- Page 12 (5) Push the anode cap with your thumb in the direction of arrow 1 as shown in the figure, then lift the cap in the direction of arrow 2 to release the hook on one side. (See Figure 2-3) Anode cap Hook Hook Figure 2-3...
- Page 13 (3) Eliminate twisting, etc. of the high-voltage cable and arrange it so that no twisting occurs. (See Figure 3-3) High-voltage cable Anode cap Caution : If the cable is not arranged correctly, the anode cap could turn and cause an installation defect. Figure 3-3 (4) Turn over the rubber cap symmetrically on the left and right.
- Page 14 (6) Apply the hook on one side to the anode button as shown on the figure. (See Figure 3-6) Caution : Check that the hook is held securely. (7) Apply the hook on the other side to the anode button as shown in Figure 3-7.
- Page 15 4. NK C.B REMOVAL (1) Disconnect CN903 (CRT GND). (2) Disconnect CN901, CN902. (3) Pul out the NK C.B. in the direction of arrow. (See Figure 4) BT301 BT601 NK C.B CN902 CRT GND CN901 CN903 MAIN C.B Figure 4 5.
- Page 16 ELECTRICAL MAIN PARTS LIST REF. NO PART NO. KANRI DESCRIPTION REF. NO PART NO. KANRI DESCRIPTION 87-016-629-080 CAP,E 0.1-50 SSL 87-018-115-080 CAP, CER 47P-50V 87-A20-364-010 IC,KIA7809PI 87-018-115-080 CAP, CER 47P-50V 87-027-666-010 IC,TC4052BP 87-018-125-080 CAP, CER 330P-50V 87-A20-312-010 IC,M62420SP 87-018-131-080 CAP, CER 1000P-50V 87-070-237-010 IC,LA7832 87-A30-041-110...
- Page 17 REF. NO PART NO. KANRI DESCRIPTION REF. NO PART NO. KANRI DESCRIPTION !C817 87-A10-688-090 CAP,M/P 0.22-275 K (B81133) C408 87-016-574-080 CAP,E 100-16 SSL C819 87-016-587-090 CAP,E 1000-25 M SSL C409 87-016-625-080 CAP,E 22-16 SSL C821 87-010-446-010 CAP,E 2200-35 KME C410 87-016-624-080 CAP,E 10-16 SSL C822...
- Page 18 TRANSISTOR ILLUSTRATION REF. NO PART NO. KANRI DESCRIPTION REF. NO PART NO. KANRI DESCRIPTION NK C.B R610 87-A00-123-090 RES,M/F 3.9K-2W J RSI-2S B R611 87-A00-561-090 RES,M/F 4.7K-2W J ERGS C901 87-012-372-010 CAP,CER 1000P-2K R624 87-A00-544-090 RES,M/F 220-3W J ERGS C902 87-018-125-080 CAP, CER 330P-50V R804...
- Page 19 SCHEMATIC DIAGRAM-1 (MAIN SECTION) TP102 TP202 TP302...
- Page 20 WIRING-1 (MAIN C.B SECTION)
- Page 21 SCHEMATIC DIAGRAM-2 (NK SECTION) WIRING-2 (NK C.B SECTION)
- Page 22 WAVEFORM IC1 Pin 17 (CV IN) IC301 Pin 21 (B OUT) 500 mV/div 1 V/div 20 µs/div 20 µs/div IC1 Pin 20 (XOUT) IC301 Pin 30 (FBP IN) 1 V/div 2 V/div 20 µs/div 50 ns/div IC301 Pin 19 (R OUT) IC301 Pin 32 (H OUT) 1 V/div 1 V/div...
- Page 23 IC301 Pin 43 (Y IN) Between X301 & C309 (VCXO) 200 mV/div 50 mV/div 20 µs/div 100 ns/div IC301 Pin 45 (CHROMA IN) IC501 Pin 2 (V-OUT) 200 mV/div 10 V/div 20 µs/div 5 ms/div IC301 Pin 47 (TV DET OUT) Q601 Collector 500 mV/div 200 V/div...
- Page 24 T601 Pin 8 (E24) Q902 Collector (G) --- NK C.B 50 V/div 20 V/div 20 µs/div 20 µs/div Q901 Collector (R) --- NK C.B Q903 Collector (B) --- NK C.B 20 V/div 20 V/div 20 µs/div 20 µs/div...
- Page 25 IC DESCRIPTION IC, M37272M8-165SP Pin No. Pin Name Description OSD horizontal synchronised signal input terminal. "L"= active. OSD vertical synchronised signal input terminal. "L"= active. A MUTE Used to mute line out sound and picture when no input signal is detected. "H" to mute. L MUTE A DET OUT Not used.
- Page 26 Pin No. Pin Name Description S OUT Not used. QSUR Surround ON "H", OFF "L". LED ON "L", OFF "H". PROM write protect. FAST BLK OSD blanking output. OSD blue output. OSD green output. OSD red output. IC, TA1268N Pin No. Pin Name Description –...
- Page 27 Pin No. Pin Name Description 27 ~ 28 SCL, SDA Input and output of I C Bus. Inputting of X-RAY protect circuit. The threshold voltage is 3.5V (typ.). X RAY If the voltage that is applied is more than the threshold voltage, the X-RAY protect circuit make horizontal output a low.
-
Page 28: Ic Block Diagram
IC BLOCK DIAGRAM IC, MM1454XD QSURROUND BIAS IC, TA1268N IC, SBX1981-72P IC, M51943BSL-700A... - Page 29 IC, KS24C041I IC, TC4052BP IC, M62420SP IC, STR-F6656...
- Page 30 IC, MM1124B IC, NJM2233BL IC, NJM2150 IC, LA7832 IC, AN5277 VERTICAL DRIVE THERMAL VERTICAL POMP UP PROTECT OUTPUT...
-
Page 31: Set-Up For Adjustment
SET-UP FOR ADJUSTMENT 1. CRT ADJUSTMENT Because the video signal output from a pattern generator is used as 1-1. Precautions the adjustment signal input during adjustment, the video signal (1) Receive the white raster signal, and then perform aging for at output from the pattern generator must conform with the least 20 minutes. - Page 32 (4) The composition of each magnet is as shown in Fig. 1-4. In making adjustments, rotate the lock ring clockwise (looking from the CRT’s back screen) and disengage. Be careful not to loose the lock ring too much. If the magnet assembly has become shifted during adjustments, secure it to the position in Fig.
- Page 33 As there is occurrence of convergence distortion after In Fig. 1-7, two 4-pole magnets are stacked together so as to be of completing the landing adjustments, be sure to carry out the same polarity. Move the B and R beams to their respective convergence adjustments.
- Page 34 IC BUS Data Setting Procedure With this model, most parts of video and deflection blocks can be adjusted using a jig remote control. Preparations: • Modify the hidden keys on the RC-6VT06 jig remote control (TV-C142/86-LB4-951-010) so that they can easily be pressed. 2 keys to be modified (see the figure below): ON/OFF TV/VIDEO...
- Page 35 3. CRT ON accumulated hour display The CRT usage hours accumulate every hour, and are displayed using hexadecimal number. Example of calculating displayed hexadecimal number: AFT OK 1234H IN-ST 1x16 2x16 3x16 4x16 = 4660 hours 4th digit 3rd digit 2nd digit 1st digit * When the accumulated hours exceed 7FFFH (32,768 hours), the...
- Page 36 ELECTRICAL ADJUSTMENT (adjustment menu screen) IC303 IC251 L201 J403 BT301 R101 S-IF TP101 IC402 (RF AGC) TP102 J401 (IF) TP302 TU101 IC406 IC301 J402 IC405 R211 L205 TP201 P-IF (AFT) TP202 IC407 C322 TP203 IC403 C213 T601 (FBT) T601 (FBT) FORCUS SCREEN R903...
- Page 37 • After replacing EEPROM, enter the following initial values before proceeding with adjustment. • During normal servicing, check the applicable items, and adjust Initial value them if necessary. PAGE 1 1. H POS 2. V POS 3. V SIZE 4. OSD POS 5.
- Page 38 White Balance Adjustment: 1-5. PIF VCO Video IF/VCO adjustment/Adjustment menu screen PAGE 1-5 Adjustment menu screen PAGEs 2-1~5 * When the adjustment menu screen appears, the user picture Input signal: ANT RF-INPUT quality will be cleared. Color bar Input signal: White raster •...
- Page 39 Screen Adjustment: 3-3. SUB TINT Sub-tint adjustment/Adjustment menu screen PAGE 3-3 Input signal: No signal (raster) Input signal: Color bar Adjustment point: Lower SFR of FBT (T601) VIDEO IN Measuring instrument: Leader LCG-404 pattern generator Measuring instruments: Oscilloscope Leader LCG-404 pattern generator 1.
- Page 40 4. TV SETTING CHECK Settings check for different models/ Tuner Adjustment: Adjustment menu screen PAGEs 4-1~4 If adjustment element has been replaced as a result of repair, perform The settings are fixed for each model: Do not change the the following adjustments, and then proceed with adjustment using settings to those other than specified.
-
Page 41: Mechanical Exploded View
MECHANICAL EXPLODED VIEW 1/1... -
Page 42: Color Name Table
MECHANICAL MAIN PARTS LIST 1/1 REF. NO PART NO. KANRI DESCRIPTION 1 87-054-086-010 BADGE,AIWA 52.5 2 8Z-JAK-003-010 PANEL,MAIN AN2010 NH 3 8Z-JBR-005-010 LENS,RC 4 8Z-JBR-006-010 LENS,LED 5 8Z-JBR-004-010 KEY,MAIN 6 8Z-JBS-001-010 CABI,FR 7 8Z-JB4-620-010 SPKR,6*12 8OHM 10W 8 8Z-JAD-620-010 AC CORD SET,NH BLK... - Page 43 2–11, IKENOHATA 1–CHOME, TAITO-KU, TOKYO 110, JAPAN TEL:03 (3827) 3111 737004 Printed in Singapore...
Need help?
Do you have a question about the TV-2010 and is the answer not in the manual?
Questions and answers