
Related Manuals for NADAMOO BF0022


Summary of Contents for NADAMOO BF0022
- Page 1 BF0022 1D Barcode Scanner Manual Service Mailbox: server@nadamoo.cn nadamoo@126.com V31.4...
- Page 3 If you have any question or concern about the operation of the scanner, please contact us at one of the following email address: server@nadamoo.cn nadamoo@126.com You should write down the model & the specific scenario and consult us , when you find...
-
Page 4: Table Of Contents
Contents Technical Parameter ............Packing list ............. Battery & Charging ............Quick Start Guide ............1. On Android / iOS device ............2. On computer ............FAQs ............Troubleshooting ............Optional Function settings ............1. Switch connection mode ............2. -
Page 5: Technical Parameter
Technical Parameter Mfr P/N BF0022 Connection technology Bluetooth + 2.4 GHz Radio Wireless Max Transmission Range 50m in bluetooth mode, 100m in 2.4 GHz wireless mode Memory 100000 barcodes Battery capacity 1400mAh Charging power DC 5V 400mA Light source 650±20nm VLD... -
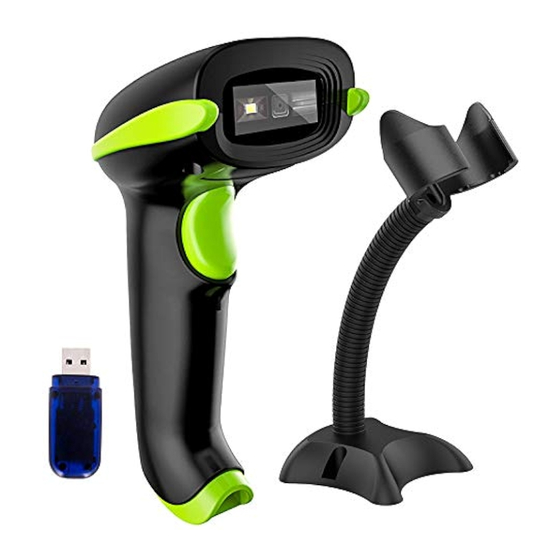
Page 6: Packing List
Packing list •Barcode scanner*1 •USB Cable*1 •Instruction Manual*1 •USB Wireless Receiver*1 Battery & Charging The scanner is powered by 1400mAh rechargeable battery. Please charge the scanner at least 30 minutes before use to ensure that the scanner has enough power. Insert one end of USB cable into the bottom of scanner, and insert another end to computer USB interface or 5V DC USB interface adapter. -
Page 7: Quick Start Guide
Quick Start Guide The scanner support 2 connections: Bluetooth mode, 2.4Ghz wireless mode . When turn the scanner on for the first time, the scanner will enter into Bluetooth pairing by default. Connection mode indication: When the light on the top of the scanner turns blue, it indicates the scanner is in bluetooth mode. - Page 8 STEP3. Scan the code “instant upload mode”to set the scanner instantly upload barcode. Instant upload mode STEP4. Test the scanner using Numbers app (iOS) or Microsoft Excel (Android), click on any cell and then scan a barcode to see if the barcode comes up on the cell. Note 1: Once the pairing is successful, the keyboard of your device will disappear.
-
Page 9: On Computer
Speed 50 Speed 60 2. 2.4GHz wireless mode quick start guide --To use the scanner on computer You may sometimes want to use the scanner on computer, in this case , please set up the scanner according to the following steps. STEP1. -
Page 10: Faqs
Instant upload mode STEP4. Test the scanner using Microsoft Excel , click on any cell and then scan a barcode to see if the barcode comes up on the cell. FAQs: Q1. If i scan a product barcode, will it include the name of the product in the file automatically? Answer:... - Page 11 If you want to use it in 2.4G wireless mode, please connect the scanner to you computer via USB receiver, and then scan the following codes "2.4GHz Wireless mode" "Match" "instant upload mode". If you want to use it in bluetooth mode, please scan the code "Bluetooth mode" to change the scanner bluetooth mode first, and enable the bluetooth on your smartphone/tablet.
- Page 12 To remove the auto-enter, please read the code “disable suffix” on page 28. Q6. Why does scanner not read the first digit of UPCE barcode. Answer: The first digit of UPCE barcode is system charater. The scanner does not output the system character by default.
-
Page 13: Troubleshooting
Troubleshooting (Bluetooth Mode) Problem Possible Reason Solution Power on the scanner, scanner reaction. the buzzer does not beep, the blue light The battery run out Recharge the scanner on the top of scanner does not turn on, the red scanning laser does not show up The PC’s USB port is Using another USB port for... - Page 14 Troubleshooting (2.4Ghz wireless Mode) Problem Possible Reason Solution 1. The PC’s USB port is Connect the USB receiver Insert the USB receiver damaged to another USB port into the PC‘ s USB port, 2. The USB receiver is the receiver’s light does Contact us for the not light up.
-
Page 15: Optional Function Settings
Optional Function Settings Settings of the barcode scanner can be changed by scanning the setup barcodes included in this manual. 1. Switch Connection Mode There are 2 operations to switch the mode. 1) Scan one of the following settings barcode to select the mode. Bluetooth-mode 2.4GHz wirelessmode 2) Press and hold the button for 10seconds to change the mode... -
Page 16: Bluetooth Mode Pairing Setting
2.Bluetooth Mode Pairing Setting Enable bluetooth function till find out“Scanner XXX”(XXX is the scanner id), and click it to begin bluetooth pairing. Wait a few seconds, the red light will be off and the blue light is still on, and the buzzer beeps twice , which means bluetooth pairing is successful. -
Page 17: 4Ghz Wireless Mode Pairing Setting
3. 2.4GHz Wireless Mode Pairing Setting In 2.4GHz wireless mode, two kinds of pairing modes are supported. 3.1 One scanner to one receiver:One scanner only sends barcode to one receiver. Pairing operation: Plug the USB receiver into your computer , scan the code "match " to pair the scanner with the USB receiver Match Pairing indication:... - Page 18 Several units can work independently with different computers in the same area. They won't interface with each other during work. If you want to use them on multiple computers, each with own scanner and receiver. Please follow the setps. (1)Plug the USB receiver A into PC A. (2)Scan the code “match”using scanner A to pair the scanner A with the receiver A.
- Page 19 3.2. Max.32 Scanner - to - One receiver Multiple scanners send barcode to one USB receiver. One USB receiver can connect to 32 scanners at most. Pairing operation: (1)Plug the USB receiver A into PC‘s USB port (2)Scan the code “match”using scanner A to pair the scanner A with the receiver A (3)Unplug the USB receiver A and plug it to PC‘s USB port again (4)Scan the code “match”using scanner B to pair the scanner B with the receiver A Match...
-
Page 20: Upload Mode Setting
4. Upload Mode Setting Two kinds of upload modes are supported in both bluetooth mode & 2.4GHz wirelelss mode. 4.1. Instant Upload Mode : Read barcodes and upload it straight to the file you have opened. ** To set the scanner to upload barcode instantly, scan the following code: Instant upload mode Scanning indication: (1) The blue/green indicator light flashes once and the buzzer beeps once when the... - Page 21 Speed 50 Speed 40 Speed 60 4.2. Storage mode : Read barcodes and store the barcodes in scanner ’ s own memory. You can upload the data to computer in batchs when you need them. Internal storage saves up to 100,000 barcodes. Note:...
- Page 22 Show total storage ** Scan the barcode “Zero clearing” to clear all stored barcode. (for storage mode only) Zero clearing Scanning indication: (1) The blue/green indicator light flashes once and the buzzer rang a fast "DI-en" when the barcode is saved successfully in the built-in memory of the scanner (2) The red indicator light flashes once and the buzzer rang a slow "DI---en"...
-
Page 23: Voice Setting
Speed 010*(bluetooth default) Speed 040 Speed 050 Speed 060 5. Voice Setting **Scan one of the following barcode to select the decoding beep mode Low volume Medium volume Close Beep High volume (default) Scan one of the following barcode to select the start-up beep mode High volume (default)... -
Page 24: Scanning Mode Setting
6. Scanning Mode Setting Two kinds of scanning modes are supported in both bluetooth mode & 2.4GHz wirelelss mode. 6.1. Manual trigger mode (default) : User press the trigger, the scanner will emit a red light to read the barcode. When user release the tigger, the red light will go off. -
Page 25: Interface Setting
8. Interface Setting Two kind of Interface are supported. 8.1. USB-HID mode In the HID protocol, there are 2 entities: the "host" and the "device". The host communicates with the device and receives input data from the device on actions performed by the human. The most common example of a "host"... -
Page 26: Indentify Barcode Type
9. Identity Barcode Type This setting is to identify what type of the barcode is, follow the below steps to confirm: Situation 1: Scan the code "Add ID front-on" below, then scan your goal barcode, there will be a character BEFORE the barcode you scanned, and this character states your Barcode Type. -
Page 27: Keyboard Language Setting
10. Keyboard Language Setting The scanner support 25 international keyboards: You are suggested to set the keyboard type of the scanner to be in agreement with that in real use by scanning the correspondent barcode listed below. UNITED STATES (default) FRENCH SERBIA/YUGOSLAVIA BELGIUM... - Page 28 SWITZERLAND (FRENCH) CZECHOSLOVAKIA (CZECH) NETHERLANDS SWITZERLAND (GERMAN) CZECHOSLOVAKIA (SLOVAK) NORWAY UNITED KINGDOM DENMARK POLAND UNIVERSAL FINLAND PORTUGAL...
-
Page 29: Case Sensitivity Setting
11. Case Sensitivity Setting The scanner can change all the letter cases of barcode into uppercase or lowercase. Letter case of barcodes can be altered through scanning correspondent bar code below. All lowercase All Capital Swap Capital/ lowercase Cancel capital/lowercase settings 12. -
Page 30: Restore Factory Setting
13. Restore factory setting To set the scanner to factory settings, please scan the code: Restore factory setting 14. End character setting By default,the scanner is sending a 'carriage return' after scanning a code (the same as pressing the 'enter' key) . CR/ENTER (default)... -
Page 31: Barcode Setting
15.Barcode Setting The code ending with word "*" is the default settings. UPCA: UPCA-Enable* UPCA-Disable Show UPCA check digit* Hide UPCA check digit Show UPCA system digit* Hide UPCA system digit UPCA to EAN13-Enable UPCA to EAN13-Disable* UPCE UPCE-Enable* UPCE- Disable... - Page 32 Show UPCE check digit* Hide UPCE check digit Show UPCE system digit Hide UPCE system digit* UPCE to UPCA-Enable UPCE to UPCA-Disable* EAN13 EAN13-Enable* EAN13-Disable Show EAN13 check digit* Hide EAN13 check digit EAN13 to ISBN-Enable EAN13 to ISBN - Disable* EAN13 to ISSN - Enable EAN13 to ISSN - Disable*...
- Page 33 EAN8 EAN8 - Enable* EAN8-Disable Show EAN8 check digit* Hide EAN8 check digit UPC/EAN Extra code UPC/EAN extra code-Enable UPC/EAN extra code-Disable* Code39 Code39-Enable* Code39-Disable Code39 FullASCII-Enable Code39FullSCII-Disable* Show Code39 start/stop digit Hide Code39 start/stop digit*...
- Page 34 Code32 Code32- Enable Code32-Disable* Show Code32 check digit Hide Code32 check digit* Code128 Code128-Enable* Code128-Disable Code93 Code93-Enable* Code93-Disable Code11 Code11-Enable* Code11-Disabel...
- Page 35 CODABAR CODABAR-Enable* CODABAR-Disable Show CODABAR start/stop digit Hide CODABAR start/stop digit Industrial 2 of 5 Industrial 2 of 5 -Enable* Industrial 2 of 5 -Disable Interleaved 2 of 5 Interleaved 2 of 5 -Enable* Interleaved 2 of 5 -Disable MSI-Enable MSI-Disable...
-
Page 36: Insert And Delete Character
16. Insert and delete character The barcode scanners permit special characters to be added at the beginning (prefix) or end (suffix) of the scanned barcode. The character also can be deleted. First step: Scan one of the following setup code to choose the event. Insert character Delete character Second step:Scan one of the following setup code to choose the barcode type. - Page 37 Industrial 2 of 5 Interleaved 2 of 5 Code11 GS1D China post GD1L GS1E Code32 Note:if you do not choose the barcode type, the setting will take effect for all barcode type by default. Third step : Scan one of the following setup code to choose the data group. Group 1 Group 2 Group 4...
- Page 38 Group 6 Group 5 Group 7 Group 8 Note 1: if you do not choose the data group, the scanner will take “Data group 1” as default setting. Note 2: The data group is used to distinguish between different setting events. it work on the following circumstances: 1).Differentiating the setting for different barcode types 2).Distinguish add / delete prefix or suffix...
- Page 39 If you want to put "A" before barcode, put "B" after barcode. The setting steps is : Insert charater > All barcode type > Data group 1 > Before barcode > 065 A > Saving settings Insert charater> All barcode type > Data group 2 > After barcode > 066 B> Saving settings After that, when the scanner read barcode 123456789, the barcode received by the computer will...
- Page 40 004 EOT Four characters 005 ENQ Five characters 006 ACK Six characters 007 BEL Seven characters 008 Back Space Eight characters 009 HT/TAB Nine characters 010 LF Ten characters Sixth steps: Scan the below code to save the setting Save setting To remove the insert setting,scan the following code in order Insert character Clear setting...
Need help?
Do you have a question about the BF0022 and is the answer not in the manual?
Questions and answers