Table of Contents
Advertisement
Quick Links
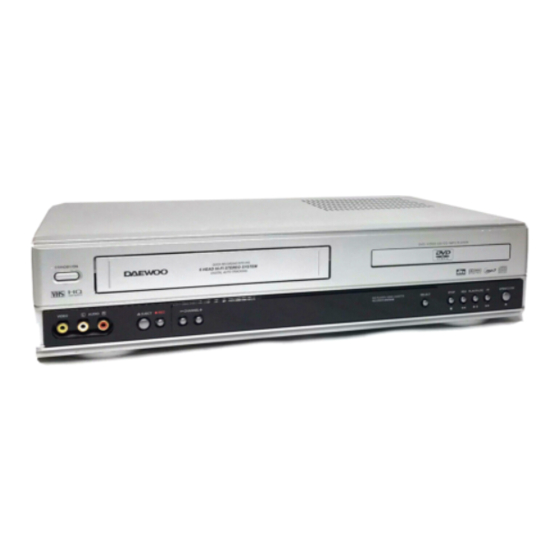
DVD-VIDEO PLAYER
OwnerÕs Manual
Model : DV6T834N [Hi-Fi]
DV6T834B [Hi-Fi]
DV6T844N [Hi-Fi]
DV6T844B [Hi-Fi]
DV6T534N [MONO]
DV6T534B [MONO]
DV6T544N [MONO]
DV6T544B [MONO]
In the initial settings, exclusive channel for DVD/Video is
set to CH 3. Set the TV channel to CH3 before using it.
Region code of DVD/Video player for home is 1 or ALL. In
inserting a disc with other region code, it does not
operate. Please only use a disc with region code 1 or ALL.
is a ÔProhibitionÕ mark. If this mark is displayed in
operating the product, please wait for a while, then use
it. If "
Prohibition" mark continues to be displayed in
pressing a button after that, it means the button does
not function in the currently played disc.
Press a product button on the remote control then use
the product.
¥ DVD operation : [DVD] button
¥ Video operation : [VCR] button
Advertisement
Table of Contents

Related Manuals for Daewoo DV6T534B


Summary of Contents for Daewoo DV6T534B
- Page 1 Model : DV6T834N [Hi-Fi] DV6T834B [Hi-Fi] DV6T844N [Hi-Fi] DV6T844B [Hi-Fi] DV6T534N [MONO] DV6T534B [MONO] DV6T544N [MONO] DV6T544B [MONO] In the initial settings, exclusive channel for DVD/Video is set to CH 3. Set the TV channel to CH3 before using it.
- Page 2 P/N : 97P95600N0-78...
-
Page 3: Important Safeguards
Important Safeguards The lightning flash with arrowhead symbol, CAUTION within an equilateral triangle, is intended to RISK OF ELECTRIC SHOCK alert the user to the presence of uninsulated DO NOT OPEN Òdangerous voltageÓ within the productÕs enclosure that may be of sufficient CAUTION: TO REDUCE THE RISK OF ELECTRIC magnitude to constitute a risk of electric SHOCK, DO NOT REMOVE COVER (OR BACK). - Page 4 This set has been designed and manufactured to 9 Ventilation assure personal safety. Improper use can result in Slots and openings in the case are provided for electric shock or fire hazard. The safeguards ventilation to ensure reliable operation of the unit incorporated in this unit will protect you if you and to protect it from overheating.
-
Page 5: Advantages Of This Product Are
Advantages of This Product Are ... ¥ DVD, VCD, CD, CD-R(MP3), CD-RW, VHS and search of track and time in VCD and CD playback function ¥ Various TV aspect (DVD) ¥ Watching DVD for recording broadcast 4:3 for Pan and Scan, 4:3 for Letter Box, and 16:9 ¥... -
Page 6: Table Of Contents
Using advanced features ... 28 Hi-Fi Stereo Playback (Hi-Fi Model only) ... 31 Identification of Controls Front panel DV6T834N, DV6T834B, DV6T534N, DV6T534B & ) 5 2 1 4 3 DV6T844N, DV6T844B, DV6T544N, DV6T544B & ) 1 234 5 ! Power (STANDBY/ON) button... -
Page 7: Rear Panel
Recording , TIMER Recording , To be Timer-recorded, To be Timer-recorded state ERROR (No Tape or Tape without tab) DV6T534N, DV6T544N, DV6T534B, DV6T544B [MONO] This is displayed in DVD disc. Tray is opened Tray is closed Disc is loaded There is no disc in tray... -
Page 8: Connecting With Tv
Remote Control [DVD] MENU button @ POWER button [DVD] TITLE /PBC button [DVD] OPEN/CLOSE button, [DVD, VCR] MOVE/SELECT in OSD, Up/Down button ^ SETUP button & [DVD] REPEAT Playback button [DVD] REPEAT a defined period from A to B button [DVD] PREVIOUS button (move into a previous chapter or track) -
Page 9: Connecting With Cable Box
You can connect a wide variety of audio/video equipment to your DVD-Video, including : an additional VCR, Laser Disc Player, DVD Player, Camcorder, Satellite Receiver, Video Game. Since all of these devices use essentially the same connections, they will be described together. -
Page 10: Connecting With An Analog Audio
Connecting with an Analog Audio How to Connect CAUTION RISK OF ELECTRIC SHOCK DO NOT OPEN CAUTION: TO REDUCE THE RISK OF ELECTRIC SHOCK. DO NOT REMOVE COVER (OR BACK). REFER SERVICING TO QUALIFIED SERVICE PRESONNEL. NO USER SERVICEABLE PARTS INSIDE. S-VIDEO AUDIO Connect Audio jack. -
Page 11: Output Select
Output Select To Select DVD Press [DVD] button. If DVD mode is correctly selected, DVD on the operation display window is lighted. Then, remote control button works as DVD function. Press the [DVD] button, then the mode of DVD-Video Player becomes to the DVD OPERATION mode. To Select VCR Press [VCR] button. -
Page 12: Dvd Playback
DVD Playback Press [√ √ ] button to power on. Press [DVD] button of remote control to change into DVD mode. Press [OPEN/CLOSE] button to open the disc tray. Place a disc firmly on the disc tray, making its label look upward. Insert the disc and press [OPEN/CLOSE] button to close the tray. -
Page 13: Memorizing Tv Channels
Memorizing TV Channels To Memorize Automatically Channels Press [SETUP] button. Press [ ] button to move into CHANNEL SET, and then select CHANNEL SET with [ENTER] button. Select ÒAUTO CHANNEL SEARCHÓ. Press [ENTER] button in CHANNEL SET window to select AUTO CHANNEL SEARCH. Select ÒDetect AutomaticallyÓ. -
Page 14: Recording
Recording To Record With VCR Press [√] button to power on. ¥ Press [VCR] button of remote control to change into VCR mode. ¥ Power on TV and select Ch 3, or press [INPUT] button of TV set to select External Input mode. -
Page 15: Timer Recordings
Timer Recordings TIMER RECORDINGS Power on TV. Make sure that current time is set correctly. Insert a recordable tape with recording tab. Prior to the setting, press [VCR] button to change to VCR mode. Press [SETUP] button and select ÒTIMER RECORDINGSÓ. Move into ÒTIMER RECORDINGSÓ... -
Page 16: Watching And Recording Cable Tv
Various TIMER RECORDINGS One Time: It is available of TIMER RECORDINGS at the desired specified time. Daily : Once you set TIMER RECORDINGS of the desired program telecasted at the same time day after day, it is available of daily recordings. It is available of TIMER RECORDINGS from Sunday to Saturday. -
Page 17: Using Advanced Features
Using advanced features Play the tape automatically This feature allows the VCR to automatically start playing when you insert a tape with the safety tab removed. Press [SETUP] button and select ÒFUNCTIONSÓ. Move into ÒFUNCTIONSÓ with [ ] and then, select the desired one with [ENTER] button. -
Page 18: Daylight Saving Time
Display (O.S.D) Press [DISPLAY] button to display the tape counter, clock and status mode on the TV screen. And, by one more pressing [DISPLAY] button before disappearing the OSD from the screen, only the tape counter will remain on the screen. Daylight-Saving Time Press [SETUP] button and select ÒCLOCK SETÓ. -
Page 19: Repeating A Defined Period From A To B
Playing a desired scene To skip scenes in a disc To move to next chapter (or track), press [NEXT √ √ √ √ ] button. The current chapter (or track) moves to the next chapter (or track). Press [ œ œ œ œ PREV] button. The current scene moves to the previous chapter (or track) or first scene of current chapter (or track). -
Page 20: Confirming The Current Play Mode On Screen
Searching DVD with a title number, a chapter number or a time If you want to search with a title number, press [SEARCH] button one time. It shows total title numbers, chapter numbers and times. Please enter the new title number to be searched using the [NUMBER] buttons. -
Page 21: Selecting A Subtitle Language
AUDIO language, SUBTITLE language and 3D AUDIO Selecting an audio language The user may select an audio language and subtitle language if a disc includes Multi-language. Keep pressing [AUDIO] button till the userÕs preferred language appears. A certain disc If DVD disc includes audio information, every time the may not support audio user presses [AUDIO] button, English (ENG), French (FRE), select or subtitle... -
Page 22: About Mp3 Discs
Playing a disc containing MP3 files This unit will play MP3 files recorded on CD-R and CD-RW discs. Turn on your television and select the channel assigned to this DVD player. Press the DVD open [OPEN/CLOSE] button, the disc tray opens. -
Page 23: Video Setup
VIDEO Setup A user can set up a connected TV condition and screen. While STOP or RESUME STOP, press [SETUP] button. Select TV Aspect. If a user selects Ò4:3 PSÓ, the user can watch only a center of the original scene of Ò16:9Ó. If a user selects Ò4:3 LBÓ, the user can watch the original scene of Ò16:9Ó, but the top and bottom of the screen look black color. -
Page 24: Playable Disc
About DVD Playable Disc ¥ DVD, Video CD (Version 1.1, 2.0), S-VCD and Audio CD Disc type Playable Restriction Possible Region number 1 or Region number All Video CD Possible Version 1.0/1.1/2.0, SVCD/CVD Possible CD-G Possible Only Audio playback CD-ROM Possible MP3 File CD-R... -
Page 25: Basic Information About Vcr And Videotape
Basic information about VCR and Videotape Terms related with VCR Automatic fine tuning, a circuit that automatically adjusts TV reception to optimum condition. CABLE Cable television. Index Search A feature of this VCR that automatically records an index each time recording begins. It helps you locate a particular segment of the tape quickly and easily. -
Page 26: Before Doubting About Troubles (Dvd)
Before doubting about troubles (VCR) Symptom ¥ ÒPower OnÓ does not work. Please check whether a power plug is inserted in an electric outlet. ¥ It does not work even in ÒPower OnÓ. Please check whether a videotape is inserted in. Try to insert a plug again. -
Page 27: Specifications
Specifications Power AC 120V, 60Hz Consumed electricity 24W (supplementary 4W) Weight 4.6kg Dimension (WxHxD) 435mm x 93mm x 255mm Operative temperature +5¡C~35¡C Installation condition Horizontal / Relative humidity under 80% Received channels VHF: 2-13 CH / UHF: 14-69 CH / Cable: 1-125 Signal type NTSC COLOR Antenna Input/output... -
Page 28: Warranty
Warranty DEAM (Daewoo Electronics America) warrants each new electronic product manufactured by it to be free from defective material and workmanship and agrees to remedy any such defect or to furnish a new part (at the CompanyÕs option) in exchange for any part of any unit of its manufacture which under normal installation,...
Need help?
Do you have a question about the DV6T534B and is the answer not in the manual?
Questions and answers