Advertisement
Available languages
Available languages
Advertisement
Table of Contents

Related Manuals for Songmics VASAGLE LSD184


Summary of Contents for Songmics VASAGLE LSD184
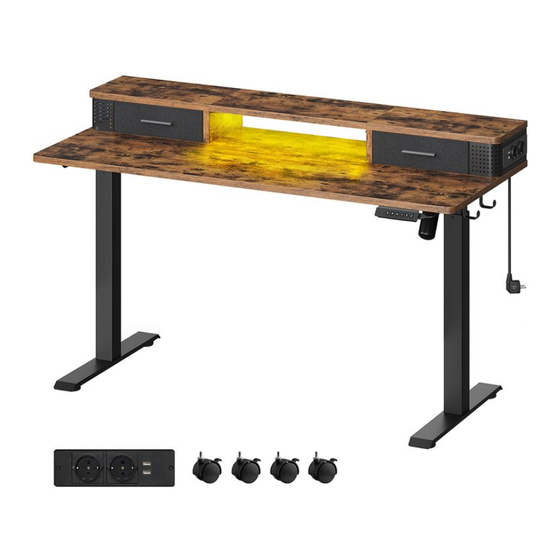
- Page 1 LSD184...
-
Page 2: General Guidelines
General Guidelines Please read the following instruction carefully and use the product accordingly. Ÿ Please keep this manual and hand it over when you transfer the product. Ÿ This summary may not include every detail of all variations and considered steps. Please contact us when further information and help are needed. Ÿ... - Page 3 Stellen Sie dieses Produkt auf eine ebene Fläche. Ÿ Setzen oder stellen Sie sich nicht auf dieses Produkt. Ÿ Verändern oder entfernen Sie keine Teile dieses Produkts während des Gebrauchs. Ÿ Introduction Lisez attentivement ces instructions et utilisez votre produit d’après ce mode d’emploi. Ÿ...
-
Page 4: Algemene Richtlijnen
Avvertenze Si prega di tenere i bambini lontani durante il montaggio, poiché le piccole parti possono essere fatali se ingerite o inalate. Ÿ Per prevenire potenziali lesioni e infortuni, si prega di impedire ai bambini di arrampicarsi o giocare con questo prodotto. Ÿ... -
Page 5: Allmänna Riktlinjer
Om de motor te beschermen, moet 18 minuten pauze worden toegepast na 2 minuten continu heffen of dalen. Ÿ In het geval van een stroomstoring of als de stekker uit het stopcontact is getrokken, kan een handmatige reset nodig zijn (zie de sectie GEBRUIK). Ÿ... - Page 6 Umieścić ciężkie przedmioty na środku blatu, aby zapobiec uszkodzeniom spowodowanych przez nierówne rozłożenie wagi. Ÿ Rekomendujemy składanie lub przesuwanie produktu przez 2 osoby dorosłe. Ÿ Używać produkt pod właściwym napięciem (zgodnie ze specyfikacją znajdującą się na skrzynce kontrolnej). Ÿ Upewnić się, że na drodze biurka nie znajdują się żadne przeszkody. Upewnić się, że biurko nie dotyka jakichkolwiek ścian oraz że wszystkie przewody są Ÿ...
- Page 7 × 1 × 1 × 1 × 1 × 1 × 1 × 1 × 1...
- Page 8 × 1 × 1 × 1 × 1 × 1 × 1 × 1 × 1...
- Page 9 × 1 × 1 × 2 × 2 × 2 × 2 × 1 × 1...
- Page 10 × 1 × 1 × 1 × 2 × 1 × 1 × 1 × 4...
- Page 11 × 28 × 16 × 4 × 2 × 2 × 6 × 8 × 22 × 4 × 14 × 30 × 5 × 4 × 2 × 4...
- Page 12 × 4 × 2 × 1 × 1 × 1 M2.5 × 1 × 1...
-
Page 14: Tools Required
Tools Required: Bolt Bout Bolzen Bult Wkręt Boulon Bullone Cıvata Perno Connecting piece Adjust connecting piece direction until it is properly lined up Verbindungsbeschlag Insert bolt when connecting piece direction is properly lined with the hole. Pièce de raccord Stellen Sie den Verbindungsbeschlag so ein, dass er wie im Bild Setzen Sie erst dann den Bolzen ein. - Page 15 Tips / Hinweise / Notes / Suggerimenti / Sugerencias / Tips / Tips / Porady / İpuçları If there is any damage after unpacking or you have any questions during assembly, please feel free to contact us at Ÿ your earliest convenience. Our customer care team provides professional returns or exchanges as well as assembly guidance.
- Page 16 × 12 × 12...
- Page 17 × 2...
- Page 18 × 4...
- Page 19 × 4 × 4 × 4...
- Page 20 × 2 × 2 × 4 × 2...
- Page 22 × 4 × 4 × 8...
- Page 23 × 12...
- Page 24 × 12 × 8...
- Page 25 × 4 × 4...
- Page 26 M2.5...
- Page 27 × 6...
- Page 28 × 10...
- Page 29 × 4...
- Page 30 × 2 × 2...
- Page 31 × 4...
- Page 32 × 2...
- Page 33 × 2 × 1 × 2...
- Page 34 13 16 × 4 × 4...
- Page 37 × 5...
- Page 39 Display Screen Up/Down Setting Button Memory Button Display Aufwärts/Abwärts Einstellungstaste Speicher-Tasten Écran d'affichage Bouton de réglage Réglage de la hauteur Boutons de mémoire Display Pulsante di impostazione Su/Giù Pulsante Memoria Pantalla de visualización Botón de ajuste Ajuste de la altura Botones de memoria Displayscherm Omhoog/Omlaag...
- Page 40 Controller The whole controller is a button-operated panel. If the display is not operated for 30 seconds, the display goes to sleep and is locked and the 1/2/3 button cannot be used. You can continue to use the display when it lights up by pressing the " " or " " button. ↑...
- Page 41 Advanced Function Setting To set a height limit: Press and hold " " and " " at the same time for 5 seconds at the desired height, and then you will hear a buzzer sound, indicating that the ↑ ↓ minimum/maximum limit is set successfully.
- Page 42 0 centimeter Press "S" 1 inch Centimeter and inch exchange Reserved, some models do 0 Off not have this function. 1 Lowest sensitivity Press "S" Anti-collision sensitivity 8 Highest sensitivity (Sensor mode) 0 Off Press "S" 1 Lowest sensitivity Upward anti-collision sensitivity 8 Highest sensitivity (Current detection mode) 0 Off...
- Page 43 Bedienfeld Bedienen Sie das Produkt mit den Tasten auf dem Bedienfeld. Wenn 30 Sekunden lang keine Taste berührt wird, schaltet das Display direkt in den Standby-Modus und wird gesperrt, zudem sind die Tasten 1/2/3 nicht mehr aktiv. Sie können das Display durch Drücken der Taste „ “ oder ↑...
- Page 44 Weitere Funktionen Höhenbegrenzung festlegen: Drücken Sie gleichzeitig die Tasten „ “ und „ “ 5 Sekunden lang, wenn die Tischplatte Ihre gewünschte Höhe erreicht; dann ertönt ein Signalton, ↑ ↓ der anzeigt, dass die minimale oder maximale Höhengrenze erfolgreich eingestellt worden ist. (Wenn die Höhe ≤ 96 cm ist, gilt dieser Wert als Standarduntergrenze, wenn die Höhe ≥...
- Page 45 Drücken Sie „S“ Maßeinheit der Tischhöhe in Zentimeter oder Zoll 0 Aus Drücken Sie „S“ 1 Geringste Empfindlichkeit Empfindlichkeit (Sensor-Modus) 8 Höchste Empfindlichkeit 0 Aus Drücken Sie „S“ 1 Geringste Empfindlichkeit Aufwärtslauf-Empfindlichkeit 8 Höchste Empfindlichkeit (Stromerkennungsmodus) 0 Aus Drücken Sie „S“ 1 Geringste Empfindlichkeit Halten Sie die Taste „S“...
- Page 46 Tableau de commande Le tableau de commande est composé de boutons. Si aucun bouton n’est touché pendant 30 secondes, l’écran se met en veille et se verrouille etles boutons 1/2/3 ne sont plus activés. Vous pouvez allumer l'écran en appuyant sur les boutons " " ou " ". ↑...
- Page 47 Paramétrage de fonction avancé Pour régler une limite de hauteur : Appuyez simultanément sur " " et " " pendant 5 secondes à la hauteur souhaitée, puis vous entendrez un signal sonore indiquant que la limite ↑ ↓ minimale/maximale est réglée avec succès. (Lorsque la hauteur est ≤...
- Page 48 Appuyez sur “S” Échange centimètres et pouces 0 Désactivé Appuyez sur “S” 1 Sensibilité la plus basse Sensibilité anti-collision 8 Sensibilité la plus élevée (Mode capteur) 0 Désactivé Appuyez sur “S” 1 Sensibilité la plus basse Sensibilité anti-collision vers le 8 Sensibilité...
- Page 49 Controller L'intero controller è un pannello - azionato da pulsanti. Se il display non viene utilizzato per 30 secondi, il display va in sospensione e viene bloccato e non è possibile utilizzare 1/2/3. È possibile continuare a utilizzare il display quando si accende premendo il pulsante " " o " ". ↑...
- Page 50 Impostazioni delle funzioni avanzate Per impostare un limite di altezza: Tieni premuti contemporaneamentee " " e " " per 5 secondi all'altezza desiderata, quindi si udirà un segnale acustico che indica che il limite ↑ ↓ minimo/massimo è stato impostato correttamente. (Il valore impostato è...
- Page 51 0 centimetro Premi "S" 1 pollice Scambio di centimetri e pollici Riservato, alcuni modelli non dispongono di questa 0 Spento funzione. Premi "S" 1 Sensibilità più bassa Sensibilità anticollisione 8 Sensibilità più alta (modalità sensore) 0 Spento Premi "S" 1 Sensibilità più bassa Sensibilità...
- Page 52 Panel de control El panel de control consta de botones. Si no se toca ningún botón durante 30 segundos, la pantalla se pone en espera y se bloquea y los botones1/ 2/3 dejan de estar activos. Puedes encender la pantalla pulsando los botones " " o " ". ↑...
- Page 53 Para establecer un límite de altura: Pulse simultáneamente " " y " " durante 5 segundos en la altura deseada, entonces oirá un pitido que le indicará que el límite ↑ ↓ mínimo/máximose ha ajustado correctamente. (Cuando la altura es ≤ 96, este valor se considera el límite inferior por defecto, cuando la altura es ≥ 97, este valor se considera el límite superior pordefecto).
- Page 54 0 centímetro Pulse “S” 1 pulgada Centímetro y Cambio de Reservado, algunos sistema métrico a pulgadas modelos no disponen 0 Apagado de esta función. Pulse “S” 1 Sensibilidad mínima Sensibilidad anticolisión 8 Máxima sensibilidad (Modo sensor) 0 Apagado Pulse “S” 1 Sensibilidad mínima Sensibilidad anticolisión ascendente 8 Máxima sensibilidad...
- Page 55 Bedieningspaneel Het gehele bedieningspaneel is een paneel dat door toetsen bediend wordt. Als het display gedurende 30 seconden niet wordt bediend, gaat het display in de slaapstand. Het wordt dan vergrendeld en de 1/2/3 toetsen kunnen dan niet worden gebruikt. U kunt het display blijven gebruiken wanneer het oplicht door op de "...
- Page 56 Geavanceerde functie-instelling Maximale hoogte instellen: Houd " " en " " gedurende 5 seconden gelijktijdig op de gewenste hoogte ingedrukt, waarna u een pieptoon hoort die aangeeft dat de ↑ ↓ minimum/maximum grens met succes is ingesteld. (De ingestelde waarde is ≤ 96, de standaardinstelling is de ondergrens, de ingestelde waarde is ≥ 97, de standaardinstelling is de bovengrens) Vervolgens houd "...
- Page 57 0 centimeter Druk op "S" 1 inch Centimeter- en inch-uitwisseling Gereserveerd, sommige modellen hebben deze 0 Uit functie niet. Druk op "S" 1 Laagste gevoeligheid Anti-botsingsgevoeligheid 8 Hoogste gevoeligheid (sensormodus) 0 Uit Druk op "S" 1 Laagste gevoeligheid Opwaartse anti-botsingsgevoeligheid 8 Hoogste gevoeligheid (huidige detectiemodus) 0 Uit...
- Page 58 Kontroller Hela kontrollern är en knappmanövrerad panel. Om displayen inte används på 30 sekunder går displayen i viloläge och låses och 1/2/3 kan inte användas. Du kan fortsätta att använda displayen när den tänds genom att trycka på knappen " " eller " ". ↑...
- Page 59 Avancerad funktionsinställning För att ställa in en höjdgräns: Tryck och håll " " och " " samtidigt i 5 sekunder på önskad höjd, då kommer du att höra ett summerljud som indikerar att ↑ ↓ minimi/maximigränsen har ställts in. (Det inställda värdet är ≤ 96, standardinställningen är den nedre gränsen, inställningsvärdet är ≥ 97, standardinställningen är den övre gränsen) För att avbryta denna funktion, kör först till gränshöjden, tryck och håll "...
- Page 60 0 centimeter Tryck på "S" 1 tum Centimeter- och tum byte Reserverad, vissa modeller 0 Av har inte denna funktion. Tryck på "S" 1 Lägsta känslighet Antikollisionskänslighet (sensorläge) 8 Högsta känslighet 0 Av Tryck på "S" 1 Lägsta känslighet Uppåtgående anti-kollisionskänslighet 8 Högsta känslighet (Nuvarande detekteringsläge) 0 Av...
- Page 61 Kontroler Cały kontroler jest panelem obsługiwanym za pomocą przycisków. Jeśli wyświetlacz nie jest obsługiwany przez 30 sekund, przechodzi on w stan uśpienia i zostaje zablokowany, a przyciski 1/2/3 nie mogą być używane. Z wyświetlacza będzie można nadal korzystać, gdy zaświeci się on, po naciśnięciu przycisku "...
- Page 62 Ustawienia funkcji zaawansowanych Aby ustawić limit wysokości: Naciśnij i przytrzymaj jednocześnie przyciski " " i " " przez 5 sekund na żądanej wysokości, a następnie usłyszysz dźwięk brzęczyka, wskazujący, że ↑ ↓ minimalny/maksymalny limit został ustawiony pomyślnie. (Jeśli ustawiona wartość to ≤ 96, ustawienie domyślne to dolna granica, jeśli ustawiona wartość to ≥ 97, ustawienie domyślne to górna granica) Aby anulować...
- Page 63 0 centymetr Naciśnij „S” 1 cal Wymiana centymetrów I cali Zastrzeżone, niektóre 0 Wyłączone modele nie mają tej funkcji. Naciśnij „S” 1 Najniższa czułość Czułość antykolizyjna (tryb czujnika) 8 Najwyższa czułość 0 Wyłączone Naciśnij „S” 1 Najniższa czułość Czułość antykolizyjna w górę 8 Najwyższa czułość...
- Page 64 Denetleyici Tüm kontrolör bir düğme paneli ile kontrol edilir. 30 saniye hareketsizlikten sonra ekran uyku moduna geçer ve kilitlenir, bu da 1/2/3'ü çalışmaz hale getirir. Ekran aydınlandığında " " veya " " tuşuna basarak kullanmaya devam edebilirsiniz. ↑ ↓ Yukarı/Aşağı "...
- Page 65 Gelişmiş İşlev Ayarı Yükseklik sınırını ayarlama: İstenilen yükseklikte " " ve " " tuşlarına aynı anda 5 saniye basılı tutun; minimum/maksimum limitin başarıyla ayarlandığını belirtmek için bir sesli ↑ ↓ uyarı duyulacaktır. (Varsayılan ayar, alt sınır olan 96'dır; varsayılan ayar, üst sınır olan 97'dir.) Bu işlevi iptal etmek için, limit yüksekliğe kadar koşun ve ardından "...
- Page 66 0 santimetre "S" ye basın 1 inç Santimetre ve inç değişimi Ayrılmış, bazı modellerde 0 Kapalı bu işlev yoktur. "S" ye basın 1 En düşük hassasiyet Çarpışma önleme hassasiyeti 8 En yüksek hassasiyet (Sensör modu) 0 Kapalı "S" ye basın 1 En düşük hassasiyet Çarpışma önleme hassasiyeti yukarı...
Need help?
Do you have a question about the VASAGLE LSD184 and is the answer not in the manual?
Questions and answers
The rod “x” Will not insert on both sides. The notches don’t line up
The rod on the Songmics LSD184 may not insert on both sides if the connecting piece is not properly aligned. The manual instructs to adjust the direction of the connecting piece until it lines up correctly with the hole before inserting the bolt. Misaligned notches can prevent proper insertion, so alignment is necessary before assembly.
This answer is automatically generated