
Subscribe to Our Youtube Channel
Related Manuals for Pelgrim IKR4092 Series


Summary of Contents for Pelgrim IKR4092 Series
- Page 1 IKR4092 --- Gebruiksaanwijzing Inductiekookplaat met afzuigunit Instructions for use Induction hob with extractor...
-
Page 2: Table Of Contents
INHOUDSOPGAVE Uw inductiekookplaat Inleiding Beschrijving Bedieningspaneel Meldingen op het display Veiligheid Temperatuurbeveiliging Kookduurbegrenzer Vermogensregeling Voor het eerste gebruik Gebruik van de aanraaktoetsen en de schuifregelaar Inductiegeluiden Geschikte pannen Pandetectie Vermogensniveaus Gebruik van de afzuigunit Richtlijnen voor het koken Reiniging Bediening van de kookplaat Bereiding starten Boost Pandetectiesymbool... - Page 3 INHOUDSOPGAVE Bediening van de afzuigunit Handmatig de afzuigunit in- en uitschakelen Boost De automatische afzuigmodus in- en uitschakelen Instellen automatisch uitschakelen van de afzuiging Verzadiging van de twin-filters Geheugenreset van de indicatie van de filterverzadiging Gebruikersmenu Vermogensbegrenzer Onderhoud Filters en waterreservoir Reiniging Problemen oplossen Technische specificaties...
-
Page 4: Uw Inductiekookplaat
UW INDUCTIEKOOKPLAAT Inleiding Gefeliciteerd met uw keuze voor dit toestel. In het ontwerp van dit product heeft eenvoudige bediening en optimale gebruiksvriendelijkheid centraal gestaan. In deze handleiding leest u hoe u dit toestel het best kunt gebruiken. Naast informatie over de bediening, vindt u hier ook achtergrondinformatie die u tijdens het gebruik van het toestel van pas kan komen. -
Page 5: Beschrijving
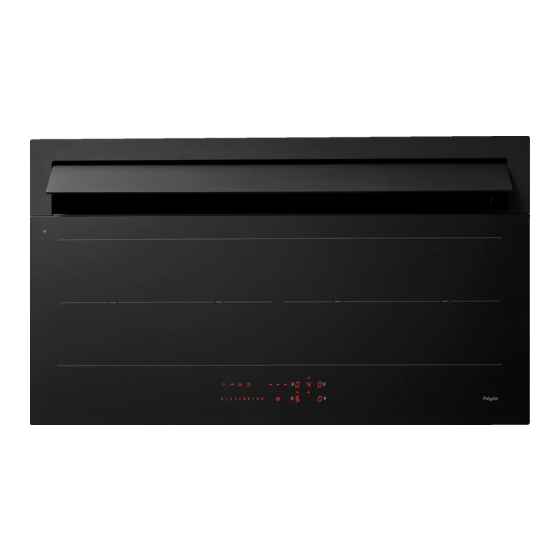
UW INDUCTIEKOOKPLAAT Beschrijving 1. Kookzone octa 210 x 190 mm / 1,6 kW (boost 1,85 kW) 2. Gekoppelde bridge inductie kookzone 210 x 380 mm / 3,7 kW 3. Kookzone octa 210 x 190 mm / 2,1 kW (boost 3,0 kW) 4. -
Page 6: Bedieningspaneel
UW INDUCTIEKOOKPLAAT Bedieningspaneel 1. Pauzetoets 2. Vergrendelingstoets 3. Warmhoudtoets 4. Eierwekkertoets 5. Timerdisplay 6. Plus-toets timer 7. Min-toets timer 8. Kookzonetoets midden links (display kookzone) en timertoets 9. Afzuigtoets (display afzuigunit) en timertoets 10. Kookzonetoets midden rechts (display kookzone) en timertoets 11. -
Page 7: Meldingen Op Het Display
UW INDUCTIEKOOKPLAAT Meldingen op het display Display kookzone Beschrijving Vermogensniveau: 1 = lage stand / 9 = hoge stand. Boostniveau actief. Geen (geschikte) pan op de kookzone (pandetectiesymbool). Restwarmte-indicator: de kookplaat heeft voor elke kookzone een restwarmte-indicator waarmee wordt aangegeven welke kookzone nog warm is. -
Page 8: Veiligheid
VEILIGHEID Lees eerst de afzonderlijke veiligheidsinstructies voordat u het apparaat in gebruik neemt! Temperatuurbeveiliging Een sensor controleert continu de temperatuur van bepaalde onderdelen van de kookplaat. Elke kookzone is voorzien van een sensor die continu de temperatuur van de bodem van de pan controleert om risico op oververhitting te voorkomen wanneer een pan droogkookt. -
Page 9: Voor Het Eerste Gebruik
VOOR HET EERSTE GEBRUIK Gebruik van de aanraaktoetsen en de schuifregelaar Plaats uw vingertop plat op een toets of op de schuifregelaar voor het beste resultaat. U hoeft geen druk uit te voeren. De aanraaktoetsen reageren alleen op lichte druk van een vingertop. Bedien de toetsen niet met andere objecten. -
Page 10: Pandetectie
VOOR HET EERSTE GEBRUIK Minimale pandiameter • De minimale pandiameter per zone is als volgt: Octa zone: minimale pandiameter 120 mm. ▷ • Op gekoppelde Bridge inductie kookzones moet de minimale pandiameter 230 mm zijn. Let op Zandkorreltjes kunnen krasjes veroorzaken die niet meer te verwijderen zijn. Zet daarom alleen pannen met een schone bodem op de kookplaat. -
Page 11: Richtlijnen Voor Het Koken
VOOR HET EERSTE GEBRUIK Richtlijnen voor het koken Aangezien de instellingen afhankelijk zijn van de hoeveelheid en samenstelling van het gerecht in de pan, geldt de onderstaande tabel alleen als richtlijn. Gebruik de boost-instelling voor: • snel aan de kook brengen van voedsel of vloeistof. Gebruik instelling 9 voor: •... -
Page 12: Bediening Van De Kookplaat
BEDIENING VAN DE KOOKPLAAT Lees het hoofdstuk ‘Voor het eerste gebruik’ zorgvuldig door voordat u begint met koken. Dit voorkomt onjuist gebruik van de kookplaat. Voor een juist gebruik van het product is het aan te raden om tijdens het koken altijd de luchtafzuiging aan te zetten. -
Page 13: Klaar Met Koken
BEDIENING VAN DE KOOKPLAAT Klaar met koken 1. Zet het vermogensniveau op ‘0’ om de kookzone uit te schakelen. 2. Schakel de inductiekookplaat uit door de aan-/uittoets aan te raken. Het symbool H wordt weergegeven op het display van de kookzone, als deze te heet is om te worden aangeraakt. -
Page 14: De Bridge-Inductiekookzones Koppelen
BEDIENING VAN DE KOOKPLAAT De Bridge-inductiekookzones koppelen Twee Bridge-inductiezones kunnen aan elkaar worden gekoppeld. Hierdoor ontstaat één grote zone die kan worden gebruikt voor bijvoorbeeld een grillplaat of een vispan op hetzelfde vermogen. De pan moet groot genoeg zijn om het midden van de twee linker of de twee rechter Bridge-inductiekookzones te bedekken (minimaal 230 mm). -
Page 15: De Eierwekker Gebruiken
BEDIENING VAN DE KOOKPLAAT De eierwekker gebruiken De eierwekker is niet aan een kookzone gekoppeld. De eierwekker schakelt de kookzone of de afzuigunit niet uit. De kookplaat is ingeschakeld en er is voor geen enkele kookzone vermogen ingesteld. 1. Raak de eierwekkertoets aan om de eierwekker in te schakelen. ▷... -
Page 16: Kinderslot
BEDIENING VAN DE KOOKPLAAT De geselecteerde kookzone wordt automatisch uitgeschakeld zodra de ingestelde tijd is ▷ verstreken. De timer knippert en het alarm klinkt wanneer de ingestelde tijd is verstreken. ▷ 4. Raak de timertoets aan om het alarm uit te schakelen. ▷... -
Page 17: Vergrendelingsfunctie Voor Een Snelle Reiniging Tijdens Het Koken
BEDIENING VAN DE KOOKPLAAT De kookplaat is nu vergrendeld. Onbedoeld inschakelen van het toestel wordt hiermee voorkomen. Na 20 seconden wordt de kookplaat automatisch uitgeschakeld. Om het kinderslot uit te schakelen, moeten de beschreven stappen binnen 10 seconden worden uitgevoerd. 1. - Page 18 BEDIENING VAN DE AFZUIGUNIT Handmatig de afzuigunit in- en uitschakelen 1. Raak de afzuigtoets aan. Het display van de afzuigunit licht op. ▷ 2. Stel binnen 3 seconden de afzuigsnelheid in door de schuifregelaar aan te raken (1 t/m 9). De afzuigunit schakelt in op het ingestelde niveau.
- Page 19 BEDIENING VAN DE AFZUIGUNIT Vermogens niveau Vermogens niveau kookzone afzuigunit Een kookzone is ingeschakeld (bijvoorbeeld stand 8) en de automatische afzuigmodus is actief. 1. Raak gedurende 3 seconden de afzuigtoets aan. ‘A’ verschijnt in de display; de automatische afzuigmodus is ingeschakeld. ▷...
- Page 20 BEDIENING VAN DE AFZUIGUNIT Verzadiging van de twin-filters De gebruikte filters in deze kookplaat zijn gecombineerde filters voor vet- en geurfiltering. Deze twin-filters zijn regenereerbaar en hebben periodiek onderhoud nodig. Standaard installatie met uitblaas naar buiten Na 30 bedrijfsuren van de afzuigunit, verschijnen ‘F’ en ‘G’ afwisselend in de display van de afzuigunit;...
- Page 21 GEBRUIKERSMENU In het gebruikersmenu kan de gebruiker de signaleringen van de kookplaat naar wens instellen. Het gaat hierbij om zowel akoestische (toon en volume) als visuele signaleringen. Menucode Beschrijving Configuratiewaarde Toont het ingestelde vermogen 7400 W (standaard) Aangesloten op een afvoerkanaal / 0: aangesloten op een afvoerkanaal Recirculatie modus (standaard)
- Page 22 VERMOGENSBEGRENZER Het instellen van de vermogensbegrenzer mag alleen worden uitgevoerd door een erkende en gekwalificeerde installateur. Lees de veiligheidsvoorschriften en de installatie-instructies zorgvuldig door. De kookplaat is voorzien van een vermogensbegrenzer. Als het totale vermogen van de actieve kookzones het maximaal beschikbare vermogen overschrijdt, wordt het vermogen automatisch verlaagd.
- Page 23 VERMOGENSBEGRENZER 5. Laat de eierwekkertoets los. ▷ “C” knippert afwisselend met “0” op het display van de kookzone links boven. De configuratiewaarde verschijnt op het display van de kookzone links onder. ▷ 6. Raak de kookzonetoets links boven aan en kies “8” met behulp van de schuifregelaar. ▷...
- Page 24 ONDERHOUD Filters en waterreservoir Om onderhoud/schoonmaak/verwijdering van de filters en het waterreservoir uit te voeren, drukt u de klep naar beneden op de punten die worden aangegeven in de volgende afbeelding. DIT ONDERHOUD MOET WORDEN UITGEVOERD MET DE AFZUIGING UIT. Waterreservoir •...
- Page 25 ONDERHOUD Twin-filters De gebruikte filters in deze kookplaat zijn gecombineerde filters voor vet- en geurfiltering. Deze twin-filters zijn regenereerbaar en hebben periodiek onderhoud nodig. • Na 30 werkuren, knipperen afwisselend ‘F’ en ‘G’ in de display van de afzuigunit; de twin- filters moeten gewassen worden.
- Page 26 PROBLEMEN OPLOSSEN Let op Wanneer u een barst in het glas ziet (hoe klein ook), schakelt u de kookplaat onmiddellijk uit en koppelt u deze los van het elektriciteitsnet. Neem contact op met de serviceafdeling. Als het toestel niet naar behoren werkt, betekent dit niet altijd dat het defect is. Probeer het probleem eerst zelf op te lossen door de onderstaande tabel te raadplegen.
- Page 27 PROBLEMEN OPLOSSEN Probleem Mogelijke oorzaak Oplossing ‘F’ en ‘G’ verschijnen Indicatie reiniging van de Onderhoud van de twin- afwisselend in de display van twin-filters. filters is noodzakelijk (zie de afzuigunit. ‘Onderhoud/Filters en waterreservoir). U hebt op twee of meer Bedien maar één toets Foutcode ER03.
- Page 28 TECHNISCHE SPECIFICATIES Technische gegevens Kookplaat Unit Waarde Producttype Ingebouwd Afmetingen Breedte Diepte Hoogte Spanning/frequentie V / Hz ~380-415V 50/60Hz ~220-240V 50/60Hz Vermogen 7400 Gewicht Afzuigunit Luchtstroom max* - Installatie met luchtuitlaat Geluidsniveau max* - Installatie met luchtuitlaat Vermogen afzuigunit * Maximale snelheid (zonder boost) Informatie volgens verordening (EU) 66/2014 Metingen volgens EN60350-2 Modelaanduiding...
- Page 29 MILIEUASPECTEN Verpakking en apparaat afdanken Bij de productie van dit apparaat is gebruik gemaakt van duurzame materialen. Dit apparaat moet aan het einde van zijn levenscyclus op verantwoorde wijze worden afgedankt. De overheid kan u hierover informatie verstrekken. De verpakking van het apparaat is recyclebaar. Mogelijk zijn de volgende materialen gebruikt: •...
- Page 30 CONTENTS Your induction hob Introduction Description Control panel Indications in the display Safety Temperature safety Cooking-time limiter Power management Before first use Use of the touch keys and slide control Induction noises Apropriate pans Pan detection Cooking levels Use of the downdraft Cooking guidelines Cleaning Operation of the hob...
- Page 31 CONTENTS Operation of the extractor unit Manually switching on and off the extractor unit Boost Switching on and off the automatic extraction mode Setting an automatic switch-off of the extraction Saturation of the twin filters Reset the memory of the filter saturation indication User menu Power limiter Maintenance...
-
Page 32: Your Induction Hob
YOUR INDUCTION HOB Introduction Congratulations on your choice of this appliance. This product was designed with simple operation and optimum comfort in mind. This manual describes the best way to use this appliance. In addition to information on operation, you will also find background information that may come in handy when using the appliance. -
Page 33: Description
YOUR INDUCTION HOB Description 1. Cooking zone octa 210 x 190 mm / 1.6 kW (boost 1.85 kW) 2. Connected bridge induction cooking zone 210 x 380 mm / 3.7 kW 3. Cooking zone octa 210 x 190 mm / 2,1 kW (Boost 3,0 kW) 4. -
Page 34: Control Panel
YOUR INDUCTION HOB Control panel 1. Pause key 2. Lock key 3. Keep warm key 4. Minute minder key 5. Timer display 6. Plus key timer 7. Minus key timer 8. Cooking zone key middle left (cooking zone display) and timer key 9. -
Page 35: Indications In The Display
YOUR INDUCTION HOB Indications in the display Cooking zone display Description Power level; 1 = low level / 9 = high level. Boost level active. No (suitable) pan on cooking zone (pan detection symbol). Residual heat indicator; The hob has a residual heat indicator for each cooking zone to show those which are still hot. -
Page 36: Safety
SAFETY Before use, read the separate safety instructions. Temperature safety A sensor continuously measures the temperature of certain parts of the hob. Every cooking zone is equipped with a sensor that measures the temperature of the bottom of the pan to avoid any risk of overheating when a pan boils dry. -
Page 37: Before First Use
BEFORE FIRST USE Use of the touch keys and slide control Place the tip of your finger flat on a key or the slide control to achieve the best results. You do not have to apply any pressure. The touch keys only react to the light pressure of a fingertip. Do not operate the controls with any other objects. -
Page 38: Pan Detection
BEFORE FIRST USE Minimum pan diameter • The minimum pan diameter per zone is as follows: Octa zone: minimum pan diameter 120 mm. ▷ • A pan used on connected Bridge induction cooking zones must have a diameter of at least 230 mm. -
Page 39: Cooking Guidelines
BEFORE FIRST USE Cooking guidelines Because the levels depend on the quantity and composition of the contents of the pan, the table below is intended as a guideline only. Use level ‘boost’ to: • bring the food or liquid to the boil quickly. Use level 9 to: •... -
Page 40: Operation Of The Hob
OPERATION OF THE HOB Please read the chapter ‘Before first use’ very carefully before you start cooking. This prevents incorrect use of the hob. For a proper use of the product, it is recommended to always turn on the air extraction during cooking. -
Page 41: Finish Cooking
OPERATION OF THE HOB Finish cooking 1. Set the power level to ‘0’ to switch off the cooking zone. 2. Switch off the induction hob by touching the On/off key. Symbol H will appear in the display of the cooking zone which is too hot to touch. The symbol disappears when the surface has cooled down to a safe temperature. -
Page 42: Connecting The Bridge Induction Cooking Zones
OPERATION OF THE HOB Connecting the Bridge induction cooking zones Two Bridge induction cooking zones can be connected to each other. This creates one large zone that can be used, for example, with a grill plate or a fish pan on the same power level. The pan must be large enough to cover the centres of the two left or the two right bridge induction cooking zones (at least 230 mm). -
Page 43: Using The Minute Minder
OPERATION OF THE HOB Using the minute minder The minute minder is not connected to a cooking zone. The minute minder does not switch off a cooking zone or the extractor unit. The hob is switched on and no power level has been set for any cooking zone. 1. -
Page 44: Child Safety Lock
OPERATION OF THE HOB All the cooking zones can have a cooking timer that has been set. The display will always show the time of the cooking zone with the shortest time remaining. Changing the pre-set cooking time The cooking time can be changed anytime during the operation. 1. -
Page 45: Locking Function For Rapid Cleaning During Cooking
OPERATION OF THE HOB To deactivate the child safety lock, the steps described must be completed within 10 seconds. 1. Switch on the hob. 2. Touch and hold any of the cooking zone keys for 3 seconds. 3. Release and slide your finger from 9 to 0 along the slide control. Locking function for rapid cleaning during cooking 1. - Page 46 OPERATION OF THE EXTRACTOR UNIT Manually switching on and off the extractor unit 1. Touch the extraction key. The display of the extractor unit lights up. ▷ 2. Set the extractor speed level within 3 seconds by touching the slide control (1 to 9). The extractor unit switches on with the extraction speed that is set.
- Page 47 OPERATION OF THE EXTRACTOR UNIT Power level Power level cooking zone extractor unit A cooking zone is operating (for example level 8) and the automatic extraction mode is active. 1. Touch the extraction key for three seconds. ‘A’ shows on the display; the automatic extraction mode is switched on. ▷...
- Page 48 OPERATION OF THE EXTRACTOR UNIT Saturation of the twin filters The used filters in this hob are combined filters for grease and odour filtering. These twin filters are regenerable and need periodical maintenance. Standard exhaust installation After 30 operating hours of the extraction unit, ’F’ and ‘G’ will be shown alternately in the display of the extraction unit;...
- Page 49 USER MENU The user menu enables the user to set the signals on the hob as desired. This concerns both audio (tone and volume) and visual signals. Menu code Description Configuration value Shows the set power 7400 W (default) Ducted mode / Recirculation mode 0: ducted mode (default) 1: recirculation mode Volume key sound 0 (off) - 1 - 2 - 3 max.
- Page 50 POWER LIMITER Setting the power limiter should only be carried out by a registered and qualified installer. Please read the safety regulations and the installation instructions carefully. The hob is equipped with a power limiter. If the total power of operating cooking zones exceeds the maximum available amount of power, the power is automatically reduced.
- Page 51 POWER LIMITER 5. Release the minute minder key. ▷ “C” is flashing alternately with “0” on the cooking zone display on the top left. The configuration value appears in the cooking zone display on the bottom left. ▷ 6. Touch the cooking zone key on the top left and choose “8” by using the slide control. ▷...
- Page 52 MAINTENANCE Filters and water collector To carry out maintenance/cleaning/removal of the filters and the water collector, press the flap downwards in the points indicated in the following figure. THIS MAINTENANCE MUST BE CARRIED OUT WITH THE SUCTION OFF. Water collector •...
- Page 53 MAINTENANCE Twin filters The used filters in this hob are combined filters for grease and odour filtering. These twin filters are regenerable and need periodical maintenance. • After 30 operating hours, ’F’ and ‘G’ will be shown alternately in the display of the extraction unit;...
- Page 54 TROUBLESHOOTING Attention If you see a crack in the glass top (however small), switch off the hob immediately and disconnect it from the power mains. Contact the service department. If the appliance does not work properly, this does not always mean that it is defective. Try to deal with the problem yourself first by checking the table below.
- Page 55 TROUBLESHOOTING Symptom Possible cause Solution You have pressed two or more Do not operate more than one Error code ER 03. keys at the same time. key at the same time. The control panel is dirty or Clean the control panel. has water lying on it.
- Page 56 TECHNICAL SPECIFICATIONS Technical data Unit Value Pruduct type Built-in Dimensions Width Depth Height Power supply voltage/frequency V / Hz ~380-415V 50/60Hz ~220-240V 50/60Hz Power 7400 Weight Extraction unit Airflow max* - Exhaust installation Noise max* - Exhaust installation Extraction unit power * Maximum speed (boost excluded) Information according regulation (EU) 66/2014 Measurements according EN60350-2...
- Page 57 ENVIRONMENTAL ASPECTS Disposal of packaging and appliance In the manufacturing of this appliance durable materials were used. Make sure to dispose of this equipment responsibly at the end of its lifecycle. Ask the authorities for more information regarding this. The appliance packaging is recyclable. The following may have been used: •...
- Page 58 INSTALLATIE / INSTALLATION B ela n g r i j k ! L e e s d e ze i n s tr u c ti e vo or ge b ru i k ! I mpo r t a nt! Re a d th e s e i n s tr u c ti o n s b e fore u s e ! Achtung! Lesen Sie diese Anweisungen für den Einsatz! I mpo r t a nt! L i s e z c e s i n s tr u c ti o n s p ou r l ’...
- Page 59 INSTALLATIE / INSTALLATION 3N 380-415V 50/60Hz - 3x 16A 3N 380-415V 50/60Hz - 3x 16A 3 fase - 1 nul 3 phases - 1 neutral 3 fase - 1 nul 3 Phasen - 1 Nullanschluss 3 phases - 1 neutral 3 phases et 1 neutre 3 Phasen - 1 Nullanschluss 3 phases et 1 neutre...
- Page 60 INSTALLATIE / INSTALLATION Vrije ruimte rondom het toestel / Free space around appliance A (mm) min. 500 B (mm) min. 40 C (mm) min. 32,5 Min.133 Max.233 504-604 600-700 >600 HD2003 r 20 HD1001 r 20 Min.133 HD2014 Max.233 504-604 HD2015 >25 HF4004...
- Page 61 INSTALLATIE / INSTALLATION >55 600-700 Front Top glass Top glass X= b Inst.A 50mm Inst.A (>25mm) Top glass Inst.B X=5mm center of the cabinet center of the hole Top glass Inst.B center of th center of the hole center of the hole center of the cabinet center of center of the cabinet...
- Page 62 INSTALLATIE / INSTALLATION O 45 center of the cabinet center of the hole center of the cabinet center of the hole...
- Page 63 INSTALLATIE / INSTALLATION...
- Page 64 INSTALLATIE / INSTALLATION...
- Page 65 INSTALLATIE / INSTALLATION...
- Page 66 INSTALLATIE / INSTALLATION Min. 200 cm...
- Page 67 INSTALLATIE / INSTALLATION • De gebruikte filters (X) in deze kookplaat zijn gecombineerde filters voor vet- en geurfiltering. Deze filters zijn regenereerbaar (zie ‘Onderhoud/Filters en waterreservoir’). • The used filters (X) in this hob are combined filters for grease and odour filtering. These filters are regenerable (see ‘Maintenance/Filters and water collector’).
- Page 68 When contacting the service department, have the complete type number to hand. Adressen en telefoonnummers van de serviceorganisatie vindt u op de garantiekaart. You will find the addresses and phone numbers of the service organisation on the guarantee card. www.pelgrim.nl www.pelgrim.be 927612...
Need help?
Do you have a question about the IKR4092 Series and is the answer not in the manual?
Questions and answers