Table of Contents
Advertisement
Available languages
Available languages
Quick Links
USA office: Fontana
AUS office: Truganina
GBR office: Ipswich
DEU office: FDS GmbH, Neuer Höltigbaum 36, 22143 Hamburg, Deutschland
If you're having difficulty, our friendly
customer team is always here to help.
ITA office: Milano
POL
FRA office: Saint Vigor d'Ymonville
USA:cs.us@costway.com
POL:sklep@costway.com
AUS:cs.au@costway.com
DEU:cs.de@costway.com
GBR:cs.uk@costway.com
FRA:cs.fr@costway.com
I T A :cs.i t @costway.com
ESP:cs.es@costway.com
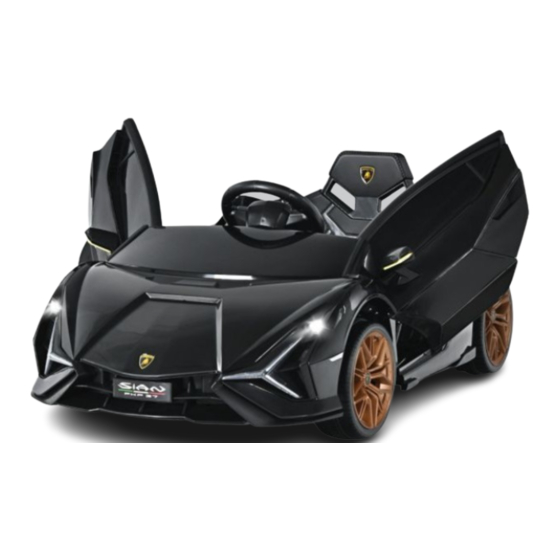
Lamborghini Ride On Car
Lamborghini Kinder Elektroauto
Voiture Électrique pour Enfants
Coche Eléctrico para Niños
Lamborghini Auto Elettrica per Bambini
Samochodzik elektryczny Lamborghini dla dzieci
TQ10069
THIS INSTRUCTION BOOKLET CONTAINS IMPORTANT SAFETY INFORMATION. PLEASE READ AND KEEP FOR FUTURE REFERENCE.
Advertisement
Table of Contents

Subscribe to Our Youtube Channel
Related Manuals for Costway TQ10069


Summary of Contents for Costway TQ10069
- Page 1 USA:cs.us@costway.com POL:sklep@costway.com If you're having difficulty, our friendly AUS:cs.au@costway.com DEU:cs.de@costway.com customer team is always here to help. GBR:cs.uk@costway.com FRA:cs.fr@costway.com I T A :cs.i t @costway.com ESP:cs.es@costway.com THIS INSTRUCTION BOOKLET CONTAINS IMPORTANT SAFETY INFORMATION. PLEASE READ AND KEEP FOR FUTURE REFERENCE.
-
Page 2: Before You Start
Lamborghini Sián Children electric car Installation and operation instructions Simulation car model System driven by remote control Forward, backward and steering operations by remote control Before You Start Forward and backward operations by manual shift Steering wheel with music function Techniques of volume regulation and MP3 amplification function Please read all instructions carefully and keep it for future reference. - Page 3 Parts List:(Name and Quantity) Chair Steering wheel Windshield M8 Nut Rearview mirror Shim Rear wheel Shim Wheel cover Front wheel M8 Nut Shim Product Specifications: Name Parameters Battery 12V4.5AHx1 Drive Motor 12V390(18000RPM)x2 Steering Motor 12V380(5600RPM)x1 Applicable Age Range 37-95 months Maximum Load 25 KG / 55 LBS Name...
- Page 4 Function Remote Control Function and Instructions • Never switch forward and backward operations in motion, or the gear box and motor will be damaged. • Use the remote control with battery. • Only the baby’s legal guardian can use the remote control. •...
- Page 5 Installation Order Diagram Installation Order Diagram 1. Install the wheels 2. Install the steering wheel First distinguish the front and rear wheels. Successively fix gasket, front Connect the wiring of the steering wheel, turn the steering wheel to the wheel, gasket, then lock with the M8 nut. The rear wheel and the gasket steering control lever and clamp it in firmly.
- Page 6 Installation Order Diagram Warnings Only adults can install parts and adjust the car, and keep moving 4. Connect the power cord parts out of children’s reach. Connect the power cord to Children under 36 months cannot use the toy car as it has many the battery.
- Page 7 Warnings Charging notice Notice of use: Charge storage battery less than 18 hours, or the storage battery Never use the product in such dangerous zones as street, road, will be damaged forever. slope or drain. When charging, insert the DC plug into the power socket and the Never change the circuit and additional electric devices.
-
Page 8: Trouble Clearing
Trouble Clearing Maintenance and Service • It is parents' responsibility to check the main parts of the toy before Type Analysis Solutions use. Must regularly examine for potential hazards, such as the battery, charger, cable or cord, plug, screws. If any part is damaged, do not Low battery voltage;... -
Page 9: Bevor Sie Beginnen
Lamborghini Sián Kinder Elektroauto Installations- und Betriebsanleitung Stimulationsauto-Modells System mit Fernsteuerung Vorwärts, rückwärts und Lenkung per Fernbedienung Vorwärts- und Rückwärtsfahrt durch manuelle Schaltung Bevor Sie beginnen Lenkrad mit Musikfunktion Techniken der Lautstärkeregelung und MP3-Verstärkungsfunktion Batteriestandsanzeige Bitte sorgfältig lesen und zum späteren Nachschlagen aufbewahren. Warnung Achtung! Müssen Persönliche Schutzausrüstung tragen . - Page 10 Teileliste:(Name und Menge) Sitz Lenkrad Windschutzscheibe Rückspiegel Unterlegscheibe Hinterrad M8 Mutter Unterlegscheibe Radabdeckung Vorderrad M8 Mutter Unterlegscheibe Produktspezifikationen: Name Parameter Batterie 12V4.5AHx1 Antriebsmotor 12V390(18000RPM)x2 Steuermotor 12V380(5600RPM)x1 Anwendbar Alter 37-95 Monate Maximale Belastung 25KG Name Karosserie Vorderrad Hinterrad Radabdeckung Menge Größe 108x62x40CM Geschwindigkeit 3-5 KM/Std.
- Page 11 Funktion Funktion und Anweisungen der Fernbedienung • Schalten Sie niemals während der Fahrt zwischen Vorwärts- und Rückwärtsfahrt um da sonst das Getriebe und der Motor beschädigt werden. • Verwenden Sie die Fernbedienung mit Batterie. • Nur der Erziehungsberechtigte des Kindes darf die Fernbedienung benutzen.
- Page 12 Montagezeichnung Montagezeichnung 1. Montage der Räder 2. Montage des Lenkrads Zuerst die Vorder- und Hinterräder unterscheiden. Dichtung, Vorderrad, Schließen Sie die Verkabelung des Lenkrads an, drehen Sie das Lenkrad Dichtung nacheinander befestigen, dann mit M8-Mutter sichern. Das auf den Lenkhebel und klemmen Sie es fest ein. Hinterrad und die Dichtung werden der Reihe nach befestigt und dann mit einer M8-Mutter arretiert.
- Page 13 Montagezeichnung Warnungen Nur Erwachsene dürfen Teile montieren und das Auto einstellen, 4. Anschließen des Netzkabels und halten Sie bewegliche Teile außerhalb der Reichweite von Schließen Sie das Netzkabel Kindern. an die Batterie an. Kinder unter 36 Monaten können das Spielzeugauto nicht benutzen, Schalten Sie dann das Gerät da es viele kleine Teile hat.
- Page 14 Warnungen Hinweis zur Aufladung Hinweis zur Verwendung: Die Ladezeit des Akkus darf 18 Stunden nicht überschreiten, sonst wird der Akku für immer beschädigt. Verwenden Sie den Artikel niemals in gefährlichen Bereichen wie Straßen, Abhängen oder Abflüssen. Stecken Sie beim Aufladen den DC-Stecker in die Steckdose und Ändern Sie niemals den Stromkreis und zusätzliche elektrische das Ladegerät in den Netzstecker.
-
Page 15: Problembehandlung
Problembehandlung Wartung und Service Problem Mögliche Ursache Lösung • Es liegt in der Verantwortung der Eltern, die wichtigsten Teile des Spielzeugs vor dem Gebrauch zu überprüfen. Es muss regelmäßig auf mögliche Gefahren untersucht werden, wie z. B. die Batterie, das Lade die Batterie auf: 1, Batterie leer;... -
Page 16: Avant De Commencer
Lamborghini Sián Voiture électrique pour enfants Instructions d'assemblage et d'utilisation Modèle d'imitation de voiture Système contrôlé par télécommande Contrôles de marche avant, de marche arrière et de virage par télécommande Avant de Commencer Contrôles de marche avant et arrière par changement de vitesse manuel Volant avec fonction musicale Réglage du volume et fonction MP3 Affichage de la puissance de la batterie... - Page 17 Liste des pièces : (Nom et quantité) Siège Volant Pare-brise Écrou M8 Rétroviseur Rondelle Roue arrière Rondelle Enjoliveur Roue avant Écrou M8 Rondelle Spécifications du produit : Paramètres Batterie 12V4,5AHx1 Moteur d’entraînement 12V390(18000RPM) x2 Moteur de direction 12V380(5600RPM) x1 Âge applicable 37-95 mois N°...
-
Page 18: Utilisation Des Piles
Fonction Fonction et instructions de la télécommande déplacement, sinon la boîte de vitesses et le moteur seront endommagés. adultes. Vitesse Arrêt Marche Méthode de connexion : avant Maintenez enfoncé le bouton de marche avant et arrière pendant 3 secondes pour commencer la connexion, la première LED clignote ;... - Page 19 Schéma de l’ordre de l’assemblage Schéma de l’ordre de l’assemblage 1. Installer les roues 2. Installer le volant Distinguez d'abord les roues avant et arrière. Fixez successivement la Connectez la poignée de câblage du volant, tournez le volant vers le levier rondelle, la roue avant, la rondelle, puis bloquez avec l'écrou M8.
- Page 20 Schéma de l’ordre de l’assemblage Avertissements Seuls les adultes peuvent installer des pièces et régler la voiture, 4. Brancher le cordon d’alimentation et gardez les pièces mobiles hors de portée des enfants. Branchez le cordon Les enfants de moins de 36 mois ne peuvent pas utiliser la d’alimentation à...
- Page 21 Avertissements Avis de charge Avis d'utilisation : Chargez la batterie moins de 18 heures, sinon la batterie sera endommagée. N'utilisez jamais le produit dans des zones dangereuses telles que Lors de la charge, insérez la fiche DC dans la prise de courant et le la rue, la route, la pente ou le drain.
-
Page 22: Dépannage
Dépannage Entretien Panne Cause possible Solutions • Il est de la responsabilité des parents de vérifier les principales pièces du jouet avant de l'utiliser. Il faut examiner régulièrement les risques 1. Faible tension de la 1. Chargez complètement potentiels, tels que la batterie, le chargeur, le câble ou le cordon, la fiche, les vis. -
Page 23: Antes De Empezar
Lamborghini Sián Coche eléctrico para niños Instrucciones de montaje y operación Simulación de modelo de coche Sistema accionado por control remoto Operaciones de avance, retroceso y dirección por control remoto Operaciones de avance y retroceso por cambio manual Antes de Empezar Volante con función de música Técnicas de regulación de volumen y función de amplificación de MP3 Indicación de la potencia de la batería... - Page 24 Lista de Piezas: (Nombre y Cantidad) Asiento Volante Parabrisas Espejo retrovisor Arandela Tuerca M8 Rueda trasera Arandela Tapacubos Rueda delantera Tuerca M8 Arandela Especificaciones del Producto: Nombre Parámetros Batería 12V4,5AH x1 Motor de Accionamiento 12V390 (18000RPM) x2 Motor de Dirección 12V380 (5600RPM) x1 Edad Aplicable 37-95 meses...
- Page 25 Función Función e Instrucciones del Control Remoto • Nunca cambie las operaciones de avance y retroceso en el movimiento, o la caja de cambios y el motor se dañarán. • Utilice el control remoto con pilas. • Sólo el tutor legal del bebé puede utilizar el control remoto. •...
- Page 26 Diagrama de Orden de Montaje Diagrama de Orden de Montaje 1. Instalar las ruedas 2. Instalar el volante Primero distinga las ruedas delanteras y traseras. Fije sucesivamente la Conecte el cableado del volante, gire el volante a la palanca de control de arandela, la rueda delantera, la arandela, y luego bloquee con la tuerca dirección y sujételo firmemente.
- Page 27 Diagrama de Orden de Montaje Advertencias Solo los adultos pueden instalar las piezas y ajustar el coche. Mantenga 4. Conectar el cable de alimentación las piezas móviles fuera del alcance de los niños. Conecte el cable de Los niños menores de 36 meses no pueden utilizar el coche de alimentación a la batería.
- Page 28 Advertencias Aviso de Carga Aviso de Uso: Cargue el acumulador menos de 18 horas, o el acumulador se dañará para siempre. Nunca utilice el producto en zonas peligrosas como calles, carreteras, Durante la carga, inserte la clavija de CC en la toma de corriente y pendientes o desagües.
- Page 29 Guía para Resolver Problemas Mantenimiento • Es responsabilidad de los padres comprobar las piezas principales Problema Causa posible Solución del juguete antes de utilizarlo. Deben examinar periódicamente los posibles peligros, como la batería, el cargador, el cable o cordón, el 1.
-
Page 30: Prima Di Iniziare
Lamborghini Auto Elettrica per Bambini Istruzioni per l'installazione e il funzionamento Simulazione modello di auto Sistema guidato dal telecomando Operazioni di marcia avanti, indietro e di sterzo tramite telecomando Volante con funzione musicale Prima di Iniziare Tecniche di regolazione del volume e funzione di amplificazione MP3 Visualizzazione della potenza della batteria Si prega di leggere attentamente tutte le istruzioni e conservarle per riferimento futuro. - Page 31 Lista delle Parti: (Nome e Quantità) Sedile Volante Parabrezza Specchio retrovisore Rondella Ruota posteriore M8 Dado Rondella Cerchione Ruota anteriore M8 Dado Rondella Specifiche del prodotto: Nome Parametri Batteria 12V4.5AHx1 Motore guidato 12V390(18000RPM)x2 Motore dello sterzo 12V380(5600RPM)x1 Età consigliata 37-95 mesi Carico massimo 25KG Carrozzeria...
- Page 32 Funzione Funzione e Istruzioni del Telecomando scatola degli ingranaggi e il motore saranno danneggiati. Stop Velocità Metodo del codice: Avanti Tenere premuto il pulsante Avanti e Indietro per 3 secondi per avviare il codice di corrispondenza, il primo LED lampeggia; Accendere ora l'alimentazione dell'auto.
- Page 33 Diagramma dell’Ordine di Montaggio Diagramma dell’Ordine di Montaggio 1. Installare le ruote 2. Installare il volante Primo a distinguere le ruote anteriori e posteriori. Successivamente fissare Collegare il cablaggio del volante, girare il volante sulla leva di comando guarnizione, ruota anteriore, guarnizione, quindi bloccare con il dado M8. dello sterzo e bloccarlo saldamente.
- Page 34 Diagramma dell’Ordine di Montaggio Avvertenza Solo gli adulti possono installare parti e regolare l'auto e tenere le parti 4. Collegare il cavo di alimentazione mobili fuori dalla portata dei bambini. Collegare il cavo di I bambini di età inferiore a 36 mesi non possono utilizzare la macchina alimentazione alla batteria.
- Page 35 Avvertenza Istruzioni per la Ricarica Avviso di utilizzo: Caricare l'accumulatore per meno di 18 ore, altrimenti l'accumulatore sarà danneggiato per sempre. Non utilizzare mai il prodotto in zone pericolose come strade, pendii Durante la ricarica, inserire la spina CC nella presa di corrente e il o scarichi.
-
Page 36: Risoluzione Dei Problemi
Risoluzione dei Problemi Manutenzione e Assistenza Problema Causa possibile Soluzione giocattolo prima dell'uso. È necessario esaminare regolarmente la 1. Bassa tensione della 1. Caricare presenza di potenziali pericoli, come la batteria, il caricabatterie, il batteria; completamente la cavo o la corda, la spina, le viti. Se una parte è danneggiata, non 2. -
Page 37: Zanim Zaczniesz
Lamborghini Sián Elektryczny samochodzik dla dziecka Zanim Zaczniesz Kierownica z funkcjami muzycznymi Uwaga! Uwaga! Uwaga! ulicznym. - Page 38 Siedzisko Kierownica Przednia szyba Lusterko Specyfikacja: Nazwa Parametry Akumulator 12V4.5AHx1 12V390(18000RPM)x2 Silnik wspomagania kierownicy 12V380(5600RPM)x1 Dla dzieci w wieku 3 - 8 lat 25KG Wymiary 108x62x40CM Korpus Nazwa 3 - 5 km/h Nazwa Kierownica Przednia szyba Siedzisko Lusterko Pilot zdalnego sterowania Klucz Nazwa Baterie pilota...
- Page 39 Funkcje pojazdu Przycisk zatrzymania pojazdu Kodowanie: Przycisk jazdy Przytrzymaj przycisk jazdy w w przód przez 3 sekundy, aby LED miga. Przycisk w prawo w lewo Wykaz funkcji Multimedia jazdy w przód/ stop akumulatora Deska rozdzielcza Nie zwieraj styków akumulatora.
- Page 40 Powtórz z drugiej strony. zamocuj.
- Page 41 akumulatora. Zamontuj siedzisko w odpowiednim miejscu w Produkt jest odpowiedni dla dzieci w wieku 3-8 lat. miejscach w korpusie pojazdu...
- Page 42 wodnych. godzin. Trzymaj produkt z dala od ognia. normalnym zjawiskiem. zestawie. czas. Typ akumulatora Nomenklatura chemiczna 6FM4.5 oddzielnie.
-
Page 43: Utrzymanie I Konserwacja
Utrzymanie i konserwacja Problem Przyczyna akumulatora; akumulator; Odczekaj kilka minut; dala od ognia. Przechowuj na równej powierzchni, w Pojazd nie elektrycznych; ; ; poprawnie; ; ; Awaria akumulatora; ; elektrycznych; ; Awaria generatora; chemicznych, ani wody. Akumulator poprawnie; ; poprawnie; ;... - Page 44 Channel Working Frequency Channel Working Frequency Channel Working Frequency Channel Working Frequency Kanal Arbeitsfrequenz Kanal Arbeitsfrequenz Kanal Arbeitsfrequenz Kanal Arbeitsfrequenz Chaîne Fréquence de Travail Chaîne Fréquence de Travail Chaîne Fréquence de Travail Chaîne Fréquence de Travail Canal Frecuencia de Funcionamiento Canal Frecuencia de Funcionamiento Canal...
- Page 45 In case a return is required, the item must be returned in original box. Without this your return will not be accepted. Take a photo of the box markings. A photo of the markings (text) on the side of the box is required in case a part is needed for replacement.
- Page 46 Dans le cas où un retour est requis, l'article doit être retourné dans sa boîte Nel caso in cui sia richiesto un reso, l'articolo deve essere restituito nella scatola d'origine. Sans cela, votre retour ne sera pas accepté. originale. Senza la scatola originale il tuo reso non sarà accettato. Prenez une photo des marquages de la boîte.
Need help?
Do you have a question about the TQ10069 and is the answer not in the manual?
Questions and answers