Advertisement
Quick Links
Advertisement

Related Manuals for Mount-It! MI-7979W

Summary of Contents for Mount-It! MI-7979W
- Page 1 User Manual MI-7979W Please scan this QR code to visit the product page MOBILE COMPUTER WORKSTATION...
- Page 2 Thank you for choosing Mount-It Read the entire instruction manual before you start installation and assembly. If you have any questions regarding any of the instructions or warnings, please contact Mount-It! for assistance. CAUTION: Use with products heavier than the rated weights indicated may result in instability causing possible injury. •...
- Page 3 PACKAGE CONTENTS DESKTOP KEYBOARD TRAY KEYBOARD TRAY BRACKETS DESKTOP BRACKET HEIGHT ADJUSTABLE COLUMN BASE H (x1) I (x2) PC MOUNT 1/2 PC MOUNT 2/2 POLE BRACKET J (x1) K (x1) L (x2) STORAGE SHELF STORAGE SHELF BRACKET PC STRAPS HARDWARE CONTENTS M (x3) N (x4) O (x11)
-
Page 4: Step 1 Install The Wheels
Step 1 Install the Wheels Turn the Base (#F) upside down and install the 4 Casters (#X, Y). The Locking Casters (#X) should be installed on the longer end of the legs as shown here. Tighten them until secure using Wrench (#S). Front Step 2 Attach the Desktop Bracket... -
Page 5: Step 4 Install The Base
Step 3 Attach the Column to the Desktop Turn the Desktop (#A) upside down and carefully place the Height Adjustable Column (#E) on top of it, aligning the holes on the two parts. Attach using Bolts (#O) and Hex Wrench (#T), tighten until secure. - Page 6 Step 5 Attach the Keyboard Brackets Attach the Keyboard Tray Brackets (#C) to the bolt holes on the underside of the Keyboard Tray (#B) as shown, using the Bolts (#R). Step 6 Attach the Keyboard Brackets Attach the Keyboard Tray Brackets to the bolt holes on the underside of Desktop (#A), using Bolts (#P) and Hex Wrench (#T).
- Page 7 Step 7 Install the Lower Shelf and PC Mount Turn the Storage Shelf (#J) over and install the Storage Shelf Bracket (#K) Connect the two halves of the using Bolts (#P) and Hex Wrench (#T). PC Mount using Washers (#W) and Wing Nuts (#V).
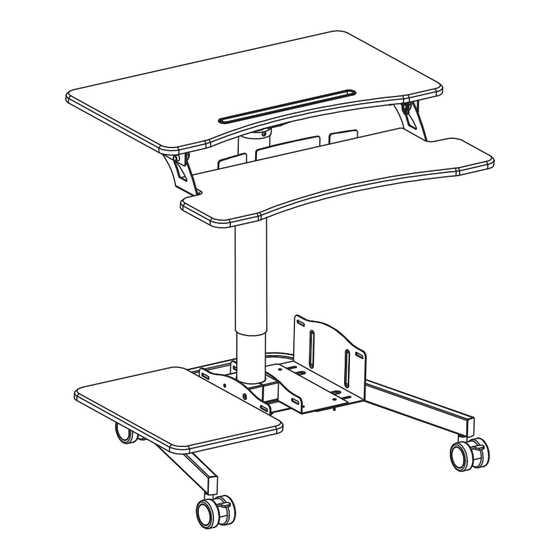
- Page 8 Step 8 Place Items on the Desk Place all monitors, laptops, or other equipment on the desk. Ensure none of the equipment is hanging off the edge or otherwise unstable/unbalanced. Pull and hold the lever to raise and lower the height of the workstation. The PC may be secured into the PC Mount using the PC Straps (#L).
Need help?
Do you have a question about the MI-7979W and is the answer not in the manual?
Questions and answers