Advertisement
Available languages
Available languages
Quick Links
RTA Desk Assembly Instructions
Before you begin:
Open, identify, and count all parts prior to assembly. Two people are required to safely assemble.
Hardware
(14) Hex Screw
(2) Locking Wheels
(1) Allen Key
Attach Legs to Desktop:
1.
Align top screw holes in Leg with the screw holes in the
Top Panel. Figure 1
2.
Insert (2) Hex Screws through the screw holes for both
the Leg and Top Panel, and hand tighten a Nut and
Small Spring Washer onto each Hex Screw. Figure 2
3.
Tighten the Nuts onto the Hex Screws using the
supplied Wrench and Allen Key.
4.
Repeat steps 1 through 3 to attach the remaining
(3) Legs to the Top Panel. 5.
Figure 2
Hex Nut
Small Spring
Washer
Allen Key
Hex Screw
12/20
For parts please visit www.hirshindustries.com. For assembly assistance, please call 1-800-383-7414.
(14) Hex Nuts
(14) Small Spring
Washers
(2) Wheels
(4) Large
Spring Washers
(1) Wrench
Wrench
Read all instructions and review illustration
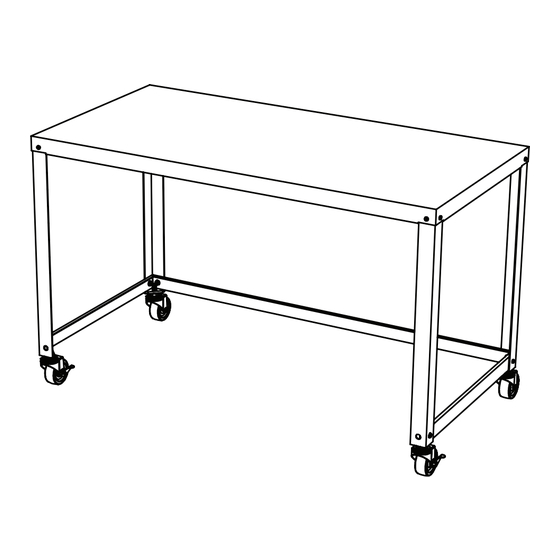
Components
(4) Legs
(2) Side Brace
Figure 1
Front
Right
Leg
Desktop
(1) Desktop
(1) Back Brace
Back Legs
Front
Left
Leg
1/6
Advertisement

Related Manuals for hirsh industries HIR-21113


Summary of Contents for hirsh industries HIR-21113
- Page 1 RTA Desk Assembly Instructions Read all instructions and review illustration Before you begin: Open, identify, and count all parts prior to assembly. Two people are required to safely assemble. Hardware Components (14) Hex Screw (14) Hex Nuts (14) Small Spring Washers (1) Desktop (4) Legs...
-
Page 2: Attach Wheels
Attach Side and Back Braces: Side Brace x2 Figure 3 Back Brace Align bottom screw holes in Leg with the screw holes in the Side Brace. Figure 3 Insert (2) Hex Screws through the screw holes for both the Leg and Side Brace, and hand tighten a Nut and Small Spring Washer onto each Hex Screw. -
Page 3: Avant De Commencer
Instructions d’assemblage du bureau RTA Lisez toutes les instructions et passez en revue les illustrations avant tout assemblage. Avant de commencer : Ouvrez, identifiez et comptez toutes les pièces avant d’assembler. Deux personnes sont nécessaires pour un assem- blage en toute sécurité. Matériel Composants (14) Vis à... - Page 4 Illustration 3 Fixer les renforts latéraux et arrière : Renfort latéral x2 Renfort arrière Aligner les trous de vis inférieurs du pied avec les trous de vis du renfort latéral. Illustration 3 Insérez deux (2) vis à tête hexagonale à travers les trous de vis des pieds et des renforts latéraux et serrez à...
-
Page 5: Antes De Que Comience
Instrucciones de Montaje del Escritorio Listo para Armar (RTA, por sus siglas en inglés) Lea todas las instrucciones y revise las ilustraciones antes del montaje. Antes de que comience: Abra, identifique y cuente todas las piezas antes del montaje. Se requieren dos personas para montarlo de forma segura. - Page 6 Colocar los Refuerzos Laterales y Posteriores: Figura 3 Refuerzo Lateral x2 Refuerzo Alinee los orificios de los tornillos inferiores de la Pata con los Posterior orificios para los tornillos en el Refuerzo Lateral. Figura 3 Inserte los tornillos hexagonales (2) a través de los orificios de los tornillos tanto para la Pata como para el Refuerzo Lateral, y apriete a mano una Tuerca y una Arandela de Presión Pequeña en cada Tornillo Hexagonal.
Need help?
Do you have a question about the HIR-21113 and is the answer not in the manual?
Questions and answers