
Related Manuals for PTZOptics Move SE


Summary of Contents for PTZOptics Move SE
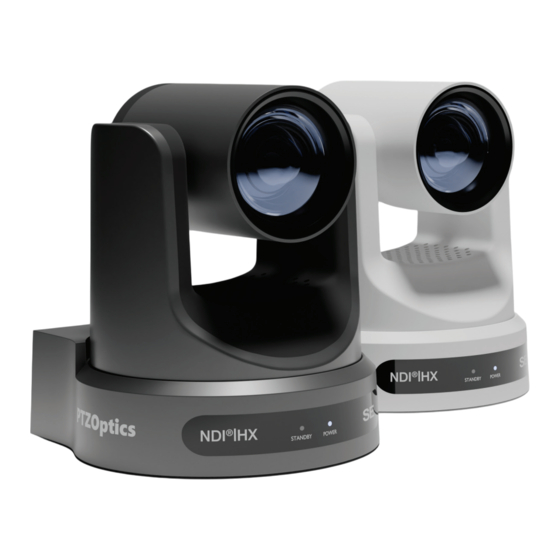
- Page 1 ™ PTZOptics Move SE Quick Start Guide MODEL No. PT12X-SE-GY-G3, PT12X-SE-WH-G3 PT20X-SE-GY-G3, PT20X-SE-WH-G3 PT30X-SE-GY-G3, PT30X-SE-WH-G3 ptzoptics.com II 1-800-486-5276 v3.0 2024-04-10...
-
Page 2: Table Of Contents
Starting the Move SE for the First Time ....... 6... -
Page 3: Preface
▪ Never operate outside of the specified operating temperature range or humidity. ▪ The power supply included in the box is the only power supply to be used with this camera. If this power supply needs to be replaced, please vist ptzoptics.com/ where-to-buy/ ▪... -
Page 4: Warranty
PTZOptics includes a limited parts & labor warranty for all PTZOptics manufactured cameras. The warranty is valid only if PTZOptics receives proper notice of such defects during the warranty period. PTZOptics, at its option, will repair or replace products that prove to be defective. -
Page 5: Fcc Statement
Users will no longer need to download and install license key to ugrade Move SE camera models to NDI. ALL current Move SE users will be able to ugrade their cameras for free through the upcoming firmware update scheduled for mid April 2024. -
Page 6: Packing List
Ŝ Quick Start Guide Ŝ IR Remote Ŝ 2 AA Batteries Powering the Move SE Your camera can be powered through DC power (with the included adapter) or Power over Ethernet (with a switch or router rated for 802.3af). v3.0 2024-04-10... -
Page 7: Starting The Move Se For The First Time
™ Starting Your Camera for the First Time Your new camera has many options for connecting, powering, controlling, and streaming. This Quick Start Guide will help you understand how to use each of these different options. 1. Refer to the Table of Contents on page 1 to find the various options available for your camera. 2. -
Page 8: Connection Guide
™ Connection Guide 1. To start your camera, please connect the power adapter to the DC-12V power connector port on the back of the camera, ensuring all connections are correct and secure. 2. The power indicator on the front panel of the camera will illuminate. 3. - Page 9 HDMI Connection, 3G-SDI Connection, USB Connection • HDMI Connection Ŝ To get the best results from the HDMI outout, PTZOptics recommends the cable legnth used be no longer than 25 ft for 1080p resolutions. The HDMI output has a maximum resolution and framerate of 1920x1080p @ 60 FPS.
-
Page 10: Resolution Dial
™ System Select Resolution Dial Resolution Dial HDMI 1080p 60 1080p 30 1080p 50 1080p 30 1080p 30 1080p 59.94 1080p 30 1080p 30 720p 60 1080p 29.97 720p 50 1080p 30 1080p 30 1080p 30 1080p 25 1080p 30 v3.0 2024-04-10... -
Page 11: Connecting The Move Se To Your Network
™ Connecting the Move SE to Your Network Upon connecting to your nework, the Move SE will automatically be assigned an IP address. If the network cannot assign an IP address, the camera will default to “192.168.100.88”. If you cannot find the camera’s IP address, please try one of the following two methods to obtain it. -
Page 12: Ir Remote Controller Guide
™ IR Remote Controller Guide... - Page 13 ™ 1. Standby Button Press this button to enter standby mode. Press it again to enter normal mode. Note: Power consumption in standby mode is approxinately half of the normal mode. 2. Number Keys Press to set or call preset camera position or input a number. 3.
- Page 14 ™ 11. # Button For multiple functions. Typically used when calling shortcuts 12. Multiple Function Buttons. Function 1: Auto Tracking Control ▪ [F1]: Enable video-based auto-framing (nonfunctional) ▪ [F2]: Enable audio-based auto-tracking (nonfunctional) ▪ [F3]: Enable video-based auto-tracking ▪ [F4]: Disable auto-tracking Function 2: For setting camera IR address.
-
Page 15: Resetting Your Camera's Ip Address
™ 18. Shortcut Functions [*] > [#] > [1]: Display OSD menu in English [*] > [#] > [3]: Display OSD menu in Chinese [*] > [#] > [4]: Show IP address [*] > [#] > [6]: Quickly restore the default settings [*] >... -
Page 16: Web Ui
Web UI To access the Web UI 1. Enter “http:/ /ptzoptics.local/” or the camera’s IP address into a web browser. 2. Enter the username and password into the login fields. Both the username and password are “admin” by default. You can change the login credentials on the System Settings pag •... -
Page 17: Using Auto Tracking
• The Move SE’s auto-tracking leverages a feature called Presenter Lock. This allows the Move SE to lock onto a specific presenter and track them even with other participants in the background. -
Page 18: Rtsp Streaming, Rtmp Streaming
™ RTSP Streaming, RTMP Streaming • RTSP Streaming Your camera is able to send two (2) RTSP streams for viewing video through your LAN. You can view these streams typically through live streaming software and typing in the following strings: Ŝ... -
Page 19: Control Options
™ Control Options PTZOptics offers a wide range of methods for controlling your cameras. Check out the list below, or visit https:/ /ptzoptics.com/applications/ for available tools: • Web UI The updated Web UI offers just about everything you’ll need. You have access to PTZ &... - Page 20 ™ • Documentation Need more information about your specific camera? Read the camera’s User Manual at https:/ /ptzoptics.com/product-documentation/...
Need help?
Do you have a question about the Move SE and is the answer not in the manual?
Questions and answers
With the PTZ Optics Move SE Camera and the HC-JOY-64 Controller, what is the best way to control this camera at a distance of about 150 feet. Is the RS-232 going to make that distance?