Advertisement
Available languages
Available languages
Quick Links
NM-ISW1
Shim washers for improving contact quality and
performance on LGA1700
Adding 1mm shim washers underneath the LGA1700
socket's ILM (Independent Loading Mechanism) will
lower the pressure that the ILM exerts onto the CPU and
thereby reduce the deformation that occurs due to this
pressure. With the CPU being deformed less, the contact
between the CPU and medium or low base convexity
heatsinks (standard and LBC version) will improve,
which can yield typical temperature improvements
of around 2-3°C. CPUs that have been used with full
ILM pressure for longer periods of time may also see
slight improvements with high base convexity (HBC
version) coolers. For further information, please visit
www.noctua.at/lga1700-ilm-mod
Caution: Using shim washers or so-called contact frames
in order to reduce ILM pressure on LGA1700 sockets has
become common practice. It is generally safe if you follow
the procedure detailed below and there is no indication
of negative long-term effects. However, it must be noted
that any such modification to the socket is entirely at the
user's own risk. Noctua cannot be held responsible for
any damage that may occur when or due to adding the
supplied shim washers.
Please follow this procedure to install the NM-ISW1
washers:
1
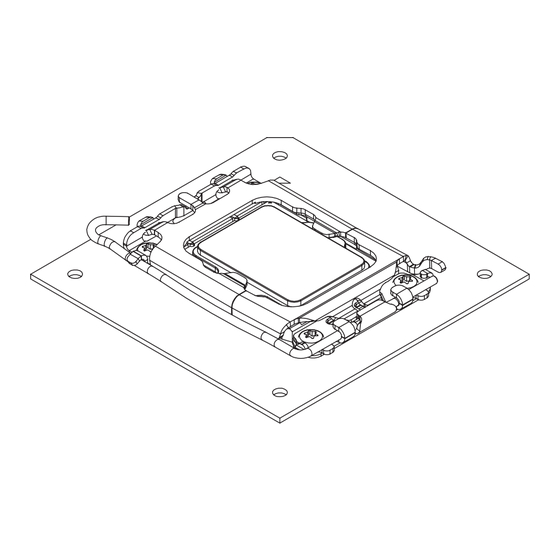
Place the motherboard on a flat, antistatic surface. Open
the socket, remove the plastic socket cover and insert the
CPU (to protect the socket pins during the following steps),
but do not close the socket.
NOCTUA NM-ISW1
INSTALLATION MANUAL
2
Remove the 4 screws from the ILM using the Torx
screwdriver that comes with the cooler and take off the
ILM.
3
T20
Place the 4 shim washers over the 4 mounting holes of
®
the ILM.
4
Put the ILM back into place and secure it using the
4 original screws. Gently tighten the screws until they stop,
but do not use excessive force (max. torque 0.6 Nm).
If the screws do not catch the threads easily, apply slight
pressure onto the screws and first turn them counter-
clockwise until you hear a clicking sound as the threads fall
into place, then start turning clockwise. If necessary, reach
behind the motherboard and apply counterpressure to the
backplate to help the screws catch the thread. If the screws
still don't catch the thread, please contact us at support@
noctua.at so that we can supply you with longer screws.
EN
Advertisement

Related Manuals for Noctua NM-ISW1


Summary of Contents for Noctua NM-ISW1
- Page 1 If necessary, reach behind the motherboard and apply counterpressure to the backplate to help the screws catch the thread. If the screws still don’t catch the thread, please contact us at support@ noctua.at so that we can supply you with longer screws.
- Page 2 Modifikation generell sicher, und es gibt keine Hinweise auf negative Langzeiteffekte. Es muss jedoch darauf hingewiesen werden, dass jegliche Modifikation des Sockels auf eigene Gefahr erfolgt. Noctua übernimmt keine Haftung für Schäden, die durch das Hinzufügen der mitgelieferten Unterlegscheiben entstehen.
- Page 3 Notez néanmoins que tous les risques liés à une modification du socket relèvent de l’entière responsabilité de l’utilisateur. Noctua ne saurait être tenu pour responsable d’un quelconque dommage pouvant être causé par l’ajout des rondelles de calage fournies ou lors de cette opération.
- Page 4 Sin embargo, debe tenerse en cuenta que cualquier modificación que se realice en el socket se hace por cuenta y riesgo del usuario. Noctua no se responsabilizará de los posibles daños que puedan ocurrir al incorporar las arandelas que se incluyen.
Need help?
Do you have a question about the NM-ISW1 and is the answer not in the manual?
Questions and answers