Table of Contents
Advertisement
Quick Links
®
ENGINEERING COMPANY INC.
51 Winthrop Road
Chester, Connecticut 06412-0684
Phone: (860) 526-9504
Internet: www.whelen.com
Sales e-mail: Iowsales@whelen.com
Customer Service e-mail: iowserv@whelen.com
WARNING: This product can expose you to chemicals including Methylene Chloride which is known to the State of California to cause cancer, and
Bisphenol A, which is known to the State of California to cause birth defects or other reproductive harm. For more information go to
www.P65Warnings.ca.gov.
WPS-2800 SERIES
HIGH POWER VOICE
& SIREN SYSTEM
INSTALLATION MANUAL
©2001 Whelen Engineering Company Inc.
For warranty information regarding this product, visit www.whelen.com/warranty
Form No.13563C (011604)
Page 1
Advertisement
Table of Contents

Related Manuals for Whelen Engineering Company WPS-2800 Series


Summary of Contents for Whelen Engineering Company WPS-2800 Series
- Page 1 Bisphenol A, which is known to the State of California to cause birth defects or other reproductive harm. For more information go to www.P65Warnings.ca.gov. WPS-2800 SERIES HIGH POWER VOICE & SIREN SYSTEM INSTALLATION MANUAL ©2001 Whelen Engineering Company Inc. For warranty information regarding this product, visit www.whelen.com/warranty Form No.13563C (011604) Page 1...
-
Page 2: Table Of Contents
Table Of Contents Important Note To Installation Technicians .................. page 5 Section I : Site Selection......................page 6 Section II: Utility Pole Preparation a) Pole Selection...................... page 7 b) Component Dimensions ..................page 7 Section III: Equipment Mounting a) Pole Top Mounting Bracket ................page 12 b) Electronic Cabinet Mounting ................ -
Page 3: Fig. 1 Station Drawing
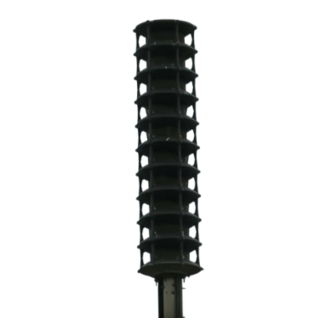
Fig. 1: Sample Station Drawing (AC Powered Battery Charger) Model Speaker Height 32.5" Number (inches) WPS-2800-1 18.7 WPS-2800-2 31.1 WPS-2800-3 43.5 WPS-2800-4 56.0 WPS-2800-5 (shown) 68.4 HEIGHT WPS-2800-6 80.8 68.4" WPS-2800-6A 80.8 WPS-2800-7 93.2 WPS-2800-8 105.6 WPS-2800-9 118.1 WPS-2800-10 130.5 ALUMINUM TO COPPER GROUND LUG. -
Page 4: Fig. 2 Station Drawing (With Optional Solar Panel)
Fig. 2: Sample Station Drawing (Optional Solar Powered Battery Charger) Model Speaker Height 32.5" Number (inches) WPS-2800-1 18.7 WPS-2800-2 31.1 WPS-2800-3 43.5 WPS-2800-4 56.0 WPS-2800-5 (shown) 68.4 HEIGHT WPS-2800-6 80.8 68.4" WPS-2800-6A 80.8 WPS-2800-7 93.2 WPS-2800-8 105.6 WPS-2800-9 118.1 WPS-2800-10 130.5 ALUMINUM TO COPPER GROUND... -
Page 5: Important Note To Installation Technicians
An Important Note to the Installation Technicians... The installation of this product requires careful planning and attention to detail! The installation of this system should NOT be attempted by individuals without experience in the disciplines necessary to this procedure (i.e. High-voltage electrical wiring, utility pole installation, etc.). -
Page 6: Site Selection
Section I: Site Selection The site selection for the WPS-2800 requires careful consideration in order to achieve the optimum coverage of the siren station. For a guideline to system planning, sound propagation and site selection we direct the user to the Federal Emergency Management Agency’s “Outdoor Warning Systems Guide, CPG 1-17.”... -
Page 7: Utility Pole Preparation
Section II: Utility Pole Preparation... a) Pole Selection NOTE: This installation manual will address the procedures applicable to wooden utility poles of specific size and dimensions. Procedures for poles consisting of other materials (steel, concrete, etc.) are not addressed within this document. The information presented, however, provides the necessary data and guidelines for a successful installation regardless of pole material. -
Page 8: Fig. 3 Pole Top Mounting Bracket Dimensions
Fig. 3: Pole Top Mounting Bracket Dimensions 10.0” DIA. POLE (MAX.) 11.0” 10.0” 12.0” 13.5” 1” Clearance Between Top Of Pole and Inside Bottom Of Bracket 18.0” 30.0” 18.0” 7.5” 4.5” Page 8... -
Page 9: Fig. 4 Type Ii Electronic Cabinet Dimensions
Fig. 4: Type II Electronic Cabinet Dimensions LEFT SIDE VIEW REAR VIEW 30.0” 5.0” 3.5” 27.7” 32.8” .625 DIA. 13.0” 2.0” 10.0” 28.0” Page 9... -
Page 10: Fig. 5 Type Iii Electronic Cabinet Dimensions
Fig. 5: Type III Electronic Cabinet Dimensions LEFT SIDE VIEW REAR VIEW 30.0” 5.0” 3.50” 44.85” 38.5” .687” DIA. 13.0” 25.25” .687” DIA. 2.0” 10.0” 28.00 Page 10... -
Page 11: Fig. 6 Antenna Mounting Bracket Dimensions
Fig. 6: Antenna Mounting Bracket Dimensions NOTE: Antenna installation must be in compliance with all FCC REGULATIONS. IMPORTANT: Top of antenna mast must be positioned at least 1 inch below the bottom of the Pole Top Mounting Bracket regardless of antenna length. 4 AWG (minimum) solid copper wire speaker ground. -
Page 12: Equipment Mounting
Section III: Equipment Mounting a) Pole Top Bracket Installation... Items Required for installation (not included)..5/8” x 14” Hex or Square head mounting bolts 5/8” Hex or Square head nuts 5/8” Flat Washer sized for the above referenced mounting bolt 5/8”... -
Page 13: Fig. 7 Pole Top Mounting Bracket
Fig. 7: Pole Top Mounting Bracket 9.5 Inches (+/- 0.5) 5/8” x 14” Square- (or Hex-) Head Bolt 5/8” Flat Washer 5/8” Split Lock Washer 5/8” Square- (or Hex-) Head Nut Page 13... -
Page 14: B) Electronic Cabinet Mounting
b) Electronic Cabinet Mounting and Siren Connections... Mounting Items Required for installation (not included)..For Type II & III cabinets Qty. Qty. (Type II) (Type III) Description 5/8” x 14” Hex or Square head mounting bolts 5/8” Flat Washer sized for the above mounting bolt 5/8”... - Page 15 The WPS-2800 siren case assembly may be installed onto the pole and wired before setting the pole. NOTE: Note: Due to the weight of the siren amplifier panel, the electronic cabinet assembly must be transported in an upright fashion to prevent distortion of the amplifier panel.
-
Page 16: C) Siren Assembly Mounting (5 Or Less Speaker Cells)
IMPORTANT! Before proceeding with the speaker installation, it is necessary for the installer to know the number of speaker cells to be installed on the utility pole. If the speaker assembly to be installed consists of 5 (five) or less speaker cells, the speaker assembly may, at the installers discretion, be mounted onto the utility pole before the pole has been set. -
Page 17: D) Siren Assembly Mounting (6 Or More Speaker Cells)
d) Siren Assembly Mounting (6 or more speaker cells)... Hardware required for installation (factory included)..20mm hex head nuts 7/8” Flat Washers 3/4” Split Lock Washers Items required (not included) Crane, Bucket Truck or similar lifting device Straps The larger siren assemblies (6 or more speaker cells) may only be mounted onto the pole top bracket after the pole has been set. -
Page 18: Fig. 9 Siren To Pole Top Mounting Bracket (Side View)
Fig. 9: Siren to Pole Top Mounting Bracket (Side View) 20mm Hex Nut 7/8” Flat Washer 3/4” Lock Washer Page 18... -
Page 19: E) Antenna Mounting (Optional)
e) Antenna Mounting (optional)... NOTE: Antenna installation must be in compliance with all FCC regulations. The proper antenna bracket mounting location is determined by several considerations. The antenna bracket should be positioned as high on the utility pole as is possible. However, under no circumstances should the top of the installed antenna mast be any closer than one inch from the bottom of the Pole Top Mounting Bracket (see “Fig. -
Page 20: F) Solar Panel Mounting (Optional)
f) Solar Panel Mounting (optional)... The solar panel must be installed so that it is directly facing the earth’s equator with an unobstructed view. Failure to orient the solar panel in this way will result in significantly reduced charging effectiveness. The most critical aspect of properly mounting the solar panel involves achieving the optimum tilt angle. -
Page 21: Fig. 11 Solar Panel Wiring Connections
Fig. 11: Solar Panel Wiring Connections NOTE 2 NOTE 3 JUMPER RED WIRE FROM CABLE NOTE 1 NOTE 5 3/4" FLEX CONDUIT (CUSTOMER SUPPLIED) NOTE 1 NOTE 2 BLACK WIRE FROM CABLE NOTE 3 NOTE 4 JUMPER NOTE 1 SOLAR PANELS (REAR VIEW) STRIP CABLE BACK THIS END AS REQUIRED... -
Page 22: Fig. 12 Solar Panel Mounting Views
Fig. 12: Solar Panel Mounting Views 8.00” Remember to ALWAYS mount panels facing the Earth’s Equator Dimension Solar Panel Mounting Bracket Hardware Qty. Description 5/16 - 18 X 1” Hex Head Bolt 8.00” 5/16 - 18 Elastic Stop Nut 5/16” Flat Washer Lower Higher Latitudes... -
Page 23: G) Determining Solar Panel Mounting Angle
g) Determining Solar Panel Mounting Angle Determine the LATITUDE of your location. Find your Latitude on the table below and not the corresponding Tilt Angle. LATITUDE TILT ANGLE 0° to 9° 75° = Tilt Angle 10° to 20° 85° minus LATITUDE = Tilt Angle 21°... -
Page 24: A) Siren Connections
Section IV: Wiring a) Siren Connections The type of speaker harness you receive depends on the number of speaker cells present. For systems consisting of 1 to 5 speaker cells, a 5-pair harness cable is provided. This cable has 5 BLACK wires numbered 1 to 5 and 5 RED wires numbered 1 to 5. For systems with 6 to 10 speaker cells, a 10-pair harness cable is used. -
Page 25: Fig. 13 Siren Amplifier Connections
Fig. 13: Siren Amplifier Connections Red wire 1 Black wire 1 Red wire 6 Black wire 6 Red wire 2 Black wire 2 Red wire 7 Black wire 7 Red wire 3 Black wire 3 Red wire 8 Black wire 8 Red wire 4 Black wire 4 Red wire 9... -
Page 26: B) Ac Wiring
b) AC Wiring An AC Service (Single Phase only) with an acceptable disconnect is required. A 15 amp (minimum) 120 VAC circuit is recommended. Locate the service on the pole according to local codes, taking care that the service entrance will meet height requirements once the pole is set into place. -
Page 27: Fig. 14 Ac Outlet Installation
Fig. 14: AC Outlet Installation SECURE GROUND WIRES HERE. LOCATE 4 x 4 BOX HERE. ATTACH THE AC SERVICE FITTING AS SHOWN. Page 27... -
Page 28: C) Batteries
c) Batteries Make sure that the system battery switch is in the OFF position. Install the batteries included with your system and connect them as shown in the illustration representing your cabinet type. MAKE SURE TO OBSERVE THE POLARITY OF THE TERMINALS BEFORE MAKING ANY CONNECTIONS. NOTE: For battery wiring, DC wiring conventions are used (BLACK is ground (-)). -
Page 29: Fig. 15 Battery Connections (Type Ii Cabinet)
Fig. 15: Battery Connections (Type II Cabinet) System Battery Switch Page 29... -
Page 30: Fig. 16 Battery Connections (Type Iii Cabinet)
Fig. 16: Battery Connections (Type III Cabinet) System Battery Switch Page 30... -
Page 31: D) Landline
d) Landline (optional) As an option. the WPS-2800 may be remotely controlled by either landline or RF link. Either method communicates via a DTMF protocol. Remote control may be one-way or two- way. The one-way option simply controls the WPS-2800, while the two-way option controls the WPS-2800 and reports WPS-2800 status back to a central control point. -
Page 32: System Test
Section V: System Test... After the installation of the WPS-2800 station has been completed, a basic system check is recommended to confirm that the system is functioning properly. Before initiating these tests, locate the system LED’s on the main control board mounted to the cabinet door (see “Fig. -
Page 33: Fig. 18 System Led Indicators
Fig. 18: System LED Diagnostic Indicators Fault (RED) - Normally off. When a DC - Normally on. If no DC voltage was problem has been detected, this LED detected during a siren tone or SI TEST® will be on. this LED will be off. Active - This LED normally flashes at a AC - Normally on. -
Page 34: Fig. 19 Electronic Cabinet Front Panel
Fig. 19: Electronic Cabinet Front Panel (Type II). Amp. S E L E C T C O M M A N D WAIL ATTACK ALERT CANCEL WHOOP HI-LO AIRHORN Amp. TRANSMIT SI-TEST TRANSMIT STATUS AUDIO DVM-TEST OPTION Amp. Amp. Siren Amplifier Diagnostic LED’s (5 cell system shown for reference)
Need help?
Do you have a question about the WPS-2800 Series and is the answer not in the manual?
Questions and answers