Table of Contents
Advertisement
Available languages
Available languages
Quick Links
Advertisement
Chapters
Table of Contents

Related Manuals for NewAir NBC177BS01


Summary of Contents for NewAir NBC177BS01
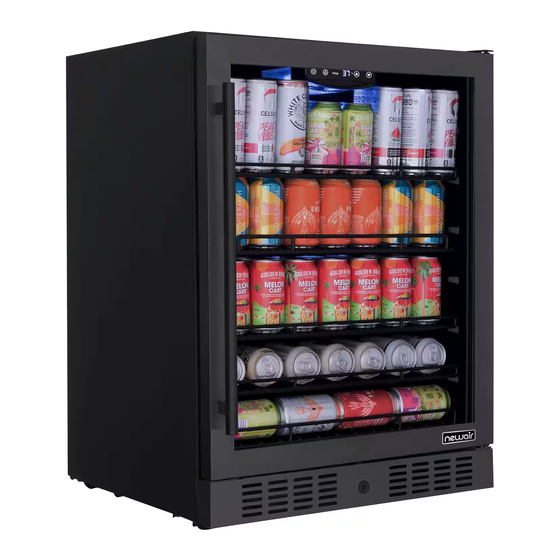
- Page 1 NBC177BS01 24” Built-in 177 Can Beverage Fridge Réfrigérateur à Boissons de 24" Encastrable 177 Canettes Refrigerador de bebidas empotrable de 24” con capacidad para 177 latas OWNER’S MANUAL Manuel de L'utilisateour Manual del Propietario EN: Pg.2 | FR: Pg.13 | ES: Pg.24...
-
Page 2: Register Your Product Online
Count on Newair As a proud Newair owner, welcome to our family. There are no robots here, real people shipped your product and real people are here to help you. Contact Us Please reach out to our customer service team before making a return to your store of purchase. -
Page 3: Table Of Contents
How to use the buttons on the display panel ............8 Cleaning & maintenance ....................9 Cleaning your beverage fridge .................. 9 Moving your beverage fridge ..................9 Troubleshooting ......................10 Limited manufacturer’s warranty ..................12 SPECIFICATIONS . NBC177BS01 ODEL : 110-120V OLTAGE : 0.9A URRENT : 60Hz... -
Page 4: Safety Information & Warnings
• The appliance should not be located next to ovens, grills or other sources of high heat. • Be sure the kick-plate on the front bottom is free of obstruction. Obstructing airflow can cause the unit to malfunction and will void the warranty. www.newair.com... - Page 5 WARNING: Risk of child entrapment. Before you throw away your old beverage fridge, please follow these steps: • Take off the doors. • Leave the shelves in place so that children may not easily climb inside. READ AND KEEP THESE INSTRUCTIONS www.newair.com...
-
Page 6: Parts List
Right Upper Hinge 10. Carbon Filter Temperature Setting (DOWN) 11. Exhaust Window Temperature Setting (UP) 12. Exhaust Window Temperature Display 13. Foot Light Switch 14. Glass Power Switch 15. Door Seal Light 16. Handle 17. Lower Hinge Shelf 18. Lock www.newair.com... -
Page 7: Electrical Circuit Diagram
ELECTRICAL CIRCUIT DIAGRAM www.newair.com... -
Page 8: Installation
Press buttons to adjust the temperature in increments of 1 degree between 37°F and 65°F (3° - 18°C). To switch between Fahrenheit and Celsius, press the button for 5 seconds. www.newair.com... -
Page 9: Cleaning & Maintenance
• Securely tape down all loose parts located inside the unit. • Turn the leveling feet up to the base to avoid damage. • Tape the door shut. • Be sure the beverage fridge stays in an upright position during transportation. www.newair.com... -
Page 10: Troubleshooting
Make sure the shelves slide all position. the way into the unit. The LED display does There may be a problem Contact the manufacturer. not work. with the main control board. There is a problem with the Contact the manufacturer. plug. www.newair.com... - Page 11 The cooling kit is no longer Contact the manufacturer. display error, or the working properly. LED displays “LO”. The PC Board is faulty. Contact the manufacturer. The buttons do not The temperature control Contact the manufacturer. function. panel may be damaged. www.newair.com...
-
Page 12: Limited Manufacturer's Warranty
When making a warranty claim, please have the original bill of purchase with the purchase date available. Once confirmed that your appliance is eligible for warranty service, all repairs will be performed by a Newair™ authorized repair facility. The purchaser will be responsible for any removal or transportation costs. Replacement parts and/or units will be new, re-manufactured or refurbished and is subject to the manufacturer’s discretion. -
Page 13: Enregistrer Votre Produit En Ligne
De l’usine à l’entrepôt et de la surface de vente à votre domicile, les fabricants des produits Newair font la promesse de vous fournir des produits novateurs, un service exceptionnel et un soutien au moment où vous en avez le plus besoin. -
Page 14: Caractéristiques
Nettoyage et entretien ....................20 Nettoyage de votre réfrigérateur ................20 Déplacement de votre réfrigérateur ............... 20 Dépannage........................21 Garantie limitée du fabricant ..................23 CARACTÉRISTIQUES : NBC177BS01 DU MODÈLE : 110V à 120V ENSION : 0,9A OURANT : 60Hz RÉQUENCE... -
Page 15: Informations Et Avertissements De Sécurité
• Ne rangez pas de substances explosives comme des aérosols contenant un propulseur inflammable dans ce réfrigérateur à boissons. REMARQUES IMPORTANTES SUR L'INSTALLATION: • Avant de brancher votre réfrigérateur à boissons, laissez reposer pendant 2 heures. www.newair.com... - Page 16 AVERTISSEMENT: : Risque de piégeage d'enfant. Avant de jeter votre ancien réfrigérateur à boissons, veuillez suivre les étapes suivantes: • Enlevez les portes. • Laissez les tablettes en place afin que les enfants ne puissent pas facilement monter à l'intérieur. LISEZ ET GARDEZ CES INSTRUCTIONS www.newair.com...
-
Page 17: Liste Des Pièces
Interrupteur (éclairage) 11. Fenêtre d’évacuation Réglage de la température 12. Fenêtre d’évacuation Affichage de la température 13. 13. Pied Réglage de la température 14. Verre Interrupteur (température) 15. Charnière inférieure Lumière 16. Poignée Ventilateur 17. Charnière inférieure Tablette 18. Verrou www.newair.com... -
Page 18: Schéma Du Circuit Électrique
SCHÉMA DU CIRCUIT ÉLECTRIQUE www.newair.com... -
Page 19: Installation
éteindre la lumière. Appuyez sur les boutons pour régler la température par incréments de 1 degré entre 37°F et 65°F (3° - 18°C). Pour basculer entre Fahrenheit et Celsius, appuyez sur le bouton pendant 5 secondes. www.newair.com... -
Page 20: Nettoyage Et Entretien
• Fixez toutes les pièces détachables à l’intérieur de l’appareil avec du ruban adhésif. • Réglez les pieds à la base afin d’éviter d’endommager l’appareil. • Utilisez du ruban adhésif pour tenir la porte fermée. • Assurez-vous que le réfrigérateur demeure en position verticale pendant le transport. www.newair.com... -
Page 21: Dépannage
La porte n’est pas installée Vérifiez les charnières de la correctement. porte pour voir si elles sont installées correctement. Le joint d’étanchéité est Remplacez le joint d’étanchéité affaibli. de la porte. Des joints de remplacement peuvent être obtenus du fabricant. www.newair.com... - Page 22 La trousse de Contactez le fabricant. d’erreur ou "LO". refroidissement ne fonctionne plus correctement. La carte PC est défectueuse. Contactez le fabricant. Les boutons ne Le panneau de commande Contactez le fabricant. fonctionnent pas. pourrait être endommagé. www.newair.com...
-
Page 23: Garantie Limitée Du Fabricant
Après avoir reçu la conformation que votre appareil est admissible à la garantie, toutes les réparations doivent être effectuées par un atelier de réparation Newair™ agréé. L’acheteur devra assumer les frais de déplacement ou de transport. Les pièces ou appareils de remplacement seront à... -
Page 24: Registre Su Producto En Línea
La confianza debe ganarse y nosotros nos ganaremos la suya. La felicidad del cliente es el centro de nuestro negocio. Desde la fábrica hasta el almacén, desde el piso de ventas hasta su hogar, toda la familia Newair se compromete a brindar productos innovadores, un servicio excepcional y asistencia cuando más lo necesite. -
Page 25: Especificaciones Técnicas
Limpieza y mantenimiento ....................31 Limpieza de su refrigerador de bebidas ..............31 Mover su refrigerador de bebidas ................31 Solución de problemas ....................32 Garantia del fabricante ....................34 ESPECIFICACIONES TÉCNICAS NBC177BS01 ODELO : 110-120V OLTAJE : 0.9A ORRIENTE... -
Page 26: Advertencias E Información De Seguridad
• Solo coloque su refrigerador de bebidas en una superficie nivelada que soporte todo el peso una vez que el refrigerador se haya cargado por completo. Puede asegurarse de que la unidad esté nivelada colocando una pequeña bola en la parte superior y verificando que no ruede en ninguna dirección. www.newair.com... - Page 27 ADVERTENCIA: Riesgo de atrapamiento de niños. Antes de desechar su viejo refrigerador de bebidas, siga estos pasos: • Quita las puertas. • Deje los estantes en su lugar para que los niños no puedan entrar fácilmente. LEA Y GUARDE ESTAS INSTRUCCIONES www.newair.com...
-
Page 28: Lista De Partes
3. Ajuste de Temperatura (Subir) 12. Ventana de escape 4. Pantalla de temperature 13. Pie 5. Interruptor de Luz 14. Vidrio 6. Interruptor 15. Sello de la Puerta 7. Luz 16. Manija 8. Abanico 17. Bisagra Inferior 9. Estante 18. Seguro www.newair.com... -
Page 29: Diagrama De Circuito Eléctrico
DIAGRAMA DE CIRCUITO ELÉCTRICO www.newair.com... -
Page 30: Instalación
La luz interior se puede encender o apagar presionando el botón Presione los botones para ajustar la temperatura en incrementos de 1 grado entre 37°F y 65°F (3° - 18°C). Para cambiar entre Fahrenheit y Celsius, presiona el botón durante 5 segundos. www.newair.com... -
Page 31: Limpieza Y Mantenimiento
• Asegure con cinta adhesiva todas las piezas sueltas ubicadas dentro de la unidad. • Gire las patas niveladoras hasta la base para evitar daños. • Cierra la puerta con cinta adhesiva. • Asegúrese de que el refrigerador para bebidas permanezca en posición vertical durante el transporte. www.newair.com... -
Page 32: Solución De Problemas
La puerta no está bien Revise las bisagras de la puerta instalada. para asegurarse de que estén correctamente instaladas. El sello de la puerta es débil. Vuelva a colocar el sello en la puerta. Se pueden adquirir repuestos del fabricante. www.newair.com... - Page 33 LED o el LED funciona correctamente. fabricante. muestra "LO". La placa de circuito impreso Póngase en contacto con el está defectuosa. fabricante. Los botones no El panel de control de Póngase en contacto con el funcionan. temperatura puede estar fabricante. dañado. www.newair.com...
-
Page 34: Garantia Del Fabricante
Newair ™. El comprador será responsable de los gastos de traslado o transporte. Las piezas y / o unidades de reemplazo serán nuevas, refabricadas o reacondicionadas y están sujetas a la discreción del fabricante.
Need help?
Do you have a question about the NBC177BS01 and is the answer not in the manual?
Questions and answers