Table of Contents
Advertisement
Quick Links
Advertisement
Table of Contents

Related Manuals for CorroVenta C15

Summary of Contents for CorroVenta C15
- Page 1 CONDENSER C15 USER MANUAL...
-
Page 2: Table Of Contents
Safety information ..........................5 Product Overview ..........................7 Main components of the machine ....................7 Name plate ............................8 How the C15 works ......................... 9 Transport and lift ..........................10 Delivery inspection, inspection after transport/lift ................10 Storage .............................. 10 Installation ............................ -
Page 3: Intended Use
A15/C15 combo to be moved on the four wheels of the A15 cage. As the C15 is designed to make use of the process airflow from the A15 to cool the wet air, the need for a dedicated cooling air fan has been eliminated, saving energy, weight and compolexity and in addition making the combination A15/C15 run with low noise. -
Page 4: Manufacturing Directive
Manufacturing directive C15 is CE approved. The machine is manufactured in Bankeryd, Sweden, by Corroventa Avfuktning AB. The company is ISO 9001 certified. Waiver of Liability • Faulty, incorrect installations and/or incorrect use can cause damage to property and human injury. -
Page 5: Safety Information
Children shall be supervised to ensure they do not to play with the appliance. Electrical installations made in connection with the installation of the C15 shall be made by authorized and qualified personnel in accordance with local and national regulations. - Page 6 26. Observe that the A15/C15 combination in use, depending on installation, may effect pressure differences and this airflows between rooms / spaces in the building and/or between the building and the ambient air.
-
Page 7: Product Overview
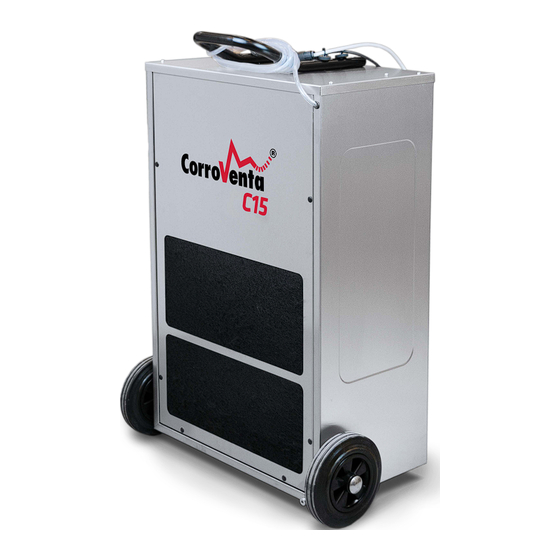
C15 have feet instead of wheels. The C15 has a built-in pump that is powered through the power outlet of the A15. Should the hose to the pump be squeezed or clogged, the C15 is also equipped with a float switch that will stop the dehumidification with the A15. -
Page 8: Name Plate
The two bar codes representing, in the example 123456 and 24C50001, are serial numbers. The weight on the name plate refers to standard, stationary configuration of the C15. For mobile use, it can be equipped with wheels and in that configuration it weighs 54 ©... -
Page 9: How The C15 Works
Having passed the heat exchanger with the C15, the process air enters the A15 to be filtered and dried. The wet air that has passed the heat exchanger is returned to the A15 for reuse as regeneration air. -
Page 10: Transport And Lift
Delivery inspection, inspection after transport/lift When the C15 ES has arrived to the site at which it shall be installed and used, it shall be inspected to ensure that it has not been damaged from the transport and/or lift. If there are visual indications or other reasons to believe damage has occurred, the machine must not be powered and used until it has been inspected by qualified personnel. -
Page 11: Installation
Position them so that their respective screws are easily accessed. 4. Standing behind it, bring the C15 up close to the A15 and lean it towards you enough for its support bracket to rest on the support bracket of the A15 transportation cage. - Page 12 Position them so that their respective screws are easily accessed. 3. Bring the C15 up close enough to the A15 to connect the power cable and, to the right of the power outlet, also the interface cable.
-
Page 13: Use Without Pump
Use without pump If gravity can be allowed to drain the C15 and if, to this purpose, a hose is to be connected to the bottom tray of the C15, the power shall preferably not be connected. With power cable connected, the pump runs dry wasting energy and causing unnecessary wear. - Page 14 2. Losen the screws on the clamps that connects the three airflows. 3. Pull the C15 about 10 centimeters away from the A15 so that the cables can be disconnected. 4. The next time the A15 has been installed and started in accordance with its manual, deactivate the condenser mode by either: •...
-
Page 15: Service And Maintenance
3. Turn off the mains power switch by turning it anti clockwise to position 0. . 4. Open the process air filter with the A15 and remove the old filter. Remove the C15 filter. 5. Clean the filter compartments, preferably with a vacuum cleaner, so that the dust and dirt that have fallen off the filters is removed. - Page 16 2. If necessary, use water hose to clean the vertical passage through the heat exchanger. With the C15 by suitable floor drain, remove the drainage plug the flush water down through the center stub.
-
Page 17: Accessories And Consumables
Accessories and consumables The following are consumables and examples of accessories available for the C15. Article number Name 105510 Filter, C15 © Corroventa Avfuktning AB 2024.07 17 (19) -
Page 18: Trouble Shooting
Symtom Trolig orsak Åtgärd At installation, the The cable intended for the Ensure that both cbale on the C15 are A15 does not detect connector to the right of connected to the A15. that a C15 is the power outlet on the installed. -
Page 19: Technical Data
Adapted in sizes and and positions to fit positions to fit A15 Filter surface (mm) 495x495 495x495 Filter quality Weight, kg Size (L x W x H) , mm 440x575x1030 507x725x1030 Article number 1006237 1006167 © Corroventa Avfuktning AB 2024.07 19 (19) - Page 20 DO YOU HAVE QUESTIONS OR NEED HELP? Visit www.corroventa.com or call us at +44 (0)161-244 95 23 to speak with an expert. We have the knowledge and the equipment to find a solution as efficiently as possible. Corroventa develops, manufactures, sells and rents high quality products for dealing with water damage, moisture, odours and radon.
Need help?
Do you have a question about the C15 and is the answer not in the manual?
Questions and answers