SolaX Power A1-ESS-G2 Installation Manual
Hide thumbs
Also See for A1-ESS-G2:
- Installation manual (172 pages) ,
- Quick installation manual (96 pages) ,
- Installation manual (70 pages)

Related Manuals for SolaX Power A1-ESS-G2


Summary of Contents for SolaX Power A1-ESS-G2
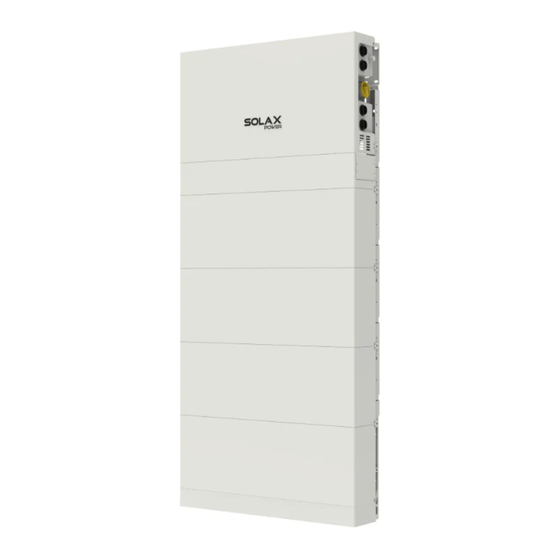
- Page 1 A1-ESS-G2 SYSTEM (A1-BI PRO-200-G2) Installation Guide Version 0.0 www.solaxpower.com...
- Page 2 SolaXCloud App Scan the QR code below to download SolaXCloud App.
- Page 3 CHANGE HISTORY Version 00 (Aug. 23, 2024) Initial release...
-
Page 4: Table Of Contents
Table of Contents About this Manual ..................1 1.1 Scope of Validity.........................1 1.2 Target Group ........................1 1.3 Symbols Used ........................1 1.4 About A1-ESS-G2 System ....................2 1.4.1 System Overview ....................4 1.4.2 Solutions .........................6 Safety ......................7 2.1 General Safety Instructions ....................7 2.2 Important Safety Instructions..................7 Specification .....................11... - Page 5 8.2 Power Connection ......................99 8.2.1 PV Connection ......................100 8.2.2 Grid Connection ....................102 8.2.3 Battery Connection .....................104 8.3 Ground Connection ......................106 8.4 Communication Connection..................108 8.4.1 Make Communication Connection to Another Inverter/BI PRO ...108 8.4.2 Emergency Stop Connection ................113 8.4.3 RGM (Meter X) Connection (Optional) ............113 8.4.4 External Electricity Meter (Meter Y) Connection (Optional) ....113 8.4.5 RSD Transmitter Connection ................113 8.4.6 Parallel Connection .....................114...
-
Page 6: About This Manual
About this Manual Scope of Validity This manual is an integral part of the A1-ESS-G2 system including A1-HYB-G2 series /A1- AC-G2 series / A1-SMT-G2 series inverter, battery and BI PRO. It describes the assembly, installation, commissioning and maintenance. Please read it carefully before operating. -
Page 7: About A1-Ess-G2 System
About this Manual About A1-ESS-G2 System A1-HYB-G2 series inverter is transformerless type without galvanic isolation. It is designed and certified to fulfill the directives of ANSI/NFPA 70, NEC 690.41, UL 1741, UL 1741 SA, IEEE 1547 and IEEE 1547.1. The inverter converts the DC power generated by PV strings into AC power and stores the energy into the battery bank or feeds the power into the power grid. - Page 8 About this Manual A1-ESS-G2 System and corresponding cartons 2 Battery Modules 500 mm ≥19.68 in 580 mm 22.9 in Weight(lb/kg): 99.2/45 850 mm 33.46 in Weight(lb/kg): 353/160 Different sized cartons for products and accessories (A~F) Inverter TBMS-MSC60060 Rechargeable Li-ion Battery Module TP-HS50/5kWh...
-
Page 9: System Overview
About this Manual 1.4.1 System Overview System overview of A1-HYB-G2 SolaXCloud BI PRO Generator Meter Main panel Load A1-HYB-G2 inverter and battery Utility Grid DC Power AC Power Communication Cloud... - Page 10 About this Manual System overview of A1-AC-G2 SolaXCloud Generator BI PRO Sub panel Load Main panel A1-AC-G2 inverter and battery Meter Existing Solar System DC Power AC Power Communication Utility Grid Cloud...
-
Page 11: Solutions
About this Manual 1.4.2 Solutions • Whole home backup solution Up to 4 A1-HYB-G2 series inverter parallel Up to 4 battery modules stackable per inverter Homeowners are automatically provided with backup power in the event of grid interruption to whole home loads. •... -
Page 12: Safety
Safety General Safety Instructions This manual contains important instructions for A1-HYB-G2 series inverter that should be followed during installation and maintenance for the inverter. A1-HYB-G2 series inverter is designed and tested to meet all applicable North American and International safety standards. However, like all electrical and electronic equipment, safety precautions must be observed and followed during installation and operation of the A1-HYB-G2 series inverter to reduce the risk of personal injury and to ensure a safe installation. - Page 13 Safety WARNING! • Do not install the system in a corrosive environment where it may be exposed to ammonia, corrosive gases, acids, or salts (eg: chemical plant, fertilizer storage areas, tanneries, near volcanic ash eruption). WARNING! • Do not disassemble any parts of the product which are not mentioned in the installation guide.
- Page 14 Safety CAUTION! Possible damage to health as a result of the effects of radiation! • Do not stay closer than 7.87 in / 20 cm to system for a long time. CAUTION! Danger of burn injuries due to hot enclosure parts! •...
- Page 15 Safety Battery safety instructions A1-HYB-G2 Series inverter should be coupled with a high voltage battery. The battery must comply with UL 1973 and must be SolaX certified. As accumulator batteries may contain potential electric shock and short-circuit current dangers, to avoid accidents that might be thus resulted, the following warnings should be observed during battery replacement: •...
-
Page 16: Specification
Specification Specification of A1-HYB-G2 Inverter PV Input Model A1-HYB-3.8K-G2 A1-HYB-5.0K-G2 A1-HYB-6.0K-G2 A1-HYB-7.6K-G2 Max.recommended PV power [W] 7600 10000 10000 15200 Max.MPPT power [W] 5700 7500 9000 11400 Max.DC voltage [V] Norminal DC operating voltage [V] Max. input current [A] A:16/B:16 A:16/B:16/C:16 Max. - Page 17 Specification Model A1-HYB-3.8K-G2 A1-HYB-5.0K-G2 A1-HYB-6.0K-G2 A1-HYB-7.6K-G2 Maximum output fault current and 48/90 duration [A/ms] Maximum output fault peak current 515/5 and duration [A/ms] Displacement power factor 0.8 leading to 0.8 lagging Total harmonic distortion <3% (THD, rated power) Parallel operation Maximum output overcurrent 20/2 25/2...
-
Page 18: Specification Of Battery
Specification Efficiency, Power Consumption and Standard Model A1-HYB-3.8K-G2 A1-HYB-5.0K-G2 A1-HYB-6.0K-G2 A1-HYB-7.6K-G2 CEC Weighted Efficiency 97.5% (PV to GRID) Maximum Inverter Efficiency 98.0% Power consumption Internal consumption(night) [W] <3 Standard UL 1741, UL 1741 SA, UL 1741 SB, UL 1741 PCS, UL 1699B, UL 1998, UL 991, Safety and Certifications CSA C22.2 No.107.1-16, CSA C22.2 No.292-18, CSA C22.2 No.330-17, IEEE Std 1547-2018, IEEE 1547-2019, IEEE Std 1547.1-2020, Rule 21, HECO SRD V2.0... -
Page 19: Specification Of Backup Interface
Specification Model T-BAT H 10.0 T-BAT H 15.0 T-BAT H 20.0 Recommend Charge/Discharge Current (A) Standard Power (kW) 5.12 7.68 10.24 Max. Power (kW) 11.1 Battery Roundtrip Effciency(0.2C,25°C/77°F) Expected Lifetime(25°C/77°F) 10 years Cycle Life90% DOD(25°C/77°F) 6000 cycles Charge Temperature 32°F~127.4°F/0°C~53°C Discharge Temperature -14°F~127.4°F/-10°C~53°C -4°F~86°F/-20°C~30°C (12 months) - Page 20 Specification NON-BACKUP PORT Nominal AC output voltage [V] / Nominal AC frequency [Hz] 240 / 60 Maximum continuous output current rating [A] SOLAR INVERTER PORT Nominal AC output voltage [V] / Nominal AC frequency [Hz] 240 / 60 Maximum continuous output current rating [A] GENERATOR Maximum AC power [W] 24000...
-
Page 21: Site Requirements And Pre-Installation Guidance
Guidance Physical Requirements The installation of A1-ESS-G2 system including A1-HYB-G2 inverter, battery and BI PRO must be done in accordance with local codes and the National Electric Code (NEC). The whole system requires adequate clearance for the installation, cabling or conduit and airflow. - Page 22 Site Requirements and Pre-installation Guidance 33.46 in 5.82 in 850 mm 148 mm (TBMS-MCS60060) 5.82 in 33.46 in 148 mm 850 mm Battery Module (TP-HS50) 5.82 in 33.46 in 148 mm 850 mm Base Figure 4-2 Dimensions of battery...
- Page 23 Site Requirements and Pre-installation Guidance 8.6 in 218.5 mm 21.7 in 7.3 in 550 mm 185 mm Figure 4-3 Dimensions of BI PRO...
-
Page 24: Installation Space Requirement
Site Requirements and Pre-installation Guidance Installation Space Requirement Inverter and battery space requirement 32 in / 812.8 mm 28 in / 711.2 mm 24 in / 609.6 mm 20 in / 508.0 mm 8 in / 203.2 mm 8 in / 203.2 mm Inverter 32 in / 812.8 mm 28 in / 711.2 mm... - Page 25 Site Requirements and Pre-installation Guidance To ensure good heat dissipation and convenient disassembly of the inverter and battery, the minimum clearance around the inverter and battery shall not be less than the following values, as shown below. The height above the ground marked below is recommended assuming that four BATs are installed with floor-mounting.
- Page 26 Site Requirements and Pre-installation Guidance For multi-inverter installation, please reserve the space of 19.68 inch (500 mm) at least between each left and right inverter and at least 19.68 inch (500 mm) distance from the ceiling . If multiple inverter are mounted in areas with high ambient temperatures, increase the clearances between the inverter and batteries and ensure an adequate fresh-air supply if possible.
- Page 27 Site Requirements and Pre-installation Guidance BI PRO space requirement 17.4 in / 443 mm 16 in / 406 mm 12 in / 305 mm To ensure good heat dissipation and convenient disassembly of the BI PRO, the minimum clearance around the BI PRO shall not be less than the following values, as shown below. ≥19.68 in (500 mm) ≥19.68 in...
- Page 28 Site Requirements and Pre-installation Guidance The following are the specification requirements for wall flatness and perpendicularity. Flatness meets local building standards Recommended Installation Space Example for single inverter installation: 19.68 in/ 500 mm Recommend installation space: (W*D*H) 107.5 in. * 28.3 in. * 93.1 in. / 2730 mm * 720 mm * 2364 mm...
- Page 29 Site Requirements and Pre-installation Guidance Example for multi-inverter installation: Recommend installation space: (W*D*H) 160.7 in. * 28.3 in. * 93.1 in. / 4080 mm * 720 mm * 2364 mm...
-
Page 30: Installation Environment Requirement
Site Requirements and Pre-installation Guidance Installation Environment Requirement • Not be exposed to glare. • Not in areas where highly flammable materials are stored. • Not in potential explosive areas. • Not near the television antenna or antenna cable. • Not higher than altitude of about 9843 ft (3000 m) above sea level. •... -
Page 31: Preparation Before Installation
Preparation before Installation A1-ESS-G2 is 100% tested and packaged and visually inspected before leaving our manufacturing facility. Please make sure the inverter is intact during transportation. If there are some visible damages, such as cracks, please contact your dealer immediately. - Page 32 Preparation before Installation Self-tapping screw Communication Washer Expansion set Dongle RESERVED M4 × L10 screw Document 8 AWG ferrules Item Name Quantity Description Inverter 1 pc Product Metal cover 1 pc Protect the inverter Bracket 1 pc Support the inverter 8-pin female terminal block Additional 8-pin female terminal block with 1 pc...
-
Page 33: Packing List Of Battery
Preparation before Installation Packing List of Battery BMS (TBMS-MCS60060) Hereinafter referred to as "MCS60060" Document Item Name Quantity Description 1 pc Product Document User Manual, Guide the installation and maintenance Battery Module (TP-HS50) Hereinafter referred to as "TP-HS50" Battery module Wall bracket Wall bracket M5*10 phillips-head... - Page 34 Preparation before Installation Item Name Quantity Description Battery module 1 pc Product Support battery module to be mounted on the Wall bracket 2 pcs wall ST6*55 self-tapping screw 2 pcs Fix the bracket Washer 2 pcs Fix the bracket Expansion bolt 4 pcs Fix the bracket M5*10 phillips-head screw...
- Page 35 Preparation before Installation Item Name Quantity Description Fix the base support in case of concrete M8*85 expansion screw 6 pcs wall M5*8 countersunk screw 4 pcs Fix the transverse plate with base support M5*20 countersunk screw 6 pcs Fix the two sides of base Fix the base support in case of wooden M8*88 self-tapping screw 6 pcs...
-
Page 36: Packing List Of Backup Interface
Preparation before Installation Packing List of Backup Interface Backup Interface Bracket Rolled strip WARNING PARALLEL ENERGY SOURCE DISCONNECT POWER SOURCE OUTPUT CONNECTION DO NOT RELOCATE THIS OVERCURRENT DEVICE WARNING PARALLEL ENERGY SOURCE DISCONNECT POWER SOURCE OUTPUT CONNECTION DO NOT RELOCATE THIS OVERCURRENT DEVICE WARNING PARALLEL ENERGY... - Page 37 1 pc the wall Rolled strip 8 pcs Fix the cable Circuit breaker label 1 pc For attaching to circuit breakers Quick installation guide of A1-ESS-G2 Document System Hexagonal stud 1 pc Fix the breaker M4*L12 screw 3 pcs Fix the breaker...
-
Page 38: Tools Required
Preparation before Installation Tools Required Installation tools include but are not limited to the following recommended ones. If necessary, use other auxiliary tools on site. Please note that the tools used must comply with local regulations. Hammer drill (drill bit: Ø4 mm / Ø10 mm Multimeter / Ø12 mm) (≥... -
Page 39: Plan The Installation Site
Plan the Installation Site Choose a propriate location Choose a wall capable of supporting the full weight of inverter, battery and BI PRO. If floor- mounting inverter and battery, choose a level surface adjacent to the below wall. • Wood studs spaced at 12, 16, 20, 24, 28 and 32 inch •... - Page 40 Plan the Installation Site Choose cable entry of BI PRO A conduit fitting or cable gland must be used when wiring connection. For the wiring connection of BI PRO the cable is routed from the bottom and sides of de- vice.
- Page 41 Plan the Installation Site Plan amount and size of conduit Calculate the amount and size of conduit needed for the installation, based on filllimits and local code requirements. An adapter may be required between the entry into the wiring compartment and the conduit. Plan the distance of each unit in the system The figure below is for maximum distances between each system unit.
-
Page 42: Mechanical Installation
Mechanical Installation Overview of Installation Schemes The anchoring details below is demonstrated assuming that four BATs are installed. Scheme A Wood Studs (spaced at 12 and 24 inches) If anchoring directly into wood studs, use at least 8 screws with washers respectively for inverter and battery, of sufficient length into the studs. - Page 43 Mechanical Installation 24 inch wood studs...
- Page 44 Mechanical Installation Scheme B Wood Studs (spaced at 16 and 32 inches) If anchoring directly into wood studs, use at least 8 screws with washers respectively for inverter and battery, of sufficient length into the studs. 16 inch wood studs...
- Page 45 Mechanical Installation 32 inch wood studs...
- Page 46 Mechanical Installation Scheme C Wood Studs (spaced at 20 inches) If anchoring directly into wood studs, use at least 8 screws with washers respectively for inverter and battery, of sufficient length into the studs. 20 inch wood studs...
- Page 47 Mechanical Installation Scheme D Wood Studs (spaced at 28 inches) If anchoring directly into wood studs, use at least 8 screws with washers respectively for inverter and battery, of sufficient length into the studs. 28 inch wood studs...
- Page 48 Mechanical Installation Scheme E Concrete or Masonry If anchoring to concrete or masonry wall, use 8 screws with washers respectively for inverter and battery and make sure the screws are at least 1.49 in (38 mm) away from the edge of bricks or blocks. Punching holes spaced at 24 inch is recommended.
- Page 49 Mechanical Installation Scheme F Steel material of sufficient thickness If anchoring to steel material, use 8 screws with washers respectively for inverter and battery. Punching holes spaced at 24 inch is recommended.
- Page 50 Mechanical Installation Weight and mounting height instructions 4 Battery Modules Inverter Backup Interface 500 mm BMS(TBMS-MSC60060) ≥19.68 in Battery Module (TP-HS50) 580 mm Battery Module 22.9 in (TP-HS50) Weight(lb/kg): 99.2/45 Battery Module (TP-HS50) Battery Module (TP-HS50) Base for TP-HS50 Battery 850 mm 33.46 in Weight(lb/kg): 591/268...
-
Page 51: Installation Methods
Mechanical Installation Installation Methods There are two alternative installation methods (wall mounting and floor mounting) and several schemes available for users. For details, please refer to "7.1 Overview of Installation Schemes". The following installation will take Scheme "base+four batterys+BMS+inverter+BI PRO" mounting on the wooden wall with studs spaced at 32 in / 812.8 mm as an example. - Page 52 Mechanical Installation Wall-mounting NOTICE! • For detailed steps of wall-mounting, please refer to "7.4 Wall-mounting".
-
Page 53: Floor-Mounting
Mechanical Installation Floor-mounting Step 1: Mount the battery a) Remove the dust cover of the base. Base for TP-HS50 Battery WARNING! • During installation, please make sure battery port is not short-circuited. NOTICE! • A distance of at least 19.68 in / 500 mm shall be set aside on both sides of the whole system. - Page 54 Mechanical Installation NOTICE! • Use a spirit level to measure the sides of the Base to ensure they are even. NOTICE! • Clockwise turn the adjustment screws to lower down the base. • Anticlockwise turn the adjustment screws to lift up the base. c) Locate the base 1.57 in / 40 mm away from the wall, accurately mark the location of the base on both sides with a marker.
- Page 55 Mechanical Installation WARNING! • If the Base is shifted after placing a Battery Module, move it to its original location according to the mark previously drawn. WARNING! • During installation, please make sure battery port is not short-circuited. e) Mount the fixing plate (2 holes) [TP-HS50 (part G)] using M5*10 cross screw [TP-HS50 (part E)], and secure M5*10 screws (2 for each side) to connect Base and Battery Module.
- Page 56 Mechanical Installation f) Place two battery modules in turn, and secure both left and right sides with screws (4×M5*10 countersunk screw). Torque: 2.2-2.5 N·m NOTICE! • In the case of the concrete wall, please perform the following steps strictly. • In the case of the solid wood wall, please go directly to step i. g) Mount the bracket of the battery module.
- Page 57 Mechanical Installation Step 2 Mark TP-HS50 (part E) Step 1 Attach screw but not tighten it Step 3 Ø0.39 in./10 mm Note! for Wall Bracket Electric drill dust collector is recommended. 90° ≥3.54 in/ 90mm CAUTION! • Please re-mount the dust cover to the battery module before drilling holes to avoid dust falling into the interface and do remember to remove the dust cover again after the installation wall bracket completed.
- Page 58 Mechanical Installation h) Place expansion bolts [TP-HS50 (part D)] into the two holes. NOTICE! • In the case of the solid wood wall, the Expansion Bolt is not required to be installed.
- Page 59 Mechanical Installation i) Place the Wall Bracket on the wall where the mark is drawn previously, and then secure the Wall Brackets on the wall using M6 Tapping Screws (× 2) and Washers [TP-HS50 (part B and C)] (Torque: 6-8 N·m). Step 2 Mark TP-HS50 (part E)
- Page 60 Mechanical Installation j) Let the platen [TP-HS50 (part F)] down and place the fourth battery module. Let the Platen down...
- Page 61 Mechanical Installation k) Fix the fixing plate (3 holes) [TP-HS50 (part F)] on both sides of battery module using M5*10 cross screw [TP-HS50 (part E)], and then tighten M5*10 screws. Torque: 2.2-2.5 N·m NOTICE! • In the case of the concrete wall, please perform the following steps strictly. •...
- Page 62 Mechanical Installation Mark Let the Platen down Self-tapping screw × 2 Washer × 2 Wall bracket × 2 Torque: 6-8 N·m NOTICE! • Electric drill dust collector is recommended. CAUTION! • Please re-mount the dust cover to the battery module before drilling holes to avoid dust falling into the interface and do remember to remove the dust cover again after the installation wall bracket completed.
- Page 63 Mechanical Installation m) Remove the bottom dust cover of BMS and place the BMS on the top. Fix the fixing plate (3 holes) [TP-HS50 (part F)] on both sides of battery module using M5*10 cross screw [TP-HS50 (part E)], and then tighten M5*10 screws. MSC60060 Torque: 2.2-2.5 N·m Step 2: Mount the inverter...
- Page 64 Mechanical Installation Inverter (part L) Torque: 4.4 Ibf.in / 0.5 N·m b) Use the bracket as the template to mark the screw hole location on the wall. Round holes...
- Page 65 Mechanical Installation c) Unscrew the two M4 screws to disassemble the bracket. Drill holes with power drill, and make sure the holes are deep enough (2.16 in / 55 mm) to support the inverter. NOTICE! • The figure below is only used for showing the depth and location of holes. Make sure the holes are in the center of each stud and keep at least 1.49 in / 38 mm away from the edge of concrete bricks or studs before marking holes.
- Page 66 Mechanical Installation concrete wooden This step is required for: wall wall e) Align the bracket over the holes and re-fix the bracket on the BMS with screws [Inverter (part L)]. And set the tapping screw [Inverter (part H)] through the washer [Inverter (part I)] and secure the bracket with tapping screws.
- Page 67 Mechanical Installation f) Place the inverter to be seated on the corresponding position of the bracket. As A1- HYB-G2 series inverters are heavy, weigh 75 lbs / 34 Kg. They should be lifted up by two persons and placed carefully onto the bracket. Then adjust the inverter to be centered on the whole system.
- Page 68 Mechanical Installation Open the wiring box cover to complete all the wiring connection. Wiring box NOTICE! • For detailed wiring connection, please refer to "8 Wiring Connection on the Inverter". h) Pre-mount the fixing plate with scews [Inverter (part C)] on the two sides of metal cover and mount the metal cover on the inverter.
- Page 69 Mechanical Installation Inverter Dowel pins Pins holes i) Fix the metal cover with six M5 screws [Inverter (part C)]. 8.8 Ibf.in / 1.0 N·m...
- Page 70 Mechanical Installation Step3: Mount the BI PRO a) Use the perforating paper as a template to mark the screw hole location on the wall; And drill nine holes on the wall. 16 in / 406 mm ≥ 19.68 in/ 500 mm Inverter Perforating paper Ø4 drill for wooden wall...
- Page 71 Mechanical Installation b) Use mallet to knock the nine expansion tube [Backup Interface (part H)] into wall (This step can be ignored in case of wooden wall). wooden This step is required for: concrete wall wall c) Secure the bracket on the wall with tapping screw [Backup Interface (part F)] and washer [Backup Interface (part G)] using torque wrench.
- Page 72 Mechanical Installation d) Hang the BI PRO on the bracket. Please make sure the cleat is well seated on the bracket. Hang the BI PRO on the bracket e) Secure the BI PRO by screwing in the tapping screw with washer on the bottom of BI PRO.
- Page 73 Mechanical Installation Open the door of Backup Interface and remove the dead front to complete all the wiring connection. Door Dead front NOTICE! • For detailed wiring connection, please refer to "9 Wiring Connection on the BI PRO".
- Page 74 Mechanical Installation Drill a hole in the back (Not recommended) a) These three holes correspond to the holes below the perforated paper. Corresponds the holes below the perforating paper b) Drill the hole with a hole cutter. Choose 1 inch or 2 inch size (Metal chips must be cleaned after drilling).
- Page 75 Mechanical Installation Conduit d) The top of the nut and contact surface of the threads must be cleaned after locking the nut, as well as the contact surface between the nut and the box. TSE-382 waterproof adhesive or a similar performance glue. NOTICE! •...
-
Page 76: Wall-Mounting
Mechanical Installation Wall-mounting NOTICE! • For wall mounting, make sure the BMS breaker is no more than 6.56 ft /2 m above the ground so that you can easily shut down the system in emergencies. BMS Breaker Step 1: Mount the battery a) Take out of the accessories from a separate accessory box. - Page 77 Mechanical Installation Studs spaced at 12, 20 and 24 inch: secure the transverse plate and base support using screws (2×M5*8 countersunk head screw), and tighten them. See figure below. Same as Way a to secure the plate. b) Mark the hole location and drill holes; (1) Place the assembled Transverse Plate and Base Support on the wall, look the cylindrical plastic bubble level on the Transverse Plate.
- Page 78 Mechanical Installation Step 1 Step 2 Ground The distance from the Base to the ground is decided according to the local regulations Ø0.24 in./6 mm for Ø0.47 in./12 mm Base Support for Base Support ≥ 3.54 in./ 90 mm ≥ 1.97 in./ 50 mm (1) Concrete Wall (2) Solid Wood Wall NOTICE!
- Page 79 Mechanical Installation c) Secure the assembled transverse plate on the wall. (1) Place the assembled Transverse Plate and Base Support to the wall (or solid wood wall); (2) Attach screws to the holes: • In the case of the concrete wall, attach the M8*85 Expansion Screw (× 4) to the holes but be sure not to tighten (Torque: 10 N·m);...
- Page 80 Mechanical Installation (2) Place Base on the Base Support and secure both left and right sides with screws (4 × M5*20 countersunk screw) [Accessories Rrequired (part C)] (Torque: 2.2-2.5 N·m). Torque: 2.2-2.5 N·m e) Make sure that each connecting pole of the battery module or base is well pluged into the slot of the next battery module which is on the bottom of the module.
- Page 81 Mechanical Installation f) Mount the fixing plate (2 holes) [TP-HS50 (part G)] using M5*10 cross screw [TP-HS50 (part E)], and secure M5*10 screws (2 for each side) to connect Base and Battery Module. Torque: 2.2-2.5 N·m g) Place two battery modules in turn, and secure both left and right sides with screws (4×M5*10 countersunk screw).
- Page 82 Mechanical Installation NOTICE! • In the case of the concrete wall, please perform the following steps strictly. • In the case of the solid wood wall, please go directly to step j. h) Mount the bracket of the battery module. (1) Attach M5*10 screw [TP-HS50 (part E)] through the platen [TP-HS50 (part F)] to Wall Bracket but be sure not to tighten;...
- Page 83 Mechanical Installation CAUTION! • Please re-mount the dust cover to the battery module before drilling holes to avoid dust falling into the interface and do remember to remove the dust cover again after the installation wall bracket completed. i) Place expansion bolts into the two holes. NOTICE! •...
- Page 84 Mechanical Installation j) Place the Wall Bracket on the wall where the mark is drawn previously, and then secure the Wall Brackets on the wall using M6 Tapping Screws (×2) and Washers [TP-HS50 (part B and C)] (Torque: 6-8 N·m). Step 2 Mark TP-HS50 (part E)
- Page 85 Mechanical Installation k) Let the platen [TP-HS50 (part F)] down and place the fourth battery module. Let the Platen down...
- Page 86 Mechanical Installation l) Fix the fixing plate (3 holes) [TP-HS50 (part F)] on both sides of battery module using M5*10 cross screw [TP-HS50 (part E)], and then tighten M5*10 screws. Torque: 2.2-2.5 N·m NOTICE! • In the case of the concrete wall, please perform the following steps strictly. •...
- Page 87 Mechanical Installation Mark Let the Platen down Self-tapping screw × 2 Washer × 2 Wall bracket × 2 Torque: 6-8 N·m NOTICE! • Electric drill dust collector is recommended. CAUTION! • Please re-mount the dust cover to the battery module before drilling holes to avoid dust falling into the interface and do remember to remove the dust cover again after the installation wall bracket completed.
- Page 88 Mechanical Installation n) Remove the bottom dust cover of BMS and place the BMS on the top. Fix the fixing plate (3 holes) on both sides of battery module using M5*10 cross screw, and then tighten M5*10 screws. MSC60060 Torque: 2.2-2.5 N·m Step 2: Mount the inverter a) Two M4 holes are reserved on the BMS for fixing the bracket of the inverter.
- Page 89 Mechanical Installation Inverter (part L) Torque: 4.4 Ibf.in / 0.5 N·m b) Use the bracket as the template to mark the screw hole location on the wall. Round holes...
- Page 90 Mechanical Installation c) Unscrew the two M4 screws to disassemble the bracket. Drill holes with power drill, and make sure the holes are deep enough (2.16 in / 55 mm) to support the inverter. NOTICE! • The figure below is only used for showing the depth and location of holes. Make sure the holes are in the center of each stud and keep at least 1.49 in / 38 mm away from the edge of concrete bricks or studs before marking holes.
- Page 91 Mechanical Installation This step is required for: concrete wooden wall wall e) Align the bracket over the holes and re-fix the bracket on the BMS with screws [Inverter (part L)]. And screw the tapping screw [Inverter (part H)] through the washer [Inverter (part I)] and secure the bracket with tapping screws.
- Page 92 Mechanical Installation f) Place the inverter to be seated on the corresponding position of the bracket. As A1- HYB-G2 series inverters are heavy, weigh 75 lbs / 34 Kg. They should be lifted up by two persons and placed carefully onto the bracket. Then adjust the inverter to be centered on the whole system;...
- Page 93 Mechanical Installation Open the wiring box cover to complete all the wiring connection. Wiring box NOTICE! • For detailed wiring connection, please refer to "8 Wiring Connection on the Inverter". h) Pre-mount the fixing plate with screws [Inverter (part C)] on the two sides of metal cover and mount the metal cover on the inverter.
- Page 94 Mechanical Installation Inverter Dowel pins Pins holes i) Fix the metal cover with six M5 screws [Inverter (part C)]. 8.8 Ibf.in / 1.0 N·m...
- Page 95 Mechanical Installation Step3: Mount the BI PRO a) Use the perforating paper as a template to mark the screw hole location on the wall; And drill nine holes on the wall. 16 in / 406 mm ≥ 19.68 in/ 500 mm Inverter Perforating paper Ø4 drill for wooden wall...
- Page 96 Mechanical Installation b) Use mallet to knock the nine expansion tube [Backup Interface (part H)] into wall (This step can be ignored in case of wooden wall). wooden This step is required for: concrete wall wall c) Secure the bracket on the wall with tapping screw [Backup Interface (part F)] and washer [Backup Interface (part G)] using torque wrench.
- Page 97 Mechanical Installation d) Hang the BI PRO on the bracket. Please make sure the cleat is well seated on the bracket. Hang the BI PRO on the bracket e) Secure the BI PRO by screwing in the tapping screw with washer on the bottom of BI PRO.
- Page 98 Mechanical Installation Open the door of Backup Interface and remove the dead front to complete all the wiring connection. Door Dead front NOTICE! • For detailed wiring connection, please refer to "9 Wiring Connection on the BI PRO".
- Page 99 Mechanical Installation Drill a hole in the back (Not recommended) a) These three holes correspond to the holes below the perforated paper. Corresponds the holes below the perforating paper b) Drill the hole with a hole cutter. Choose 1 inch or 2 inch size (Metal chips must be cleaned after drilling).
- Page 100 Mechanical Installation Conduit d) The top of the nut and contact surface of the threads must be cleaned after locking the nut, as well as the contact surface between the nut and the box. TSE-382 waterproof adhesive or a similar performance glue. NOTICE! •...
-
Page 101: Wiring Connection On The Inverter
Wiring Connection on the Inverter Overview of All Electrical Wiring Methods All electrical wiring will be done in the wiring box, and all electrical wiring methods are similar. Therefore this section will introduce all electrical wiring steps and requirements. • Opening the wiring box cover WARNING! •... - Page 102 Wiring Connection on the Inverter • Removing wiring box waterproof plugs A1-HYB-G2 series inverter is equipped with four 1 inch conduit fittings which are used for electrical wiring access. Four waterproof plugs have been installed on the inverter at the factory. Before wiring connection, these waterproof plugs should be removed by the operator.
- Page 103 Wiring Connection on the Inverter • Cable entry of inverter A conduit fitting or cable gland must be used when wiring connection. The cable is routed from the right side of inverter. Item Type of Cable Entry Conduit plug for AC connection Conduit plug for communication connection Conduit plugs for PV connection Conduit plugs for PV connection...
-
Page 104: Power Connection
Wiring Connection on the Inverter Power Connection • General steps of connecting electrical wirings to terminals Step 1: Choose the appropriate wire according to the specific connection. Step 2: Remove 0.47 in / 12 mm of insulation from the end of DC wire and the AC wire. Step 3: Insert the end of wires into the Cord End Terminal, and then use the crimping tool to crimp the Cord End Terminal tightly (the shape will be square). -
Page 105: Pv Connection
Wiring Connection on the Inverter 8.2.1 PV Connection CAUTION! • Never reverse the polarity of the array string cables as it can cause damage to the inverter. Always ensure correct polarity. WARNING! • Select PV modules with excellent functioning and reliable quality. Open-circuit voltage of module arrays connected in series should be less than the inverter Max. - Page 106 Wiring Connection on the Inverter NOTE! The PV connection mode below is NOT allowed! Inverter PV Array The inverter supports the following PV module connection modes. √ Inverter • PV String Connection A1-HYB-G2 Series inverter can be connected with PV modules in series with 2 MPPTs for A1-HYB-3.8K-G2, A1-HYB-5.0K-G2 and A1-HYB-6.0K-G2, 3 MPPTs for A1-HYB-7.6K-G2.
-
Page 107: Grid Connection
Wiring Connection on the Inverter 8.2.2 Grid Connection CAUTION! • The installer is responsible for providing overcurrent protection. To reduce the risk of fire, only connect to a circuit provided with overcurrent protection in accordance with the National Electrical Code, ANSI/NFPA 70. The connection procedure will vary depending on the grid configuration. - Page 108 Wiring Connection on the Inverter A: L1 cable B: L2 cable C: N cable AC circuit breaker requirements The AC circuit breaker is required to protect each AC line (L1 and L2) of the HYB series inverter. The circuit breaker should be able to handle the rated maximum output voltage and current of the inverter.
-
Page 109: Battery Connection
Wiring Connection on the Inverter 8.2.3 Battery Connection CAUTION! • Never reverse the polarity of the battery cables as this will result in inverter damage. Always ensure correct polarity. Charging and Discharging system of A1-HYB-G2 series inverter is designed for high- voltage lithium-ion battery. - Page 110 Wiring Connection on the Inverter Inverter On the side of inverter Battery BAT- BAT+ POWER On the side of battery A: BAT+ B: Communication connection C: BAT- NOTICE! • Don't violently remove cables when they are locked.
-
Page 111: Ground Connection
Wiring Connection on the Inverter Ground Connection Please additionally earth the inverter to the enclosure of a second earthing or equipotential bonding if it is required by local safety. This prevents electric shock if the original protective conductor fails. • Ground terminal Ground terminals are as follows. - Page 112 Wiring Connection on the Inverter c) Crimp it with crimping tool, pull the heat-shrink tubing over the stripped section of the grounding terminal and use a heat gun to shrink it so that it can be firmly contacted with the terminal; d) Connect the ground cable to the inverter and fix it with M4 screw.
-
Page 113: Communication Connection
Wiring Connection on the Inverter Communication Connection All communication cables will be done on the communication board which is in the wiring box. For the specific requirement of cable, please refer to "Appendix A: Wiring and Breaker Requirement". 8.4.1 Make Communication Connection to Another Inverter/BI PRO •... - Page 114 Wiring Connection on the Inverter Multi-inverter Inverter Inverter BI PRO 120-Ohm terminating resistor 3 2 1 3 2 1 MLPE MLPE Inverter Inverter COMM IN COMM OUT COMM IN COMM OUT 1 2 3 4 5 6 7 8 1 2 3 4 5 6 7 8 1 2 3 4 5 6 7 8 1 2 3 4 5 6 7 8 1 2 3 4 5 6 7 8...
- Page 115 Wiring Connection on the Inverter • Connection steps of terminating resistor Step 1: The 120-Ohm resistor has been pre-installed on the 8-pin female block before leaving factory. Take it out from the accessory box. Step 2: Install the 8-pin female block with resistor to the COMM in male terminal by using slot screwdriver.
- Page 116 Wiring Connection on the Inverter NOTICE! • For the specific communication terminal on the BI PRO, please refer to "9 Wiring Connection on the BI PRO". Diagram for communication connection steps between inverters Step 1 Step 2 Strip Length Inverter (part A) 0.24 in / 6 mm 24-18 AWG Conduit...
- Page 117 Wiring Connection on the Inverter Diagram for communication connection steps between inverter and BI PRO Step 1 Step 2 Strip Length Inverter (part A) 0.24 in / 6 mm 24-18 AWG Conduit 8-pin 18-16 AWG Step 3 Step 4 Step 5 Step 5 On the side of inverter On the side of BI PRO...
-
Page 118: Emergency Stop Connection
Wiring Connection on the Inverter 8.4.2 Emergency Stop Connection Generally, Emergency stop is connected to backup interface to simultaneously command the whole system to become idle and enter a safe mode. While SolaX A1-HYB-G2 series inverter can be wired to include an emergency stop switch as well. Emergency stop connects to inverter only if no backup interface is equipped. -
Page 119: Parallel Connection
Wiring Connection on the Inverter 8.4.6 Parallel Connection A1-HYB-G2 series same-power inverters support up to 4 parallel connection, Unified EMS management function by the primary machine. The primary and secondary machines are interconnected via CAN and RS485 buses. For detailed diagram, please refer to "Appendix D: System Wiring Diagram". -
Page 120: Wiring Connection On The Bi Pro
Wiring Connection on the BI PRO WARNING! • To avoid shock hazard, never power on the system without a connection to Earth at BI PRO. CAUTION! • Before BI PRO wiring connection, please make sure the BI PRO is correctly wall- mounted and can be configured for cable entry at the bottom and sides of the enclosure. - Page 121 Wiring Connection on the BI PRO Step 2: Open the door. Step 3: Remove the door upwards.
- Page 122 Wiring Connection on the BI PRO Step 4: Remove the dead front by unscrewing the seven screws with a screwdriver. Unscrew the metal cover where circuit breakers are to be installed.
-
Page 123: Install Breakers
Wiring Connection on the BI PRO Install Breakers Install a main breaker For Service Equipment The product is "SUITABLE FOR USE AS SERVICE EQUIPMENT". For this scenario, 1. The following main breaker accessory needs to be installed. a. EATON main breaker b. - Page 124 Wiring Connection on the BI PRO WARNING! • Suitable for use with interconnected parallel electric power production sources. WARNING! • Suitable for use in accordance with Article 705 of the National Electrical Code, NFPA WARNING! • MAX. CONTINUOUS LOADS ON MAIN OR BRANCH CIRCUITS NOT TO EXCEED 80% OF THE RATINGS OF THE LISTED CIRCUIT BREAKERS.
- Page 125 Wiring Connection on the BI PRO Grounded bar Neutral bar NOTICE! • Please refer to "Appendix D: System Wiring Diagram" for specific wiring diagram of each solution. Install branch circuit breakers Step 1: Install the breaker. Step 2: Use a Phillips screwdriver to tighten the self-tapping screws on the circuit breaker with a torque of 13 lb-in.
- Page 126 Wiring Connection on the BI PRO Paste labels Paste the attached label in the appropriate place as follows. WARNING PARALLEL ENERGY SOURCE DISCONNECT POWER SOURCE OUTPUT CONNECTION DO NOT RELOCATE THIS OVERCURRENT DEVICE WARNING PARALLEL ENERGY SOURCE DISCONNECT POWER SOURCE OUTPUT CONNECTION DO NOT RELOCATE THIS OVERCURRENT DEVICE...
-
Page 127: Make Ac Connection To Inverter, Generator, Load And Grid
Wiring Connection on the BI PRO Make AC Connection to Inverter, Generator, Load and Grid NOTICE! • Before any wiring connection, the conduit must be installed according to the national and local requirement. NOTICE! • For the specific conductor requirement of size and torque, please refer to "Appendix A: Wiring and Breaker Requirement". - Page 128 Wiring Connection on the BI PRO NOTICE! • For the specific requirement of cable and torque, please refer to "Appendix A: Wiring and Breaker Requirement". • Connect the solar conductors to BI PRO NOTICE! • For the specific requirement of cable and torque, please refer to "Appendix A: Wiring and Breaker Requirement".
- Page 129 Wiring Connection on the BI PRO • Connect the ESS 2 conductors to BI PRO L1 L2 Before installing a main breaker ESS 2 Breaker Installing a main breaker NOTICE! • After installing the main breaker, lugs feed opposite bus.
- Page 130 Wiring Connection on the BI PRO • Connect the smart load conductors to BI PRO NOTICE! • For the specific requirement of cable and torque, please refer to "Appendix A: Wiring and Breaker Requirement". • Connect the non-backup conductors to BI PRO NOTICE! •...
- Page 131 Wiring Connection on the BI PRO • Connect the backup conductors to BI PRO L1 L2 Before installing a main breaker Backup Breaker Installing a main breaker NOTICE! • After installing the main breaker, lugs feed opposite bus.
-
Page 132: Make Communication Connection
Wiring Connection on the BI PRO Make Communication Connection • Overview of all communication cables connection methods All communication cables will be done on the communication board of BI PRO. This section will introduce the steps and requirements for all communication cables connections. - Page 133 Wiring Connection on the BI PRO Item Terminals Port Pin Pin 1: DRY_GEN Pin 2: GND_GEN Pin 3: RS485_RESERVE_A AUX1 terminal (for communication between Pin 4: RS485_RESERVE_B generator and BI PRO, Pin 5: RESERVE Emergency stop and BI PRO) Pin 6: RESERVE Pin 7: STOP_NO+ Pin 8: STOP_NO- Pin 1: NO_1...
- Page 134 Wiring Connection on the BI PRO • Communication connection between inverter and BI PRO Please refer to "8.4.1 Make Communication Connection to Another Inverter/BI PRO" for the detailed steps of connection. • Communication connection of Emergency stop and generator The Emergency stop and generator share the same AUX1 port. Install optional Emergency stop The BI PRO can be wired to include an external emergency stop switch that can switch off the whole system.
- Page 135 Wiring Connection on the BI PRO Step 1 Step 2 Strip Length 0.24 in / 6 mm Inverter (part A) 24-16 AWG Generator Conduit Conduit 8-pin 24-18 AWG E-Stop Step 3 Step 4 1.8 Ibf.in / 0.2 N·m Step 6 Step 5 On the side of BI PRO...
- Page 136 Wiring Connection on the BI PRO Dry contact switch The GEN dry contact switch is used as a controller for an AC generator with a remote start function. The GEN dry contact switch may be used to start the generator by closing the appropriate circuit.
- Page 137 CT L2B are used to measure total current both load and generation of the same phase L2. NOTICE! • For detailed information about how to configure external CT, please refer to "BI PRO CT configuration for A1-ESS-G2" by scanning the QR code. Lock the dead front and close the door. 8.8 lbf.in / 1.0 N·m...
-
Page 138: Close Wiring Cover And Turn On The System
10 Close Wiring Cover and Turn on the System 10.1 Check Below Steps before Turn on the System Step 1: Ensure the system is properly mounted. Step 2: Ensure all grounding wire to the grounding bus-bar are connected properly. Step 3: Ensure all the communication wirings are connected properly. -
Page 139: Shut Down The System
Close Wiring Cover and Turn on the System NOTICE! • If the left indicator do not turn green please check the below points: - All the connections are correct. - All the external breakers are switched on. - The DC switch on the inverter is in the "ON" position. 10.3 Shut Down the System Step 1:... -
Page 140: 11 Indicator Light And Button
11 Indicator Light and Button Indicator light and button of inverter Fault LED 1 and Fault LED 2 LED1 flashes green (0.5s on, 0.5s off) and LED2 is red when arc fault occurs. LED1 flashes green (2s on, 2s off) and LED2 is red when ground fault occurs. - Page 141 Indicator Light and Button Operation LED (Primary) Green for 2s and then quick flashing green for 1s (0.2s on, 0.2s off) when the inverter is in normal or backup status. Flashing green for 2s (1s on, 1s off) and then quick flashing green for 1s (0.2s on, 0.2s off) when the inverter is in waiting or checking status.
- Page 142 Indicator Light and Button Indicator light and button of battery Status light } BAT+ BAT- SOC power indicators POWER Working: When charging, status light will remain on solid green light; when discharging, status light will flash green every 0.5 sec. Fault: Status light begins on solid red;...
- Page 143 Indicator Light and Button Indicator light and button of BI PRO Operation LED Green when the BI PRO is in on-grid status. Flashing green (2s on, 2s off) when the BI PRO is in backup status. Flashing green (0.5s on, 0.5s off) when the BI PRO is in generator status.
- Page 144 Indicator Light and Button BI PRO power button When ON, the A1-ESS-G2 system can intelligently switch between on-grid and off-grid without human intervention. When OFF, manual control of the BI PRO will be enabled when the internal relay is not switched automatically. When some unrecoverable failure is encountered,...
-
Page 145: 12 Troubleshooting
12 Troubleshooting This section contains information and procedures for solving possible problems with A1- ESS-G2 system, and provides you with troubleshooting tips to identify and solve most problems that could occur with the system. This section will help you narrow down the source of the problems you may encounter. Please read the following troubleshooting steps. - Page 146 Troubleshooting Faults Diagnosis and solution U Disk Upgrade Fault Udisk Update Fault • Check if the U disk is correctly plugged and the file is correct • Please contact SolaX Technical Support Meter Communication Fault Meter Fault • Check if the communication cable between inverter and BI connects normally or contact SolaX Technical Support BMS Communication Lost •...
- Page 147 Troubleshooting Faults Diagnosis and solution Over Load in EPS Mode. EPS OverLoad Fault • Turn off some device and clear the error Grid Frequency Out of Range Grid Over Freq Fault • System will reconnect if the utility is back to normal •...
- Page 148 Troubleshooting Faults Diagnosis and solution Temperature Below the Limitation or Temperature Sensor Fault UnderTemp Fault • Please contact SolaX Technical Support Temperature over the limitation • Check if the environment temperature is over limitation Over Temp Fault • Check if the internal fan is fault •...
- Page 149 Troubleshooting Troubleshooting for battery Faults Diagnosis and solution Unable to establish communication with inverter. BMS_External_Err • Restart BMS • Contact SolaX Technical Support Unable to establish communication among batteries. • Restart BMS; BMS_Internal_Err • Check if the connection among batteries is normal; •...
- Page 150 Troubleshooting Faults Diagnosis and solution Insulation fault of BMS. BMS_Insulation_Fault • Restart BMS; • Contact SolaX Technical Support Voltage sampling fault of BMS. BMS_VoltSensor_Fault • Restart BMS; • Contact SolaX Technical Support Temperature sampling fault of BMS. BMS_TempSensor_Fault • Restart BMS; •...
- Page 151 Troubleshooting Faults Diagnosis and solution Inverter does not respond the charging request. BMS_CR_Unresponsive • Restart BMS or inverter; • Contact SolaX Technical Support Software protection of battery module. S_Software_Protect • Restart BMS; • Contact SolaX Technical Support BMS voltage sampling fault. BMS_536_Fault •...
- Page 152 Troubleshooting Troubleshooting for BI Faults Diagnosis and solution CAN Communication Fault between BI and Inverter BI_InvCommFlt • Check the communication cable between BI and inverter • Please SolaX Technical Support BI_E-Stop Emergently switched off or Emergency stop activated BI_ManualOverride BI manual switch activatted Grid Relay Fault BI_GridRlyFlt •...
- Page 153 Troubleshooting Faults Diagnosis and solution Transformer Temperature High or Transformer with Load Imbalance in Off-grid BI_OverTempFlt • Check if the imbalance is over high in off-grid • Please contact SolaX Technical Support BI_InvEngyLow Battery Energy Low in Off-grid Detected BI_GridLost Grid Lost Detected BI_GridVolHigh Grid Voltage High Detected...
-
Page 154: 13 Maintenance
13 Maintenance Maintenance of battery • If the ambient temperature for storage is -4°F~122°F/-20°C~50°C, recharge the batteries at least once every 3 months. • If the ambient temperature for storage is 32°F~104°F/0°C~40°C, recharge the batteries at least once every 12 months. •... - Page 155 Maintenance Step 2: (Optional) Reinstall and secure the buckles to the BAT cables. (1) Align the curve of the cable head to that of the buckle, and then stick the cable head into the buckle base. (2) Align the buckle cover to the buckle base, and then press the cover down to lock it until a "click"...
- Page 156 Maintenance Maintenance of BI PRO The internal fan of BI PRO needs to be replaced when BI PRO prompts fan error. The replacement of fan shall be performed by professional electricians. Before replacement, make sure all the power of BI PRO is switched off. Step 1: First open the outer cover of BI PRO.
-
Page 157: 14 Commission The System
14 Commission the System Step 1: Scan the QR code below to download SolaXCloud APP. You can also find the QR code at www.solaxcloud.com. NOTICE! • The screenshots in this chapter correspond to the SolaXCloud App V6.0.4. Step 2: Create a new account: a) Touch Sign up to start the registration. - Page 158 Commission the System b) Select your Country/Region and Server, then touch Confirm. c) Select your identity type and touch Next.
- Page 159 Commission the System d) Fill in the information as shown in the picture below, then tick Log in means that you have read, understood and agreed to the Privacy Policy and Terms of Use. Then touch Sign up. Step 3: Log in.
-
Page 160: Appendix A: Wiring And Breaker Requirement
Appendix A: Wiring and Breaker Requirement Inverter wiring Inverter power terminal (Purchased by customer) Terminals Type Cross-sectional Area Range Strip Length 90°C(194°F), PV terminals 10-8 AWG 0.47 in / 12 mm 600 V, copper 90°C(194°F), 12-8 AWG(3.8 kW), AC terminals 0.47 in / 12 mm 600 V, copper 10-8 AWG(5/6/7.6 kW) - Page 161 Appendix A: Wiring and Breaker Requirement Inverter communication terminal (Purchased by customer) Strip Torque Terminals Port Pin Type Range Length (in-lbs) Pin 1: RS485_METER_A CAT5 or better Pin 2: RS485_METER_B Pin 3: GND Pin 4: +12V_RELAY_OUT 24-18 0.24 in / terminal 6 mm Pin 5: DRM0...
- Page 162 Appendix A: Wiring and Breaker Requirement BI PRO wiring BI PRO power terminal required wire sizes and torques Cross-sectional Torque Terminals Strip Length Tool Area Range (in-lbs) ESS 2 lugs 4-4/0 AWG 1.0 in / 25 mm 5/16 HEX Key Non-Backup Load lugs 4-4/0 AWG 1.0 in / 25 mm...
- Page 163 Appendix A: Wiring and Breaker Requirement BI PRO communication terminal (Purchased by customer) Strip Torque Terminals Port Pin Type Range Length (in-lbs) Pin 1: RESERVE Pin 2: RESERVE Pin 3: CAN_L CAT5 or 24-18 better Pin 4: CAN_H 0.24 in / 1.8 Ibf.in / Communication 6 mm...
- Page 164 Appendix A: Wiring and Breaker Requirement BI PRO communication terminal (Purchased by customer) Strip Torque Terminals Port Pin Type Range Length (in-lbs) Pin 1: CT L1A+ Shielded, CT L1A terminal twisted pair Pin 2: CT L1A- Pin 1: CT L1B+ Shielded, CT L1B terminal twisted pair...
-
Page 165: Appendix B: Emergency Stop Connection Steps
Appendix B: Emergency Stop Connection Steps For installing Emergency Stop on the inverter, follow the below installation instructions. Step 1: Remove the factory-installed jumper from Pin 7 and 8 of the 8-position "AUX" connector inside the inverter. Step 2: Use minimum 24 AWG conductors to connect Pin 7 and Pin 8 (labeled "12V" and "STOP_NO") to a suitable emergency stop switch. -
Page 166: Appendix C: Meter Y Connection Diagram
Appendix C: Meter Y Connection Diagram... -
Page 167: Appendix D: System Wiring Diagram
Appendix D: System Wiring Diagram 1 Whole home backup solution Generator Solar inverter Solar Electric meter Grid Backup load Main panel Combiner box Smart load A1-ESS-G2 A1-ESS-G2 A1-ESS-G2 N(N≤4) - Page 168 Appendix D: System Wiring Diagram 2 Partial home backup solution Generator Solar inverter Solar Electric meter Grid Combiner box Backup load Backup panel Non_essential load Non_backup panel Smart load A1-ESS-G2...
- Page 169 Appendix D: System Wiring Diagram Generator Electric meter Solar inverter Solar Grid Combiner box Non_essential Non_backup load panel Backup load Backup panel Smart load A1-ESS-G2...
- Page 170 SolaX Power Network Technology (Zhejiang) Co., Ltd. Add.: No. 278, Shizhu Road, Chengnan Sub-district, Tonglu County, Hangzhou, Zhejiang, China E-mail: info@solaxpower.com Copyright © SolaX Power Network Technology (Zhejiang) Co., Ltd. All rights reserved. 320101113900...
Need help?
Do you have a question about the A1-ESS-G2 and is the answer not in the manual?
Questions and answers