
Related Manuals for CARDIO STRONG TX90


Summary of Contents for CARDIO STRONG TX90
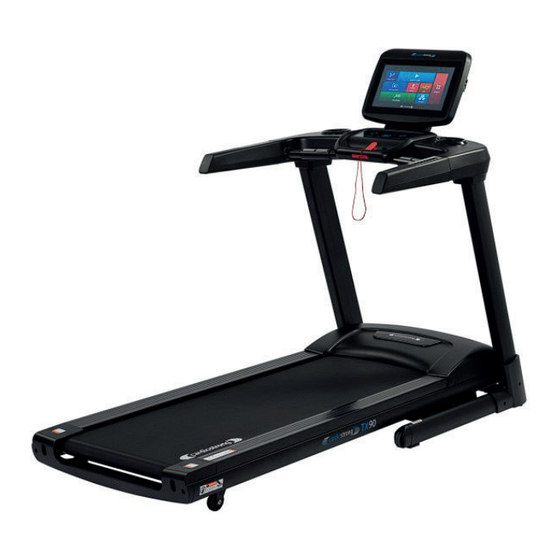
- Page 1 Assembly and Operating Instructions max. 160 kg ~ 60 Min. 125 kg L 125 | W 90 | H 145 FSCSTTX90HD.02.01 Art.-No. CST-TX90-2-HD Treadmill TX90...
- Page 2 TX90...
-
Page 3: Table Of Contents
Content GENERAL INFORMATION Technical Data Personal Safety Electrical Safety Set-Up Place ASSEMBLY General Instructions Scope of Delivery Assembly OPERATING INSTRUCTIONS Console Display Button Functions Programmes 3.3.1 Quick Start Programme 3.3.2 Target programmes 3.3.3 Low-Speed Programme 3.3.4 Pre-Set Programmes 3.3.5 Pace Programme 3.3.6 User-Defi ned Programmes 3.3.7 Heart Rate Controlled Programmes Fitness test... - Page 4 5.4.2 Re-tensioning the Running Mat 5.4.3 Lubricating the Running Mat Maintenance and Inspection Calendar DISPOSAL RECOMMENDED ACCESSORIES ORDERING SPARE PARTS Serial Number and Model Name Parts List Exploded Drawing WARRANTY CONTACT TX90...
- Page 5 Dear customer, thank you for choosing fi tness equipment from cardiostrong®. cardiostrong off ers high-quality home fi tness equipment that is optimally adapted to the conditions at home. Train at home no matter what the weather or time of the day. cardiostrong fi tness equipment off ers training programmes and a variety of equipment for all training levels and all training goals.
- Page 6 (person with legal responsibility). Class H (home use): use at home. These stationary training devices are intended for the use in private homes where access to the training device is regulated by the owner (person with legal responsibility). TX90...
- Page 7 Please pay close attention to the safety and maintenance instructions given here. The contract partner cannot be held liable for damage to health, accidents or damage to the equipment when it is not used in accordance with these instructions. The following safety instructions may appear in this manual: ATTENTION This notice indicates potentially hazardous situations which, if not avoided, may result in property damage.
-
Page 8: General Information
125 kg Packaging dimensions (L x W x H): 225 cm x 96 cm x 43 cm Set-up dimensions (L x W x H): 205 cm x 89.5 cm x 144.5 cm Maximum user weight: 160 kg Use classes: TX90... -
Page 9: Personal Safety
Personal Safety ⚠ DANGER Before you start using the equipment, you should consult your physician that this type of exercise is suitable for you from a health perspective. Particularly aff ected are persons who: have a hereditary disposition to high blood pressure or heart disease, are over the age of 45, smoke, have high cholesterol values, are overweight and/or have not exercised regularly in the past year. -
Page 10: Electrical Safety
The software systems on gym equipment with TFT consoles are set up only for the pre- installed apps. Do not install any additional apps. NOTICE The pre-installed apps on TFT consoles are produced and provided by external manufacturers. Fitshop does not take any responsibility for the availability, functionality or contents of these apps. TX90... -
Page 11: Set-Up Place
Set-Up Place ⚠ WARNING Do not place the equipment in main corridors or escape routes. ⚠ CAUTION Make sure that there is a safety area behind the treadmill with a length of at least 2 m and a width at least equal to the width of the treadmill. The training room should be well ventilated during training and not be exposed to any draughts. -
Page 12: Assembly
To prevent damage to the equipment and the fl oor, assemble the equipment on a mat or packaging board. NOTICE In order to make the assembly as simple as possible, some screws and nuts to be used can already be pre-assembled. Ideally, assemble the equipment at its later set-up place. TX90... -
Page 13: Scope Of Delivery
Scope of Delivery ⚠ WARNING Around the treadmill there is a strap that prevents the treadmill from opening during transport. This strap must be removed before assembly. The scope of delivery consist of the following parts. At the beginning, check whether all parts and tools belonging to the device are included in the scope of delivery and whether damage has occurred. -
Page 14: Assembly
Be careful not to pinch the cables in the following step. Fix the right and left handlebar post (2 and 3) to the main frame (1) with eight allen bolts (7), eight spring washers (8) and eight fl at washers (9). Step1 TX90... - Page 15 Step 2: Assembly of the console unit Connect the two cables (114 and 115) with one another. ATTENTION Be careful not to pinch the cables in the following step. Fix the handlebar (4) to the handlebar posts (2 and 3) with four allen screws (10), four spring washers (8) and four fl at washers (11).
- Page 16 Fix the console cover (89B) to the console (88) with two cross bolts (132). Attach the decorative cover (89A) with two screws (25). Now tighten the bolts (7) from step Attach the two covers for the handlebar post (52L and 52R) with six bolts (42). 31 8 11 110 114 93 Step3 TX90...
- Page 17 Step 4: Alignment of the feet If the fl oor is uneven, you can stabilize the treadmill by turning the two setting screws under the main frame. ⚠ WARNING The treadmill is equipped with high-pressure shock absorbers that can cause the treadmill to suddenly open if handled incorrectly.
-
Page 18: Operating Instructions
To enable the safety key to detach from the contact point of the cockpit in the event of a fall, the safety key clip must be fi rmly attached to your clothing! Make sure that the safety key is not accessible to children. TX90... -
Page 19: Console Display
Console Display... - Page 20 Furthermore, you need 7 times as much oxygen than when in rest. Training between three to six METs is seen as moderate physical activity. Training at more than six METs is seen as strong physical activity. TX90...
-
Page 21: Button Functions
Button Functions BUTTON DESCRIPTION With this button you can start a training programme. When you are in the main menu, you can start your training via quick start. START When your training is paused, you can continue with your training by pressing this button. -
Page 22: Programmes
5.1. Press STOP again to end your training. An overview of the collected training data will be displayed. 5.2. Press START to continue with your training. Upon completion of the programme the console will start the cool down phase automatically. TX90... -
Page 23: Low-Speed Programme
3.3.3 Low-Speed Programme Tap on “LOW SPEED” on the main menu. Choose either time, distance or calories as your target unit. NOTICE You can only choose one unit. Set a value for your desired target unit. Press START to start the programme. The programme starts with a speed of 0.5 km/h. - Page 24 Setting time / 30 = time for each section Programme SPEED INCLINE SPEED INCLINE SPEED INCLINE SPEED INCLINE SPEED INCLINE SPEED INCLINE SPEED INCLINE SPEED INCLINE SPEED INCLINE SPEED INCLINE SPEED INCLINE SPEED INCLINE SPEED INCLINE SPEED INCLINE SPEED INCLINE SPEED INCLINE SPEED INCLINE TX90...
- Page 25 Setting time / 30 = time for each section Programme SPEED INCLINE SPEED INCLINE SPEED INCLINE SPEED INCLINE SPEED INCLINE SPEED INCLINE SPEED INCLINE SPEED INCLINE SPEED INCLINE SPEED INCLINE SPEED INCLINE SPEED INCLINE SPEED INCLINE SPEED INCLINE SPEED INCLINE SPEED INCLINE SPEED...
- Page 26 Setting time / 30 = time for each section Programme SPEED INCLINE SPEED INCLINE SPEED INCLINE SPEED INCLINE SPEED INCLINE SPEED INCLINE SPEED INCLINE SPEED INCLINE SPEED INCLINE SPEED INCLINE SPEED INCLINE SPEED INCLINE SPEED INCLINE SPEED INCLINE SPEED INCLINE TX90...
- Page 27 Setting time / 30 = time for each section Programme SPEED INCLINE SPEED INCLINE SPEED INCLINE SPEED INCLINE SPEED INCLINE SPEED INCLINE SPEED INCLINE SPEED INCLINE SPEED INCLINE SPEED INCLINE SPEED INCLINE SPEED INCLINE SPEED INCLINE SPEED INCLINE SPEED INCLINE...
-
Page 28: Pace Programme
6.1. Press STOP again to end your training. An overview of the collected training data will be displayed. 6.2. Press START to continue with your training. Upon completion of the programme the console will start the cool down phase automatically. TX90... -
Page 29: Heart Rate Controlled Programmes
3.3.7 Heart Rate Controlled Programmes ⚠ WARNING Your training equipment is not a medical device. The heart rate measurement of this equipment may be inaccurate. Various factors can aff ect the accuracy of the heart rate measurement. The heart rate measurement serves only as a training aid. There are three diff erent heart rate-oriented programmes. -
Page 30: Fitness Test
In case the console does not receive a signal for 15 seconds the programme will be stopped. If your heart rate gets to high the console will display “OVER PULSE”. In this case, please interrupt your test immediately. Upon completion of the test an overview of the collected training data will be displayed. TX90... -
Page 31: Media
Media Here you will fi nd many diff erent apps like YouTube, Twitter, Facebook or Instagram. IMPORTANT NOTE To make sure the preinstalled apps are working correctly, you will have to update them from time to time. The apps that need to be updated will give you a message. To update the app, you need to have a google account. -
Page 32: Wireless Connection And Fitness Apps
Just follow the instructions on the screen to perform the update. Please note: The system is set up only for the pre-installed apps. Do not install any additional apps as their proper functionality can not be guaranteed. The installation of other apps might cause technical issues. Example: Kinomap TX90... -
Page 33: Storage And Transport
STORAGE AND TRANSPORT General Instructions ⚠ WARNING The storage location should be chosen so that improper use by third parties or children can be prevented. If your equipment does not have transportation wheels, the equipment must be disassembled before transportation. ATTENTION Make sure that the equipment is protected from moisture, dust and dirt in the selected storage location. -
Page 34: Folding Up The Treadmill
To release the hydraulic brake lock, use your left foot to push the upper part of the hydraulic brake slightly forward until the lock releases and the treadmill can be pulled back. Keep holding the treadmill. The hydraulic brake lowers itself gently downwards. Once the treadmill has lowered 2⁄3, you can let go of the treadmill. TX90... -
Page 35: Troubleshooting, Care And Maintenance
TROUBLESHOOTING, CARE AND MAINTENANCE General Instructions ⚠ WARNING Do not make any improper changes to the equipment. ⚠ CAUTION Damaged or worn components may aff ect your safety and the life of the equipment. Therefore, immediately replace damaged or worn components. In such a case, contact the contract partner. -
Page 36: Error Codes And Troubleshooting
Error Codes and Troubleshooting The electronics of the equipment continuously carries out tests. In case of deviations, an error code appears on the display and normal operation is stopped for your safety. Please contact the contract partner for technical support. TX90... -
Page 37: Care And Maintenance
Care and Maintenance The most important maintenance measure is the care of the running mat. This includes adjustment, re tensioning and lubrication of the running mat. Damage resulting from insuffi cient or neglected care is not covered by the warranty. You should therefore carry out maintenance checks at regular intervals. -
Page 38: Re-Tensioning The Running Mat
Continue turning the belt by hand so that the entire surface between the endless belt and the running plate is lubricated. Wipe off the excess silicone oil or silicone spray. NOTICE This maintenance must also be carried out after prolonged non-use of the equipment. TX90... -
Page 39: Maintenance And Inspection Calendar
Maintenance and Inspection Calendar To avoid damage from body sweat, the equipment must be cleaned with a damp towel (no solvents!) after each training session. The following routine tasks must be performed at the specifi ed intervals: Part Weekly Monthly Quarterly Display console Tension of the running mat... -
Page 40: Recommended Accessories
Alternatively, you can use the QR-code provided. Of course, you can also contact our customer service: by telephone, e-mail, in one of our branches or via our social media channels. We will be happy to advise you! chest strap fl oor mat chest strap contact gel silicone spray handrails TX90... -
Page 41: Ordering Spare Parts
It’s located on a white sticker. The exact position of this sticker is shown in the following illustration. Enter the serial number in the appropriate fi eld. Serial number: Brand / Category: cardiostrong / treadmill Model Name: TX90 Smart Article Number: CST-TX90-2-HD... -
Page 42: Parts List
23800-6-1272-04 D33*D44*34.5 Nylon nut 55208-1-2008-FA M8*1.25*8T Metal clip 26100-6-1086-N0 D27*D4.3*2T Screw 52842-2-0015-F0 ST4.2*15L Motor cover fi xing plate 26100-6-1090-00 32*18*18 cable tie base 26100-6-1089-00 15*10 Screw 50904-2-0015-N0 ST4*1.41*15L Fixing plate 816S0-6-1673-N0 30*27*4T Motor 26100-6-1085-03 DC-3.5HP Allen bolt 50308-5-0015-F0 M8*1.25*15L TX90... - Page 43 Buff er 78000-6-1081-B2 20*56*2.0T Allen screw 54010-5-0030-C3 M10*1.5*30L Allen bolt 50308-5-0040-F3 M8*1.25*40 Front roller set 26100-3-1100-01 D17*D60*625L Rear roller set 261D1-3-1200-01 D17*D60*620L Belt 58004-6-1101-00 PJ8 227 Allen screw 54008-5-0075-F0 M8*1.25*75L Upper cover 261D8-6-1576-B0 388.6*895.3*85 Lower cover 26100-6-1577-B0 388.8*395.3*137.4 Water bottle holder 26100-6-1578-B0 D134*115 Upper cover for button base...
- Page 44 Buff er 55308-4-0020-G9 D10.5*20L Screw 53329-2-0009-D0 ST2.9x9.5L Flat washer 55105-1-1208-DA D12*D5.2*0.8T Nylon nut 55205-1-2005-DA M5*0.8*5T Console 261DH-6-1701-B0 AC00400-07 Decorative cover for computer 261D8-6-1749-B0 202*49*23 Back computer cover 261D8-6-1748-B0 202*178*37 Upper computer cover 261D8-6-1702-B0 454.2*348*44.3 Lower computer cover 261D8-6-1703-B0 454.2*344.5*60.5 TX90...
- Page 45 Button plate 261D8-6-1756-B0 267.2*95.3*13.5 Upper cable for button on side 261D8-6-1589-01 500L Handle pulse cable 261D8-6-1785-00 1000L Button overlay 261D8 Right speaker 261D8-6-1761-00 B00202050,4Ω 3W 100L LED light connecting plate 261D1-6-1744-00 PA-AA01170-K5 Backlight plate 261D2-6-2405-01 190*25 Lower cable for button on left 261D8-6-1582-00 800L Lower cable for button on right...
- Page 46 D15*D5.2*1.0T Round head cross screw 50903-2-0025-F0 ST3*25L Round end cap 553K0-1-0016-B8 D 1 1/4"x16L PCB board for button 261D8-6-1759-00 Air Buff er 261D8-6-1061-R0 200*43*37 Allen screw 54008-5-0016-UF0 M8*1.25*16L Open mouth spanner 58030-6-1050-C0 153*6.5T 13*15(chrome) Allen cross spanner 58030-6-1051-N0 M6*130L TX90...
-
Page 47: Exploded Drawing
Exploded Drawing... -
Page 48: Warranty
Ownership of equipment or parts of equipment which have been replaced is transferred to us. The warranty period is not extended nor does a new warranty period begin following repair or replacement under the warranty. TX90... - Page 49 Warranty Conditions For the warranty to be valid, the following steps must be taken: Please contact our customer service by email or phone. If the product under warranty has to be sent in for repair, the seller bears costs. After expiry of the warranty, the buyer bears the costs of transport and insurance.
-
Page 50: Contact
Sie unserer Homepage: Sie unserer Homepage: https://stg.fi t/statit6 https://stg.fi t/statitb https://stg.fi t/statit9 Please fi nd a detailed overview including address and opening hours for all stores of the Fitshop Group in Germany and abroad on the following website: www.fi tshop.com/en/stores TX90... - Page 51 LIVE FITNESS WEBSHOP AND SOCIAL MEDIA Fitshop is Europe’s largest specialist store for www.fi tshop.co.uk home fi tness equipment with currently over 70 www.fi tshop.de/blog stores and one of the world’s most renowned online mail order companies for fi tness equipment.
- Page 52 Notes TX90...
- Page 53 Notes Notes...
- Page 54 Notes Notes TX90...
- Page 56 Treadmill TX90...
Need help?
Do you have a question about the TX90 and is the answer not in the manual?
Questions and answers