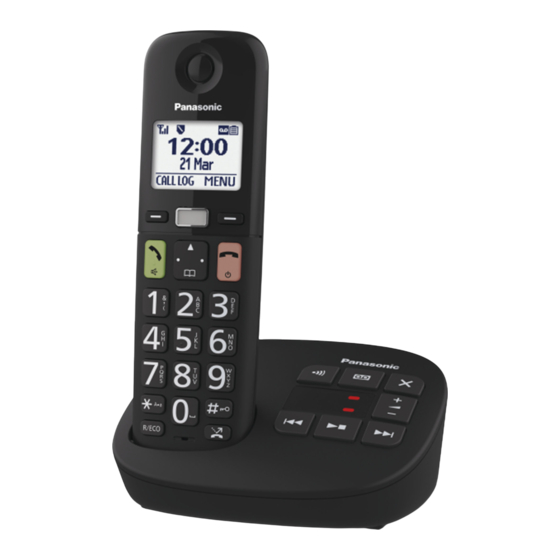
Panasonic KX-TGU120 Series Operating Instructions Manual

Panasonic KX-TGU120 Series Operating Instructions Manual

Digital cordless answering system

Advertisement

Model shown is KX-TGU120.
Before initial use, see "Getting Started" on
page 12.
Thank you for purchasing a Panasonic product.
Please read these operating instructions before using the unit and save them for
future reference.
To use this unit in your country, first change the unit's region setting to match
your country (page 50).
Operating Instructions
Digital Cordless Answering System
Model No.
KX-TGU120AZ
KX-TGU432AZ

Advertisement

Table of Contents
loading
Need help?

Need help?

Do you have a question about the KX-TGU120 Series and is the answer not in the manual?

Questions and answers

Subscribe to Our Youtube Channel

Summary of Contents for Panasonic KX-TGU120 Series

  • Page 1 Model shown is KX-TGU120. Before initial use, see “Getting Started” on page 12. Thank you for purchasing a Panasonic product. Please read these operating instructions before using the unit and save them for future reference. To use this unit in your country, first change the unit’s region setting to match...
  • Page 2: Table Of Contents

    Table of Contents Introduction Phonebook Model composition .....3 Phonebook ......34 Accessory information ....4 Speed dial ........36 Graphical symbols for use on Favourites Key ......36 equipment and their Programming descriptions .......5 Menu list ........38 Important Information Alarm ........45 For your safety ......6 Do not disturb mode ....46 Important safety instructions ..9 Baby monitor ......47...
  • Page 3: Introduction

    Introduction Model composition n KX-TGU120 series n KX-TGU430 series R Model shown is KX-TGU120. R Model shown is KX-TGU432. Base unit Handset Series Model No. Part No. Part No. Quantity KX-TGU120 KX-TGU120 KX-TGU120 KX-TGUA10 series KX-TGU430 KX-TGU432 KX-TGU430 KX-TGUA40 series...
  • Page 4: Accessory Information

    Introduction Accessory information Supplied accessories Quantity Accessory item/Part number KX-TGU120 KX-TGU432 AC adaptor for base unit/ PNLV226AL0X Telephone line cord (for Australia) Telephone line cord (for New Zealand) Rechargeable batteries Handset cover Charger/PNLC1099ZB – AC adaptor for charger/ – PNLV233ALKZ The AC adaptor is for use with information technology equipment only.
  • Page 5: Graphical Symbols For Use On Equipment And Their Descriptions

    Introduction Additional/replacement accessories Please contact your nearest Panasonic dealer for sales information. Accessory item Model number/Specifications Rechargeable Battery type: batteries – Nickel metal hydride (Ni-MH) – 2 x AAA (R03) size for each handset – 1.2 V Other information R Design and specifications are subject to change without notice.
  • Page 6: Important Information

    Important Information Installation For your safety R To prevent the risk of fire or electrical shock, do not expose the To prevent severe injury and loss of life/ product to rain or any type of property, read this section carefully moisture.
  • Page 7 Important Information make sure children use this product R Never install telephone line sockets only under adult supervision. in wet locations unless the socket is R To prevent hearing damage, we specifically designed for wet recommend that you set this product locations.
  • Page 8 Important Information instructions and limitations specified R No “000” (for Australia), “111” (for in this manual. New Zealand), and/or other calls R Only use a compatible base unit (or can be made from this device during charger) to charge the batteries. Do a mains power failure.
  • Page 9: Important Safety Instructions

    R The product should be kept away The base unit and other compatible from heat sources such as heating Panasonic units use radio waves to devices, cooking appliances, etc. It communicate with each other. should not be placed in rooms...
  • Page 10: Other Information

    Important Information R The maximum calling distance may Information on Disposal in other be shortened when the product is Countries outside the European used in the following places: Near Union obstacles such as hills, tunnels, underground, near metal objects such as wire fences, etc. R Operating the product near electrical appliances may cause interference.
  • Page 11 Important Information R Power consumption: Base unit: Standby: 0.8 W Maximum: 2.7 W Charger: Standby: 0.2 W Maximum: 1.2 W R Operating conditions: 0 °C–40 °C, 20 %–80 % relative air humidity (dry)
  • Page 12: Getting Started

    Getting Started Note: Setting up R Use only the supplied Panasonic AC adaptor PNLV226AL. R Use only the supplied telephone line Connections cord. n Base unit n Charger Connect the AC adaptor plug to the unit until you hear a click.
  • Page 13 Getting Started Removing the battery Battery installation R USE ONLY rechargeable Ni-MH batteries AAA (R03) size ( R Do NOT use alkaline/manganese/ Ni-Cd batteries. R Confirm correct polarities ( R Follow the directions on the display to set up the unit.
  • Page 14 AC adaptor to your telephone line. Note for battery installation R Use the supplied rechargeable batteries. For replacement, we recommend using the Panasonic rechargeable batteries noted on page 5, 7. Note for battery charging R It is normal for the handset to feel warm during charging.
  • Page 15: Controls

    When eco mode is on. KX-TGU430 series: page 3 When torchlight or Amplify key feature is off. (KX-TGU430 series: Handset page 3) n KX-TGU120 series: page 3 Note: R Actual battery performance depends on usage and ambient environment. Controls Base unit...
  • Page 16 Getting Started Torchlight/Ringer indicator /ZN (Talk/Speakerphone) M N (Amplify key) Dial keypad MjN/MkN ( : Volume up/down) N (Key lock) MR/ECON Speaker R: Recall/Flash /ZN (Talk/Speakerphone) ECO: Eco mode shortcut key Dial keypad Microphone N (Key lock) Receiver N (Torchlight) Display Microphone Favourites Key (Favourites call)
  • Page 17: Display Icons/Indicators

    Getting Started Item Meaning Display icons/ R When displayed near the battery Indicators icon: Answering system is on. Handset display items (page 54) R When displayed Item Meaning with a number: Range status: The New messages more bars visible, the have been closer the handset is recorded.
  • Page 18: Turning The Power On/Off

    Getting Started Item Meaning Handset soft key icons Baby monitor is Icon Action activated. The name/ Accepts the current number displayed selection. next to the icon indicates the Temporarily turns off the monitoring unit. ringer for incoming calls. (page 47) (page 22) Line in Someone is using the...
  • Page 19: Other Settings

    When this setting is selected, ringer indicator will not work. are not displayed on the handset display. KX-TGU120 series: page 3 Low battery alert When this feature is turned on, the unit Setting the eco mode notifies you by beeping 3 times at the...
  • Page 20 Getting Started Setting low battery alert To turn this feature on, select the desired alert interval, or select “Off” to turn this feature off. The default setting is “Every Hour”. MMENUN#176 MbN: Select the desired setting. a MOKN a M...
  • Page 21: Making/Answering Calls

    PIN 5 (max.), it will be changed to level 4 in the phonebook, a pause is also in the next call. (KX-TGU120 series: needed (page 35). page 3) Example: If you need to dial the line access number “0”...
  • Page 22: Answering Calls

    R After holding for 10 minutes, the call is disconnected. Adjusting the ringer volume Mute Handset n KX-TGU120 series: page 3 Press MMUTEN during a call. Press MDN or MCN on the navigator key To return to the call, press repeatedly, to select the desired MMUTEN.
  • Page 23 High volume emitted To answer the 2nd call, from the product may cause hearing n KX-TGU120 series: page 3 damage. Press MR/ECON R Pressing the M N key activates the Amplify key feature. Use this key n KX-TGU430 series: page 3 with care.
  • Page 24 Making/Answering Calls Note: Turning the Amplify key feature on/ R Depending on the environment where this handset is being used, Press M N while on a call. this feature may not be effective. R The unit displays . R This feature is not available while using the speakerphone.
  • Page 25: Intercom

    Making/Answering Calls callers, turn the privacy mode on To resume the conference: (page 42). MMENUN a MbN: “Conference” a MOKN R To cancel the conference: Transferring calls, MMENUN a MbN: “Stop conference calls Conference” a MOKN Available for: You can continue the KX-TGU432 conversation with the outside caller.
  • Page 26: Key Lock

    Making/Answering Calls After the other party answers, the speakerphone mode is Key lock turned on. The handset can be locked so that no When you finish talking, press calls or settings can be made. Incoming calls can be answered, but Note: most other functions are disabled while the key lock is on.
  • Page 27 Making/Answering Calls may change when you turn on the handset again: – Without a password: The key lock turns off. – With a password: The key lock stays on. R The following keys and operations are available when the key lock is on: –...
  • Page 28: Nuisance Call Block

    Nuisance Call Block – “Single Number”: The unit blocks calls from specific phone numbers Nuisance call block stored in the call block list. – “Range of Numbers”: The unit You can press the M N key in the blocks calls that begin with a following situations to disconnect the number stored in the call block list, current call and add a phone number to...
  • Page 29 Nuisance Call Block MbN: Select the desired entry to be Viewing/editing/erasing call blocked. block numbers N a MbN: “Yes” a MOKN a MbN: “Nuisance Call Block” Adding call blocked numbers a MOKN manually MbN: “Single Number” or “Range of Numbers” a MOKN MbN: Select the desired entry.
  • Page 30 Nuisance Call Block Displaying and clearing the blocked call count The total number of blocked calls (up to 65,000) will be displayed. MbN: “Nuisance Call Block” a MOKN MbN: “Blocked Calls Count” a MOKN R To exit, press M MCLEARN MbN: “Yes”...
  • Page 31: Automated Call Block

    Automated Call Block R When the unit receives a call from a caller who is not registered in the Automated call block phonebook, Favourites Key, allow name list, or allowed number Automated call block means the unit database in the following situations, screens incoming calls before ringing.
  • Page 32 Automated Call Block Setting the automated call Adding to the allow name list block You can allow specific callers to pass through by adding the caller’s name to N a MOKN the allow name list even if you do not MbN: “Block/Unblock”...
  • Page 33 Automated Call Block MERASEN a MbN: “Yes” a MOKN Resetting to the pre-recorded greeting message for automated call MbN: “Yes” a MOKN a M block This procedure will erase your greeting Greeting message for message for automated call block and automated call block reset to the pre-recorded one.
  • Page 34: Phonebook

    (24 digits max.) to the phonebook, and To store the name, continue from assign each phonebook entry to the step 3, “Editing entries”, page 35. desired category (page 34). KX-TGU120 series: page 3 Storing caller information to the KX-TGU430 series: page 3 phonebook Important: Press left M N navigator key.
  • Page 35 Phonebook To change category names MbN: Select the desired category MbN: “Category Name” a MOKN (page 34). a MOKN 2 times a a Edit the name (10 characters max.). a MOKN To set category ringer tone Erasing entries MbN: Select the current setting of the category ringer tone.
  • Page 36: Speed Dial

    Phonebook press MDN (Pause) to add pauses MbN: “Edit” a MOKN after the number and PIN as Edit the name if necessary. a necessary (page 21). MOKN Edit the phone number if necessary. a MOKN 2 times a Speed dial You can assign 1 phone number to each of the dial keys (1 to 9) on the Erasing an entry...
  • Page 37 Phonebook Note: Press Favourites Key. MbN: Select the desired entry. R Favourite contacts are a common a MOKN feature within the system. R If the indicator flashes when the handset is not placed on the base Adding phone numbers unit or charger, battery consumption manually to Favourites Key will be faster than usual.
  • Page 38: Programming

    Programming Menu list To access the features, there are 2 methods. n Scrolling through the display menus MMENUN Press MCN, MDN, MEN, or MFN to select the desired main menu. a MOKN Press MCN or MDN to select the desired item from the next sub-menus. a MOKN Press MCN or MDN to select the desired setting.
  • Page 39 Programming Sub-menu 1 Sub-menu 2 Settings Code New Message Outgoing Call #338 – On/Off <Off> *1 , *2 Alert Outgoing Call – – Notification Outgoing Call Activate – Remote Code <Inactivate> Base Unit Beep #339 <Off> Settings Number of Auto #211 2-9 Rings Rings...
  • Page 40 Programming Main menu: “Initial Setup” Sub-menu 1 Sub-menu 2 Settings Code Ringer Setup Off-6 <6> #160 – Ringer Volume (External) – Handset Off-6 <3> #G160 – Ringer Volume (External) – Base Unit 1-6 <6> #175 – Ringer Volume (Intercom) (Handset) <Ringtone 1>...
  • Page 41 Programming Sub-menu 1 Sub-menu 2 Settings Code Time Settings – #101 Set Date/Time Memo Alarm <Off> #720 – Alarm1-3 Once Daily Weekly <Caller ID> #226 – Time *1 , *5 Manual Adjustment Amplify Volume – <Normal> #279 Amplified Mode Low Battery –...
  • Page 42 Programming Sub-menu 1 Sub-menu 2 Settings Code *1 , *2 – <Normal> #729 Security Enhanced Record – – #302 Greeting Display Setup LCD & Key <On> #276 – Backlight Level 1–4 #145 – Contrast <2> (Display contrast) Handset Name – #104 Display Name #105...
  • Page 43 Programming Sub-menu 1 Sub-menu 2 Settings Code – <0000> #132 Base Unit PIN Register Register – #130 Handset Cancel – #131 Register – <Australia> #136 Country NewZealand Main menu: “Ringer Setup” Sub-menu 1 Sub-menu 2 Settings Code Ringer Volume Handset Off-6 <6>...
  • Page 44 If you program these settings using one of the handsets, you do not need to program the same item using another handset. (KX-TGU432) KX-TGU430 series: page 3 KX-TGU120 series: page 3 This menu is not displayed when scrolling through the display menus. It is only available in direct command code.
  • Page 45: Alarm

    Programming *12 To prevent other users from joining your conversations with outside callers, turn this feature on. Proceed with the operation Alarm according to your selection in step An alarm sounds at the set time for 1 n Once: minute and is repeated 5 times at 5 Enter the desired date and minute intervals (snooze function).
  • Page 46: Do Not Disturb Mode

    Programming Continue from step 3, “Turning do Do not disturb mode not disturb mode on/off”, page 46. Do not disturb mode allows you to Setting the ring delay select a period of time during which the This setting allows the handset to ring handset will not ring for outside calls.
  • Page 47: Baby Monitor

    Programming Setting the baby monitor Baby monitor Perform the setting operation with the handset to be monitored (for example, Available for: the handset placed in a baby’s room). KX-TGU430 series: page 3 This feature allows you to listen in on a To monitor with a handset room where another handset is The internal baby monitor feature is...
  • Page 48 Programming Note: Edit the name if necessary. a MOKN R If you edit a phonebook entry which is assigned for monitoring, Edit the phone number if the edited entry does not transfer necessary. a MOKN 2 times to the monitor. Erasing an outside monitoring n By entering phone numbers: number...
  • Page 49: Other Programming

    Programming the auto intercom feature is set to Displaying the handset name “On” (page 26). You can select whether or not the Note: handset name is displayed in standby R If you receive an outside call mode. The default setting is “Off”. when communicating with the MMENUN#105 monitored handset, the interrupt...
  • Page 50 Programming Enhancing security for Changing the unit’s region phone calls setting You can increase the security of phone MMENUN#136 conversations by setting this feature to MbN: Select the desired country. “Enhanced”. When “Enhanced” is a MOKN selected, is displayed. The default “Australia”...
  • Page 51: Caller Id Service

    Caller ID Service 7-digit local number. Do not dial the “0” prefix or the area code. Using Caller ID service Caller ID features When an outside call is being received, Important: the caller information is displayed. R This unit is Caller ID compatible. To Caller information for the last 50 callers use Caller ID features (such as is logged in the caller list from the most...
  • Page 52: Caller List

    If the redial list is displayed, the 1st call on hold. press left M N navigator key to n KX-TGU120 series: page 3 switch to the caller list. Follow your phone service provider Press MCN to search from the most instructions using MR/ECON.
  • Page 53 Caller ID Service caller list, you can store the area If the redial list is displayed, code which you want the unit to press left M N navigator key to delete automatically (page 53). switch to the caller list. MbN: Select the desired entry. a Storing an area code to be MMENUN deleted automatically...
  • Page 54: Answering System

    ( messages (old and new) (KX-TGU120 series: page 3) on (KX-TGU430 series: page 3) the base unit flashes rapidly, if while the answer on/off indicator...
  • Page 55: Greeting Message

    Answering System Resetting to a pre-recorded greeting Greeting message message Use this procedure to erase your When the unit answers a call, a greeting message and use a greeting message is played to callers. pre-recorded one. You can use either: MMENUN#304 –...
  • Page 56 Answering System R Even if you press and hold M Operating the answering system when the end of this message is during playback played, the next message is played Operation at normal speed. MjN or MkN Adjust the speaker Erasing all messages volume Press M N 2 times while the unit is not...
  • Page 57: Advanced New Message Alerting Features

    Answering System Operation Erasing all messages Play all messages MMENUN#325 Play greeting MbN: “Yes” a MOKN a M message Record greeting message Advanced new Turn answering message alerting system on features MMENUN Pause message 9 or Stop recording Available for: MSTOPN Stop playback KX-TGU430 series: page 3...
  • Page 58 Answering System After you answer the new message n If the phone number is not being alert call, you can listen to messages stored: from that call (page 59). MMENUN#338 Important: MbN: “On/Off” a MOKN R A new message alert is stopped 1 R If you select “Off”, press minute after the unit starts to call.
  • Page 59: Remote Operation

    Answering System R Even if the unit makes a new Activating/inactivating the remote message alert call, the handset access code to play messages redial list does not show the record. If you activate this feature, you must enter the remote access code (page 59) to play the new message Remote operation from the new message alert call.
  • Page 60 Answering System Operation Using the answering system Record greeting message remotely Stop recording Dial your phone number from a Stop playback touch-tone phone. Turn answering system off After the greeting message starts, enter your remote access code. Erase currently playing message Follow the voice guidance prompts as necessary or control the unit...
  • Page 61: Answering System Settings

    Answering System MbN: Select the desired setting. a Answering system MOKN a M settings For service provider voicemail subscribers (for Australia) Call screening To receive voicemail and use the answering system properly, please While a caller is leaving a message, note the following: you can listen to the call through the R “Voicemail”...
  • Page 62 Answering System For Call Minder or Voicemail Selecting “Greeting Only” subscribers (for New Zealand) You can select “Greeting Only” To receive Call Minder or Message which sets the unit to announce a Mailbox messages and use the unit’s greeting message to callers but not answering system properly, please record messages.
  • Page 63: Useful Information

    Useful Information Voicemail service For New Zealand To receive Call Minder or Message Mailbox messages, please note the following: “Call Minder” and “Message Mailbox” are automatic answering services offered by your phone service provider. For Australia and New Zealand In addition to your unit’s answering system you may also have voicemail service from your phone service provider.
  • Page 64 Useful Information – To enter another character located on the same dial key, press MEN to move the cursor to the next space, then press the appropriate dial key. – If you do not press any dial key within 2 seconds after entering a character, the character is fixed and the cursor moves to the next space.
  • Page 65 Useful Information Extended 1 character table ( R The following are used for both uppercase and lowercase: Extended 2 character table ( R The following are used for both uppercase and lowercase: Cyrillic character table (...
  • Page 66: Error Messages

    Useful Information Error messages Display message Cause/solution Base no power R Confirm the base unit’s AC adaptor is connected to the unit and the power outlet correctly. No link. R The handset has lost communication with the Reconnect base unit. Move closer to the base unit and try AC adaptor.
  • Page 67 Useful Information General use Problem Cause/solution The handset does not turn R Place the handset on the base unit or charger to on even after installing turn on the handset. charged batteries. The unit does not work. R Make sure the batteries are installed correctly (page 13).
  • Page 68 Useful Information Problem Cause/solution Excessive use of the R Continuous usage of the torchlight will reduce torchlight can reduce the the battery life to 2 hours. battery life. Note: Torchlight will automatically turn off after 5 minutes of usage. You can press the M N key to turn back Handset functions R This could be due to temporary communication...
  • Page 69 Useful Information Making/answering calls, intercom Problem Cause/solution R The handset is too far from the base unit. Move is displayed. closer. R The base unit’s AC adaptor is not properly connected. Reconnect AC adaptor to the base unit. R The handset is not registered to the base unit. Register it (page 73).
  • Page 70 Useful Information Problem Cause/solution I cannot make a call. R You dialled a call restricted number (page 49). R The key lock feature is turned on. Turn it off (page 26). R The unit is not designed to be used with rotary/ pulse dialling services.
  • Page 71 Useful Information Caller ID Problem Cause/solution Caller information is not R You must subscribe to a Caller ID service. displayed. Contact your phone service provider for details. R If your unit is connected to any additional telephone equipment, remove and plug the unit directly into the wall socket.
  • Page 72 Useful Information Problem Cause/solution The name stored in the R Edit the phonebook entry name to fit in 1 line of phonebook is not fully text (page 35). displayed while an outside call is being received. The following features are R If the handset is directly registered to the router/ not available: FritzBox, these features may not be available.
  • Page 73: Registering A Unit

    Useful Information Liquid damage Problem Cause/solution Liquid or other form of R Disconnect the AC adaptor and telephone line moisture has entered the cord from the base unit. Remove the batteries handset/base unit. from the handset and leave to dry for at least 3 days.
  • Page 74 Useful Information Deregistering a handset A handset can cancel its own registration to the base unit, or other handsets registered to the same base unit. This allows the handset to end its wireless connection with the system. MMENUN#131 R All handsets registered to the base unit are displayed. MbN: Select the handset you want to cancel.
  • Page 75: Warranty (New Zealand)

    6) Damage to the product caused by accident, misuse or Act of God. 7) Repairs when the product has been dismantled, repaired, modified or serviced by other than a Panasonic Authorised Dealer authorised to service that type of product. IF YOUR PANASONIC PRODUCT FAILS WITHIN THE...
  • Page 76: Warranty (Australia)

    Australia. 2. Subject to the conditions of this warranty and during the Warranty Period, Panasonic or its Authorised Service Centre will perform the necessary service on the product without charge for parts or labour, if in the opinion of Panasonic, the product is found to be faulty within the Warranty Period.
  • Page 77: Index

    Index Conference calls: 25 Index Control type: 16 D Date and time: 18 A Alarm: 45 Direct command code: 38 Answering calls: 22 Display Answering system: 54 Contrast: 42 Call screening: 61 Do not disturb mode: 46 Erasing Eco mode: 19 messages: 56, 57, 60 Equalizer: 24 Greeting message: 55...
  • Page 78 Index Ringer indicator: 19 Ringer tone Intercom call: 40 Outside call: 40 Security for phone calls: 50 Speakerphone: 21 Speed dial: 36 Time adjustment: 41 Torchlight: 19 Transferring calls: 25 Troubleshooting: 66 Voicemail: 63 Volume Amplify key: 23 Receiver: 21 Ringer (Base unit): 22 Ringer for intercom call (Handset): 40...
  • Page 79 Notes...
  • Page 80 Customer Care Centre Tel. No.: (09) 272 0178 or website www.panasonic.com/nz Sales Department: 1 Innovation Road, Macquarie Park NSW 2113, Australia 18 Sir Woolf Fisher Drive, Highbrook, East Tamaki, Auckland, New Zealand Phone: (09) 272 0100 © Panasonic Entertainment & Communication Co., Ltd. 2024 PNQP1950ZA PP0724MH0...

This manual is also suitable for:

Kx-tgu432 seriesKx-tgu120azKx-tgu432az

Table of Contents