Advertisement
Quick Links
Quick Installation Guide
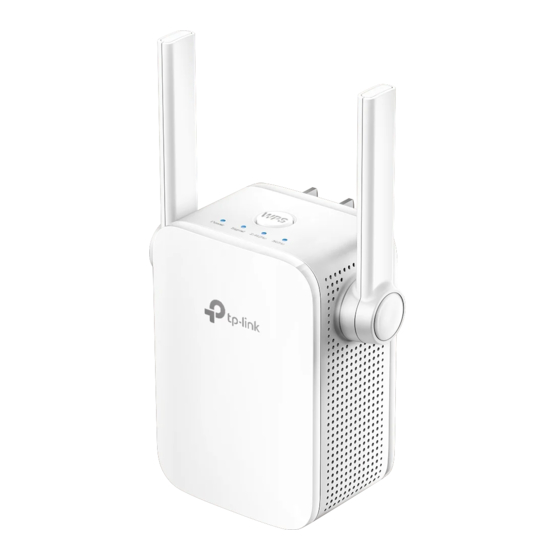
Wi-Fi Range Extender
Setup with videos
Scan QR code or visit
https://www.tp-link.com/support/setup-video/#range-extenders
and search for the setup video of your model.
2
Set Up
Method 1: Via the WPS Button
1. Activate the WPS function on your router by
pressing the WPS button.
Note: If you don't know how to do it, refer to your router's user
manual, or you can use other methods to set it up.
2. Within 2 minutes, press the WPS button on the
extender for 1 second, and the Signal LED starts
blinking. Wait for the Signal LED, 2.4GHz LED and 5GHz
LED to turn solid blue, indicating a successful
connection.
Note: If only the 2.4GHz or 5GHz LED is solid blue, check to see if
the router has both 2.4GHz and 5GHz bands turned on. If both are
turned on, try WPS again or use other methods.
Blinking
3. Done. You can connect to the extender's Wi-Fi.
Extended Network Names:
Router's network name with _EXT at the end
or
Same as your EasyMesh router (see back for EasyMesh
details)
Passwords:
Same as your router
3
Relocate
1. Plug in the extender about halfway between your router and the Wi-Fi dead
zone. The location you choose must be within the range of your router.
2. Wait for about 2 minutes until the Signal LED turns solid blue. If it doesn't,
relocate the extender closer to the router to achieve better signal quality.
Tip: To place the extender for optimal Wi-Fi performance, access extender settings
via the Tether app and go to find Location Assistant, or simply scan the QR code to
visit https://www.tp-link.com/support/faq/3103/.
Enjoy!
·
Connect your devices to the extender wirelessly or via an Ethernet cable,
then enjoy the internet. The password of your extended network is the same
as your main router.
·
You can also change the extender to Access Point Mode to transform your
existing wired network to a wireless one. For details, see Access Point Mode
(AP Mode) on the back page.
Method 2: Via the Tether App
1. Get the up-to-date Tether app from the Apple App
Store or Google Play, or simply scan the QR code.
The WPS button might
look like one of these:
2. Launch the Tether app and log in with your TP-Link ID.
If you don't have an account, create one first.
3. Tap the
Notes:
1. If you cannot find your device, please refer to FAQ > Q1.
2. Due to Tether app updates, your actual user interface
and pathway may differ from those depicted here.
Solid On
4. Follow app instructions to complete the setup. The
Signal LED should turn solid on, indicating successful
connection to your router.
Note: If the LED does not turn solid on, please refer to FAQ
> Q2.
1
Power On
Plug the extender into a power outlet next to your router. Wait until its
Power LED turns solid on after blinking for a while.
Note: For safety, only plug the extender in the direction as shown below.
or
Scan for Tether
Tether
button and select Range Extender.
My Devices
No devices found.
Choose Your Device Type
Wireless Router
Gaming Router
Range Extender
.
Next to
Method 3: Via a Web Browser
1. Connect your computer or smartphone to the
extender's network TP-Link_Extender.
TP-Link_Extender
2. Visit http://www.tplinkrepeater.net or
http://192.168.0.254 in a web browser. Create a
password to log in.
http://www.tplinkrepeater.net
Create Password
Low
Middle
High
Confirm Password
Start
3. Follow web instructions to complete the setup.
Solid On
Blue: Suitable location
Red: Too far from router
Router
Halfway
Smartphone
Tablet
Smart TV
Game Console
Solid On
Devices
Laptop
Desktop
Advertisement

Related Manuals for TP-Link RE750C


Summary of Contents for TP-Link RE750C
- Page 1 Scan for Tether Tether 2. Within 2 minutes, press the WPS button on the 2. Launch the Tether app and log in with your TP-Link ID. extender for 1 second, and the Signal LED starts 2. Visit http://www.tplinkrepeater.net or If you don’t have an account, create one first.
- Page 2 Q2. What should I do if the Signal LED doesn’t turn solid on after TP-Link hereby declares that the device is in compliance with the essential requirements and other completing setup via the Tether app or web browser? relevant provisions of directives 2014/53/EU, 2009/125/EC, 2011 /65/EU and (EU) 2015/863.
Need help?
Do you have a question about the RE750C and is the answer not in the manual?
Questions and answers