Advertisement
Table of Contents
HEATIT
PRO
Installers manual
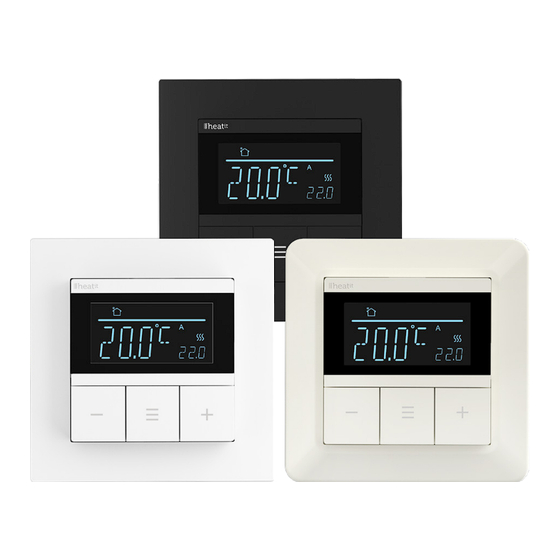
White RAL 9003
54 305 82
TABLE OF CONTENTS
1. Introduction
2. Quick start
3. Installation disclaimer
4. Connections
5. Installation
6. Factory reset
7. Startup
8. Principles of regulation
9. Waterbased heating/
electrical heating
10. Local settings menu
11. Display menu structure
12. Weekly schedule
13. Standby and main screen
14. Weekly schedule and
adapative function
15. Active power metering
values in menu
PRODUCT
DOCUMENTS
Firmware version
Document version
FW 1.0
2024-A
Article no.
Document date
54 305 81
54 305 82
01.07.2024
54 305 83
Org. doc. date 01.07.2024
Black matt
54 305 83
White RAL 9010
54 305 81
16. Size of load
17. Choice of sensor
18. Selecting sensor value
19. Calibration
20. Brightness
21. Display on/off
22. Display icons
23. Child lock
24. Open window detection
25. Anti-freeze function
26. Error codes
27. Safety features
28. Thermostat setpoint
29. Thermostat mode
30. Thermostat dimensions
31. Thermostat controls
32. Chart - display menu
Product info
1. INTRODUCTION
Heatit Pro is an electronic thermostat designed for electrical
heating, waterbased heating and cooling systems. The
thermostat has a user-friendly interface that can be controlled
from the buttons on the front of the thermostat.
Heatit Pro has 2 modes; Heat and Cool.
The thermostat fits in standard European junction boxes and
may be used with most System 55 frames. It has a sturdy metal
frame for secure fastening on the junction box. The thermostat
has one built-in room temperature sensor. Two additional
external temperature sensors may also be connected.
Heatit Pro has the option of a weekly program and open
window detection.
The product has implemented ZeroX technology. This
technology makes sure the relay switches at 0V when turning
on and off. With this technology the thermostat will have a
much longer lifetime.
Heatit Pro has active power metering, which allows the user to
see the real time power consumption.
The thermostat can withstand a load of max 16A/3600W at
230VAC. We recommend a contactor for loads above 13A.
2. QUICK START
1. Switch off the mains voltage (disable the fuse).
2. Open the junction box.
3. Connect the wires according to the description in
Chapter "Connections". Optional: Connect external wired
sensors.
4. After verifying the connections, switch on the mains voltage.
3. INSTALLATION DISCLAIMER
Installation must be done by a qualified electrician in
accordance with national building codes. Before installation,
disconnect the power to the device from the mains. During
installation of the device, power to the device must be
disconnected AT ALL TIMES!
4. CONNECTIONS
Max tightening torque for terminal screws: 2Nm.
If the cable used has multiple strands, using an end sleeve is
advised. The product allows for wiring of cables with a cross
section of up to 1x2.5mm2.
The screw terminals are located at the back of the device, and
are accessable at all times.
Advertisement
Table of Contents

Related Manuals for Heatit Controls PRO


Summary of Contents for Heatit Controls PRO
- Page 1 Black matt 54 305 83 Heatit Pro has the option of a weekly program and open window detection. The product has implemented ZeroX technology. This technology makes sure the relay switches at 0V when turning on and off.
-
Page 2: Installation
Art. no. 54 305 81 16A/3600W 54 305 82 230VAC~50/60Hz 54 305 83 heatit.com 7. STARTUP After powering up the device for the first time, all parameters will have default settings and the thermostat will start by asking for the date and time. 8. - Page 3 11. DISPLAY MENU STRUCTURE Internal room sensor + Floor sensor See flowchart at the end of this manual. External room sensor External room sensor + Floor sensor 12. WEEKLY SCHEDULE To enable the weekly schedule, enter the menu, navigate to NOTE: Some types of floor require that a floor sensor “PROF”...
-
Page 4: Anti-Freeze Function
23. CHILD LOCK 26.2 Overload The child lock function disables the buttons on the display. The device features a 16A overload protection. The overload is It will show “LOCK” when attempting to operate it while the triggered if there is a current draw of more than 16A. function is enabled. - Page 5 31. CHART - DISPLAY MENU STRUCTURE Hold the middle button for 5 seconds to enter menu. 10, 20, ..., 100 Default 100 10, 20, ..., 100 Default 20 -10, -9.5, ..., 9.5, ..., 10° Default 0° 5, 5.5, ..., 30° Default 5.0°...
- Page 6 Hold button Change between date display modes...
- Page 7 0.5, 1.0, ..., 10° Default 20 5, 6, ..., 10° Hold button...
- Page 8 Hold button 0, 100, ..., 6500W Default 0 Go to ADVA...
-
Page 9: Product Info
Any wrongful installation, misuse or damage to the product is not covered under warranty. Heatit Controls AB · Läkarvägen 4, 454 31 BRASTAD, SWEDEN Heatit Controls AB can not be held liable for any type of errors or omittances in our product information. Phone: +47 61 18 77 77 · post@heatit.com · heatit.com...
Need help?
Do you have a question about the PRO and is the answer not in the manual?
Questions and answers