Table of Contents
Advertisement
Available languages
Available languages
Quick Links
Please give us a chance to make it right and do better !
Contact our friendly customer service department for help first.
Replacements for missing or damaged parts will be shipped ASAP !
US office: Fontana
UK office: Ipswich
Contact Us !
Do NOT return this item.
AU office: Truganina
US:cs.us@costway.com
UK:cs.uk@costway.com
AU:cs.au@costway.com
EN
DE
FR
ES
IT
PL
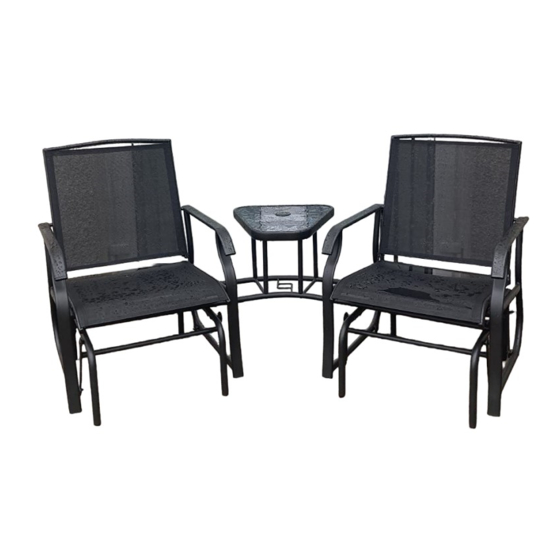
Patio Furniture Set 3 Pieces
THIS INSTRUCTION BOOKLET CONTAINS IMPORTANT SAFETY INFORMATION. PLEASE READ AND KEEP FOR FUTURE REFERENCE.
USER'S MANUAL
NP10188
Advertisement
Table of Contents

Related Manuals for Costway NP10188


Summary of Contents for Costway NP10188
- Page 1 US office: Fontana UK office: Ipswich AU office: Truganina USER’S MANUAL Contact Us ! Patio Furniture Set 3 Pieces NP10188 Do NOT return this item. US:cs.us@costway.com UK:cs.uk@costway.com AU:cs.au@costway.com THIS INSTRUCTION BOOKLET CONTAINS IMPORTANT SAFETY INFORMATION. PLEASE READ AND KEEP FOR FUTURE REFERENCE.
-
Page 2: Parts List
PARTS LIST Before You Start Left Armrest Right Armrest Back Cross Bar Read each step carefully before starting. It is very important to ensure each step followed in correct order, otherwise assembly difficulties may occur. Most of board parts are labeled or stamped on the raw edges. -
Page 3: Hardware List
HARDWARE LIST Mx12 Ox12 Hex Wrench Open-end Wrench M6x15mm Bolt M6x35mm Bolt M6x45mm Bolt Qx16 PREPARATION Before beginning assembly of product, make sure all parts are present. Compare parts with parts list and hardware list above. If any part is missing or damaged, do not attempt to assemble. - Page 4 STEP 2 : Repeat STEP 1 for another chair. ASSEMBLY INSTRUCTIONS STEP 1 : Place all chair parts on a protected flat surface. Assemble Sway Bar (D) to Left Leg Tube (J) with M6 x 45mm Bolt (O), 5mm Plastic Washer (T), Steel Washer (S) and M6 Nut (R). Do not tighten the bolt fully at this moment.
- Page 5 STEP 3 : Assemble Chair Cross Bars(L) to Leg Tube (K or J) on the STEP 4 : Assemble Right Armrest (B) and Left Armrest (A) to Sway outside of chair seat using M6 x 60mm Bolts (Q), Steel Washers (S) Bars (D) using ;...
- Page 6 STEP 5 : Put Glass Table Top (H) upside down on a protected flat STEP 7 : Connect glass table top to one chair by inserting Table surface. Assemble Front Support Bar (E) to the Glass Table Top (H) Cross Bar (G) into Chair Cross Bars (L). Assemble Table Cross Bar with M6* 15mm Bolt (M) .Repeat for Back Support Bar (F).
-
Page 7: Care And Maintenance
STEP 8 : Assemble Chair Back (I) to Le Armrest (A) and Right Care and Maintenance Armrest (B) using M6 x 45mm Bolts (O), Steel Washers (S) and 14mm Plastic Washers (V). See Figure 7. Assemble Chair Seat (I) to Le Armrest (A) and Right Armrest (B) using M6 x 60mm Bolts (Q), Use a soft, clean cloth that will not scratch the surface when dusting. -
Page 8: Kontaktieren Sie Uns
Deutsches Büro: FDS GmbH, Neuer Höltigbaum 36, 22143 Hamburg, Deutschland HANDBUCH Kontaktieren Sie uns ! Gartenmöbel 3er Set NP10188 Schicken Sie diesen Artikel NICHT zurück, DE:cs.de@costway.com bitte wenden Sie sich an unseren Kundenservice. DIESE ANLEITUNG ENTHÄLT WICHTIGE SICHERHEITSINFORMATIONEN. BITTE SORGFÄLTIG LESEN UND ZUM SPÄTEREN NACHSCHLAGEN AUFBEWAHREN. -
Page 9: Vor Dem Beginnen
Teileliste Vor dem Beginnen Linke Armlehne Rechte Armlehne Hintere Querstange Lesen Sie jeden Schritt sorgfältig durch, bevor Sie beginnen. Es ist sehr wichtig, dass jeder Schritt in der richtigen Reihenfolge ausgeführt wird. Die meisten Plattenteile sind an den Schnittkanten beschriftet oder gestempelt. - Page 10 Zubehörliste Mx12 Ox12 Sechskantschlüssel Gabelschlüssel M6x15mm Bolzen M6x35mm Bolzent M6x45mm Bolzen Qx16 VORBEREITUNG Vergewissern Sie sich, dass alle Teile vorhanden sind, bevor Sie mit der Montage des Produkts beginnen. Vergleichen Sie die Teile mit der obigen Teileliste und der Zubehörliste. Sollte ein Teil fehlen oder beschädigt sein, versuchen Sie nicht, das Gerät zusammenzubauen.
- Page 11 SCHRITT 2: Wiederholen Sie SCHRITT 1 für einen weiteren Stuhl. MONTAGEANLEITUNG SCHRITT 1 : Legen Sie alle Stuhlteile auf eine geschützte, ebene Fläche. Montieren Sie die Querstange (D) am linken Beinrohr (J) mit der M6 x 45 mm Bolzen (O), der 5 mm Kunststoffunterlegscheibe (T), der Stahlunterlegscheibe (S) und der M6 Mutter (R).
- Page 12 SCHRITT 3: Montieren Sie die Querstangen des Stuhls (L) mit M6 x SCHRITT 4: Montieren Sie die rechte Armlehne (B) und die linke 60 mm Bolzen (Q), Stahlunterlegscheiben (S) und M6-Muttern (R) an Armlehne (A) mit M6 x 50mm Bolzen (P), den Beinrohren (K oder J) an der Außenseite des Sitzes.
- Page 13 SCHRITT 5: Legen Sie die Glastischplatte (H) umgedreht auf eine SCHRITT 7: Verbinden Sie die Glastischplatte mit einem Stuhl, geschützte ebene Fläche. Montieren Sie die vordere Stützstange (E) indem Sie die Querstange des Tisches (G) in die Querstangen des mit der M6*15mm Bolzen (M) an der Glastischplatte (H) und Stuhls (L) einsetzen.
-
Page 14: Pflege Und Wartung
SCHRITT 8: Montieren Sie die Stuhllehne (I) an der linken Armlehne Pflege und Wartung (A) und der rechten Armlehne (B) mit M6 x 45mm Bolzen (O), Stahlunterlegscheiben (S) und 14mm-Kunststoffunterlegscheiben (V). Siehe Abbildung 7. Montieren Sie den Stuhlsitz (I) an der linken Verwenden Sie ein weiches, sauberes Tuch, das beim Abstauben die Armlehne (A) und der rechten Armlehne (B) mit M6 x 60mm Bolzen Oberfläche nicht zerkratzt. -
Page 15: Manuel De L'utilisateur
Salon de Jardin NP10188 Ne retournez pas cet article. FR : cs.fr@costway.com Contactez notre service à la clientèle pour obtenir de l’aide. CE MANUEL CONTIENT DES INFORMATIONS IMPORTANTES SUR LA SÉCURITÉ. VEUILLEZ LE LIRE ET LE CONSERVER POUR TOUTE RÉFÉRENCE FUTURE. -
Page 16: Avant De Commencer
Liste des pièces Avant de Commencer Accoudoir gauche Accoudoir droit Barre Lisez attentivement chaque étape avant de commencer. Suivez l’ordre correct. La plupart des pièces ont les parties étiquetées ou imprimées sur le bord. Veuillez vérifier toutes les pièces. Travaillez dans un endroit spacieux, de préférence sur un tapis, à... -
Page 17: Liste Des Accessoires
Liste des accessoires Mx12 Ox12 Clé Allen Clé plate M6x15mm Boulon M6x35mm Boulon M6x45mm Boulon Qx16 PRÉPARATION Avant de commencer l’assemblage du produit, toutes les pièces doivent être présentes. Comparez les pièces avec la liste des pièces. Si une pièce est manquante ou endommagée, n'essayez pas de commencer l’assemblage. - Page 18 ÉTAPE 2 : Répétez l’ÉTAPE 1 pour un autre fauteuil. ASSEMBLAGE ÉTAPE 1 : Placez toutes les pièces du fauteuil sur une surface plane et protégée. Assemblez la barre (D) au tube du pied (J) avec le boulon M6 x 45 mm (O), la rondelle en plastique de 5 mm (T), la rondelle en acier (S) et l’écrou M6 (R).
- Page 19 ÉTAPE 3 : Assemblez les barres (L) aux tubes des pieds (K ou J) à ÉTAPE 4 : Assemblez l’accoudoir droit (B) et l’accoudoir gauche (A) l’extérieur du siège du fauteuil à l’aide de boulons M6 x 60 mm (Q), aux barres (D) à...
- Page 20 ÉTAPE 5 : Posez le plateau en verre (H) à l’envers sur une surface ÉTAPE 7 : Raccordez le plateau en verre à un fauteuil en insérant la plane protégée. Assemblez le support avant (E) au plateau en verre barre (G) dans la barre (L). Assemblez la barre (G), la barre (L) et le (H) à...
-
Page 21: Entretien
ÉTAPE 8 : Assemblez le dossier (I) à l’accoudoir gauche (A) et à Entretien l’accoudoir droit (B) à l’aide des boulons M6 x 45 mm (0), des rondelles en acier (S) et des rondelles en plastique de 14 mm (V) (Voir la figure 7). -
Page 22: Manual Del Usuario
Juego de Muebles de Jardín NP10188 NO devuelva este artículo. ES : cs.es@costway.com Primero póngase en contacto con nuestro amable departamento de servicio al cliente para obtener ayuda. ESTE MANUAL DE INSTRUCCIONES CONTIENE IMPORTANTES INFORMACIONES DE SEGURIDAD, POR FAVOR, LÉALO Y GUÁRDELO PARA FUTURAS CONSULTAS. -
Page 23: Lista De Piezas
LISTA DE PIEZAS Antes de Empezar Barra Apoyabrazos izquierdo Apoyabrazos derecho transversal trasera Lea cada paso cuidadosamente antes de comenzar. Es muy importante asegurarse de que cada paso se siga en el orden correcto, de lo contrario, pueden surgir problemas de montaje. La mayoría de las piezas del tablero están etiquetadas o Barra de soporte estampadas en los bordes en bruto. - Page 24 LISTA DE ACCESORIOS Mx12 Ox12 Llave hexagonal Llave de boca Perno M6x15mm Perno M6x35mm Perno M6x45mm Qx16 PREPARACIÓN Antes de comenzar el montaje del producto, asegúrese de que todas las piezas estén presentes. Compare las piezas con la lista de piezas y la lista de accesorios anteriores.
-
Page 25: Instrucciones De Montaje
PASO 2: Repita el PASO 1 para otra silla. INSTRUCCIONES DE MONTAJE PASO 1: Coloque todas las piezas de la silla en una superficie plana protegida. Ensamble la barra estabilizadora (D) al tubo de la pata izquierda (J) con el perno M6x45mm (O), la arandela de plástico 5mm (T), la arandela de acero (S) y la tuerca M6 (R). - Page 26 PASO 3: Ensamble las barras transversales de la silla (L) a los tubos PASO 4: Ensamble el apoyabrazos derecho (B) y el apoyabrazos de las patas (K o J) en la parte exterior del asiento de la silla izquierdo (A) a las barras estabilizadoras (D) utilizando los pernos utilizando los pernos M6x60mm (Q), las arandelas de acero (S) y las M6x50mm (P), las arandelas de plástico 8mm (U), las arandelas de tuercas M6 (R).
- Page 27 PASO 5: Coloque el tablero de mesa de vidrio (H) boca abajo sobre PASO 7: Conecte el tablero de mesa de vidrio a una silla insertando una superficie plana protegida. Monte la barra de soporte frontal (E) la barra transversal de la mesa (G) en las barras transversales de la en el tablero de mesa de vidrio (H) con el perno M6*15mm (M).
-
Page 28: Cuidado Y Mantenimiento
PASO 8: Monte el respaldo de la silla (I) en el apoyabrazos izquierdo Cuidado y Mantenimiento (A) y en el apoyabrazos derecho (B) utilizando los pernos M6x45mm (O), las arandelas de acero (S) y las arandelas de plástico 14mm (V). Ves la Figura 7. -
Page 29: Manuale Utente
Le parti di ricambio per le parti mancanti o danneggiate verranno spedite al più presto! MANUALE UTENTE Contattaci ! Poltrona con Tavolino NP10188 NON restituire questo articolo. IT: cs.it@costway.com Si prega di contattare prima il nostro servizio clienti per assistenza. -
Page 30: Lista Delle Parti
Lista delle Parti Prima di iniziare Barra trasversale Bracciolo sinistro Bracciolo destro posteriore Leggere attentamente ogni passo prima di iniziare. È molto importante assicurarsi che ogni passo sia seguito nell'ordine corretto, altrimenti potrebbero verificarsi difficoltà di montaggio. La maggior parte delle parti del pannello è etichettata o Barra di supporto Barra di supporto stampata sui bordi grezzi. -
Page 31: Lista Degli Accessori
Lista degli Accessori Mx12 Ox12 Chiave a brugola Chiave aperta M6x15mm Bullone M6x35mm Bullone M6x45mm Bullone Qx16 PREPARAZIONE Prima di iniziare il montaggio del prodotto, assicurarsi che tutte le parti siano presenti. Confrontare le parti con la lista delle parti e la lista degli accessori di cui sopra. -
Page 32: Istruzioni Di Montaggio
PASSO 2: Ripetere il PASSO 1 per un'altra sedia. ISTRUZIONI DI MONTAGGIO PASSO 1: Posizionare tutte le parti della sedia su una superficie piana protetta. Montare la barra d'oscillazione (D) al tubo della gamba sinistra (J) con un bullone M6 x 45 mm (O), una rondella di plastica da 5 mm (T), una rondella d’acciaio (S) e un dado M6 (R). - Page 33 PASSO 3: Montare le barre trasversali della sedia (L) al tubo delle PASSO 4: Assemblare il bracciolo destro (B) e il bracciolo sinistro (A) gambe (K o J) all'esterno della seduta utilizzando bulloni M6 x 60mm alle barre d'oscillazione (D) usando i bulloni M6 x 50mm (P), le (Q), rondelle d’acciaio (S) e dadi M6 (R).
- Page 34 PASSO 5: Mettere piano del tavolino in vetro (H) capovolto su una PASSO 7: Collegare il piano del tavolino in vetro a una sedile superficie piana protetta. Assemblare la barra di supporto anteriore inserendo la barra trasversale del tavolino (G) nelle barre trasversali (E) al piano del tavolino in vetro (H) con il bullone M6*15mm (M).
-
Page 35: Cura E Manutenzione
PASSO 8: Assemblare lo schienale del sedile (I) al bracciolo sinistro Cura e manutenzione (A) e al bracciolo destro (B) usando i bulloni M6 x 45 mm (O), le rondelle d’acciaio (S) e le rondelle di plastica da 14 mm (V). Vedere la Figura 7. -
Page 36: Instrukcja Obsługi
PL office: Gdańsk INSTRUKCJA OBSŁUGI Fotel bujany ze Skontaktuj się z nami ! stolikiem w zestawie NP10188 Nie zwracaj tego produktu. PL: sklep@costway.com Skontaktuj się z naszym działem obsługi klienta, aby uzyskać pomoc. NINIEJSZA INSTRUKCJA ZAWIERA ISTOTNE INFORMACJE DOTYCZĄCE BEZPIECZEŃSTWA. PROSIMY O ZAPOZNANIE SIĘ Z NIĄ I ZACHOWANIE JEJ DO WGLĄDU W PRZYSZŁOŚCI. -
Page 37: Lista Części
LISTA CZĘŚCI Zanim Zaczniesz Lewy Podłokietnik Prawy podłokietnik Tylna poprzeczka Przed rozpoczęciem montażu zapoznaj się z każdym krokiem i upewnij się, że wykonywać je będziesz w odpowiedniej kolejności - w przeciwnym przypadku montaż może sprawić ci kłopot. Większość elementów posiada wyraźne oznaczenia. Przed Stabilizator Przedni wspornik Wspornik oparcia... -
Page 38: Lista Akcesoriów
LISTA AKCESORIÓW Mx12 Ox12 Klucz imbusowy Klucz płaski prosty Śruba M6x15mm Śruba M6x35mm Śruba M6x45mm Qx16 PRZYGOTOWANIE Przed rozpoczęciem montażu produktu upewnij się, że wszystkie części znajdują się w zestawie. Porównaj części z powyższą listą części i akcesoriów. Jeśli brakuje jakiejkolwiek części lub jest ona uszkodzona, nie należy jej montować. -
Page 39: Instrukcje Montażu
KROK 2: Powtórz KROK 1 dla drugiego fotela. INSTRUKCJE MONTAŻU KROK 1: Umieść wszystkie części fotela na zabezpieczonej, płaskiej powierzchni.Zamontuj drążek stabilizatora poprzecznego (D) do rury nogi (J) za pomocą śruby M6 x 45 mm (O), podkładki plastikowej 5 mm (T), podkładki stalowej (S) i nakrętki M6 (R).Nie dokręcaj śruby całkowicie! Powtórz krok dla prawej rury nogi (K).Następnie, powtórz krok dla kolejnego stabilizatora (D) z tyłu.Następnie zamontuj tylną... - Page 40 KROK 3: Zamontuj poprzeczki fotela (L) do rury nogi (K lub J) na KROK 4: Zamontuj prawy podłokietnik (B) i lewy podłokietnik (A) do zewnątrz siedziska krzesła, za pomocą śrub M6 x 60mm (Q), stabilizatorów (D) za pomocą śrub M6 x 50 mm (P), plastikowych stalowych podkładek (S) i nakrętek M6 (R).
- Page 41 KROK 5: Połóż szklany blat (H) do góry nogami na zabezpieczonej KROK 7: Połącz szklany stolik z jednym fotelem, wkładając płaskiej powierzchni. Zamontuj przedni wspornik (E) do szklanego poprzeczkę stolika (G) do poprzeczek fotela (L). Zamontuj poprzeczkę blatu (H) za pomocą śruby M6*15mm (M). Powtórz dla tylnego stołu (G), poprzeczkę...
-
Page 42: Czyszczenie I Pielęgnacja
KROK 8: Zamontuj oparcie fotela (I) do lewego podłokietnika (A) i Czyszczenie i Pielęgnacja prawego podłokietnika (B) za pomocą śrub M6 x 45 mm (O), podkładek stalowych (S) i podkładek plastikowych 14 mm (V). Patrz rysunek 7. Zamontuj siedzisko krzesła (I) do podłokietnika lewego Do czyszczenia używaj czystej, miękkiej szmatki, która nie porysuje (A) i prawego podłokietnika (B) za pomocą...
Need help?
Do you have a question about the NP10188 and is the answer not in the manual?
Questions and answers