
Related Manuals for Beko FTG6232TCK


Summary of Contents for Beko FTG6232TCK
- Page 1 Double Cavity User Manual FTG6232TCK 285380224/ EN/ R.AA/ 02/04/2024 23:44 7734986412...
- Page 2 Welcome! Dear Customer, Thank you for choosing the Beko product. We want your product, manufactured with high quality and technology, to offer you the best efficiency. Therefore, carefully read this manual and any other documentation provided before using the product.
-
Page 3: Safety Instructions
1 Safety Instructions • This section includes the Intended Use safety instructions necessary • This product is designed to be to prevent the risk of personal used at home. It is not suitable injury or material damage. for commercial use. •... -
Page 4: Electrical Safety
• Children should not play with • When the door is open, do not the product. Cleaning and user put any heavy objects on it or maintenance should not be allow children to sit on it. You performed by children unless may cause the oven to tip over there is someone overseeing or damage the door hinges. - Page 5 which the product is connec- Otherwise, cable insulation ted, in compliance with the may melt and cause fire as a electrical regulations and sep- result of short circuit. arating all poles from the net- • Use original cable only. Do not work.
- Page 6 of electric shock. Unplug the anical ventilation device product or turn off the fuse (mechanical extractor / hood). from the fuse box. Intensive use of the product for a long time may require ad- If your product has a power ditional ventilation: For ex- cable and plug: ample, opening a window or...
-
Page 7: Transportation Safety
• Gas cooking products and sys- • Turn off all valves on gas cook- tems must be regularly ing products and gas meter at checked for proper function- the main control valve, unless ing. Regulator, hose and its it's in a confined space or cel- clamp must be checked regu- lar. -
Page 8: Installation Safety
• Before the product is installed, • Direct sunlight and heat check the product for any dam- sources, such as electric or age after transport. Contact gas heaters, must not be the importer or the authorized present in the area where the service centre if damaged. -
Page 9: Safety Of Use
• There should be no gas hose, • Make sure to check for gas plastic water pipe and socket leakage after the gas connec- on the back or side wall of the tion of your product is made. place where the product will be Make sure there are no gas installed. -
Page 10: Temperature Warn- Ings
• The oven handle is not a towel • Keep your distance when dryer. When using the product, opening the oven door during do not hang towels, gloves or or at the end of cooking. The similar textiles on the handle. steam may burn your hand, •... - Page 11 Be mindful of the following pre- • CAUTION: In solid or liquid oil cooking, it is dangerous to cautions when using greasy parchment paper or similar ma- leave the hob unattended, which may cause a fire. NEVER terials: • Place the greaseproof paper in try to extinguish the fire with a cookware or on the oven ac- water;...
-
Page 12: Environmental Instructions
liquids dripping onto the tray the cookware does not over- can cause smoking or even ig- flow to the side surface of the nite flames. cookware. • An air flow is generated when 1.11 Maintenance and the product lid is opened. Cleaning Safety Greaseproof paper can come •... -
Page 13: Package Information
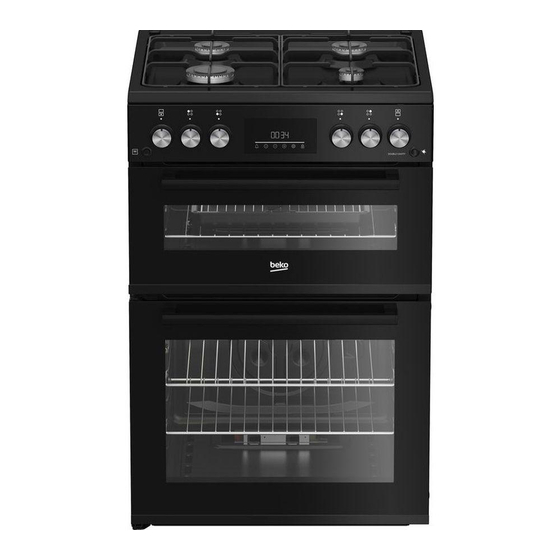
points. Disposing of the appliance properly The following suggestions will help you use helps prevent negative consequences for your product in an ecological and energy-ef- the environment and human health. ficient way: • Defrost frozen food before baking. • In the oven, use dark or enamelled con- Compliance with RoHS Directive: tainers that transmit heat better. - Page 14 3.1 Product Introduction Varies depending on the model. Your product may not be equipped with a wire rack. In the image, a product with wire rack is shown as an example. Varies depending on the model. Your product may not be equipped with a lamp, or the type and loca- tion of the lamp may differ from the illustration.
-
Page 15: Product Accessories
1 Lamp button 2 Oven control knob - Bottom cooking section 3 Hob control knobs 4 Timer 5 Hob control knobs 6 Oven control knob - Upper cooking section 7 Ignition button Lamp button 3.3 Product Accessories You may turn the lamp of your oven on and There are various accessories in your off with the lamp button. - Page 16 Wire grill in tray Placing the wire grill on the cooking By placing it in the tray (if provided), it is en- shelves sured that the oils flowing while grilling are On models with wire shelves : collected in the tray and thus the contamin- ation of the oven is prevented.
- Page 17 On models with wire shelves : On models without wire shelves : EN / 17...
-
Page 18: Technical Specifications
3.5 Technical Specifications General specifications Product external dimensions (height/width/depth) (mm) 900 /600 /600 Voltage/Frequency 220-240 V ~ 50 Hz Cable type and section used/suitable for use in the min. H05VV-FG 3 x 0,75 mm2 product Fuse (min.) Total power consumption (kW) 0.026 Total gas consumption (kW) 12,7 (923 g/h - G30) - Page 19 Values stated on the product labels or in the documentation accompanying it are obtained in laboratory conditions in accordance with relevant standards. Depend- ing on operational and environmental conditions of the product, these values may vary. Country gas categories/types/pressure You can find the gas type, pressure and gas category that can be used for the country where the product will be installed in the table below.
- Page 20 COUNTRY CATEGORY GAS TYPE AND PRESSURE CODES Cat II 2H3B/P G20,20 mbar G30,30 mbar Cat II 2H3B/P G20,20 mbar G30,30 mbar Cat II 2H3B/P G20,20 mbar G30,30 mbar Cat II 2H3B/P G20,20 mbar G30,30 mbar Cat II 2H3B/P G20,20 mbar G30,30 mbar Cat II 2H3B/P...
- Page 21 Gas oven (Bottom cooking section) G20,20 G30,28 30 mbar mbar G20,10 G20,13 G20,25 G25.3,25 G2.350,13 G30,37 G30,50 Power mbar mbar mbar mbar mbar mbar mbar G25,25 G31,37 mbar mbar 2,5 kW EN / 21...
-
Page 22: Installation
4 Installation • It can be used with cabinets on either General warnings side but in order to have a minimum dis- • Refer to the nearest Authorised Service tance of 400mm above hotplate level al- Agent for installation of the product. low a side clearance of 65mm between Make sure that the electric and gas in- the appliance and any wall, partition or... - Page 23 Warning: In order to prevent tipping of the appliance, this stabilizing means must be installed. Refer to the instructions for in- stallation. If your product has 2 safety chains; Fasten hook (1) by using a proper peg to the kitchen wall (6) and connect safety Stability chain to be as short as chain (3) to the hook via the locking mech- practicable to avoid oven tilting for-...
-
Page 24: Electrical Connection
The fixed ventilation opening can include The cooker may be located in a kitchen, kit- openings for existing airbricks, extraction chen/diner or a bed-sitting room, but not in hood ducting opening dimension etc. a room containing a bath or a shower. The cooker must not be installed in a bed-sit- Total gas consumption Min. - Page 25 • Power cable plug must be within easy reach after installation (do not route it above the hob). Do not use extension or multi sockets in power connection. • and must use the appropriate socket out- let/line and plug for oven. In case of the product's power limits are out of current carrying capability of plug and socket outlet/line, the product must be connec-...
- Page 26 • If you need to use your product later with product and cookware on the product. a different type of gas, you must consult There is a risk of explosion due to dam- the authorised/licensed/ qualified person age to the gas hose! or technician for the related conversion •...
- Page 27 connections parts to be used may vary ac- cording to the gas type and country regula- tions. Leakage Seal : Connection piece EN 10226 R1/2” : Connection piece for liquid gas (G30,G31) : Gas outlet connection piece : Blind plug : Making the gas connection - NG •...
- Page 28 EN 10226 R1/2” type connection checked regularly and replaced within the periods recommended by its manufac- 1. Place the new seal in the connection turer or when necessary. piece and make sure the seal is seated • A new sealing gasket must be used while correctly.
-
Page 29: Placing The Product
2. Secure the gas connection piece to the Leakage check at the connection point appliance with using a 22 mm spanner • Make sure that all knobs on the product and place the connection piece into the are turned off. Make sure that the gas connection piece using a 24 mm span- supply is open. -
Page 30: Gas Conversion
4.5 Gas Conversion General warnings • Before starting any work on the gas in- stallation, disconnect the gas main sup- Exchange of injector for the burners ply. There is the risk of explosion! 1. Turn all control knobs to off positions •... - Page 31 Unless there is an abnormal condi- tion, do not attempt to remove the gas burner taps. You must call an Authorised service agent or techni- cian with licence if it is necessary to change the taps. Reduced gas flow rate setting for hob taps 1.
- Page 32 Oven burner Screw (3 pieces) Cut-off valve 1 Grill burner Injector holder 2 Injector holder Injector 3 Injector Oven burner holder 4 Screw Clips 5. Remove the securing screw of the grill injector holder. 6. Remove the injector and replace with a suitable one, see the injector table.
- Page 33 7. Conduct the leakage control after repla- If the temperature of the oven in- cing the injector. creases excessively, turn off the oven and call the authorised ser- 8. Assemble the oven burner (1) to its vice to have oven thermostat re- holder (6) by pushing the burner on the paired.
-
Page 34: First Use
agent or technician with licence. Do not use the product until the authorized service has intervened in the product. 5 First Use Before you start using your product, it is re- 5. Confirm by touching the key. commended to do the following stated in ð... - Page 35 Before using the accessories: NOTICE: During the first use, smoke and odour may come up for several hours. This Clean the accessories you remove from the is normal and you just need good ventila- oven with detergent water and a soft clean- tion to remove it.
- Page 36 6.2 Operation of the hobs 5. After the initial ignition, keep pressing on the knob for 3-5 seconds. Gas burner control knob 6. Adjust your desired power level. Turning off the gas burners Bring the burner knob to off position (top). If the flames of the burner are extin- guished inadvertently, turn off the burner control knob.
- Page 37 7 Using the Oven 7.1 General Information on Using the may overheat. The cooling fan continues to operate during oven operation or after the Oven oven is turned off (approximately 20-30 Cooling fan ( It varies depending on the minutes). If you cook by programming the product model.
- Page 38 Turning off the gas oven Decrease key Turn gas oven control knob to off position Increase key (top). Settings key Key lock key Do not attempt to ignite the gas Display symbols more that 15 seconds. If the burner : Baking time symbol is not ignited within 15 seconds, : Baking end time symbol * turn off the knob and wait for 1...
- Page 39 ð The symbol is shown on the display After setting the operation function and the 3-2-1 count down starts. The and temperature, you can set the key lock activates when the countdown cooking time for 30 minutes by ends. When any key is touched after touching the key directly for the key lock is set, the timer sounds an...
- Page 40 2. Set the desired level with the keys. (b-01-b-02-b-03) 2. Set the alarm time with the keys. 3. Touch the key for confirmation or wait without touching any key. The volume set becomes active after a while. Setting the display brightness ð...
- Page 41 3. Touch key to activate the Switching on the grill minutes field. Oven door must remain open while grilling. There is a switch on the door. As a safety precaution, this switch prevents operation of the grill when the door is CLOSED. ü...
- Page 42 8.1 General warnings about cooking • For foods that you will cook according to your own recipe, you can reference sim- with hob ilar foods given in the cooking tables. General warnings about cooking with hob • Using the supplied accessories ensures •...
- Page 43 • The values specified in the cooking Hints for pastry tables are determined as a result of the • If the pastry is too dry, increase the tem- tests carried out in our laboratories. Val- perature by 10 °C and shorten the cook- ues suitable for you may differ from ing time.
- Page 44 8.2.2 Meat, Fish and Poultry • After the cooking time is expired, keep the meat in the oven for approximately The key points on grilling 10 minutes. The juice of the meat is bet- • Seasoning it with lemon juice and pepper ter distributed to the fried meat and does before cooking whole chicken, turkey and not come out when the meat is cut.
- Page 45 The oven tray you will slide should be Cooking table for the upper cooking sized to cover the entire grill area. This section tray may not be supplied with the product. Put some water into the oven tray for easy cleaning. Food Accessory to be used Shelf position...
- Page 46 Maintenance and Cleaning General Cleaning Information zones, clean any overflown fluids imme- diately after cooling down the hob by General warnings turning it off. • Wait for the product to cool before clean- • Wok type burners used at high temperat- ing the product.
-
Page 47: Cleaning Accessories
Catalytic surfaces • Do not use hard metal scrapers and ab- rasive cleaners. They may damage the • The side walls in the cooking area can surfaces. only be covered with enamel or catalytic • Ensure that the joints of the components walls. - Page 48 8. Do not contact burner caps with ag- Cleaning the Control Panel gressive detergents such as oven in- • When cleaning the panels with knob-con- terior cleaning agents, descalers while trol, wipe the panel and knobs with a cleaning them, this may cause discol- damp soft cloth and dry with a dry cloth.
- Page 49 5. (B) type hinge is available in soft closing 3. To reattach the shelves, the procedures door types. applied when removing them must be repeated from the end to the beginning, respectively. Cleaning The Upper Oven Door You can remove your upper oven door and door glasses to clean them.
- Page 50 Removing the Inner Glass of The Upper Oven Door Inner glass of the product's front upper oven door may be removed for cleaning. 1. Open the oven door. Innermost glass 2* Inner glass (it may not be available for your product) 4.
-
Page 51: Troubleshooting
suitable for operation at temperatures 4. Refit the glass cover. above 300 °C. Oven lamps are available If your oven has a square lamp, from Authorised Services or licensed 1. Disconnect the product from the electri- technicians. This product contains a G city. - Page 52 Water droplets appear while cooking • The steam generated during cooking condenses when it comes into contact with cold surfaces outside the product and may form water droplets. >>> This is not an error. Metal sounds are heard while the product is warming and cooling.
Need help?
Do you have a question about the FTG6232TCK and is the answer not in the manual?
Questions and answers