Table of Contents

Subscribe to Our Youtube Channel
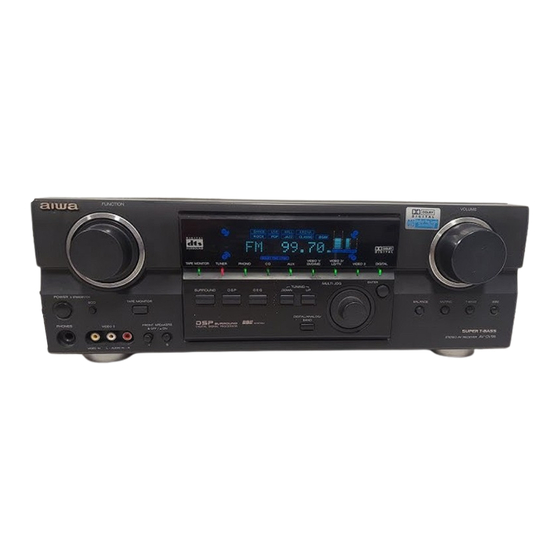
Related Manuals for Aiwa AV-DV95


Summary of Contents for Aiwa AV-DV95
- Page 1 OPERATING INSTRUCTIONS MANUAL DE INSTRUCCIONES MODE D’EMPLOI — For assistance and information call toll free I-800-BUY-AIW’A (United States and Puerto Rico) DIGITAL 8Z-AR1 -903-01 SURROUND 99031 5ACK-Y-9...
-
Page 2: Precautions
Allow 10 cm (4 in.) clearance from the rear and the top of the Explanation of Graphical Symbols: unit, and 5 cm (2 in.) from each side. - Do not place the unit on a bed, rug, or similar surface that... -
Page 3: Table Of Contents
- The unit does not seem to operate normally - The unit exhibits a marked change in performance SETTING THE CLOCK ........r....2l - The unit has been dropped, or the cabinet has been damaged SETTING THE SLEEP TIMER .........22 DO NOT ATTEMPT TO” sEf3VICE THE UNIT YOURSELF. -
Page 4: Article 810 Of The Provides Information Preparation!3 Structure, And Unit, As Well As The Connections
AC cord White jacks and plugs: For the left channel of audio signals The rated voltage of your unit shown on the rear panel is 120 V Yellow jacks and plugs: For video signals AC. Check that the rated voltage matches your local voltage. - Page 5 - the center speaker cord to the CENTER SPEAKER terminals - the surround speaker cords to the SURROUND SPEAKERS terminals. - for more powerful bass, the sub woofer (with a built-in amplifier) cord to the SUPER WOOFER ~ jack ft+”_ Surround speakers When not connecting...
- Page 6 L–—___”.. AM loop antenna: Position for the best reception. Do not bring the FM antenna near metal objects or curtain rails. Do not bring the AM antenna near other external equipment, the unit itself, the AC power cord or speaker cords, as noise will be picked up.
- Page 7 Aiwa receiver mode. same names as those on the main unit can be used as well. Press one of the buttons indicated above. If the unit is not going to be used for an extended...
-
Page 8: Before Operation
UP button or turn the MULTI JOG within four or function name is displayed one after the other for the first four seconds to display “SUBW OFF.” seconds. The selected function indicator lights up in red and the others in green. - Page 9 The BBE system cannot be turned on: The volume level is shown on the display for four seconds. It can - While the DIGITAL (Dolby Digital or DTS) mode is selected - While the Dolby Pro Logic is turned on be adjusted between O and MAX (31).
-
Page 10: Graphic Equalizer
Repeat steps 2 and 3 to make the desired equalization curve. In steps 2 and 3, the unit returns to normal mode when no operation is made for about 8 seconds. Within 8 seconds, press the ENTER button. - Page 11 ~+~;j speakers Press the MANUAL !3ELECT button on the remote control three times to display “SUR 0d13° while the DSP system is turned on, Then press the DOWN or UP button repeatedly or turn the MULTI JOG within four seconds.
-
Page 12: Of Audioaodeo Source
ENTER button. The displayed name for the VIDEO 2 function can be changed to VIDEO 2, LD or TV; while the VIDEO 2 function is selected, press the DIGITAL/ANALOG/BAND button while pressing ENTER button. To select the “ANALOG” or “DIGITAL” (Dolby... -
Page 13: An Audio Source
Press the TAPE MONITOR button, “TAPE ON” appears on the display for four seccmds, and then the source name selected in step 1 comes back on, To cancel the tape monitor, press it again The DVD (LD) player connected to the OPTICAL (COAXIAL) so that “TAPE OFF”... -
Page 14: Manual Tuniiug
(Auto Search) Keep the UP or DOWN button on the main unit pressed until the tuner starts searching for a station. After tuning in to a station, the search stops. To stop the Auto Search manually, press the UP or DOWN button. - Page 15 DC)WNM4 button to select a preset number. The unit can store a total of 32 preset stations. When a station is stored, a preset number is assigned to the station. Use the preset number to tune in to a preset station directly.
-
Page 16: Dolby Surround
Digital decoder and DTS decorder. The unit and the center and surround speakers (standard) assure full-scale home theater sound. When playing back discs or video software that have been recorded in Dolby Pro Logic, Dolby Digital surround or DTS surround,... - Page 17 - The Dolby Pro Logic cannot be turned on. The unit is equipped with a built-in test signal generator called a - The Dolby Digital surround mode cannot be changed. noise sequencer for easy balance adjustment of all five channels.
- Page 18 When the surround speakers delay time of the Dolby Digital surround is set to O m’s (5 ms, 10 ‘ms , or 15 ins), that o~the Dolby Pro Logic is set to 15 ms (20 ms, 25 ms or 30 ins), and vice versa.
-
Page 19: Dolby Digital Surround Sound
MULTI JOG to display “SUBW ON: When setting the sub-woofer mode of the Dolby Digital surround to “SUBW OFF,” that of the Dolby Pro Logic is also set to “SUBW OFF,” and vice versa. In this case, the sub-woofer... -
Page 20: Dts Surround
16. To adjust the balance while listening to the source, see the right column in page 17 and follow the steps 2 and 3. The delay time of the center and surround speakers cannot be adjusted in The optimal DTS surround modes and settings depend on the DTS surround mode. -
Page 21: Operating Tv, Cable Tv, Vcr And Cd Player
Other buttons indicated above have the same function which ID code is 124 or 157. In this case, press the DIGIT buttons in you will find on the unit to be controlled. the order of”1; “2” and “4” (or “1; ‘(5” and “7” ). -
Page 22: Setting The Clock
000, buttons, or tuning in a station On the right side of the screen, the setting results appear for 5 seconds. DIGITAUANALOISJBAND V I DEO 1 Video When the AC cord is connected for the first time, the clock on Aud\o the display flashes. -
Page 23: Setting The Sleep Timer
Press the UP or DOWN button repeatedly within four seconds after step 2. Each time the button is pressed, the time changes between 5 and 240 minutes in 5-minute steps. Cmm3mmcmmcxima Cm2smmmcmammmm SLEEP .. -
Page 24: Specifications
DIGITAL IN and pending. “DTS and “DTS Digital Surround” are trademarks COAXIAL (VIDEO 2): of Digital Theater Systems, Inc. @l 996 Digital Theater systems, OPTICAL (VIDEO 1): Inc. All Rights Reserved. OPTICAL (VIDEO 3): OPTICAL... -
Page 25: Guide
CARE AND MAINTENANCE PARTS INDEX Instructions about each part on the unit or remote control are Occasional care and maintenance of the unit is needed optimize the performance of your unit. indicated on the pages listed below. $inr;~habetical order) To clean... - Page 26 DE SERVICIO CAPACITADO.” espacio suficiente a su alrededor para asegurar su ventiiacion adecuada. Deje un espacio Iibre de 10 cm en la parte posterior y superior de la unidad, y de 5 cm a cada Iado. Exp11caci6n de Ios s~mbolos grdficos:...
- Page 27 OPERAClONES 13 ASICAS proporciona information sobre la puesta a tierra adecuada del mastil, la estructura de soporte, y la acometida a la unidad SELECCION DE IUNA FUENTE DE AUDIO/VIDEO ..11 de descarga de la entena, asi como sobre el tamario de la GRABACION DE UNA FUENTE DE AUDIO ....
- Page 28 Cerciorese de conectar el terminal VIDEO OUT de un reproductor de discos DVD directamente a un televisor, no a traves de esta unidad. 10 contrario, es posible que aparezca ruido en Ias imageries cuando reproduzca discos DVD protegidos contra copia.
- Page 29 _-. —_ Cuando utilice altavoces de 4 ohmios, ponga el selector .— ——. lMP:4f2. Cuando utilice altavoces de 8 ohmios, ponga el selector en IMP:8Q. Antes de ajustar el selector, desenchufe el cable de aiimentacion de CA. Altavoces perimetricos y altavoz...
- Page 30 AM: Coloquela con la orientation optima. No acerque la antena de FM a objetos metalicos ni a rieles de cortinas. No acerque la antena de AM a otros equipos externos, la propia unidad, el cable de alimentaci&r de CA, ni Ios cables de Ios altavoces, porque podria captar ruido.
- Page 31 R6 (AA), externos, consulte “CQNTROLADOR REMOTO de la pagina 2CI, ; m ,, ..-..& &~, A continuation se explica como controiar el receptor Aiwa.
- Page 32 Despues de presionar el boton SURROUND para activar muestra el nivel de volumen (VOL) o el nombre de funcion, uno Dolby Pro Logic, presione el boton MANUAL SELECT detras del otro. controlador remoto para que aparezca “SUBW...
- Page 33 17, la proxima vez que vuelva a conectarla Presione el boton T-BASS. se ajustara automaticamente a 16. Cada vez que presionle el boton, el nivel cambiara.
- Page 34 Repita Ios pasos 2 y 3 para crear la curva de CLASSIC — ROCK— POP— JAZZ — ecualizacion que desee. En Ios pasos 2 y 3, la unidad vuelve al modo normal si nose L----w Ml ~ M2— —M3— realiza...
- Page 35 DANCE, HALL o ARENA no oira sonido a traves de 10s altavoces perim6tricos, Para cancelar el modo seleccionado Presione el boton DSP para mostrar el nombre del modo DSP y vuelva a presionar el boton dentro de 4 segundos.
- Page 36 IN o VIDEO 3 se seleccionara como VIDEO l/DVD/MD, Videocintas fuente para la funcion CD, VIDEO 10 VIDEO 3, y el conectado a VIDEO 2/LD/TV. Ios terminals VIDEO 2/LD/TV para la funcion VIDEO 2. VIDEO 3 VIDEO 2/LDITV Discos laser o programas cablevision El modo “DIGITAL’...
- Page 37 (consulte la pagina 11) debera : .:. :..: ; .: :.,, ~ : ser V2 o V3. No es posible grabar mientras VI (VIDEO 1) este :. .;::.. Iimmkmiml!i ,,..:,, ,. :.., seleccionado y mostrado en el visualizador.
- Page 38 SINTONIA MANUAL Para cambiar el intervalo de sinton[a de El ajuste initial del intervalo de sintonia de AM es de 10 kHz/ paso. Para utilizar esta unidad donde el sistema de asignacion de frecuencias sea de 9 kHz/paso, cambie el intervalo “1...
- Page 39 La emisora siguiente no se almacenara si ya ha almacenado un total de 32 emisoras para todas Ias bandas. Cuando cambie el intervalo de sintonia de AM, se borraran todas Ias emisoras memorizadas. En este caso tendra que volver a memorizar Ias emisoras.
- Page 40 DTS. SURROUND Los altavoces central y perimetricos (estandar) aseguran sonido de tine a plena escala para el hogar. Cuando reproduzca discos SURR~UND o software de video grabados con Dolby Pro Logic, Dolby Digital surround o DTS surround, un sonido sorprendentemente...
- Page 41 Ios cinco canales. El secuenciador da salida a una sehal de ruidc) que “viaja” de canal a canal para permitir el ajuste sencillo del nivel del sonido a fin de obtener la misma sonoridad apa,rente desde cada canal en su position de escucha.
- Page 42 El tiempo de retardo del altavoz central esta inicialmente ajustado un campo acktico amplio. a 20 ms. Podra ajustarse entre 15 y 30 ms en pasos de 5 ms. altavoces parimetricos montados atras realzan “profundidad...
- Page 43 El nivel del sonido de Ias sehales LFE podra ajustarse de acuerdo [MIN] con Ios altavoces conectados mientras este activado el sistema Usted podra disfrutar de sorrido de gam,s dinamica completa al Dolby Digital surround.
- Page 44 16. Para ajustar el balance mientras escucha la fuente, consulte la columns derecha de la pagina 17 y realice Ios pasos 2 y 3. El tiempo de retardo de Ios altavoces central y perimetricos puede ajustarse en el modo de sonido perimetrico DTS.
- Page 45 DIGIT correspondientes al codigo de identification del equipo externo. Con respecto a la lutilizaci6n de Ios bcltones O – 9 y ENTER, Por ejemplo, si su reproductor de discos compactos es AlWA, consulte el manual de instrucciones surninistrado con la unidad...
- Page 46 Ios Cuando presione botones de efectos actisticos, tales minutes. como botones SURROUND, DSP, GEQ, T-BASS, BBE y El tiempo avanza al girar a la derecha y retrocede al girar a la MANUAL SELECT izquierda. En la parte izquierda de la pantalla apareceran...
- Page 47 Presione una vez el boton SLEEP. El tiempo restante visualizara durante cuatro segundos. Para cancelar el temporizador cronodeeconectador Presione el boton SLEEP dos veces para que aparezca “SLEEP en el visualizador. ESPANOL...
- Page 48 Con Iicencia de BBE Sound Inc. AUX: 230 mV, ajustable (47 kiloohmios) Fabricados con Iicencia de Dolby Laboratories. DIGITAL IN “Dolby”, “Pro Logic”, y el s[mbolo de la doble D son marcas COAXIAL (VIDEO 2): comerciales de Dolby Laboratories. Trabajos no publicados...
- Page 49 BALANCE detergence. No utilice disolventes fuertes, como alcohol, bencina, 8,21 o diluidor de pintura ya que podria daiiar el acabado de la unidad. 11,20 CHANNEL CLOCK DIGITAL/ANALOG/E3 AND 11-14, 21 GUIA PARA LA SOLUCION DE 9-11, ”13 ,14,17,18,22...
- Page 50 Objets et Iiquide — Veillez a ce qu’aucun objet ni Iiquide ne i’utilisation et I’entretien (OU la r¶tion) de penetre clans Ies orifices de ventilation de I’ampli-tuner.
- Page 51 TABLE DES MATIERES 5 Quand I’ampli-tuner n’est pas utilis6 — Debranchez l’ampli- tuner de la prise murale si vous prevoyez de ne pas I’utiliser pendant plusieurs mois. Quand Ie cordon est branche, petite quantite d’electricity s’ecoule vers m~me s’il est hors tension.
- Page 52 La tension nominale de l’ampli-tuner indiquee surlepanneau Prises et fiches blanches: Canal gauche des signaux audio arriere est de 120 V. Verifiez si elle correspond a la tension locale. Prises et fiches jaunes: Signaux video IMPORTANT Raccordez lesenceintes, Iesantennes etlesautres...
- Page 53 Ies bornes SURROUND SPEAKERS et la prise SUPER !%!%~_Q~ WOOFER Q. Pour Ies enceintes surround et Ie caisson de grave, utilisez des enceintes d’au moins 8 ohms. Raccordement des bornes + a + et - a - # “ .,4 Pour obtenir I’effet sonore adequat,...
- Page 54 Ne pas dt+rouler Ie fil de I’antenne cadre AM. RACCORDEMENT D’UN ANTENNE EXTERIEURE Pour garantir une reception FM de qualite, il est conseiile d’utiliser une antenne exterieure. Raccordez I’antenne exterieure bornes FM 75 Q.
- Page 55 “TUNER PRESET/ POWER entre la telecommande et Ie capteur de I’ampli-tuner, devrait &re SURROLJND de 5 metres (16 pieds). Quand la portee est reduite, remplacez FUNCTION +) VOLUME Ies piles par des neuves. Utilisation de la telecommande Les instructions de ce mode d’emploi...
- Page 56 MULTI JOG clans Ies quatre secondes pour afficher “SUBW OFF. Pour changer la Iuminosite de I’afflchage Appuyez sur la touche ECO de fagon a ce que “ECO MODE s’affiche. Pour eteindre I’ampli-tuner, appuyez sur I’interrupteur POWER.
- Page 57 DTS) seconded. llpeut&re reglede Oa31 (MAX) maisilclignotes’il selectionne est regle au-dessus du niveau 21, - Le Dolby Pro Logic est active. Le niveau du volume reste memorise a la mise hors tension de I’ampli-tuner, maiss’il estregle au-dessusduniveau 17ilsera automatiquement regleauniveau...
- Page 58 Le numero preregle selectionne et la courbe d’egalisation Pour annuler Ie mode selectionne s’affichent chacun quelques secondes. Appuyez sur la touche GEQ pour afficher Ie nom de mode GEQ et appuyez ensuite a nouveau sur cette touche clans Ies 4...
- Page 59 - Le Dolby Pro Logic est active. - Le casque est branche. (DSP) peuvent recreer circuits processeur d’ambiance I’effet de sons r6flechis par Ies murs et Ies plafonds, pour simuler la presence d’un environnement particulier, II y a quatre modes d’ambiance avec Ies modes d’egalisation correspondents.
- Page 60 VI: VIDEO 1, V2: VIDEO 2, V3: VIDEO 3 Le niveau peut etre ajuste entre –6dB (M IN) et +8dB (MAX) par pas de 2dB. Ajustez Ie niveau de sorte que Ie son soit au La source video sdlectionnee est indiqu@e sur I’afficheur et Ie m~me niveau que celui de la radio.
- Page 61 Aucun systbme de contrde du son n’agit sur I’enregistrement (voir page 8). Pour selectionner Ie mode Dolby Digital surround approprie Le son fourni aux prises DIGITAL IN ne peut pas &re enregistre. pour vos enceintes, reportez-vous a “SELECTION Quand vous enregistrez Ie son du Iecteur DVD, CD, MD ou LD, DOLBY SURROUND”...
- Page 62 Pm5Btimr : ..Pour rechercher une station rapidement sur I’appareil principal (recherche automatique) Appuyez en continu sur la touche UP ou DOWN jusqu’a ce que la recherche commence. Quand une station est accordee, recherche s’arr?+te.
- Page 63 Pour supprimer une station prereg16e Selectionnez Ie numero de la station prereglee a supprimer. Appuyez ensuite sur la touche ENTER de l’ap~areil et appuyez ensuite a nouveau dessus clans Ies quaitre secondes. Le numero de toutes Ies autres stations prereglees suivantes...
- Page 64 Les voix sent reproduites par Ie champ sonore avant et central, tandis que I’ambiance, par exemple bruits de voitures ou de la foule, enveloppe de toute part et recree une atmosphere incroyablement realiste. Veuillez Iire attentivement ce qui suit pour C)oo “accorder”...
- Page 65 Leffet Dolby Digital surround ou Dolby Pro Logic ne peut pas i?Areobtenu avec Ies disques non enregistres en Dolby Digital surround ou Dolby Pro Logic. Dans ce cas, utilisez a la place Ie systeme surround DSP (voir page 10). Quand un casque est branche: - Le systeme Dolby Pro Logic est automatiquement annule.
- Page 66 Le temps de retard des enceintes a ete initialement regle sur Les enceintes gauche et droite creent I’effet st&’60. 5 ms. II peut 6tre regle entre O et 15 ms par paliers de 5 ms. Le haut-parfeur centraf permet un positionnement precis du Dolby Pro Logic son clans un vaste champ sonore.
- Page 67 REGLAGEDU SON DOLBY La plage dynamique du Dolby Digital surround peut ~tre ajustee. DIGITAL S URROUND Cet appareil a ete regle initialement sur Ie mode “S1-D (standard). Quand Ie mode Dolby Digital surround est active, appuyez sur la touche ENTER de I’arwareil principal et Imaintenez-la enfonlcee jusqu’a ce que...
- Page 68 17 et executez Ies etapes 2 et 3. Le decalage des haut-parleurs central et spatiaux ne peut etre ajuste en mode spatial DTS.
- Page 69 Appuyez sur une touche de la section MODE correspondent au code ID de I’appareil exterieur. SELECT (TV, CABLE, VCR (CD) Par exemple, si Ie Iecteur CD est un modele AlWA, qui a Ie La telecomrnande est prit!te pour fairf? fonctionner I’appareil code ID 124 ou 157, appuyez sur Ies touches DIGIT”1”,...
- Page 70 Ies touches de fonction ou accordez une station Le resultat du reglage apparait pendant 5 secondes sur Ie cbte droit de I’ecran. Voici des exemples d’affichage sur ecran. DIGITAUANALOG/t3AND V,d~oV I DEO t Quand Ie cordon secteur est raccorde au secteur uour la ~remiere fois, I’horloge clignote sur I’afficheur.
- Page 71 Appuyez plusieurs fois de suite sur la touche UP et DOWN clans les quatre secondes qui suivent I’etape 2. A chaque pression sur la touche, Ie temps change par increments de 5 minutes de 5 a 240 minutes.
- Page 72 SPEAKER IMPEDANCE 170 watts par canal, minimum RMS a SELECTOR regle sur 8C2,accepte 8 ohms, de 40 Hz ~ 20 kHz, avec des enceintes de 8 ohms ou plus. moins de 0,97. de distortion PHONES (jack stereo): accepte un...
- Page 73 Si la surface est extremement sale, utilisez un chiffon Iegerement AIWA RECEIVER 6, 22 impregne d’une solution detergence neutre. Ne pas utiliser de solvants puissants, tels que I’alcooi, la benzine et du diluant, car BALANCE ils pourraient abimer la finition. 8,21 CABLE...
- Page 74 ID c IDES FOR TV IGOSDE INDENTIFICACION PARA TELEVISION ESID DE TELEVISEURS %mmi--i D CODE Fujitsu Multitech :6DIG0 Funai DENTIFICATION Futuretech 00M DE MARQUE :ODE ID Nikko ====--i \-Mark Noshi 051,055, 135, \dventura 174>178,282, 4iko Dnwa Ikai Dptimus 154, 166,250...
- Page 75 ID cODEs FOR CABLE Irv CODIG(iS DEINDENTIFKYMON PARACABLEVIS1ON CODES ID DE DECODEIJRS —.—— 047, 054,056, BRAND NAME ID CODE Sears MARCA C6DIG0 146, 154, 156, IDENTIFICATION 159, 171, 178, NOM DE MARQUE CODE ID 001,003, 007, 039, 165 Sharp 008,011,013,...
- Page 76 ID CODES FOR VCR CODIGOS DE IDENTIFICATION PARA VIDEOGRABADORAS CODES ID DE MAGNETOSCOPES BRAND NAME ID CODE MARCA C6DIG0 IDENTIFICATION NOM DE MARQUE CODE ID I Headquarter I 046 Action Philips 035%062,081, HI-Q I 047 Adventura I Hitachi I 041,042...
- Page 77 Teknika 000, 035, 037 208,240 Toshiba 043, 045, 060, Totevision 037, 240 California Audio Lab 1029 Unitech Carver 1157,179 Vector Vector Research Video Concepts 045, 061 Videosonic Wards 000, 035, 042, G enexxa 1032,305 047, 060, 062, Hitachi 1032 072, 149, 240...
- Page 80 NOTE This equipment has been tested and found to comply with the limits for a Class B digital device, pursuant to Part 15 of the FCC Rules. These limits are designed to provide reasonable protection against harmful interference in a residential installation.
Need help?
Do you have a question about the AV-DV95 and is the answer not in the manual?
Questions and answers