Table of Contents
Advertisement
Quick Links
Advertisement
Table of Contents

Related Manuals for SIERRA-OLYMPIA TECHNOLOGIES VENTUS HD6


Summary of Contents for SIERRA-OLYMPIA TECHNOLOGIES VENTUS HD6
- Page 1 VENTUS HD6 USER GUIDE 603 Portway Avenue, Suite 100 | Hood River, OR 97031 | 855.222.1801 | www.sierraolympia.com Product Export Classification Control Number (ECCN): 6A003.b.4.a. This document is provided for operation purposes only and does not contain export-controlled technology...
-
Page 2: Table Of Contents
USER GUIDE VENTUS HD6 CONTENTS Table of Figures ......................... 1 Safety Conditions ..................... 2 Export Notice ......................2 Reference Documents ....................2 Introduction ......................2 Included Items......................3 Quick start guide ...................... 4 3G/HD-SDI Accessory Installation ................7 Focus ........................9 Nonuniformity Correction .................. -
Page 3: Safety Conditions
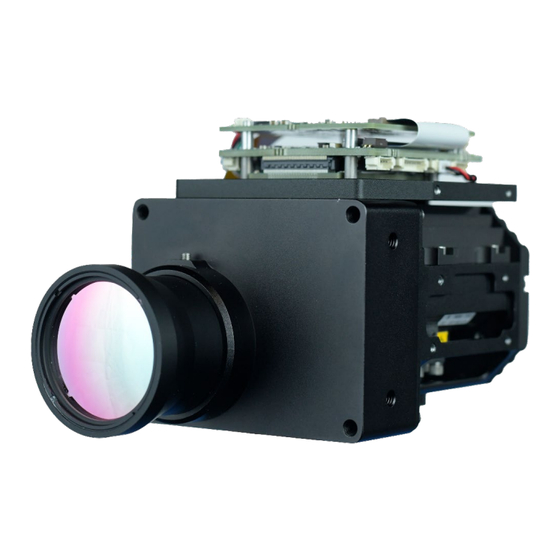
HexaBlu Baseline OEM Camera Core 4 INTRODUCTION The Ventus HD6 is ready to operate out of the box. This guide will provide a walkthrough of the minimum setup to begin imaging. This document applies to WIND Viewer Version 3.x. More detailed information on WIND Viewer is available in the WIND Viewer User Guide. -
Page 4: Included Items
This quick start guide will describe camera operation using WIND Viewer. The Ventus HD6 may be installed in an enclosure that protects the camera from the elements and provides field-friendly connectors using patch cables to the camera’s interfaces as defined by the electrical ICD. -
Page 5: Quick Start Guide
USER GUIDE VENTUS HD6 6 QUICK START GUIDE Connect the Ethernet cable. 6.1.1 Connect the provided Picoblade-terminated Ethernet cable to J11. The camera can be connected to a managed network, a switch or directly to a computer. The ethernet interface is preconfigured for DHCP. -
Page 6: Figure 3: Hdmi Connection
USER GUIDE VENTUS HD6 Optional HDMI Connection 6.3.1 Connect a type D Micro-HDMI cable to J16. The Type D Micro-HDMI may be connected to an HDMI monitor or capture card. Figure 3: HDMI Connection WIND Viewer – Connection Procedure 6.4.1 Establish IP Connection 6.4.1.1 Install WIND Viewer from the USB delivery drive. -
Page 7: Figure 4: Connection Dropdown
6.4.1.6 When the Connect button changes to Disconnect, you have successfully established connection. 6.4.2 Stream Video The Ventus HD6 utilizes H.265 encoding by default, which is more processor intensive than H.264 encoding. This can be modified on the SLA if your decoder struggles with the H.265 data stream 6.4.2.1 H.264 video will begin streaming to the local computer’s IP address on port 15004. -
Page 8: Hd-Sdi Accessory Installation
USER GUIDE VENTUS HD6 7 3G/HD-SDI ACCESSORY INSTALLATION A kit is available for separate purchase to enable Standard Display Interface (SDI) output (configured by the Sightline). The kit contains electronics, mounting equipment, and cables. The following instructions are provided to mount the kit on the chassis; the kit may also be remote mounted. -
Page 9: Figure 6 Install Sdi Board
USER GUIDE VENTUS HD6 7.1.2 Install the SDI board with four 2-56 x 1/4in SHCS Figure 6 Install SDI board. 7.1.3 Install the FFC and power cables Figure 7 FCC and Power Cable Installation 7.1.4 Once the SDI accessory kit is installed power the camera, use any 75-ohm MCX cable to the SDI connection. -
Page 10: Focus
30Hz 10 to 40C The Ventus HD6 is equipped with a shutter to perform Flat Field Corrections (FFCs). A FFC can be used to correct changes in the nonuniformity over time. By default, the camera will automatically perform an FFC 20 seconds after the sensor finishes initializing, and 1 second after the camera is commanded to switch NUC tables. -
Page 11: Integration Considerations
FFCs may be commanded manually with the Execute FFC button in Wind Viewer, or via the Do Flat Field Correction (0x82) command in the Wind API. 10 INTEGRATION CONSIDERATIONS The Ventus HD6 dissipates ~11W of heat, please see the corresponding mechanical ICD • for heatsinking surfaces. When enclosed, stirred air is recommended, the volume wall should promote conduction to ambient air.
Need help?
Do you have a question about the VENTUS HD6 and is the answer not in the manual?
Questions and answers