Subscribe to Our Youtube Channel
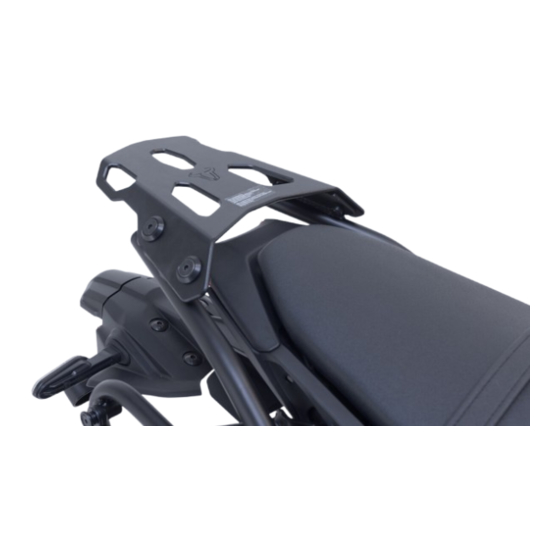
Summary of Contents for SW-Motech GPT.06.036.16000/B
- Page 1 ANBAUANLEITUNG mounting instructions • instructions de montage • instrucciones de montaje • istruzioni di montaggio GPT.06.036.30000 beinhaltet • contains • contient • contiene • contiene GPT.06.036.16000/B GPT.00.152.54500/B BC.HTA.00.305.30000...
- Page 2 ~ 1 h. EASY DIFFICULT ENGLISH ·Thank you for choosing this premium product from SW-MOTECH. PREPARATION: Read the mounting instructions carefully and make sure Visit our online shop for more information (e.g. model assignments). Required that all parts on the parts list are available.
- Page 3 Indicates the tightening torque of a part specified by SW- strength; M (MEDIUM): medium strength; L (LOW): MOTECH or the vehicle manufacturer (OEM). low strength. The content translation is automated. Errors and omissions excepted © SW-MOTECH GmbH & Co. KG Subject to technical and design changes.
- Page 4 Ø 20 / ø 8.4 / h 5 DB.ST.0220.0084.0150.02 DB.ST.0200.0084.0050.02 M8 x 25; DIN 7991 ø 8.4 GPT.00.564.050.11 SC.ST.08.025.02.7991.088 SE.00.084.02 The content translation is automated. Errors and omissions excepted © SW-MOTECH GmbH & Co. KG Subject to technical and design changes.
- Page 5 WARNING: Always wear eye and hand protection! WARNING: Always use the proper tools! Remove the passenger seat and seat from the vehicle. The content translation is automated. Errors and omissions excepted © SW-MOTECH GmbH & Co. KG Subject to technical and design changes.
- Page 6 MOUNTING STEP · READ AND KEEP MOUNTING INSTRUCTIONS! Loosen the two plastic dowels, and remove the rear panel from the vehicle. The content translation is automated. Errors and omissions excepted © SW-MOTECH GmbH & Co. KG Subject to technical and design changes.
- Page 7 MOUNTING STEP · READ AND KEEP MOUNTING INSTRUCTIONS! Loosen the screws and plastic dowels shown on both sides of the side panelling. The content translation is automated. Errors and omissions excepted © SW-MOTECH GmbH & Co. KG Subject to technical and design changes.
- Page 8 MOUNTING STEP · READ AND KEEP MOUNTING INSTRUCTIONS! Loosen the screws shown on both sides; remove the side panels from the vehicle. The content translation is automated. Errors and omissions excepted © SW-MOTECH GmbH & Co. KG Subject to technical and design changes.
- Page 9 MOUNTING STEP · READ AND KEEP MOUNTING INSTRUCTIONS! Separate the panel parts on both sides. The outer cladding parts are omitted. The content translation is automated. Errors and omissions excepted © SW-MOTECH GmbH & Co. KG Subject to technical and design changes.
- Page 10 Install the inner side panels on both sides of the vehicle using the original screws/plastic dowels. Tighten the original (Orig.) screws according to the manufacturer's instructions. The content translation is automated. Errors and omissions excepted © SW-MOTECH GmbH & Co. KG Subject to technical and design changes.
- Page 11 MOUNTING STEP · READ AND KEEP MOUNTING INSTRUCTIONS! Mount the rear panel on the vehicle using the original plastic dowels. The content translation is automated. Errors and omissions excepted © SW-MOTECH GmbH & Co. KG Subject to technical and design changes.
- Page 12 MOUNTING STEP · READ AND KEEP MOUNTING INSTRUCTIONS! NOTE: If the SW-MOTECH side carrier is mounted at the same time, the × × attachment parts (7) and (8) are omitted. Instead of these attachments, mount the side support(s) using the attached attachments (*) as shown in the detailed drawing.
- Page 13 When all components are loosely attached, tighten screws (4), (5), and (10) as specified in the mounting instructions. × 20 Nm × The content translation is automated. Errors and omissions excepted © SW-MOTECH GmbH & Co. KG Subject to technical and design changes.
- Page 14 MOUNTING STEP · READ AND KEEP MOUNTING INSTRUCTIONS! Reattach the seat and passenger seat to the vehicle. The content translation is automated. Errors and omissions excepted © SW-MOTECH GmbH & Co. KG Subject to technical and design changes.
- Page 15 TÜV regulations. After assembly, parts that are subject to registration should be entered in the vehicle documents by your test center. The content translation is automated. Errors and omissions excepted © SW-MOTECH GmbH & Co. KG Subject to technical and design changes.


Need help?
Do you have a question about the GPT.06.036.16000/B and is the answer not in the manual?
Questions and answers