Table of Contents
Advertisement
AV Receiver
HT-RC330
Instruction Manual
Thank you for purchasing an Onkyo AV Receiver.
Please read this manual thoroughly before making
connections and plugging in the unit.
Following the instructions in this manual will enable
you to obtain optimum performance and listening
enjoyment from your new AV Receiver.
Please retain this manual for future reference.
Contents
Introduction ...................................2
Connections.................................10
Turning On & Basic Operations ......17
Advanced Operations .................29
Controlling Other Components...38
Appendix ......................................43
E
n
Advertisement
Table of Contents

Related Manuals for Onkyo HT-RC330


Summary of Contents for Onkyo HT-RC330
- Page 1 Instruction Manual Advanced Operations ....29 Controlling Other Components...38 Appendix ........43 Thank you for purchasing an Onkyo AV Receiver. Please read this manual thoroughly before making connections and plugging in the unit. Following the instructions in this manual will enable you to obtain optimum performance and listening enjoyment from your new AV Receiver.
-
Page 2: Introduction
Servicing is required when the apparatus has been Leave 20 cm (8") of free space at the top and sides and damaged in any way, such as power-supply cord or 10 cm (4") at the rear. The rear edge of the shelf or plug is damaged, liquid has been spilled or objects board above the apparatus shall be set 10 cm (4") -
Page 3: Precautions
• This unit’s top and rear panels may get warm after prolonged use. This is normal. • If you do not use this unit for a long time, it may not work properly the next time you turn it on, so be... -
Page 4: Supplied Accessories
(Note for China: The battery for the remote controller is not supplied for this unit.) In catalogs and on packaging, the letter at the end of the product name indicates the color. Specifications and operations are the same regardless of color. -
Page 5: Table Of Contents
Connecting a Recording Component ......15 Specifications ..............52 Connecting Antenna............. 16 Connecting the Power Cord ......... 16 To reset the AV receiver to its factory defaults, turn it on and, while holding down VCR/DVR, press Turning On & Basic Operations 8 ON/STANDBY (➔... -
Page 6: Features
• 40 FM/AM Presets with safety and regulatory standards. • Crossover Adjustment Please note that the use of this accessory with iPod or iPhone (40/50/60/70/80/90/100/120/150/200 Hz) may affect wireless performance. • A/V Sync Control Function (up to 400 ms) •... -
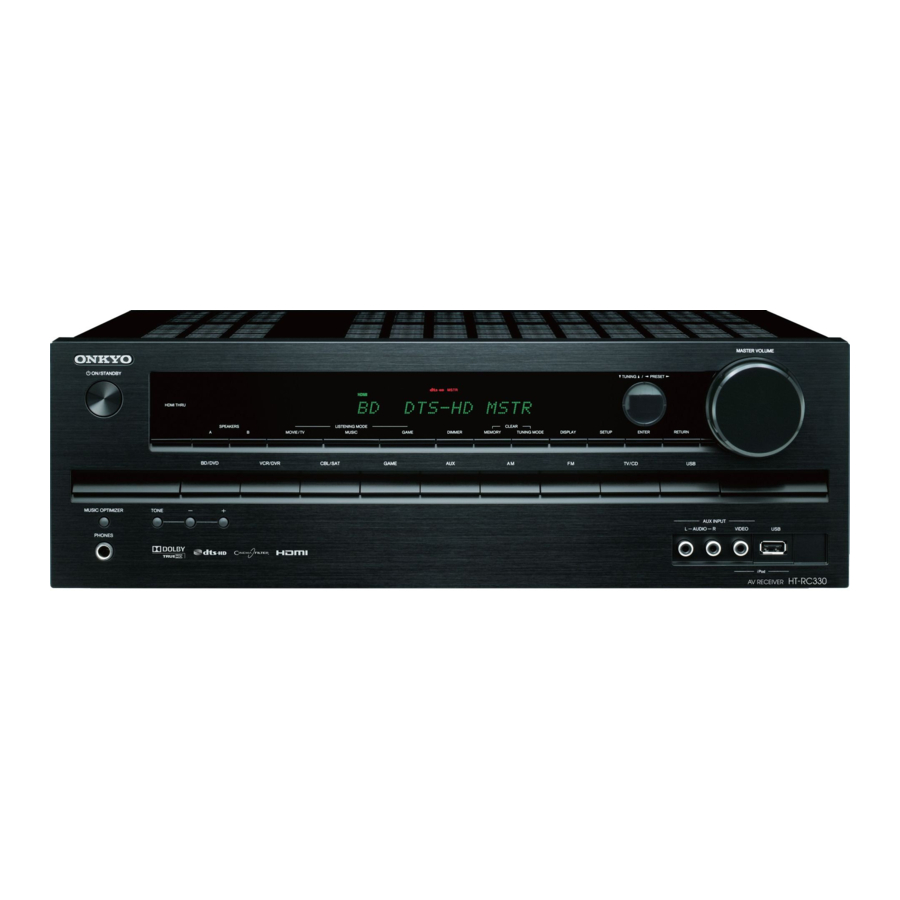
Page 7: Front & Rear Panels
(North American models) h i j k l m (Chinese models) The page numbers in parentheses show where you can find the main explanation for each item. a 8 ON/STANDBY button (17) l TUNING, PRESET (20 to 21), arrow and ENTER... -
Page 8: Display
Display For detailed information, see the pages in parentheses. a A and B speaker indicators (26) e RDS indicator (excluding North American models) (21) b Audio input indicators f SLEEP indicator (26) c Listening mode and format indicators (23, 27) -
Page 9: Remote Controller
HOME button (26) n SLEEP button (26) ■ Controlling the tuner To control the AV receiver’s tuner, press AM or FM. a Arrow q/w buttons (20) b D.TUN button (21) c DISPLAY button (21) d CH +/– button (21) -
Page 10: Connections
Speakers B Speakers A ■ Push-type speaker terminals Strip 3/8" to 1/2" (10 to 12 mm) of insulation from the ends of the 3/8" to 1/2" (10 to 12 mm) speaker cables, and twist the bare wires tightly, as shown. - Page 11 Using a Powered Subwoofer speaker cable in accordance with the table above. Then all you need to do is to match the color of each label to the To find the best position for your subwoofer, while corresponding speaker terminal.
-
Page 12: About Av Connections
Note • The AV receiver does not support SCART plugs. • The AV receiver’s optical digital jacks have shutter-type covers that open when an optical plug is inserted and close when it’s removed. Push plugs in all the way. Caution... -
Page 13: Connecting Components With Hdmi
• When listening to an HDMI component through the AV receiver, set the HDMI component so that its video can be seen on the TV screen (on the TV, select the input of the HDMI component connected to the AV receiver). If the TV power is off or the TV is set to another input source, this may result in no sound from the AV receiver or the sound may be cut off. -
Page 14: Connecting Your Components
When USB input is selected, you can input video signals from the AUX INPUT VIDEO jack. Video signals input from AUX INPUT VIDEO will be output from the MONITOR OUT jack. Do not connect the AV receiver’s USB port to a USB port on your computer. Music on your computer cannot be played through the AV receiver in this way. -
Page 15: Connecting Onkyo U Components
• The AV receiver must be turned on for recording. Recording is not possible while it’s in Standby mode. • If you want to record directly from your TV or playback VCR to the recording VCR without going through the AV receiver, connect the TV/VCR’s audio and video outputs directly to the... -
Page 16: Connecting Antenna
Indoor FM antenna (supplied) Note • Once your AV receiver is ready for use, you’ll need to tune into a radio station and position the antenna to achieve the best possible reception. • Keep the AM loop antenna as far away as possible from your AV receiver, TV, speaker cables, and power cords. -
Page 17: Turning On & Basic Operations
Press 8 ON/STANDBY on the front panel. Press RECEIVER followed by 8 on the remote controller. The AV receiver will enter standby mode. To prevent any loud surprises when you turn on the AV receiver, always turn down the volume before you turn it off. -
Page 18: Playback
• “iPod/iPhone Playback via Onkyo Dock” page 38) (➔ TOP MENU • “Controlling Other Onkyo Components” This button displays the top menu for each media or service. (➔ page 40) q/w and ENTER To adjust the volume, use VOL q/w. -
Page 19: Understanding Icons On The Display
“Connecting...” appears on the display. Note Press MODE to switch to Extended Mode. • The buttons you can use will differ depending on the devices and media used for playback. A list of your iPod/iPhone model’s contents appears. Use q/w to open a folder, and then press ENTER. -
Page 20: Playing Usb Device
■ Auto tuning mode • If you connect a USB hard disk drive to the AV receiver’s USB port, we recommend that you use its AC adapter to power it. • The AV receiver supports USB MP3 players that support the... - Page 21 Also, unexpected characters may be displayed when unsupported characters are received. This is not a malfunction. • If the signal from an RDS station is weak, RDS data may be displayed intermittently or not at all.
- Page 22 Current affairs Affairs • The message “Waiting” may appear while the AV receiver waits for the RT information. Information Info • If the message “No Text Data” appears on the display, no Sport Sport RT information is available. Education Educate...
-
Page 23: Using Basic Functions
Direct, Stereo, Mono, or T-D (Theater-Dimensional) MOVIE/TV, MUSIC, GAME listening mode. About Listening Modes The AV receiver’s listening modes can transform your listening room into a movie theater or concert hall, with high fidelity and stunning surround sound. ■ Explanatory Notes Input Source The following audio formats are supported by the listening mode. - Page 24 A l l S t e r e o Full Mono In this mode, all speakers output the same sound in mono, so the sound you hear is the same regardless of where you are within the listening room. F u l...
- Page 25 For the Blu-ray Discs, Dolby Digital is used. AV receiver can input the DSD signal from HDMI IN. Setting the output setting on the player side to PCM might obtain a better sound according to the player. In that case, set the output setting on the player side to PCM.
-
Page 26: Using The Home Menu
Press RECEIVER followed by SLEEP repeatedly Info to select the required sleep time. You can view the information of the following The sleep time can be set from 90 to 10 minutes in 10 items: “Input” and “Output”. minute steps. ■... -
Page 27: Setting The Display Brightness
(➔ page 40). • Alternatively, you can use the AV receiver’s DISPLAY. When AM or FM radio is used, the band, preset number, and frequency are displayed. Using the Music Optimizer If the input signal is analog, “Analog” is displayed. If the input signal is PCM, the sampling frequency is displayed. -
Page 28: Muting The Av Receiver
AUX INPUT VIDEO are recorded by the • To unmute, press MUTING again or adjust the volume. • The mute is cancelled when the AV receiver is set to VCR connected to the VCR/DVR OUT jacks. standby. -
Page 29: Advanced Operations
Audio Adjust (➔ page 30) (➔ page 32) Note BD/DVD Input Ch (Mux) • This procedure can also be performed on the AV receiver by VCR/DVR Input Ch (Mono) CBL/SAT Panorama using SETUP, arrow buttons, and ENTER. GAME Dimension... -
Page 30: Hdmi Input
- - - - - already been assigned, you must set first any unused TV/CD OPTICAL2 input selectors to “- - - - -”, or you will be unable to ■ assign HDMI1 - HDMI3 to input selector. BD/DVD, VCR/DVR, CBL/SAT, GAME, AUX,... -
Page 31: Sp Config (Speaker Configuration)
TV speakers, or subwoofer. – Speakers B is on, or – Speakers A is off. Note • This function can be set only if the “Subwoofer” setting is set to ■ Subwoofer “Yes”, and the “Front” setting is set to “Large” (➔... -
Page 32: Level Cal (Level Calibration)
With this setting, you can move the sound field forward or Note backward when using the Dolby Pro Logic II Music • Speakers that you set to “No” or “None” in the “Sp Config listening mode. Higher settings move the sound field page 31) cannot be selected. -
Page 33: Source Setup
Note • Can not set the input selector by the same name. ■ Listening Angle • This menu cannot be used for the AM, FM or USB input Wide: selector. Select if the listening angle is 40 degrees. Audio Selector Narrow: Select if the listening angle is 20 degrees. -
Page 34: Hardware
DTS CD, try setting the format to DTS. Note When “Auto Standby” is set to “On”, AV receiver will • The setting will be reset to “Off” when you change the setting in automatically perform standby operation if there is no page 33). -
Page 35: Hdmi Setup
“Auto”. Note • This setting is set to “Off” automatically when the “HDMI Ctrl • When set to “On” and close the menu, the name of connected (RIHD)” setting is set to “Off”. p-compatible components and “RIHD On” are ■... -
Page 36: Using The Audio Settings
Dolby Digital, Dolby Digital Plus, or Dolby TrueHD. Operating on the AV receiver • The Late Night function is set to “Off” when the AV receiver is set to Standby. For Dolby TrueHD sources, it will be set to Press TONE on the AV receiver repeatedly to “Auto”. - Page 37 OPTIMIZER. Note • The Music Optimizer function only works with PCM digital audio input signals with a sampling rate below 48 kHz and analog audio input signals. The Music Optimizer is disabled when the Direct listening mode is selected. • The setting is stored individually for each input selector.
-
Page 38: Controlling Other Components
• If you do adjust the volume control on your iPod/iPhone while your Apple iPod/iPhone through the AV receiver and it’s inserted in RI Dock, be careful that it’s not set too loud enjoy great sound, and watch iPod/iPhone slideshows and before you reconnect your earphones. - Page 39 • For detailed operation of the iPod/iPhone, please refer to the instruction manual. This button does not turn the Onkyo DS-A2 or DS-A2X RI Dock on or off. Your iPod/iPhone may not respond the first time you press this button, in which case you should press it again.
-
Page 40: Controlling Other Onkyo Components
(RCA). with remote control codes for controlling the components See “Connecting Onkyo u Components” for details listed. You do not need to enter a remote control code to (➔ page 15). control these components. -
Page 41: Resetting Remote Mode Buttons
Resetting REMOTE MODE Buttons You can reset a REMOTE MODE to its default remote control code. While holding down REMOTE MODE that you want to reset, press and hold down HOME until the remote indicator lights (about 3 seconds). Within 30 seconds, press REMOTE MODE again. - Page 42 The p function is not supported. The p supported by the AV receiver is the CEC system control function of the HDMI standard. These buttons function as colored buttons or A, B, C, D buttons. 3 (Pause) functions as reverse playback.
-
Page 43: Appendix
Appendix Troubleshooting ■ If you have any trouble using the AV receiver, look for a When the power is restored after a power solution in this section. If you can’t resolve the issue interruption, “CHECK SP WIRE” appears on the yourself, contact your Onkyo dealer. - Page 44 Only the center speaker produces sound ■ The Late Night function doesn’t work If you use the Dolby Pro Logic II Movie, Dolby Pro — Logic II Music, or Dolby Pro Logic II Game Make sure the source material is Dolby Digital, listening mode with a mono source, such as an AM Dolby Digital Plus, or Dolby TrueHD.
-
Page 45: Usb Device Playback
If you’ve connected a cassette tape deck, to the an HDMI IN TV/CD IN jack, or an RI Dock to the TV/CD IN or GAME IN or VCR/DVR IN jacks, for the remote Reliable operation with an HDMI-to-DVI adapter is controller to work properly, you must set the display. - Page 46 ■ The following settings can be made for the composite video inputs You must use the buttons on the unit to make these settings. On the AV receiver, press the input selector for the input source that you want to set and the SETUP button simultaneously.
-
Page 47: Connection Tips And Video Signal Path
Use the following sections as a guide. The on-screen setup menus appear only on a TV that is connected to the HDMI OUT. If your TV is connected to the MONITOR OUT V or the COMPONENT VIDEO OUT, use the AV receiver’s display when changing settings. -
Page 48: Usb Features
• MP3 files must be MPEG-1/MPEG-2.5 Audio Layer 3 format with a sampling rate of 8 kHz, 11.025 kHz, 12 kHz, 16 kHz, 22.05 kHz, 24 kHz, 32 kHz, 44.1 kHz, 48 kHz and a bit-rate of between 8 kbps and 320 kbps. -
Page 49: About Hdmi
Note • The HDMI video stream is compatible with DVI (Digital Visual Interface), so TVs and displays with a DVI input can be connected by using an HDMI-to-DVI adapter cable. (Note that DVI connections only carry video, so you’ll need to make a separate connection for audio.) However, reliable operation with such an adapter is not guaranteed. -
Page 50: Using An Rihd-Compatible Tv, Player, Or Recorder
Using an RIHD-compatible TV, Player, or Recorder p, which stands for Remote Interactive over HDMI, is the name of the system control function found on Onkyo components. The AV receiver can be used with CEC (Consumer Electronics Control), which allows system control over HDMI and is part of the HDMI standard. - Page 51 DVD player to 2ch PCM. (It may not be possible depending on the player models.) • Audio Return Ch (ARC): Auto • Even if you set to output audio on the TV speakers, audio will be output from the speakers connected to the AV See details of each setting (➔...
-
Page 52: Specifications
17-1/8" 5-7/8" 12-15/16" (Chinese) × Weight 7.5 kg (16.5 lbs.) 1 ch 100 W at 6 ohms, 1 kHz, 1 ch driven of 1% (IEC) ■ HDMI Maximum Effective Output Power (Chinese) × Input IN 1, IN 2, IN 3... - Page 53 Memo...
- Page 54 Memo...
- Page 55 Memo...
- Page 56 The Coach House 81A High Street, Marlow, Buckinghamshire, SL7 1AB, UK Tel: +44-(0)1628-473-350 Fax: +44-(0)1628-401-700 ONKYO CHINA LIMITED Unit 1 & 12, 9/F, Ever Gain Plaza Tower 1, 88, Container Port Road, Kwai Chung, N.T., Hong Kong. Tel: 852-2429-3118 Fax: 852-2428-9039 http://www.ch.onkyo.com/...
Need help?
Do you have a question about the HT-RC330 and is the answer not in the manual?
Questions and answers