Table of Contents
Advertisement
Quick Links
Advertisement
Table of Contents

Related Manuals for myPOS Slim


Summary of Contents for myPOS Slim
- Page 1 Slim user manual mypos.com myPOS Slim Technical Specification & Warranty...
-
Page 2: Table Of Contents
Accepting payments and even more ...............12 Built-in apps Accept payments Smart card Magnetic stripe card Contactless cards Accept card-not-present (MO/TO) transactions Send payment request Warranty and return policy ................16 Replacement of myPOS package with defect Important: disposal For more information ..................16... -
Page 3: Introduction
Your new myPOS Slim device is a revolutionary mobile terminal for accepting payments with credit, debit cards and mobile wallets, in store and on-the-go. To start using your Slim device, you need to open a free e-money account at www.mypos.com and then activate the myPOS Slim device. -
Page 4: Activation
Slim device is activated, every transaction accepted with it, will be credited to your myPOS account. You can link more than one myPOS device to one e-money account. In this case, the payments accepted with all myPOS terminals will be credited to the same myPOS account. -
Page 5: Activation Code
Congratulations! Your new myPOS Slim device is now activated and ready to be used. You can find the new device listed in your myPOS account, menu “Devices”. Once the device is successfully connected to the Internet, you will be prompt to choose a device language. -
Page 6: Getting Started
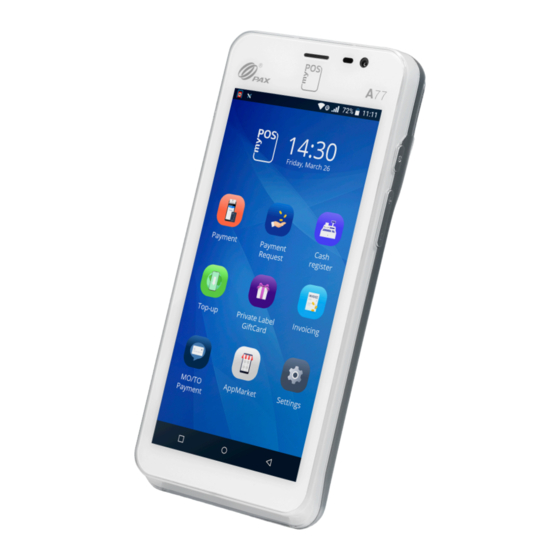
Learn more about your new device’s hardware, assembly procedures, and how to get started. Learn about your device Home screen Status bar App shortcuts Back Recent Home apps myPOS Smart Technical Specification & Warranty (Updated March 2018) | page 5 myPOS Slim User Manual | page 5... -
Page 7: Status Bar
To clear all notifications, tap Clear all. Drag upward from the bottom of the screen or tap Back to close the Notification panel. myPOS Smart Technical Specification & Warranty (Updated March 2018) | page 6 myPOS Slim User Manual | page 6... -
Page 8: Quick Settings
Sound – tap to switch to Silent or Vibrate mode or activate the sound of your device • Restart– tap to reboot the device • Power off – tap to shut down the device myPOS Smart Technical Specification & Warranty (Updated March 2018) | page 7 myPOS Slim User Manual | page 7... -
Page 9: Manage Your Device
- Send log - Reset device - reset your device and start using it with a different Store or myPOS account. Please have in mind that this will restore your default device settings and you will no longer be able to accept payments. To start using your device again, you will need to activate it. -
Page 10: Network Settings
Network tab - change the connection type of your device (WiFi, Bluetooth and Mobile Network). myPOS Smart Technical Specification & Warranty (Updated March 2018) | page 9 myPOS Slim User Manual | page 9... - Page 11 6. Press the 3 dots in the top right corner and choose Save 3. Open Access point names 7. Select the entered APN 4. Press + in the top right corner myPOS Smart Technical Specification & Warranty (Updated March 2018) | page 10 myPOS Slim User Manual | page 10...
-
Page 12: Configuration Update
Send log from terminal To send log from terminal, enter the Settings app, select About terminal and press Send log. myPOS Smart Technical Specification & Warranty (Updated March 2018) | page 11 myPOS Slim User Manual | page 11... -
Page 13: Accepting Payments And Even More
One-stop shop for business applications, designed exclusively for myPOS Slim. You can find detailed information about each app’s functionalities in the Built in Apps Guide. myPOS Smart Technical Specification & Warranty (Updated March 2018) | page 12 myPOS Slim User Manual | page 12... -
Page 14: Accept Payments
“Transaction successful” will be displayed. At this point, you can remove the card from the reader and return it to the customer. myPOS Smart Technical Specification & Warranty (Updated March 2018) | page 13 myPOS Slim User Manual | page 13... -
Page 15: Magnetic Stripe Card
Magnetic stripe card Magnetic stripe cards are swiped with the magnetic stripe facing up through the reader located at the top side of the myPOS Slim device. Make sure that the card is inserted properly and the bottom of the card runs firmly and at even speed. The speed of swiping the card must not be too slow, as this can sometimes cause problems. -
Page 16: Accept Card-Not-Present (Mo/To) Transactions
Sell and accept payments with Private Label GiftCards With the Private Label GiftCard app, you can load and check GiftCards balance. The app is pre- installed on the myPOS Slim devices and includes the following features: • New GiftCard sale – load cards in seconds •... -
Page 17: Warranty And Return Policy
Return Policy. • You have the right to return the full myPOS package within 60 days from the date of receipt. • Some Distributors may provide post-sale customer support and may be able to take back the defected myPOS Slim device.
Need help?
Do you have a question about the Slim and is the answer not in the manual?
Questions and answers