Table of Contents
Advertisement
Quick Links
Advertisement
Table of Contents

Related Manuals for myPOS Mini


Summary of Contents for myPOS Mini
- Page 1 Mini user manual mypos.com myPOS Mini - User Manual...
-
Page 2: Table Of Contents
Scope Related documentation Internet connectivity ..................2 Using myPOS Mini with a mobile phone (via Bluetooth or personal hotspot) Using myPOS Mini with a wireless router (Wi-Fi) Using myPOS Mini with SIM card How to connect your myPOS Mini with Bluetooth... -
Page 3: Introduction
Internet connectivity In order to be able to process payments with credit and debit cards, the myPOS Mini device has to be connected to the Internet. Your myPOS Mini can use the internet connection of your mobile phone (via Bluetooth or personal hotspot), a wireless router and a SIM Card. -
Page 4: Using Mypos Mini With A Wireless Router (Wi-Fi)
WARNING! Please proceed with caution if you are using SIM card adapter for fitting a smaller SIM card into a myPOS myPOS Mini as there is a high risk of damaging your POS device. This damage is not covered by the warranty. We recommend you placing a regular-sized SIM card instead. -
Page 5: How To Connect Your Mypos Mini With Bluetooth
Step1: Select “Bluetooth” from the CONNECTION TYPE menu by pressing (3) on the keyboard. It will warn you to install and open the myPOS BT App on the mobile phone in order to proceed, confirm by pressing “O”. The myPOS Mini will scan for all available (discoverable) Bluetooth devices in its range and will display a list of their names on the screen. -
Page 6: How To Connect Your Mypos Mini With Wi-Fi
How to connect your myPOS Mini with Wi-Fi Make sure the myPOS Mini is in the range of your Wi-Fi network. Switch ON your myPOS Mini and wait for a few seconds until it completes the initialization. If you see the screen CONNECTION TYPE, please proceed to Step 1 below. If you are in the Bluetooth Menu please press (<) to return to CONNECTION TYPE screen and proceed... -
Page 7: How To Connect Mypos Mini Using Sim Card
Your myPOS Mini device is working with standard SIM card size. If you have micro or nano SIM card, please use a SIM adapter. Put the battery back into the myPOS Mini device, close the cover and switch ON the device. -
Page 8: Activation
Congratulations! Your new myPOS Mini is now activated and ready to be used. You can find the new myPOS Mini listed in your myPOS account in the POS terminals menu section. Once myPOS Mini device is activated by you, it is permanently linked to your myPOS account. -
Page 9: Accepting Payments
AMOUNT: 19.99 EUR insert the card in the bottom reader with the CHIP facing towards the keyboard. When myPOS Mini is reading the card, the screen will flash Green. If the card is not recognized, the screen will flash Red. -
Page 10: Processing Magnetic Stripe Cards
Please, insert the card with the CHIP facing up into the reader located at the bottom of the myPOS Mini and follow the steps for accepting CHIP cards laid out in the previous section. Complete the transaction as described in Step 3 of the previous section. -
Page 11: Mobile Top-Up
Step 5: Review all entered details and confirm the green key (O). Step 6: The myPOS Mini device will request an email to send the merchant’s copy of the receipt for the approved PAYMENT transaction. -
Page 12: Send Payment Request
Step 1: From the home screen, press (F1) from the keyboard in order to enter the Transaction type menu. Go to Transaction menu 2 and select SEND PAYMENT REQUEST by pressing key (1). The myPOS Mini terminal will display the SEND PAYMENT REQUEST screen. -
Page 13: Refund Transactions
Step 1: From the home screen, press the green key (O) and then press (F1) in order to enter the Transaction type menu. Select Last Transaction Void by pressing key (6) and confirm with the green key (O). The myPOS Mini terminal will display the Last Transaction void screen showing the amount of your last transaction. -
Page 14: Mypos Mini Functions
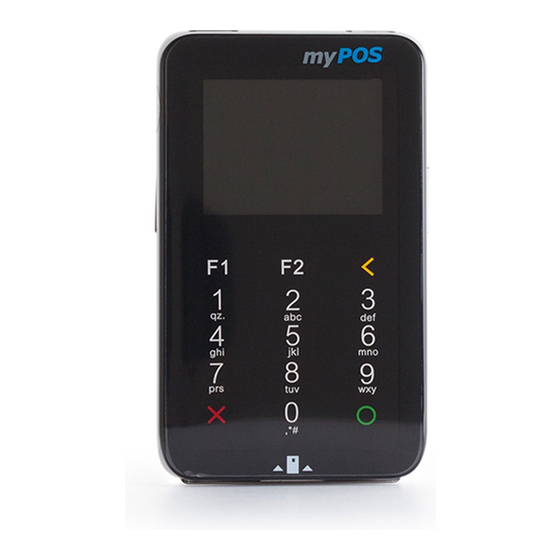
Mini functions For better user experience and convenience all functions of your myPOS Mini are divided into two groups – TRANSACTION MENU (F1) and SETTINGS (F2). From the home screen (any other screen by pressing red key (X) first) you can select the TRANSACTION menu by pressing (F1) key or you can select the SETTINGS menu by pressing (F2) key. -
Page 15: F2 - Settings Menu
The myPOS Mini will display a list of all available languages. 2. Keyboard sound ON/OFF You can turn Off or On the sound when any key is clicked on the myPOS Mini. 3. Change Connection type From this option, you can change the chosen network connection. The myPOS Mini will scan for available devices and will display a list with their names on the screen. - Page 16 STAN. 2. Reset device Use this option with caution and only if you want to reset your myPOS Mini. The myPOS Mini will display a screen where you need to enter a deactivation code. The code can be generated when you log in to mypos.com...
-
Page 17: Warranty And Return Policy
You are not allowed to dispose of the myPOS Mini device, including its battery, cables or other components with the general household waste. If your myPOS Mini is not functioning, you have to send it for repair by following the Return policy available at mypos.com/legal.
Need help?
Do you have a question about the Mini and is the answer not in the manual?
Questions and answers