Table of Contents
Advertisement
Quick Links
USER MANUAL
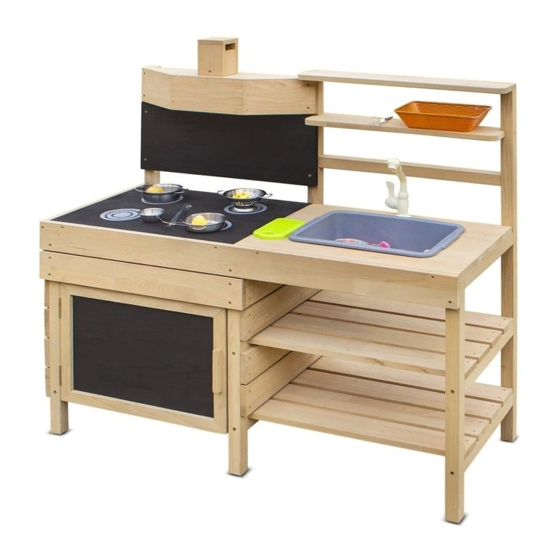
LK200 Ramsey Outdoor
Play Kitchen
WARNING: The disassembled product may contain small parts
which pose a choking hazard to children under 3.
IMPORTANT:
This product may contain sharp points and small parts prior to assembly. The owner's manual contains
safety, assembly, use and maintenance instructions. This product must be assembled by an adult who
has read and understood these instructions. Keep the packaging away from children and dispose of all
packaging before use.
For the installer and your children's safety, it is important to fully read and understand the instructions
and safety hazards before commencing the assembly of the product.
NOTE:
This manual should not be used to guide your purchasing decision. Your product, and the contents
inside its carton, may vary from what is listed in this manual. This manual may also be subject to
updates or changes. Updated manuals are available through our website at www.lifespankids.com.au.
Find the Digital
Manual Online
Advertisement
Table of Contents

Related Manuals for LifeSpan Kids LK200


Summary of Contents for LifeSpan Kids LK200
- Page 1 USER MANUAL LK200 Ramsey Outdoor Play Kitchen Find the Digital Manual Online WARNING: The disassembled product may contain small parts which pose a choking hazard to children under 3. IMPORTANT: This product may contain sharp points and small parts prior to assembly. The owner’s manual contains safety, assembly, use and maintenance instructions.
-
Page 2: Table Of Contents
TABLE OF CONTENTS I. GENERAL SAFETY INSTRUCTIONS 1.1 Danger for Children 1.2 Risk of Injuries 1.3 Product Damage 1.4 Assembly Advice II. SAFETY INSTRUCTIONS III. ASSEMBLY INSTRUCTIONS 3.1 Parts List 3.2 Set Up IV. MAINTENANCE V. WOOD ADVICE VI. CLEANING VII. -
Page 3: General Safety Instructions
I. GENERAL SAFETY INSTRUCTIONS NOTE: This product is intended for outdoor domestic use only. 1.1 DANGER FOR CHILDREN WARNING: No eating while using the product at the same time. • Children do not recognize potential dangers from this product. The unassembled product must be stored out of reach of children and pets. -
Page 4: Assembly Advice
1.4 ASSEMBLY ADVICE • The assembly of the product must be done carefully and by an able-bodied adult. If in any doubt, ask a technically qualified person. • Before you start with the assembly, read the instructions carefully. • Remove all packaging materials and lay down all parts on an open space. This gives you an overview and simplifies the assembly procedure. -
Page 5: Safety Instructions
II. SAFETY INSTRUCTIONS • The safety instructions of the product should always be considered and obeyed. • Using the product may result in permanent injury such as paralysis, or even death. Falling off the product may lead to injuries, particularly to the back, neck or head. •... - Page 6 Consumer Information Sheet for Playground Surfacing Materials The US Consumer Product Safety Commission (CPSC) estimates that about 100 000 playground equipment-related injuries resulting from falls to the ground surface are treated annually in US hospital emergency rooms. Injuries involving this hazard pattern tend to be among the most serious of all playground injuries, and have the potential to be fatal, particularly when the injury is to the head.
-
Page 7: Assembly Instructions
III. ASSEMBLY INSTRUCTIONS P A R T S L I S T 1pc. 1pc. 1pc. 1pc. 1pc. 1pc. 1pc. 1pc. 1pc. 1pc. 1pc. 1pc. 1pc. 2pcs. 1pc. 1pc. 1pc. 1pc. ASSEMBLY INSTRUCTIONS... - Page 8 2pcs. 1pc. 4pcs. 1pc. x 4pcs. x 32pcs. x 4pcs. x 4pcs. M3*15 M3*35 M3.5*15 M3.5*30 x 59pcs. x 9pcs. x 13pcs. x 1pc. M3.5*35 M3.5*45 M3.5*60 x 1pc. x 1pc. x 2pcs. x 3pcs. x 1pc. x 1pc. ASSEMBLY INSTRUCTIONS...
-
Page 9: Set Up
S E T U P STEP 1 Z1 = 1 STEP 2 Z2 = 1 ASSEMBLY INSTRUCTIONS... - Page 10 STEP 3 Z3 = 1 F = 1pc. ASSEMBLY INSTRUCTIONS...
- Page 11 STEP 4 E = 20pcs. ASSEMBLY INSTRUCTIONS...
- Page 12 STEP 5 493mm G = 3pcs. ASSEMBLY INSTRUCTIONS...
- Page 13 STEP 6 E = 8pcs. ASSEMBLY INSTRUCTIONS...
- Page 14 STEP 7 E = 4pcs. G = 4pcs. ASSEMBLY INSTRUCTIONS...
- Page 15 STEP 8 C = 4pcs. ASSEMBLY INSTRUCTIONS...
- Page 16 STEP 9 92mm 108mm 194mm E = 16pcs. STEP 10 499mm 533mm G = 6pcs. ASSEMBLY INSTRUCTIONS...
- Page 17 STEP 11 E = 4pcs. STEP 12 ASSEMBLY INSTRUCTIONS...
- Page 18 STEP 13 92mm F = 2pcs. ASSEMBLY INSTRUCTIONS...
- Page 19 STEP 14 B = 16pcs. STEP 15 B = 16pcs. ASSEMBLY INSTRUCTIONS...
- Page 20 STEP 16 E = 2pcs. STEP 17 F = 4pcs. ASSEMBLY INSTRUCTIONS...
- Page 21 STEP 18 233mm E = 3pcs. F = 2pcs. ASSEMBLY INSTRUCTIONS...
- Page 22 STEP 19 STEP 20 E = 2pcs. ASSEMBLY INSTRUCTIONS...
- Page 23 STEP 21 A = 4pcs. ASSEMBLY INSTRUCTIONS...
- Page 24 STEP 22 100mm 100mm 43mm 90mm 100mm D = 4pcs. ASSEMBLY INSTRUCTIONS...
- Page 25 STEP 23 ASSEMBLY INSTRUCTIONS...
-
Page 26: Maintenance
IV. MAINTENANCE WARNING: Please keep for future reference. We recommend regular maintenance to be conducted at the beginning of each season as well as at regular intervals during the usage session for your play equipment to ensure all main parts/fixings are tightly secured, well-oiled and intact to avoid failure, injury or hazards. -
Page 27: Wood Advice
V. WOOD ADVICE Our products are manufactured from premium timber. Great care is taking in selecting, machining, and treating the timber before it is sold to you. 1. Inspect wood parts monthly. The grain of the wood sometimes will lift in dry periods causing splinters to appear. - Page 28 WHEN SHOULD WOOD CRACKS BE A CONCERN? Most of the wood splits will never become large enough to affect the reliability and strength of our products, however, there can be rare cases where splits can occur. This happens when a crack develops past the halfway point from the timber, splitting it into two separate pieces.
-
Page 29: Cleaning
Bleach A solution of bleach and water can also be highly effective in killing mould. For this method, mix the water and bleach on a 1 to 1 ratio, then use a sponge or brush to scrub the affected area. You can also use a higher concentration of bleach for spot treating. -
Page 30: Warranty
VII. WARRANTY AUSTRALIAN CONSUMER LAW Many of our products come with a guarantee or warranty from the manufacturer. In addition, they come with guarantees that cannot be excluded under the Australian Consumer Law. You are entitled to a replacement or refund for a major failure and compensation for any other reasonably foreseeable loss or damage. - Page 32 www.l i f e s p an k i d s . co m . a u...
Need help?
Do you have a question about the LK200 and is the answer not in the manual?
Questions and answers