
Related Manuals for RENON Flex HV-EU Series


Summary of Contents for RENON Flex HV-EU Series
- Page 1 User Manual of Flex HV-EU Series Email: support@renonpower.com Official website: www.renonpower.com Address: 5900 Balcones Drive STE 100, Austin, TX 78731, United States...
- Page 2 Revision History Revise contents Reviser Ver. Date New Edition 2024.01.20 Doreen...
-
Page 3: Table Of Contents
CATALOG 1. About this manual ..................................4 1.1 Applicability ................................4 1.2 Target group ................................4 1.3 Symbols used ................................4 2.Safety ......................................4 2.1 General Safety ................................4 2.3 Explanation of symbols .............................. 6 3. Introduction ....................................7 3.1 Basic features ................................7 3.2 Work modes ................................ - Page 4 Copyright Declaration All rights to the content of this manual are owned by Renon Power Technology Co., Ltd. (here in after called as ‘Renon Power’). Any corporation or individual should not plagiarize, partially or fully copy it, and reproduce or distribute it in any form or means without prior written permission from Renon Power.
-
Page 5: About This Manual
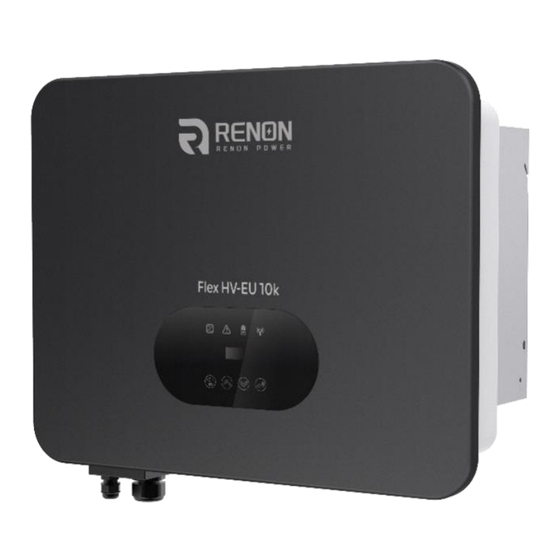
1. About this manual 1.1 Applicability Please read the product manual carefully before installation, operation or maintenance of the inverter. This manual contains important safety instructions and installation instructions that must be followed during installation and maintenance of the equipment. R-IFH05-EU03 R-IFH06-EU03 R-IFH08-EU03... - Page 6 ◆ Electrical installation and maintenance must only be carried out by trained and qualified electrician, following all local regulations. NOTICE ◆ Do not open inverter lid or change components without Renon Power's authorization. Unauthorized work will invalidate warranty. ◆ Operate inverter as explained in this manual, failure will damage equipment and invalidate...
-
Page 7: Explanation Of Symbols
Islanding is a condition when grid connected PV/ batteries back feed energy into the Grid when Grid is turned off for maintenance work, putting maintenance personal at serious risk. Flex HV-EU series inverters prevent islanding through Active Frequency Drift (AFD). -
Page 8: Introduction
3.1 Basic features The Flex HV-EU Series hybrid inverters are designed to work with PV modules, battery, mains supply and electrical loads. Hybrid inverter helps to optimize on-site consumption, charge battery with surplus PV energy and supply energy from battery to meet load. - Page 9 On site consumption of PV energy is the highest priority. Excess generation is used to charge batteries, and finally export to grid. Work mode: Feed in Use Priority: PV generated energy to a. Meet load b. Export to grid c. Charge battery Figure 3-3 Feed in Use Mode This mode is preferred for areas with Feed-in Tariff.
-
Page 10: Terminals
Charging may be set flexibly, and the rest of time is in self-use mode. Work mode: Back up Use Priority: PV generated energy to a. Charge battery b. Meet load c. Buy from grid Figure 3-6 Back up Use Mode This mode applies to area that face frequent power outages. -
Page 11: Dimensions
3.4 Dimensions Figure 3-8 Product Size 4. Technical data R-IFH06- R-IFH08- R-IFH10-A- Model R-IFH05-EU03 R-IFH10-EU03 EU03 EU03 EU03 PV Input Data Max. Recommended PV Power (W) 7500 9000 12000 15000 15000 Max. PV Input Voltage (V) 1000 MPPT Voltage Range (V) 160 ~ 950 Rated PV Input voltage (V) Start-up Voltage(V) - Page 12 AC Input Data Max .apparent AC Power (VA) 10000 12000 16000 20000 20000 Max . AC Current(A) 15.2 18.2 24.3 28.8 30.4 Rated AC Voltage / Range (V) 3 / N / PE, 220 / 380, 230 / 400 Grid Frequency / Range (Hz) 50 / 60 AC Inrush Current (A) Maximum Output Overcurrent Protection...
-
Page 13: Installation
Operating Temperature Range (℃) -25 ~ +60 Relative Humidity (%) 0% ~ 100% ≤ 2000 Operating Altitude (m) Standby Self Consumption (W) < 15 Topology Transformerless Pollution degree Protective class OVC categories DC II / AC III Environmental categories Outdoor Cooling Natural Protection Grades... -
Page 14: Check For Transport Damage
5.2 Check for transport damage On opening packaging, inspect product for any damage, in case of concern, please contact dealer immediately. 5.3 Installation precaution The Flex HV-EU series inverter is designed for outdoor installation (IP65). Do not install inverter in direct sunlight. ... -
Page 15: Space Requirement
Figure 5-2 Recommended Installation Locations 5.4 Space requirement Figure 5-3 Minimum clearance required 5.5 Preparation Tool Model Function Sprit level To ensure proper install Two-Speed Hammer Drill To drill holes on the wall Hammer Hanging the bracket Impact Wrench Set Hanging the bracket... -
Page 16: Installation Steps
PV-AZM-410 Stripping plier for PV cable PV-CZM-22100 Crimping plier for PV cable Screwdriver Wiring RJ45 Crimping Tool Crimping tool for RJ45 terminal Crimping Tool For Insulated Electrical Crimping plier Connectors Lifting and Handling The unit is heavy. Do not lift it alone. When lifting, ensure that the unit is firmly held to avoid risk of accidental tipping or dropping. -
Page 17: Electrical Connection
To hang the inverter over the bracket, move the inverter close to it, slightly lower inverter making sure the 4 mounting bars on the back of the inverter is fixed well with 4 grooves on the bracket. Figure 5-5 Wall Mount Bracket 5.7 Electrical Connection For an overview of the connection terminals of the inverter please refer to Figure 3-7, and for other wiring details, refer to chapter 3.1. -
Page 18: Pv Connection
Communication connection 5.7.1 PV Connection Before connecting PV strings to Flex HV-EU Series hybrid inverter, ensure the following: The total short- circuit current of PV string must not exceed inverter’ s maximum DC current. Make sure that open circuit voltage of PV string is less than 1000V. -
Page 19: Battery Connection
Figure 5-8 4. Insert striped cable into pin contact and ensure all conductor strands are captured in the pin contact. Figure 5-9 5. Crimp pin contact by using a crimping pliers(PV-CZM-22100). Put the pin contact with striped cable into the corresponding crimping pliers and crimp the contact. - Page 20 1. Battery Power Cable Connection 1) Prepare tin-plated cables of conductor cross section of 4 to 6 mm² (AWG 10). 2) Strip 15mm insulation off the conductor. Use a suitable stripping tool for this (e.g. "Knipex Solar 121211"). 3) Open spring using a screwdriver (Figure 5-11). Figure 5-11 4) Carefully insert the stripped wire with twisted conductors all the way in (Figure 5-12, A).
-
Page 21: Ac Output Connection
Figure 5-16 5.7.3 AC Output Connection Flex HV-EU series inverters have already integrated RCMU (residual current monitoring unit) inside, however if an external RCD is required, a type A RCD with rated residual current of 30mA or higher is recommended. - Page 22 Model R-IFH05-EU03 R-IFH06-EU03 R-IFH08-EU03 R-IFH10-A-EU03 R-IFH10-EU03 Cable(Cu) 4-6mm 4-6mm Normal Load-Breaker or external fuse Grid-Breaker WARNING! Select cables of the correct specifications. Failure could result in in fire and lead to death or serious injury. Don’t connect the line/phase cable to 'PE' terminal, failure will result in improper operation of the inverter.
-
Page 23: Earth Connection
5.7.4 Earth Connection One may earth the inverter enclosure of a second earth or equipotential bonding if required under local regulations. This prevents touch current if the original protective conductor fails. Cable size: 12AWG Connection step: Strip the earthing cable insulation. ... - Page 24 Figure 5-24 Function METER- METER- GENA GENB SHUTDOWN Relay 485A 485B Meter communication: METER_485A & METER_485B----pin1 & pin2 Relay contact output for generator: GENA & GENB----pin3 & pin4 Shut down the hybrid inverter: +5V & SHUTDOWN----pin5 & pin6 Relay & GND---pin7 & pin8 4.
- Page 25 4.2 Meter wiring diagram for AC Retrofit System Renon Hybrid inverters can be used in the following situations also. If the site already has a grid tied PV system and want to increase module capacity or provide back-up power. Additional meter between the grid-connected inverters and Flex HV-EU hybrid inverter is required.
- Page 26 CT direction CT direction Three Phase On- Grid Grid Inverters Solar Panels SDM630MCT SDM630MCT Load Smart Meter2 Smart Meter1 230V AC Power supply 230V AC Power supply Grid Battery Flex HV Hybrid ADD interface Inverter Solar Panels Figure 5-27 Connect one On-Grid three-phase inverter The connect steps are the same as in the previous chapter.
- Page 27 3) Connect one On-Grid three-phase inverter (Figure 5-27): The local address needs to be set as "001" on the inverter screen, and meter1 address set as "001", meter2 address set as "002". The address of meter1 itself needs to be set to "001", and meter2 needs to be set to "002".
-
Page 28: Multiple Inverters Connection
ripple control receiver dry contact cables is shown in the figure below: Inverter Ripple Control Receiver Figure 5-30 K1 K2 K3 K4 Switch Operation on External RCR Output power (in % of the Rated AC output power) Close K1 100% Close K2 Close K3 Close K4... -
Page 29: Relay Connection
EPS Parallel Box LOAD GRID Single-phase Backup Load Three-phase Master Slave Slave Slave Slave Backup Load Inverter Inverter1 Inverter2 Inverter3 Inverter4 Grid Grid Grid Grid Grid Meter Three-phase Single-phase Common Load Common Load Figure 5-32 System block diagram Note: Maximum number of parallel is five. The CAN communication port is the parallel port of the hybrid inverter(Figure 5-22). -
Page 30: Inverter Configuration
2. Manual On/Off: You can manually set the switch state of the relay. 3. Timing: The relay is on according to the setting relay switch-on start time, and it is off according to the setting relay switch- on end time. And it supports setting up to two time periods. (T1, T2). 4. -
Page 31: Operation
6. Operation 6.1 Control panel Object Name Description Green: Normal working Status. Indicator Red: Fault. Blue: Battery communication status. Yellow: RS485 communication status. ESC button: Leave from current interface or function. Function Up button: Move cursor to increase value. Button Down button: Move cursor to decrease value. -
Page 32: Lcd Function
6.2 LCD function Menu structure:... -
Page 33: Lcd Operation
6.3 LCD operation 1. Main screen The main screen as below. Press up or down for more information. 2. Status Press ‘OK’ to enter the menu, check grid , solar, battery, EPS and temperature of the inverter. Press up and down to select, press... - Page 34 ‘ESC’ to return to the Menu. 2.1) Solar This status shows the real time PV parameters of the system. The input voltage, current and power of each PV input. Press up and down button to review the parameter. Press ‘ESC’ to return to status. 2.2) Grid This status shows the real time grid parameters such as voltage, current, output power and frequency.
- Page 35 2.6) EPS EPS will only have data when the inverter is working in EPS mode, it will show the real time data of the EPS output, as voltage , current, power, frequency. Press up and down button to review the parameter. Press ‘ESC’ to return to Status. 3.
- Page 36 4.4) Communication Address Press up or down button to change address of local and meter. Press ‘OK’ to confirm. 4.5) Advanced settings require the original password ‘0000’, Press ‘OK ’to confirm. 4.5.1) On-Grid Press up or down button to set the grid functions. Press ‘OK’ to confirm. 4.5.1.1) Safety Press up or down button to change the grid code.
- Page 37 4.5.1.3) Export control With this function the inverter can control the energy export to the grid. Press up or down button to change the export power. Press ‘OK’ to confirm. 4.5.1.4) Phase unbal When the system is connected with three-phase unbalanced load or single-phase load, customers can enable the phase unbalance function, the inverter can detect and identify the three-phase current unbalance in the system through the meter and output unbalanced power to different phase.
- Page 38 4.5.4) Relay Function Press up or down button to set the relay function. Press ‘OK’ to confirm. 4.5.5) Feature Press up or down button to enable or disable Remote Control, DRM0, RCR, Meter Setting, and Bypass Relay. Press ‘OK’ to confirm. 4.5.6) New Password Press up or down button to set new password.
- Page 39 4.5.7) Reset Press up or down button to reset energy, reset errors or factory reset. Press ‘OK’ to confirm. 4.5.8) USB Press up or down button to upgrade DSPM, DSPS, ARMC, BATM or BATS. Press ‘OK’ to confirm. 5. System Switch Press up or down button to turn on or turn off the inverter.
-
Page 40: Troubleshooting
This section contains information and procedures for solving possible problems with the Flex HV-EU series inverters, and provides you with trouble shooting tips to identify and solve most problems that could occur with the Flex HV-EU series inverters. This section will help you narrow down the source of any problems you may encounter. Please read the following troubleshooting steps. - Page 41 Or seek help from us, if not go back to normal state. PV voltage out of range. PV Volt Fault Please check the output voltage of PV panels. Or seek for help from us. Bus voltage out of range detected by hardware. Bus Volt Fault Disconnect PV, grid and battery, then reconnect.
- Page 42 Wait the battery to be recharged. Or seek for help from us. By pass relay fault. ByPassRelay Fault Disconnect PV, grid and battery, then reconnect. Or seek help from us, if not go back to normal state. ...
- Page 43 Wait for 5 minutes, check again. Or seek help from us, if not go back to normal state. Battery temperature sensor error. BMS Tepr Fault Wait for 5 minutes, check again. Or seek help from us, if not go back to normal state. ...
-
Page 44: Decommissioning
Are the display panel and the communications cable are properly connected and undamaged? Contact Renon Power Customer Service for further assistance. Please be prepared to describe details of your system installation and provide the model and serial number of the unit.
Need help?
Do you have a question about the Flex HV-EU Series and is the answer not in the manual?
Questions and answers