Hama 00176637 Operating Instructions Manual
Smart hub
Hide thumbs
Also See for 00176637:
- Warnings and safety instructions (38 pages) ,
- Quick start manual (2 pages)
Table of Contents
Advertisement
Available languages
Available languages
Quick Links
Advertisement
Table of Contents

Related Manuals for Hama 00176637


Summary of Contents for Hama 00176637
- Page 1 00176637 SMART HUB G Operating Instructions D Bedienungsanleitung...
-
Page 2: Table Of Contents
6. Setting options in the Hama Smart Home app ....... .11... - Page 3 5.2 Einbinden über eine Drittanbieter App ......... . . 21 6. Einstellmöglichkeiten in der Hama Smart Home App ......23 7.
-
Page 4: Introduction
G Operating instructions 1. Introduction Thank you for choosing a Hama product! Take your time and read the following instructions and notes completely first. Keep these operating instructions in a safe place for future reference. If you sell the unit, pass these operating instructions on to the new owner. -
Page 5: Explanation Of Warning Symbols And Notices
PACKAgE CoNTENTS Explanation of warning symbols and notices Danger of electric shock This symbol indicates a risk of contact with uninsulated parts of the product carrying a dangerous voltage of such magnitude as to constitute a risk of electric shock. Warning Used to mark safety instructions or to draw attention to particular hazards and risks. -
Page 6: Safety Instructions
SAfETy INSTRUCTIoNS 3. Safety instructions Warning • Only operate the product from a socket that has been approved for the device. The socket must be installed close to the product and must be easily accessible. Danger of electric shock • Do not open the device or continue to operate it if it becomes damaged. •... -
Page 7: Commissioning
• iOS 16.3 or later • Android 6.0 or later • Download the Hama Smart Home app from the App Store (iOS) or from Google Play (Android) to your smartphone/tablet. • To install the app, follow the instructions on your smartphone/tablet. -
Page 8: Installation
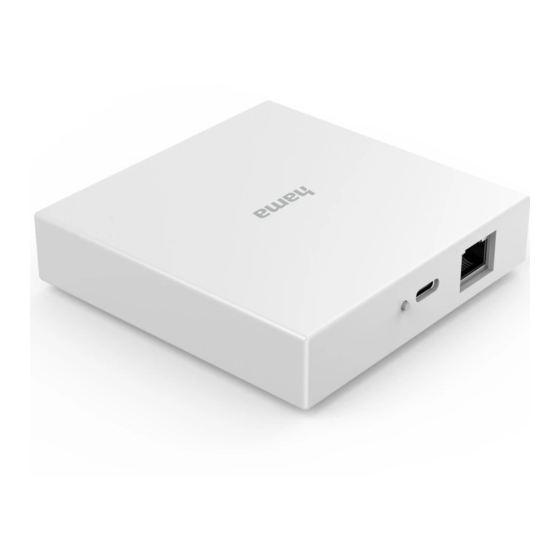
INSTALLATIoN 5. Installation • Connect the product to a port on your WLAN router. • Connect the smart hub to your router using the enclosed Ethernet cable. Then connect the smart hub using the enclosed USB-C cable. Connect the free plug on the USB-C cable to a suitable power supply unit. To do this, consult the operating instructions for the USB power supply unit you are using. -
Page 9: Integration Into The Hama Smart Home App
Integration into the Hama Smart Home app After successful installation of the device and app, now integrate the device into the app. • Start the Hama Smart Home app on your smartphone/tablet. • Tap the [Add Device] button. Or the plus (top right). - Page 10 INSTALLATIoN • Scan the QR code on your item: Once the QR code has been recognised, the setup of your item begins. For this, you must confirm the network data of your 2.4 GHz network. The setup process can take up to 3 minutes. Once setup is complete, you can customise the name of your item or finish the setup process.
-
Page 11: Embedding Via A Third-Party App
5.2.1 Share after initial integration in Hama Smart Home app: If you have already set up the item in the Hama Smart Home app, but want to share it with a third-party app for control, this is possible via the following steps:... - Page 12 QR code. 5.2.2 Initial integration via a third-party app You can also use our items without first connecting them to the Hama Smart Home app. Please follow the steps below to do so: • Open your chosen Matter-compatible app and start the device integration process.
-
Page 13: Setting Options In The Hama Smart Home App
SETTINg oPTIoNS IN THE HAMA SMART HoME APP 6. Setting options in the Hama Smart Home app The following settings can be made in the app: 1. Secondary devices: Add devices that support Matter (Zigbee) 2. Display lamp: Switch LED on/off... -
Page 14: Extended Usage Options Through Scenes
ExTENDED USAgE oPTIoNS THRoUgH SCENES 7. Extended usage options through scenes Through scenes and automations that can be created in the app, there are many possible combinations and uses of these products, depending on the Smart Home products already in your home. Programming is always done via the app (see chapter 4 of the App Guide) and is offered/suggested to you individually. -
Page 15: Technical Data
Clean this product with a lint-free, slightly damp cloth and do not use aggressive cleaners. 10.Disclaimer Hama GmbH & Co KG accepts no liability or warranty for damage resulting from improper installation, assembly and improper use of the product or failure to observe the operating instructions and/or safety instructions. -
Page 16: Einführung
D Bedienungsanleitung 1. Einführung Vielen Dank, dass Sie sich für ein Hama Produkt entschieden haben! Nehmen Sie sich Zeit und lesen Sie die folgenden Anweisungen und Hinweise zunächst vollständig durch. Bewahren Sie diese Bedienungsanleitung anschließend an einem sicheren Ort auf, um darin nachschlagen zu können. -
Page 17: Erklärung Von Warnsymbolen Und Hinweisen
Wird verwendet, um zusätzlich Informationen oder wichtige Hinweise zu kennzeichnen. Erklärung von Symbolen der Produktkennzeichnung Das Produkt ist nur für den Gebrauch in Innenräumen vorgesehen. 2. Verpackungsinhalt 1x Smart Hub 1x USB-C Kabel 1x Ethernet Kabel 1x Kurzanleitung 1x Warn- und Sicherheitshinweise 00176637 SMART HUB... -
Page 18: Sicherheitshinweise
SICHERHEITSHINWEISE 3. Sicherheitshinweise Warnung • Betreiben Sie das Produkt nur an einer dafür zugelassenen Steckdose. Die Steckdose muss in der Nähe des Produktes angebracht und leicht zugänglich sein. gefahr eines elektrischen Schlages • Öffnen Sie das Produkt nicht und betreiben Sie es bei Beschädigungen nicht weiter. •... -
Page 19: Inbetriebnahme
• iOS 16.3 oder höher • Android 6.0 oder höher • Laden Sie die App Hama Smart Home aus dem App Store (iOS) oder von Google Play (Android) auf Ihr Smartphone/Tablet herunter. • Zur Installation der App folgen Sie den Anweisungen auf Ihrem Smartphone/Tablet. -
Page 20: Montage
MoNTAgE 5. Montage • Bringen Sie das Produkt an einen Platz nahe Ihres WLAN Routers an. • Verbinden Sie den Smart Hub mit dem beiliegendem Ethernet Kabel mit Ihrem Router. Anschließend ver- binden Sie den Smart Hub mit dem beiliegenden USB-C Kabel. Schließen Sie den freien Stecker des USB-C Kabels an einem geeigneten Netzteil an. -
Page 21: Einbinden In Der App Hama Smart Home
Nach erfolgreicher Installation des Gerätes und App, binden Sie jetzt das Gerät in die App ein. • Starten Sie die App Hama Smart Home auf Ihrem Smartphone/Tablet. • Tippen Sie auf die Schaltfläche [gerät hinzufügen]. Oder auf das Plus (rechts oben). - Page 22 MoNTAgE • Scannen Sie den QR-Code auf Ihrem Artikel: Wurde der QR-Code erkannt, beginnt die Einrichtung Ihres Artikels. Hierfür müssen Sie die Netzwerkdaten Ihres 2,4 Ghz Netzwerkes bestätigen. Der Vorgang zum Einrichten kann bis zu 3 Minuten dauern. Ist die Einrichtung abgeschlossen, können Sie den Artikel noch individuell benennen oder die Einrichtung beenden.
-
Page 23: Einbinden Über Eine Drittanbieter App
Funktionsumfang nur bei Nutzung in der Hama Smart Home App zur Verfügung steht. 5.2.1 Teilen nach Ersteinbindung in Hama Smart Home App: Wenn Sie den Artikel bereits in der Hama Smart Home App eingerichtet haben, Ihn jedoch zu Steuerung in die App eines Drittanbieters teilen wollen, ist dies über folgende Schritte möglich:... - Page 24 Zahlen- oder QR-Codes einzurichten. 5.2.2 Ersteinbindung über eine Drittanbieter App Sie können unsere Artikel auch nutzen, ohne diese vorher mit der Hama Smart Home App zu verbinden. Bitte folgen Sie hierfür den folgenden Schritten: • Öffnen Sie die von Ihnen gewählte, Matter kompatible App und starten Sie die Geräte Einbindung.
-
Page 25: Einstellmöglichkeiten In Der Hama Smart Home App
EINSTELLMögLICHKEITEN IN DER HAMA SMART HoME APP 6. Einstellmöglichkeiten in der Hama Smart Home App Folgende Einstellungen können in der App gemacht werden: 1. Untergeräte: Matter (Zigbee) unterstützende Geräte hinzufügen 2. Anzeigelampe: LED Ein/Ausschalten Für erweiterte Nutzungsmöglichkeiten können Szenen in der App angelegt werden. (siehe Kapitel 7 und... -
Page 26: Erweiterte Nutzungsmöglichkeiten Durch Szenen
ERWEITERTE NUTzUNgSMögLICHKEITEN DURCH SzENEN 7. Erweiterte Nutzungsmöglichkeiten durch Szenen Durch Szenen und Automationen, die in der App angelegt werden können, ergeben sich je nach vorhandenen SmartHome Produkten in Ihrem Zuhause viele Kombinations- und Nutzungsmöglichkeiten dieser Produkte. Die Programmierung erfolgt immer über die App (siehe Kapitel 4 des App Guide) und wird Ihnen individuell angeboten/vorgeschlagen. -
Page 27: Technische Daten
Reinigen Sie dieses Produkt mit einem fusselfreien, leicht feuchten Tuch und verwenden Sie keine aggressiven Reiniger. 10.Haftungsausschluss Die Hama GmbH & Co KG übernimmt keine Haftung oder Gewährleistung für Schäden, die aus unsachgemäßer Installation, Montage und unsachgemäßem Gebrauch des Produkts oder einer Nichtbeachtung der Bedienungsanleitung und/oder der Sicherheitshinweise resultieren. - Page 28 Bluetooth SIG, Inc. and ® any use of such marks by Hama GmbH & Co. KG is under license. Other trademarks and trade names are those of their respective owners. All listed brands are trademarks of the corresponding companies. Errors and omissions excepted,...
Need help?
Do you have a question about the 00176637 and is the answer not in the manual?
Questions and answers