
Related Manuals for Esatto ETL95.1


Summary of Contents for Esatto ETL95.1
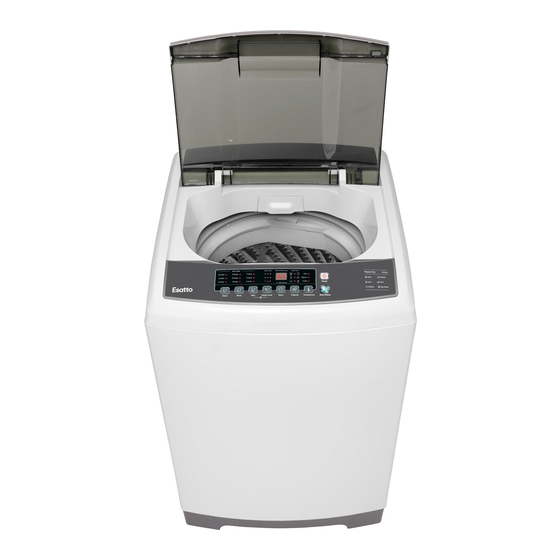
- Page 1 Product: Model Code/s: 9.5kg Top Load ETL95.1 Washing Machine User Manual Exactly what you need Online: MODEL: STL95 | PRODUCT CODE: 57475 | 07/2017 esatto.house...
- Page 2 Appliances Exactly what you need...
- Page 3 Contents Welcome Safety Instructions Product Getting Overview Started: Installation Controls Operating Your Washing Machine Care and Cleaning Other Useful Warranty Information Information...
- Page 4 — Telephone ensure optimum performance. 1300 11 4357 — Again, thank you for choosing an Esatto appliance and we look forward to being of Email service to you. support@residentia.group Kind Regards, The Residentia Team...
-
Page 5: Safety Instructions
Safety Instructions IMPORTANT SAFETY INSTRUCTIONS READ CAREFULLY AND KEEP FOR FUTURE REFERENCE Important Read this manual thoroughly before first use, even if you are familiar with this type of product. The safety precautions enclosed herein reduce the risk of fire, electric shock and injury when correctly adhered to. -
Page 6: Installation
User Manual General Safety Instructions Cont. Installation • Install the washing machine on a flat surface to avoid overturning during use. • Connect the washing machine to the water mains using new hose sets. Do not reuse old hose sets. •... - Page 7 General Safety Instructions Cont. Warnings Do not let children climb into the Do not wash clothes that washing machine or peer into the have residue of flammable rotating spin barrel. materials. Do not use the appliance if the Regularly clean the power plug...
- Page 8 User Manual General Safety Instructions Cont. To avoid electric shock, fire and Do not pull out or insert the plug malfunction, do not install this with wet hands to avoid electric machine in a damp place. shock. No wet hands No dampness Cautions Do not allow children to lay or sit...
-
Page 9: Product Overview
Product Overview Top Load Washing Machine Layout Key: Accessories (not to scale): Water inlet hoses 12 Hot water inlet hose (red stripe) 13 Cold water inlet hose (blue stripe) Softener dispenser 14 Base cover Washing/Spin drum 15 Installation screws... -
Page 10: Getting Started: Installation
User Manual Getting Started: Installation Unpacking • This product has been packaged to protect it against transportation damage. Unpack the appliance but keep all packaging materials until you have made sure your new washing machine is undamaged and in good working order. The carton is recyclable. Whenever possible, reuse the carton and recycle it when disposing of the packaging materials. - Page 11 Getting Started: Installation Cont. Installing the Drain Hose • The drain hose and drain pump filter are located at the back of the machine, as illustrated below (Fig. 3). • Pinching the two bands of the clamp on the drain hose, connect it to the drain hose connection at the back of the washer, as illustrated below, middle.
- Page 12 User Manual Getting Started: Installation Cont. • Attach the curved end of the hose to the corresponding inlet valve of the washing machine. • Tighten the coupling nuts securely by hand, as illustrated on Fig. 6 the right and below (Fig. 6 and Fig. 7). •...
- Page 13 Getting Started: Installation Cont. Location of machine & Levelling • The washing machine is equipped with two rollers at the rear that can be used to easily move the machine to its desired location. Tilt the washing machine by approximately 30 degrees and push forward or pull backwards while holding the machine securely on both sides with your hands as illustrated below (Fig.
- Page 14 User Manual Controls Water Level Button – Press this button to increase or decrease the desired water level for the selected program (more information page 18). – When the machine is first powered on, the default program is the “heavy” program.
- Page 15 Controls Cont. Power Button Press this button to switch the machine on; press this button again to switch the machine off. Delay Level Button – Press this button to delay the start of your selected Note: If you switch the machine on and washing program.
-
Page 16: Operating Your Washing Machine
User Manual Operating Your Washing Machine Before you start • It is important to sort your washing into appropriate loads, particularly separating white/light colours from dark colours, as well as separating out sheets and towels. • Wash new, highly coloured and dark coloured items separately to prevent dye transfer onto other items. •... - Page 17 Operating your Washing Machine Cont. • Heavy o Suitable for washing large loads including towels and bed sheets. The Heavy program includes an additional 15 minute soaking time during the washing process. • Jeans o Suitable for denim and heavily soiled clothes such as workwear •...
- Page 18 User Manual Operating your Washing Machine Cont. Customising a Program • The washing machine is equipped with fuzzy logic technology when using the “Heavy” program. The machine will detect the weight of your wash load and select the appropriate wash cycle processes. •...
- Page 19 Operating your Washing Machine Cont. Using the Delay start feature • The delay start feature on the washing machine can delay the start of your selected washing program by 1 hour up to 24 hours. • Press the power on/off button to turn the machine on and...
- Page 20 User Manual Error messages When the following problems occur, the microcomputer inside the washer will detect the errors. An electronic buzzer will sound for approximately 10 seconds, an error message will flash, as shown below, and the washer will stop operating. Problem Error Possible Diagnosis...
-
Page 21: Troubleshooting
FAQ Cont. Troubleshooting The following is a list of problems you may encounter when using this appliance and some suggestions that may help to correct the problem. If you still have problems, please contact our customer service. Problem Possible Diagnosis... -
Page 22: Care And Cleaning
User Manual Care & Cleaning Cleaning and Care To prolong the service life of the washing machine, keep it in good condition and perform regular maintenance. For any type of cleaning and maintenance, make sure the washing machine is disconnected from the mains power supply. - Page 23 Care and Cleaning Cont. Drain pump maintenance We recommend that you clean the drain pump filter regularly (at least once a month) to avoid blockages created by bobby pins, coins and excess lint. Proceed as follows: 1. Disconnect the washer from the power source.
-
Page 24: Other Useful Information
Other Useful Information Spare Parts Our after sales support centre stocks a wide range of spare parts for the ETL95.1 Esatto 9.5kg Top Load Washing Machine. To purchase a part, call the centre on 1300 11 4357 or email us at support@residentiagroup.com.au... - Page 25 Other Useful Information Cont. WARNING: This appliance must be earthed In the event of a malfunction or breakdown, earthing will reduce the risk of an electric shock by providing a path of least resistance for the electric current. This appliance is equipped with a cord having an equipment-earthing conductor and an earthing plug. The plug must be plugged into an appropriate outlet that is installed and earthed in accordance with all local standards and requirements.
-
Page 26: Warranty Information
User Manual Warranty Information WARRANTY TERMS AND CONDITIONS IN THIS WARRANTY LAUNDRY APPLIANCES ‘acceptable quality’ as referred to in clause 10 of this warranty has the same meaning referred to in This document sets out the terms and conditions of the the ACL;... -
Page 27: Contact Service
You will bear the cost of transportation, travel and For Appliances and services provided by Residentia delivery of the Appliance to and from Residentia Group in Australia, the Appliances come with a Group or its ASR. If you reside outside of the service... - Page 28 This page is intentionally left blank Appliances Exactly what you need A RESIDENTIA MODEL: STL95 | PRODUCT CODE: 57475 | 07/2017 GROUP INITIATIVE...
Need help?
Do you have a question about the ETL95.1 and is the answer not in the manual?
Questions and answers