
Subscribe to Our Youtube Channel
Related Manuals for Esatto EFLW500


Summary of Contents for Esatto EFLW500
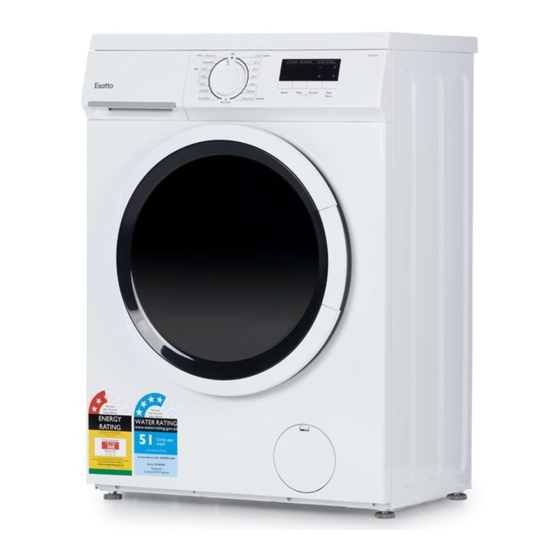
- Page 1 Product: Model Code/s: 5kg Front Load Washing Machine EFLW500 6kg Front Load Washing Machine EFLW600 User Manual Exactly what you need Version: Online: V1.2 0521 esatto.house...
- Page 2 Burnley, Victoria to ensure optimum performance. Australia 3121 — Again, thank you for choosing an Esatto appliance and we look forward to being of Telephone service to you. 1300 11 4357 Kind Regards,...
-
Page 3: Table Of Contents
User Manual: Page: Contents: Page: Safety Instructions Your Washing Machine Installation Operating Instructions Cleaning & Maintenance Troubleshooting Technical Specifications Your Receipt Purchase Details Warranty Information... -
Page 4: Safety Instructions
• Damage due to improper use or repairs made by EFLW500 5.0kg 0.05-1MPa unqualified personnel will void your warranty. The producer will assume no liability for any eventual... - Page 5 User Manual: Page: RISK TO CHILDREN OPERATING THE APPLIANCE • This appliance is not intended for use by persons • Before washing the clothes at first time, the product SAFETY INSTRUCTIONS (including children) with reduced physical, sensory or should be operated in one round of the whole mental capabilities or lack of experience and knowledge procedures without the clothes inside.
- Page 6 User Manual: Page: LLATION INSTALLATION INSTALLATION Your Washing Machine oduct Description Product Description Product Description PRODUCT DESCRIPTION Top cover Top cover Top cover Top cover ply hose Water supply hose Water supply hose Water supply hose Control panel Control panel Control panel Control Panel Power supply cord...
- Page 7 • Stability is important to prevent the product from wandering! INSTALLATION • Make sure that the product should not stand on User Manual: Page: INSTALLATION INSTALLATION the power cord. W> 20mm Installation Before installing the machine, the location characterized Installation Installation Installation follows shall be selected:...
- Page 8 User Manual: Page: Installation (Continued) INSTALLATION Levelling the washing machine Warning! ! ! LEVELLING THE WASHING MACHINE • The lock nuts on all four feet must be screwed tightly against the housing. WARNING! Check if the legs are closely attached to the cabinet. If not, please turn them to The lock nuts on all four feet must be screwed tightly against the housing their original positions tighten the nuts.
- Page 9 INSTALLATION NSTALLATION Connect the other end of inlet pipe to the inlet valve at the backside of product Connect the other end of inlet pipe to the inlet valve at the backside of product User Manual: Page: and fasten the pipe tightly clockwise. and fasten the pipe tightly clockwise.
-
Page 10: Operating Instructions
User Manual: Page: OPERATIONS Operating Instructions Quick Start Caution! FIRST TIME USE OPERATIONS OPERATIONS OPERATIONS OPERATIONS OPERATIONS OPERATIONS OPERATIONS OPERATIONS • Before washing, please make sure it’s installed properly. CAUTION! • Prior to using the washing machine, ensure that it is correctly installed. •... - Page 11 User Manual: Page: WASHING CONSIDERATIONS • The working condition of the washer should be (0-40)°C. If used under 0°C, the inlet valve and draining system may be damaged. If the machine is placed under condition of 0°C or less, then it should be transferred to normal ambient temperature to ensure the water supply hose and drain hose are not frozen before use.
- Page 12 User Manual: Page: Operating Instructions (Continued) OPERATIONS OPERATIONS OPERATIONS THE DETERGENT DISPENSER Detergent Dispenser Detergent Dispenser Detergent Dispenser Pre wash detergent Pre wash detergent Pre wash detergent Pre wash detergent Main wash detergent Main wash detergent Main wash detergent Main wash detergent Softener Softener Softener...
- Page 13 User Manual: Page: START / PAUSE THE CONTROL PANEL After selecting your desired wash settings, press this button PROGRAM OFF POSITION to start your wash cycle. The washing machine Turn the Program dial You can also use this button is powered off. to select your wash to pause the washing machine program type.
- Page 14 User Manual: Page: Operating Instructions (Continued) WASHING PROGRAMS • HOT 90°C • COTTON This program should be reserved for brightening whites, The cotton washing programs are suitable to wash removing stubborn stains on cotton or linen, killing durable, heat-resistant textiles made of cotton or linen. bacteria on heavily soiled items or performing a routine drum clean maintenance wash on your machine.
- Page 15 User Manual: Page: OPTIONAL WASHING PROGRAMS • SPEED Press this button to select your desired amount of times to spin. • DELAY After choosing your wash settings, press the Delay button to choose a delayed start time of up to 24 hours. •...
- Page 16 User Manual: Page: Operating Instructions (Continued) MODEL: EFLW500 DEFAULT SPEED PROGRAM LOAD TEMP. (°C) DEFAULT TIME DELAY EXTRA RINSE PRE-WASH (RPM) Cotton (Cold) Cold 2:20 1000 Optional Optional Optional Cotton (20°C) 2:20 1000 Optional Optional Optional Cotton (40°C) 2:40 1000...
- Page 17 User Manual: Page: MODEL: EFLW600 DEFAULT SPEED PROGRAM LOAD TEMP. (°C) DEFAULT TIME DELAY EXTRA RINSE PRE-WASH (RPM) Cotton (Cold) Cold 2:20 1000 Optional Optional Optional Cotton (20°C) 2:20 1000 Optional Optional Optional Cotton (40°C) 2:40 1000 Optional Optional Optional Cotton (60°C) 2:45 1000...
-
Page 18: Cleaning & Maintenance
User Manual: Page: MAINTENANCES Cleaning & Maintenance Cleaning And Care Warning! CLEANING AND CARE ! ! • Before your maintenance starts, please unplug the machine and close the tap. WARNING! Before you begin maintenance, please unplug the machine and close the tap. Cleaning The Cabinet CLEANING THE CABINET Proper maintenance on the washing machine can extend its working life. - Page 19 MAINTENANCES MAINTENANCES of the machine. 4.Reconnect the water supply hose MAINTENANCES 2.Pull out the filter with long nose pliers Washing the filter in washing machine: Cleaning The Drain Pump Filter Cleaning The Drain Pump Filter and reinstall it back after being washed. Screw off the inlet pipe from the backside Cleaning The Drain Pum hine:...
-
Page 20: Troubleshooting
User Manual: Page: Troubleshooting OPERATION IN CASE OF EMERGENCY In the event of an emergency you should: • Switch off all controls. • Switch the washing machine off at the power point or at the fuse box. • Call the Residentia Support Team on 1300 11 HELP (4357). Some minor faults can be fixed by referring to the instructions given in the Troubleshooting section below. - Page 21 User Manual: Page: When the washing machine experiences a fault, please contact the Residentia Group support team on: Telephone: 1300 11 HELP (4357). WARNING! Never dismantle the washing machine. ERROR MESSAGES AND SOLUTIONS INDICATION REASON SOLUTION Check if the clothes is stuck. "E30"...
-
Page 22: Technical Specifications
User Manual: Page: Technical Specifications Below outlines the technical specifications for your Esatto Washing Machine. Model EFLW500 EFLW600 Size 595w � 400d � 850h (mm) 595w � 400d � 850h (mm) 52kg 55kg Net Weight 2050W 2050W Rated Input Power... - Page 23 User Manual: Page: TESTING METHODS EFLW500 EFLW600 ADDITIONAL INFORMATION FOR Standard performance ADDITIONAL INFORMATION FOR Standard performance TESTING:(AS/NZS 2040.1:2005+Amdt1-2007+Amdt2-2009) TESTING:(AS/NZS 2040.1:2005+Amdt1-2007+Amdt2-2009) • Water connections: Cold & hot water connection • Water connections: Cold & hot water connection • Water supply pressure: 320 kPa •...
-
Page 24: Your Receipt
User Manual: Page: Attach your receipt to this page... -
Page 25: Purchase Details
User Manual: Page: Purchase Details For future reference, please record the following information which can be found on the rating plate and the date of purchase which can be found on your sales invoice. STORE DETAILS STORE NAME ADDRESS TELEPHONE PURCHASE DATE PRODUCT DETAILS MODEL NO. -
Page 26: Warranty Information
User Manual: Page: Warranty Information AUSTRALIA WARRANTY TERMS & CONDITIONS IN THIS WARRANTY LAUNDRY APPLIANCES ‘acceptable quality’ as referred to in clause 10 of this warranty has the same meaning referred to in the ACL; This document sets out the terms and conditions of the ‘ACL’... - Page 27 User Manual: Page: You will bear the cost of transportation, travel and For Appliances and services provided by Residentia delivery of the Appliance to and from Residentia Group Group in Australia, the Appliances come with a or its ASR. If you reside outside of the service area, guarantee by Residentia Group that cannot be you will bear the cost of: excluded under the Australian Consumer Law.
- Page 28 This page is intentionally left blank Appliances Exactly what you need A RESIDENTIA GROUP INITIATIVE...
Need help?
Do you have a question about the EFLW500 and is the answer not in the manual?
Questions and answers