
Subscribe to Our Youtube Channel
Related Manuals for Stancor LX Series


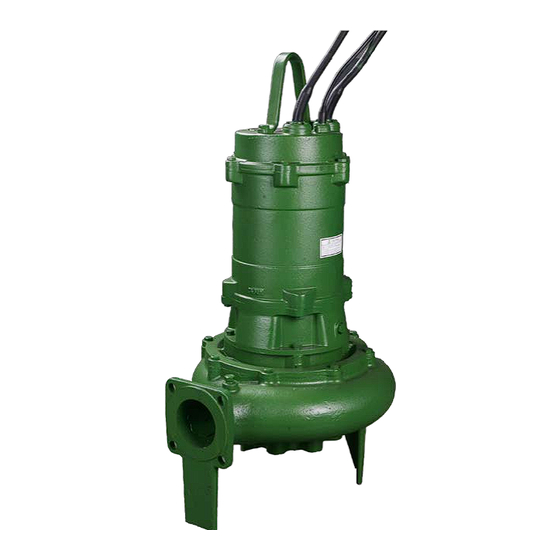
Summary of Contents for Stancor LX Series
- Page 1 Installation, Operation and Maintenance Manual Stancor LX Series Pumps EI-700-003 Rev --...
-
Page 2: Table Of Contents
Caution Thank you for selecting the Stancor submersible sewage pumps Model LX. Stancor takes very caution in manufacturing the product for safe use by the customer. However unsuitable handling may reduce the performance and result in accident. -
Page 3: Warnings
(1) Warnings Warnings in this manual provide information required for safe operation of the pump, and instructions for preventing danger or injury to you or other people. So that you will know the degree and imminence of danger that warnings signify, they are divided into two grades, WARNING and CAUTION, according to the seriousness of what will happen if their instructions are not heeded. -
Page 4: Delivery Check
Do not operate the pump with 50 Hz specifications at 60 Hz. Otherwise motor should be burnt out. Do not operate the pump with 60 Hz specifications at 50 Hz. It will cause the pump to perform poorly. If you have purchased a standard pump, refer to Section (4) “Specification”. The optional specifications pump is made to meet the needs of some customers. -
Page 5: Specifications
Fig. 1 -Data of pump nameplate (4) Specifications For the head, capacity, speed and other major specification of your pump, see the nameplate. The standard specifications and optional specifications are given in the tables below. If you have purchased a standard pump, refer to the standard specifications shown below. The optional specifications pump is made meet the needs of some customers. -
Page 6: Installation
(5) Installation Before lifting the pump, confirm the mass on catalogue or outline drawing. Use appropriate crane (or hoist) and check position and tightness of lift system so that mass of the pump is not unbalanced. Failure to observe this precaution can result in serious accidents. On the condition of suspended pump, do not attach a part and use. -
Page 7: Electrical Wiring
3. Electrical Wiring All wiring work should be performed correctly by a qualified electrician. And all national and local electrical codes must be observed. Install and ground an earth cable. Electric shock could occur during Warning accidents or electric leakage. To prevent danger of electric shock, use short circuit breakers as exclusive use. -
Page 8: Operation
When temperature of the winding raises and reaches the thermal protector acting point, the motor protection circuit is activated to protect motor from over heat. Connect to the control panel in accordance with the following specifications. Be sure to install a thermal relay on the control panel, since the thermal protector is not capable of detecting sudden temperature rises caused by single phase or locked rotor. -
Page 9: Maintenance
Output The number of starting times per hour Up to 10HP From 15 to 30HP c) Do not operate a pump in the outside of the specified range. Run the pump at a discharge capacity that is suitable for the equipment. NOTE (Capacity that is too large or small will cause noise and vibration, and vibration, and also waste power.) -
Page 10: For Long Period
Once a year Replace mechanical seal at an interval of one year or 6000 hours of total operating hours, either shorter one. By the replacement, the pump life extends. Once every two to five years Overhaul of the pump assures safe and long period of operation. For the case of high frequency of operations, early overhaul is requested. -
Page 11: Trouble Shooting
(8) Trouble shooting Trouble Cause Remedy Obstacle inhibits the float movement. Remove the obstacle. The pump does not start. Power is failed. Request the electric power company for The pump starts, but it immediately stops. action. ... -
Page 12: Construction
(9) Construction 1. Section drawing Typical Model: 100LX67.5 Name Quantity BEARING COVER LIFTING HANGER 2※3 THERMAL PROTECTOR 849-2 BALL BEARING 849-1 BALL BEARING SHAFT OPPOSITE SIDE BRACKET POWER SIDE BRACKET MOTOR FRAME 1※2 811-2 SUBMERSIBLE CABLE 811-1 SUBMERSIBLE CABLE 2※1 STATOR ROTOR IMPELLER BOLT... -
Page 13: Dimensions
(10) Dimensions -12-... - Page 14 -13-...
- Page 15 -14-...
-
Page 16: Disassembly And Reassembly
(11) Disassembly and reassembly Refer to the cross sectional drawing. 1. Disassembly a) Unscrew and remove the bolts (120-2), and lift up the motor part. Then lay it down carefully. b) Unscrew and remove the impeller bolt (275), Pull the impeller (021) out. c) Unscrew and remove the oil plug (193), Withdraw oil d) Unscrew and remove the bolts (120-1), and remove the mechanical seal cover (016) carefully. -
Page 17: Limited Warranty
2. During the said period, STANCOR will repair the pump free of charge provided that: The trouble is due to shortcomings in design, workmanship, etc., that can be attributed to STANCOR, and that the pump was being operated correctly and in a normal manner in accordance with the Instruction Manual when the trouble occurred.
Need help?
Do you have a question about the LX Series and is the answer not in the manual?
Questions and answers