Table of Contents
Advertisement
Available languages
Available languages
Advertisement
Chapters
Table of Contents

Related Manuals for Aiwa NSX-V2100


Summary of Contents for Aiwa NSX-V2100
-
Page 2: Precautions
WARNING TO REDUCE RISK DO NOT EXPOSE SHOCK, RAIN OR MOISTURE. RISK OF ELECTRIC DO NOT OPEN “CAUTION:TO REDUCE THE RISK OF ELECTRIC SHOCK, DO NOT REMOVE COVER (OR BACK). NO USER-SERVICEABLE REFER SERVICING TO QUALIFIED SERVICE PERSONNEL.” Explanation of Graphical Symbols: The lightning flash with arrowhead symbol, within an equilateral triangle, is intended to alert the user... -
Page 3: Table Of Contents
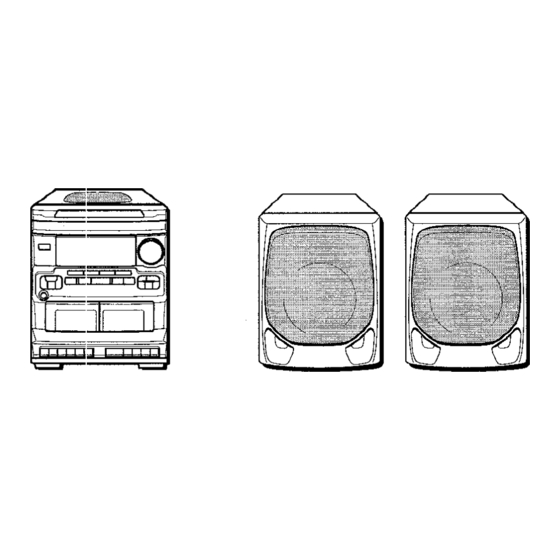
Congratulations on your purchase of an Aiwa Stereo System. To optimize the performance of this system, please take the time to read through these Operating Instructions and become familiar with the operating procedures. Check your system and accessories SX-NV21OO (L, R) -
Page 4: Connections
CONNECTIONS Before connecting the AC cord The rated voltage of your unit shown on the rear panel is 120 V AC. Check that the rated voltage matches your local voltage. IMPORTANT Connect the speakers, antennas, and all optional equipment first. Then connect the AC cord in the end. -
Page 5: Before Operation
BEFORE OPERATION _ _-. o ~ i POWER ~f= ,==+— -“”’!====4 —. -., -107– \ _ ____ —! To turn the unit on Press one (ofthe function buttons (TAPE, TUNER, VI DEO/AUX, CD)-The unit is turned on. At this time, playback of the inserted disc begins, or the previously tuned station is received (Direct Play Function). -
Page 6: Volume Control
VOLUME CONTROL Turn the VOLUME control on the main unit, or press the VOLUME buttons on the remote control, SUPER T-BASS SYSTEM The T-BASS system enhances the realism of low-frequency sound, Press the T-BASS button. Each time it is pressed, the level changes. three levels, or the off position to suit your preference. -
Page 7: Manual Tuning
MANUIAL TUNING 1 Press the TUNER/BAND button select the desired band, FM or AM. If the power is turned off, the previously tuned station will be played (Direct Play Function). To sele(ct a band with the remote control Press the BAND button while pressing the SHIFT button. 2 Press the l<<... -
Page 8: Basic Operations
BASIC OPERATIONS LOADING DISCS Press the CD button, then press the & OPEN/ CLOSE button to open the disc compartment. disc(s) with the label side up. To play one or two discs, place the discs on tray 1 and 2. To play three discs, press the DISC CHANGE button to rotate the trays after placing two discs. -
Page 9: Random /Repeat Play
RANDOM /REPEAT PLAY Use the remote control. RANDOM play Allthetracks on the selected disc or on allthe played randomly. REPEAT play A single disc or all the discs can be played repeatedly. Press the RANDOM/REPEAT button SHIFT button. Each time t is pressed, the function can be selected cyclically. @ RANDOM play @ REPEA-[ play @ RANDOM/REPEAT play... -
Page 10: Basic Operations
BASIC OPERATIONS := ~ (Deck 1) Usable tapes Use only normal (type I) tapes. 1 Press the TAPE button. 2 Press the button to open the cassette holder and insert a tape exposed side down. Push the cassette holder to close it. Press the F button to start playback. -
Page 11: Al Edit Recording
Al EDIT RECORDING The Al edit function enables CD recording without worrying about tape length and track length. When a CD is inserted, the unit automatically calculates track lengths. If necessary, the order of tracks is rearranged so that no track is cut short. (Al: Artificial Intelligence) Insert the tape to be recorded on into deck 1, and wind up to the beginning... -
Page 12: Programmed Edit Recording
PROGRAMMED EDIT RECORDING The Programmed edit function enables CD recording while checking the remaining time on each side of the tape as the tracks are programmed. Insert the tape into deck 1. Insert the tape-with the side to be recorded first facing out from the unit. -
Page 13: Setting The Sleep Timer
About cassette tapes To prevent accidental erasure, break off the plastic tabs on the cassette tape after recording with a screwdriver or other pointed tool. Side A To record on the tape again, cover the tab openings with adhesive tape, etc. 120-minute or longer tapes are extremely thin and easily deformed or damaged. -
Page 14: Setting The Timer
SETTING THE TIMER The unit can be turned on at a specified time every day with the built-in timer. Preparation Make sure the clock is set correctly. (See page 4.) Press the TIMER button on the remote control white pressing the SHIFT button once to display 0, and press the 11 SET button within 4 seconds. -
Page 15: Connecting Optional Equipment
When connecting a turntable Use an Aiwa turntable equipped with a built-in equalizer amplifier. CD DIGITAL OUT (OPTICAL) JACK This unit can output CD digital sound signals through this jack. Use an optical cable to connect digital audio equipment (digital amplifier, DAT deck, MD recorder, etc.). -
Page 16: General
SPECIFICATIONS Main unit CX-NV2100 FM tuner section Tuning range 87.5 MHz to 108 MHz Antenna Wire antenna AM tuner section Tuning range 530 kHz step) 531 kHz to 1602 kHz (9 kHz step) Antenna Loop antenna Amplifier section 15 W+15W(I Power output ohms) 12 W + 12 W(5O Hz-20 kHz, THD... -
Page 17: Troubleshooting Guide
TROUBLESHOOTING GUIDE If the unit fails to perform as described Instructions, check the following guide. GENERAL There is no sound. Is the AC cord connected properly? Is there a bad connection? (+ page 3) There may be a short circuit in the speaker terminals. + Disconnect the AC cord, then correct... -
Page 18: Precauciones
ADVERTENCIA PARA REDUCIR EL RIESGO SACUDIDAS ELECTRICAS, NO EXPONGA APARATO A LA LLUVIA A LA HUMEDAD. /“!/ RISK OF ELECTRIC SHOCK DO NOT OPEN “CAUTION:TO REDUCE THE RISK OF ELECTRIC SHOCK, DO NOT REMOVE COVER (OR BACK). NO USER-SERVICEABLE PARTS INSIDE. REFER SERVICING TO QUALIFIED SERVICE PERSONNEL.”... - Page 19 %i?@6fiti d 4&i?@z4 &M?-e@ Enhorabuena por haber adquirido un sistema estereo Aiwa. Para optim izar Ias prestaciones de este sistema, tome el tiempo necesario para leer completamente este manual de instrucciones y familiarizarse con Ios procedimientos de utilization. Compruebe su sistema y Ios accesorios...
-
Page 20: Conexiones
CONEXIONES Antes de conectar el cable de aiimentacion La tension nominal de su unidad, mostrada en el panel trasero, es de 120 V CA. Asegurese de que la tension nominal coincida con la tension empleada en su Iocalidad. IMPORTANTE Conecte primero Ios altavoces, Ias antenas y todos Ios demas equipos opcionales. -
Page 21: Antes De La Operacion
ANTES DE LA OPERACION — —.- ? ,.=-.. t-L. l.-._ ,— _ —. —-! POWER- p .- ——,, #’-(lI)-’ ,..C% - — — –.. _ _– ,- llSET- ““”-””- – ti-- Para encender la unidad Pulse unc~de Ios botones de funcion (TAPE, TUNER, VIDEO/ AUX, CD). -
Page 22: Ajuste Del Sonido
AJUSTE DEL SONIDO CONTROL DE VOLUMEN Gire el control VOLUME de la unidad principal o pulse Ios botones VOLUME del control remoto. SISTEMA SUPER T-BASS El sistema T-BASS realza el realismo frecuencia. Pulse el boton T-BASS. Cada vez que 10pulse, el nivel cambiara. Seleccione uno de Ios tres niveles o la position de apagado, 10que usted prefiera. -
Page 23: Sintonizacion Manual
SINTONIZACION MANUAL Pulse repetidamente el boton TUNEFUBAND para seleccionar la banda deseada, Si la alimentaci6n esta desconectada se recibira la emisora previalmente sintonizada (funcion de reproduction Para seleccionar una banda con el control remoto Pulse el boton BAND mientras pulsa el boton SHIFT. Pulse el boton DOWN... -
Page 24: Reproduction De Discos Compactos
OPERAClONES BASICAS _,— INTRODUCTION DE DISCOS Pulse el boton CD, y Iuego pulse el boton = OPEN/ CLOSE para abrir el compartimiento Introduzca el(los) disco(s) con el Iado de la etiqueta hacia arriba. Para reproducer uno o dos discos, ponga 10s discos en Ias bandejas 1 y 2. -
Page 25: Disc Direct Play
REPRC)DUCCION ALEATORIA/ REPETITION DE REPRODUCTION Utilice el rnando a distancia, Reproduction aleatoria Todas Ias canciones del disco seleccionado o de todos Ios discos se reproduciran aleatoriamente. Repeticicm de reproduction Un solo disco o todos ellos podran reproducirse repetidamente. Pulse el boton RANDOM/REPEAT miantras pulsa et boton SHIFT. -
Page 26: Operaclones Basicas
OPERAClONES BASICAS (Platina 1) Cinta utilizable Utilice solo Ias cintas normales (tipo I). 1 Pulse el boton TAPE. Pulse el boton ~= para abrir el compartimiento de casete e inserte el casete con el Iado donde esta expuesta la cinta hacia abajo. portacasete para cerrarlo. - Page 27 GRAIBACION CON EDICION Al La funcitin de edition Al permite grabar discos compactos sin preocupi?rse de la duration de la cinta y de Ias canciones. Cuando se inserte un disco compacto, automaticamente la duration de Ias canciones. En caso de ser necesario, ei orden de Ias canciones se cambiara para que ninguna cancion quede cortada.
-
Page 28: Grabacion Con Edicion Al
GRABACION CON EDICION PROGRAMADA La funcion de edition programada permite compactos mientras se comprueba el tiempo restante de cada cara de la cinta segun se programan Ias canciones. Inserte la cinta en la platina 1. Inserte la cinta con la cara que se va a grabar primero hacia afuera de la unidad. -
Page 29: Derechos De Autor
Acerca de Ias cintas de casete Para evitar el borrado accidental, destornillador u otra herramienta puntiaguda Ias Ienguetas de pliistico del casete despues de grabar. 4“;Q- Cara A Para volver a grabar en una cinta, tape Ias aberturas con cinta adhesiva, etc. Las cintas de 120 minutes o mas son extremadamente finas y se deforman o estropean facilmente. - Page 30 AJUSTE DEL TEMPORIZADOR La unidad podra encenderse a la hors especificada todos Ios d~as gracias al temporizador incorporado. Preparation Asegurese de que la hors del reloj sea corrects. (Consulte la pagina 4.) Pulse una vez el boton TIMER mientras puisa el boton SHIFT del control remoto para visualizer 0, y pulse el boton II SET antes de aue pasen 4 seuundos.
-
Page 31: Escucha De Fuentes De Sc)Nido Externas
Los cables de conexion no han sido suministrados, Obtenga Ios cables de conexion necesarios. Consulte con su concesionario Aiwa en cuanto al equipo optional. TOMAS VIDEO/AUX Esta unidad puede introducer sefia[es de sonido analogico a traves de estas tomas. -
Page 32: Generalidades
ESPECIFICACIONES Unidad winci~ai CX-NV21OO Seccion del sintonizador de FM Gama de sintonizacion 87,5 Antena Antena de cable Seccion del sintonizador de AM 530 kHz a 1710 kHz (pasos de Gama de sintonizacion 10 kHz) 531 kHz a 1602 kHz (pasos de 9 kHz) Antena Antena de cuadro... - Page 33 GUIA P ARA LASO14JCION DEPROBLEMAS Si la uniclad no funciona como se describe en este manual de instrucciones, compruebe la guia siguiente: GENERALIDADES No hay !sonido. “ LEsta bien conectado el cable de alimentacion de CA? . ~Hay alguna conexion mal hecha? (+ pA9ina 3) Puede haber un cortocircuito en Ios terminals + Desconecte el cable de alimentacion de CA y corrija Ias conexiones de Ios altavoces.
- Page 34 AVERTISSEMENT POUR REDUIRE LE RISQUE DE COURT-CIRCUIT OU DE CHOC ELECTRIQUE, NE PAS EXPOSER APPAREILA LA PLUIE OU A L’HUMIDITE. RISK OF ELECTRIC SHOCK DO NOT OPEN “CAUTION:TO REDUCE THE RISK OF ELECTRIC SHOCK, DO NOT REMOVE COVER (OR BACK). NO USER-SERVICEABLE PARTS INSIDE.
- Page 35 Awawuuada%t%dkw Felicitations pour votre achat d’une chatne stereo Aiwa. La lecture de ce mode d’emploi vous permettra de ma~triser I’utilisation et d’optimiser Ies performances de cette chahe. Contr61er la chaine et Ies accessoires. CX-NV2100 Radio SX-NV21OO (G, D) magnetocassette Iecteur...
-
Page 36: Connexions
CONNEXIONS Avant de brancher Ie cordon secteur La tension nominale d’alimentation secteur de I’appareil, indiquee au dos de ce dernier, est de 120 V. S’assurer que cette tension nominale correspond a celle du secteur local. IMPORTANT Commencer par brancher Ies enceintes, Ies antennes et tout appareil optionnel. -
Page 37: Avant L'utilisation
AVANIT L’UTILISATION Pour mettre I’appareil sous tension Appuyer sur une des touches de fonction VIDEO/AIJX, CD). L’appareil est mis sous tension. A ce moment, la lecture du disque en place commence, ou la station ecoutee en dernier est re~ue (fonction de lecture directe). On peut aussi appuyer sur la touche POWER pour mettre I’appareil sous tension. -
Page 38: Reglage Du Son
REGLAGE DU SON WL”ME- T-BASS COMMANDE DU VOLUME Tourner la commande VOLUME de I’appareil principal, ou appuyer sur Ies touches VOLUME de la telecommande. SYSTEME SUPER T-BASS Le systeme T-BASS ameliore Ie realisme du son aux basses frequencies. Appuyer T-BASS. sur la touche A chaque pression... -
Page 39: Accord Manuel
ACCORD MANUEL 1 Appuyer sur la touche TUNER/BAND reprises pour selectionner la gamme souhaitee, 0[.! Si I’alimentation est toupee, la station ecoutee en dernier sera re$ue (fonction de lecture directe). Pour selectionner une gamme avec la telecommande Appuysr sur la touche BAND tout en appuyant sur la touche SHIFT Appuyer sur la touche 1<<... -
Page 40: Operations De Base
OPERATIONS DE BASE MISE EN PLACE DE DISQUES Appuyer sur la touche CD, puis appuyer touche OPEN/CLOSE pour compartment a disques. Mettre Ie(s) disque(s) place avec I’etiquette en haut. Pour Iire un ou deux disques, mettre Ies disques sur Ies plateaux 1 et 2. -
Page 41: Lecture Programmed
LECTURE ALEATOIRE/REPETEE Utiliser la teiecommande. Lecture aleatoire Toutes Ies plages du disque selectionne ou de tous Ies disques peuvent 6tre Iues clans un ordre aleatoire. Lecture repetee Un seul disque ou tous Ies disques peuvent i%re Ius a plusieurs reprises. Appuyer sur la touche RANDOM/REPEAT... -
Page 42: Operations De Base
OPERATIONS DE BASE k-— — —— ..— .._ — _,, .— ~..–d ‘“ (P __ — —-— o,–– — ---- —’— ---------’ (Platine 1) Cassettes utilisables N’utiliser que des cassettes normales (type I). Appuyer sur la touche TAPE. Appuyer sur la touche pour ouvrir... -
Page 43: Enregistrement Avec Montage Et Calcul Du Temps
ENREIGISTREMENT AVEC MONTAGE ET CALCUL DU TEMPS La fonction montage et calcul du temps permet d’enregistrer a partir de disques compacts saris se preoccuper de la duree de la cassett[? et des durees des plages. Quand on met un disque compact en place, I’appareil calcule automatiquement Ies durees des plages. -
Page 44: Enregistrement Avec Montage Programme
ENREGISTREMENT AVEC MONTAGE PROGRAMME La fonciton de montage programme permet d’enregistrer a partir de disques compacts tout en contrdant chaque face de la cassette au fur et a mesure programmation des plages. P–— — Installer la cassette clans la platine 1. Introduire la cassette avec la face a enregistrer en premier orientee vers I’exterieur. -
Page 45: Droits D'auteur
Au sujet des cassettes Pour eviter un effacement accidental, tournevis ou tout autre objet effile pour casser Ies ergots en plastique de la cassette apres I’enregistrement. @Q;;! Face A IL-J Pour enregistrer de nouveau sur une cassette, recouvrir Ies cavites des ergots avec du ruban adhesif ou autre. Le rulban magnetique des cassettes de 120 minutes ou plus est extr~mement... - Page 46 REGLAGE DE LA MINUTERIE L-.’..:._ ‘~- .-=, . -.-.=:.-:.1. =.--$ ’41 Avec la minuterie integree, I’appareil peut &re mis sous tension chaque jour a I’heure specifiee. Preparation S’assurer que I’horloge est reglee correctement. (Voir page 4.) Appuyer une fois sur la touche TIMER tout en appuyant sur la touche SHIFT de la telecommande pour afficher puis appuyer...
-
Page 47: Ecoute De Sources Externes
Connecter la fiche rouge a la prise R et la fiche blanche a la prise L. Pour connecter un tourne-disque Utiliser un tourne-disque Aiwa muni d’un amplificateur a egaliseur integre. PRISE CD DIGITAL OUT (OPTICAL) Cet appareil peut sortir Ies signaux sonores numeriques disque ccmpact par cette prise. -
Page 48: Generalities
SPECIFICATIONS Atmareil wincioal CX-NV2100 Partie tuner FM Plage d’accord 87,5 MHz a 108 MHz Antenne Antenne fil Partie tuner AM Plage d’accord 530 kHz a 1710 kHz (pas de 10 kHz) 531 kHz a 1602 kHz (pas de 9 kHz) Antenne Antenne cadre Partie amplificateur... -
Page 49: En Cas De Probleme
EN CAS DE PROBLEME Si I’apparsil ne fonctionne pas comme decrit clans ce mode d’emploi, contr61er Ie guide suivant. GENERALITIES a pas de son. II n’y Le cordon secteur est-il branche correctement? N’y a-t-ii pas une mauvaise connexion? (+ page y a peut-&re un court-circuit clans Ies bornes d’enceinte. - Page 52 (: AUTION Modifications or adjustments to this product, which are not expressly approved by the manufacturer, may void the user’s right or authority to operate this product. Call TO// ~h% I-8M7-BUY-AIWA Printed in Malaysia (United States and Puerto Rico) AIWA...
Need help?
Do you have a question about the NSX-V2100 and is the answer not in the manual?
Questions and answers