Advertisement
Quick Links
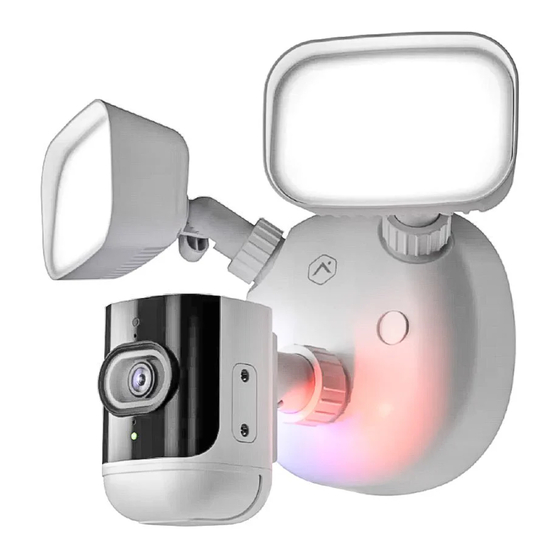
4MP Outdoor Camera Floodlight (ADC-V729/V729AC/VC729P) -
Installation Guide
Pre-installation checklist
When using the ADC-V729AC:
• ADC-V729AC camera
• Mounting hardware (included)
• Broadband (Cable, DSL, or Fiber Optic) internet connection with router
• Wi-Fi enabled computer or mobile device
Note: If the router does not have the WPS button, you will need the case-sensitive SSID (wireless network name)
and the network WPA or WEP key (if the encryption is enabled at the router).
In the box
In the unit
• 1 set (x2) of M4 7/16 screws to attach the floodlight base to the mounting bracket
• 1 set (x2) of weatherproof caps to seal the unit after install
Screw bags
Multiple screw sizes are included to accommodate multiple junction box and screw hole sizes. Choose which set to use
based on your particular install requirements. The following screws are included for mounting:
• (4) #8-32 X 7/8" – for attaching the mounting bracket to the wall/junction box
• (4) #8-32 X 1/2" – for attaching the mounting bracket to the wall/junction box
• (2) 6-32 X 1", - for attaching the adapter plate to the mounting bracket
• (2) 6-32 X ½ - for attaching the adapter plate to the mounting bracket
• Set of wall anchors and screws (V729DC and VC729P only)
• Camera base to mounting bracket grounding wire and nut
https://answers.alarm.com/Partner/Installation_and_Troubleshooting/Video_Devices/4MP_Outdoor_Floodlight_Camera_(ADC...
Updated: Tue, 06 Aug 2024 18:15:46 GMT
1
Advertisement

Related Manuals for Alarm.Com ADC-V729

Summary of Contents for Alarm.Com ADC-V729
- Page 1 4MP Outdoor Camera Floodlight (ADC-V729/V729AC/VC729P) - Installation Guide Pre-installation checklist When using the ADC-V729AC: • ADC-V729AC camera • Mounting hardware (included) • Broadband (Cable, DSL, or Fiber Optic) internet connection with router • Wi-Fi enabled computer or mobile device Note: If the router does not have the WPS button, you will need the case-sensitive SSID (wireless network name) and the network WPA or WEP key (if the encryption is enabled at the router).
-
Page 2: Mounting Recommendations
Caution: There is a risk of electrical shock when installing the ADC-V729AC. Ensure the power is off at the circuit breaker before doing any work. Mounting recommendations Note: For optimal PIR motion detection performance, it is recommended to install the ADC-V729 at a height of eight feet with the camera pointed downwards at a 30° angle. https://answers.alarm.com/Partner/Installation_and_Troubleshooting/Video_Devices/4MP_Outdoor_Floodlight_Camera_(ADC…... - Page 3 Note: This should be a rare situation. Use just the mounting bracket in all other cases. To install on the ceiling: With the ball joint exposed to the front, flip the camera and lights 180°. The adapter should be installed with the camera https://answers.alarm.com/Partner/Installation_and_Troubleshooting/Video_Devices/4MP_Outdoor_Floodlight_Camera_(ADC… Updated: Tue, 06 Aug 2024 18:15:46 GMT...
- Page 4 ◦ If installing the camera on the wall, the hook should face the floor. ◦ If installing the camera on an eave, the hook should face the wall. 2. Ensure the mounting bracket is secure to the wall. https://answers.alarm.com/Partner/Installation_and_Troubleshooting/Video_Devices/4MP_Outdoor_Floodlight_Camera_(ADC… Updated: Tue, 06 Aug 2024 18:15:46 GMT...
- Page 5 Caution: For secure positioning, confirm that all knobs and collars are firmly tightened. The lights and camera should not be left loose and should not allow for any motion when the camera is mounted. https://answers.alarm.com/Partner/Installation_and_Troubleshooting/Video_Devices/4MP_Outdoor_Floodlight_Camera_(ADC… Updated: Tue, 06 Aug 2024 18:15:46 GMT...
- Page 6 For HWV 0104+ the mounting screws come captive in the unit. To install the unit on the mounting bracket for HWV 0104: i. Remove the weatherproof caps. ii. Align the two holes on the back of the floodlight base with the metal poles and push the unit into bracket. https://answers.alarm.com/Partner/Installation_and_Troubleshooting/Video_Devices/4MP_Outdoor_Floodlight_Camera_(ADC… Updated: Tue, 06 Aug 2024 18:15:46 GMT...
- Page 7 Align the two holes on the back of the floodlight base with the metal poles. ii. Screw in the unit using the included black screws. iii. Insert the weatherproof caps. 4. Screw in the unit using the included black screws. 5. Insert the weatherproof caps. https://answers.alarm.com/Partner/Installation_and_Troubleshooting/Video_Devices/4MP_Outdoor_Floodlight_Camera_(ADC… Updated: Tue, 06 Aug 2024 18:15:46 GMT...
- Page 8 3. On the same device, open a web browser and enter 192.168.1.1 in the URL field. Follow the on-screen instructions to add the ADC-V729 to the Wi-Fi network. The LED will briefly turn red before blinking green. The LED will be solid green when the connection is complete.
- Page 9 Follow the on-screen instructions to finish adding the camera. LED reference guide LED pattern Description Power off Solid green Connected to Alarm.com Blinking green Local network connection Blinking red and green Reverting to factory default settings Blinking red Power on, camera booting...
-
Page 10: Troubleshooting
(about 15 seconds), then release the button. The camera will reboot to factory default. Important If the camera was previously installed on a different Alarm.com account, it will need to be deleted before it can be installed again. - Page 11 This device and its antenna(s) must not be co-located or operating in conjunction with any other antenna or transmitter. Please contact intsupport@alarm.com for more information on Canadian RF exposure compliance. • Les appareils numériques de classe B sont conformes à la norme canadienne ICES-003.
Need help?
Do you have a question about the ADC-V729 and is the answer not in the manual?
Questions and answers