Table of Contents
Advertisement
Quick Links
Advertisement
Table of Contents

Related Manuals for D-Link DAP-1360/B


Summary of Contents for D-Link DAP-1360/B
-
Page 2: Table Of Contents
Web-based Con guration Utility ..........20 DMZ (WISP modes only) ..........59 Wireless Setup Wizard ...............21 Parental Control (WISP modes only) ......60 Access Point Mode .............22 Advanced Network (WISP modes only) ......61 Repeater Mode ..............26 Wireless Client Mode ............32 D-Link DAP-1360 User Manual... - Page 3 Con gure WEP ................75 Con gure WPA/WPA2 Personal ..........76 Registration ..................106 Con gure WPA/WPA2 Enterprise ..........77 Connect to a Wireless Network .............78 Using Windows ® XP ..............78 Con gure WEP ................79 Con gure WPA-PSK ..............81 D-Link DAP-1360 User Manual...
-
Page 4: Product Overview
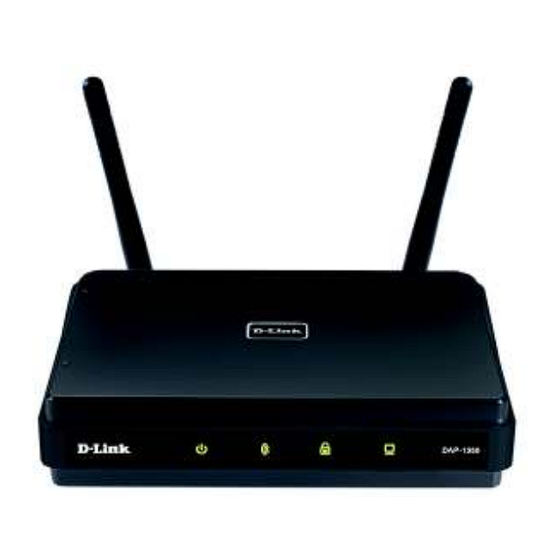
Section 1 - Product Overview Product Overview Package Contents • D-Link DAP-1360 Wireless N Range Extender • Power Supply • CAT5 Ethernet Cable • CD-ROM with User Manual • Quick Install Guide Note: Using a power supply with a different voltage than the one included with the DAP-1360 will cause damage and void the warranty for this product. -
Page 5: Introduction
Section 1 - Product Overview Introduction D-Link, an industry leader in networking, introduces the new D-Link DAP-1360 Wireless N Range Extender. With the ability to transfer files with a maximum wireless signal rate of up to 300Mbps*, the DAP-1360 gives you high-speed wireless network access for your home or o ce. - Page 6 ULTIMATE PERFORMANCE The D-Link Wireless N Range Extender (DAP-1360) is a draft 802.11n compliant device that delivers real world performance of up to 650% faster than an 802.11g wireless connection (also faster than a 100Mbps wired Ethernet connection). Create a secure wireless network to share photos, les, music, video, printers, and network storage throughout your home.
-
Page 7: Features
• User-friendly Setup Wizard - Through its easy-to-use Web-based user interface, the DAP-1360 lets you control what information is accessible to those on the wireless network, whether from the Internet or from your company’s server. Con gure your access point to your speci c settings within minutes. D-Link DAP-1360 User Manual... -
Page 11: Installation
• Wireless Client mode - page 13 • Repeater mode - page 14 • Bridge mode - page 15 • Bridge with AP mode - page 16 • WISP Client Router mode - page 17 • WISP Repeater mode - page 18 D-Link DAP-1360 User Manual... -
Page 12: Access Point Mode
(wireless network name) and channel as the AP in order to connect. If wireless security is enabled on the AP, the client will need to enter a password to connect to the AP. In Access Point mode, multiple clients can connect to the AP at the same time. D-Link DAP-1360 User Manual... -
Page 13: Wireless Client Mode
Ethernet switch, then connect your devices to this switch. Example: Connect a gaming console using an ethernet cable to the DAP-1360. The unit is set to Wireless Client mode which will wirelessly connect to a wireless router on your network. D-Link DAP-1360 User Manual... -
Page 14: Repeater Mode
AP or wireless router. The APs and wireless router (if used) must be within range of each other. Make sure that all clients, APs, and the wireless router all use the same SSID (wireless network name), channel, and security settings. D-Link DAP-1360 User Manual... -
Page 15: Bridge Mode
LANs. In the Bridge mode, both DAP-1360 units do not act as APs. Note: The Bridge mode is not speci ed in the Wi-Fi or IEEE standards. This mode will only work using two DAP-1360 units. Communication with other APs (even other D-Link APs) is not guaranteed. LAN 1... -
Page 16: Bridge With Ap Mode
Note: The Bridge with AP mode is not specified in the Wi-Fi or IEEE standards. This mode will only work using two DAP-1360 units. Communication with other APs (even other D-Link APs) is not guaranteed. LAN 1 LAN 2... -
Page 17: Wisp Client Router Mode
If you are a WISP subscriber and want to access your WISP account using wired computers, connect your computers to the DAP-1360 to get NAT, and then connect them to the WISP AP. Connecting Wired PCs to the Internet Using the DAP-1360 D-Link DAP-1360 User Manual... -
Page 18: Wisp Repeater Mode
WISP AP and provide access to wireless clients in your house. Using this mode, wireless as well as wired clients can connect to the outdoor WISP AP through the DAP-1360. Connecting Wired and Wireless PCs to the Internet Using the DAP-1360 D-Link DAP-1360 User Manual... -
Page 19: Wireless Installation Considerations
1. Keep the number of walls and ceilings between the D-Link access point and other network devices to a minimum. Each wall or ceiling can reduce your adapter’s range from 3-90 feet (1-30 meters.) Position your devices so that the number of walls or ceilings is minimized. -
Page 20: Con Guration
Section 3 - Configuration Configuration This section will show you how to con gure your new D-Link wireless access point using the web-based con guration utility. Web-based Configuration Utility If you wish to change the default settings or optimize the performance of the DAP-1360, you may use the web-based con guration utility. -
Page 21: Wireless Setup Wizard
To set up your wireless network, click Add Wireless Device With WPS and skip to page 38. If you want to enter your settings without running the wizard, click Wireless Setup on the left side and skip to page 40. D-Link DAP-1360 User Manual... -
Page 22: Access Point Mode
Enter the Device Name of the AP and click Next to continue. It is recommended to change the Device Name if there is more than one D-Link device within the same wireless network. Select Access Point from the drop-down menu. - Page 23 Click Next to continue. Click Save to save your network settings. In order for your network settings to take e ect AP will reboot automatically. When the device has finished rebooting the main screen will display. D-Link DAP-1360 User Manual...
- Page 24 This key must be entered on your wireless clients. For WEP encryption, enter a Network Key exactly 5 or 13 characters long or exactly 10 or 26 characters using 0-9 and A-F. Click Next to continue. D-Link DAP-1360 User Manual...
- Page 25 Section 3 - Configuration The following screen will show you your network key to enter on your wireless clients. Click Save to nish the Setup Wizard. D-Link DAP-1360 User Manual...
-
Page 26: Repeater Mode
This Wizard is designed to assist you in con guring your DAP-1360 as a repeater. Enter the Device Name of the AP and click Next to continue. It is recommended to change the Device Name if there is more than one D-Link device within the same wireless network. Select Repeater from the drop-down menu. - Page 27 Select PIN to connect your wireless device with WPS. You may click Generate New PIN to use a different PIN number. Click Connect to start the WPS scan. Within 2 minutes, enter the PIN number into the other device you want to connect to. D-Link DAP-1360 User Manual...
- Page 28 DAP-1360 instead of running this wizard. On the device you want to connect to, start the PBC process on the device. You will have 2 minutes to start the PBC process on both devices. D-Link DAP-1360 User Manual...
- Page 29 If you do not know the exact name or would like to search for the wireless network, click Site Survey. Find your access point from the list, click the radio button in the right column, and click Connect. D-Link DAP-1360 User Manual...
- Page 30 HEX), the key size (64 or 128-bit), and enter the wireless security password. Click Next to complete the Setup Wizard. If you select WPA or WPA2, enter the wireless security password. Click Next to complete the Setup Wizard. D-Link DAP-1360 User Manual...
- Page 31 Section 3 - Configuration The Wireless Setup Wizard is complete. Click Finish to reboot the device. D-Link DAP-1360 User Manual...
-
Page 32: Wireless Client Mode
Enter the Device Name of the AP and click Next to continue. It is recommended to change the Device Name if there is more than one D-Link device within the same wireless network. Select Wireless Client from the drop-down menu. - Page 33 Select PIN to connect your wireless device with WPS. You may click Generate New PIN to use a different PIN number. Click Connect to start the WPS scan. Within 2 minutes, enter the PIN number into the other device you want to connect to. D-Link DAP-1360 User Manual...
- Page 34 DAP-1360 instead of running this wizard. On the device you want to connect to, start the PBC process on the device. You will have 2 minutes to start the PBC process on both devices. D-Link DAP-1360 User Manual...
- Page 35 If you do not know the exact name or would like to search for the wireless network, click Site Survey. Find your access point from the list, click the radio button in the right column, and click Connect. D-Link DAP-1360 User Manual...
- Page 36 HEX), the key size (64 or 128-bit), and enter the wireless security password. Click Next to complete the Setup Wizard. If you select WPA or WPA2, enter the wireless security password. Click Next to complete the Setup Wizard. D-Link DAP-1360 User Manual...
- Page 37 Section 3 - Configuration The Wireless Setup Wizard is complete. Click Finish to reboot the device. D-Link DAP-1360 User Manual...
-
Page 38: Add Wireless Device With Wps
Select PIN to use your PIN number from your wireless device to connect to your network. For PBC coniguration, skip to the next page. Click Connect to continue. Start WPS on the wireless device you are adding to you wireless network to complete the setup. D-Link DAP-1360 User Manual... - Page 39 Select PBC to use the Push Button Con guration in order to connect to your network. Click Connect to continue. Press down the Push Button on the wireless device that you are adding to your network to complete the setup. D-Link DAP-1360 User Manual...
-
Page 40: Manual Con Guration
• Wireless Client mode - page 44 • Bridge mode - page 45 • Bridge with AP mode - page 46 • WISP Client Router mode - page 47 • WISP Repeater mode - page 47 D-Link DAP-1360 User Manual... -
Page 41: Access Point Mode
Mixed 802.11n and 802.11g - Select if you are using a mix of 802.11n and 11g wireless clients. Mixed 802.11n, 802.11g and 802.11b - Select if you are using a mix of 802.11n, 11g, and 11b wireless clients. D-Link DAP-1360 User Manual... - Page 42 Reset PIN to Default: Restore the default PIN of the access point. Reset to Resets Wi-Fi Protected Status to Not Configured. The Vista WPS icon will only be displayed when the Wi-Fi Protected Unconfigured: Status is Not Con gured. D-Link DAP-1360 User Manual...
-
Page 43: Repeater Mode
Select a wireless security setting. Options are None, WEP, WPA, or WPA2. See the Wireless Security section in this manual for a detailed explanation of the wireless security options. Mode: WPS: Select enable if you want to con gure the DAP-1360 with Wi-Fi Protection setup. D-Link DAP-1360 User Manual... -
Page 44: Wireless Client Mode
Select a wireless security setting. Options are None, WEP, WPA, or WPA2. See the Wireless Security section in this manual for a detailed explanation of the wireless security options. Mode: WPS: Select enable if you want to con gure the DAP-1360 with Wi-Fi Protection setup. D-Link DAP-1360 User Manual... -
Page 45: Bridge Mode
(No RADIUS server required). Note: The Bridge mode is not completely specified in the Wi-Fi or IEEE standards. This mode can work with other DAP-1360 units. Communication with other APs (even other D-Link APs) is not guaranteed. D-Link DAP-1360 User Manual... -
Page 46: Bridge With Ap Mode
(No RADIUS server required). Note: The Bridge mode is not completely specified in the Wi-Fi or IEEE standards. This mode can work with other DAP-1360 units. Communication with other APs (even other D-Link APs) is not guaranteed. D-Link DAP-1360 User Manual... -
Page 47: Wisp Repeater/Client Router Modes
This option is unavailable in WISP Client Router and available in the WISP Repeater mode. Wireless: Wireless Security Select a wireless security setting. Options are None, WEP, WPA, or WPA2. Refer to the Wireless Security section of this manual for a detailed explanation of the wireless security options. Mode: D-Link DAP-1360 User Manual... -
Page 48: Wan Settings
Address button to replace the AP’s MAC address with the MAC address of the PC that you used to register with your ISP. It is not recommended that you change the default MAC address unless required by your ISP. D-Link DAP-1360 User Manual... -
Page 49: Static Ip
The default MAC address is set to the MAC address on the AP (Access Point). You can click the Clone Your PC’s MAC Address button to replace the AP’s MAC address with the MAC address of your Ethernet card. It is not recommended that you change the default MAC address unless required by your ISP. D-Link DAP-1360 User Manual... -
Page 50: Pppoe
The default MAC address is set to the MAC address on the AP (Access Point). You can click the Clone Your PC’s MAC Address button to replace the AP’s MAC address with the MAC address of your Ethernet card. It is not recommended that you change the default MAC address unless required by your ISP. D-Link DAP-1360 User Manual... -
Page 51: Pptp
The default MAC address is set to the MAC address on the AP (Access Point). You can click the Clone Your PC’s MAC Address button to replace the AP’s MAC address with the MAC address of your Ethernet card. It is not recommended that you change the default MAC address unless required by your ISP. D-Link DAP-1360 User Manual... -
Page 52: Lan Settings
(DHCP) to automatically obtain an IP address on the LAN/private network. Device Name: Enter the Device Name of the AP. It is recommended to change the Device Name if there is more than one D-Link device within the subnet. D-Link DAP-1360 User Manual... -
Page 53: Static Ip
Enter the Device Name of the AP. It is recommended to change the Device Name if there is more than one D-Link device within the subnet. You can enter the device name of the AP into your web browser to access the instead of IP address for con guration. -
Page 54: Advanced
WMM is QoS for your wireless network. This will improve the quality of video and voice applications for your wireless WMM Enable: clients. Enable Multicast This function will enhance your network performance when you use multicast services such as video conferencing and Streams: video/audio streaming. D-Link DAP-1360 User Manual... -
Page 55: Access Control
You may select the client already connected PCs: to the access point from the drop-down menu. Select the MAC address and click the Clone button. Click Save Settings. MAC Filter Lists the clients currently in your access control List: list. D-Link DAP-1360 User Manual... -
Page 56: User Limit
Check the Enable User Limit box to enable Enable User Limit: this feature. Enter the maximum number of clients, between User Limit: 1 and 32. Save Click Save Settings to save and activate the Settings: new changes. D-Link DAP-1360 User Manual... -
Page 57: Port Forwarding (Wisp Modes Only)
Start/End Ports: Enter the port or ports that you want to open. If you want to open one port, enter the same port in both boxes. Traffic Type: Select TCP, UDP, or Both. D-Link DAP-1360 User Manual... -
Page 58: Port Filter (Wisp Modes Only)
Name field with the application name that you selected. Start/End Ports: Enter the port or ports that you want to open. If you want to open one port, enter the same port in both boxes. Traffic Type: Select TCP, UDP, or Both. D-Link DAP-1360 User Manual... -
Page 59: Dmz (Wisp Modes Only)
Enter the IP address of the computer you Address: would like to open all ports to. You can select a computer from the Computer Name drop-down menu and click << to enter the computer name into the DMZ Host IP Address eld. D-Link DAP-1360 User Manual... -
Page 60: Parental Control (Wisp Modes Only)
Website Filtering ON and DENY computers access to ONLY these sites. Website URL Enter a keyword or URL that you want to block Address: and click Save Settings. Any URL that contains the keyword will be blocked. D-Link DAP-1360 User Manual... -
Page 61: Advanced Network (Wisp Modes Only)
Web-Management interface. In general, only a member of your network can browse the built-in web pages to perform Administrator tasks. This feature enables you to perform Administrator tasks from the remote (Internet) host. D-Link DAP-1360 User Manual... -
Page 62: Maintenance
Enter a new password for the Administrator Login Name. The administrator can make changes to the settings. Verify Enter the same password that you entered in the previous textbox in order to confirm its Password: accuracy. D-Link DAP-1360 User Manual... -
Page 63: System
Any settings that have not been saved will be lost, including any rules that you have created. If you want to save the current access point con guration settings, use the Save button above. D-Link DAP-1360 User Manual... -
Page 64: Language Pack
You can upgrade the rmware of the access point here. Make sure the rmware you want to use is on the local hard drive of the computer. Click on Browse to locate the rmware le to be used for the update. Please check the D-Link support website for irmware updates at http://support.dlink.com. -
Page 65: Watchdog
Check the box to enable authentication that is used with the SMTP server. Enable Authentication: Account Name: Enter your account name that is used with the SMTP server. Enter your password that is used with the SMTP server and re-enter it in the next box. Password: D-Link DAP-1360 User Manual... -
Page 66: Time
To manually input the time, enter the values in these fields for the Year, Month, Day, Hour, Minute, and Second and then click Save Settings. You can also click the Copy Your Computer’s Time Settings button at the bottom of the screen. D-Link DAP-1360 User Manual... -
Page 67: Schedules
Save Settings at the top for your schedules to go into e ect. Schedule Rules The list of schedules will be listed here. Click List: the Edit icon to make changes or click the Delete icon to remove the schedule. D-Link DAP-1360 User Manual... -
Page 68: Status
Displays the access point’s time and firmware version. LAN: Displays the MAC address and the private (local) IP settings for the access point. Wireless LAN: Displays the wireless MAC address and your wireless settings such as SSID and Channel. D-Link DAP-1360 User Manual... -
Page 69: Logs
This button directs you to the next page of the Next Page: log. Clear Log: This button clears all current log content. Log Settings: This button opens a new menu where you can con gure the log settings. Refresh: This button refreshes the log. D-Link DAP-1360 User Manual... -
Page 70: Statistics
The DAP-1360 keeps statistics of the tra c that passes through it. You can view the amount of packets that pass through the LAN and wireless portions of the network. The tra c counter will reset if the access point is rebooted. D-Link DAP-1360 User Manual... -
Page 71: Wireless
The wireless section allows you to view the wireless clients that are connected to your wireless access point. Connection Time: Displays the amount of time the wireless client has been connected to the access point. MAC Address: The Ethernet ID (MAC address) of the wireless client. D-Link DAP-1360 User Manual... -
Page 72: Help
Section 3 - Configuration Help D-Link DAP-1360 User Manual... -
Page 73: Wireless Security
ASCII format is provided so you can enter a string that is easier to remember. The ASCII string is converted to HEX for use over the network. Four keys can be de ned so that you can change keys easily. D-Link DAP-1360 User Manual... -
Page 74: What Is Wpa
WPA/WPA2 incorporates user authentication through the Extensible Authentication Protocol (EAP). EAP is built on a more secure public key encryption system to ensure that only authorized network users can access the network. D-Link DAP-1360 User Manual... -
Page 75: Con Gure Wep
7. Click Save Settings at the top of the window to save your settings. If you are configuring the access point with a wireless adapter, you will lose connectivity until you enable WEP on your adapter and enter the same WEP key as you did on the access point. D-Link DAP-1360 User Manual... -
Page 76: Con Gure Wpa/Wpa2 Personal
6. Click Save Settings at the top of the window to save your settings. If you are configuring the access point with a wireless adapter, you will lose connectivity until you enable WPA-PSK on your adapter and enter the same passphrase as you did on the access point. D-Link DAP-1360 User Manual... -
Page 77: Con Gure Wpa/Wpa2 Enterprise
6. Next to Port, enter the port you are using with your RADIUS server. 1812 is the default port. 7. Next to Shared Secret, enter the security key. 8. Click Save Settings to save your settings. D-Link DAP-1360 User Manual... -
Page 78: Connect To A Wireless Network
Click on a network (displayed using the SSID) and click the Connect button. If you get a good signal, but cannot access the Internet, check you TCP/IP settings for your wireless adapter. Refer to the Networking Basics section in this manual for more information. D-Link DAP-1360 User Manual... -
Page 79: Con Gure Wep
XP Wireless Utility by right-clicking on the wireless computer icon in your system tray (lower-right corner of screen). Select View Available Wireless Networks. 2. Highlight the wireless network (SSID) you would like to connect to and click Connect. D-Link DAP-1360 User Manual... - Page 80 It may take 20-30 seconds to connect to the wireless network. If the connection fails, please verify that the WEP settings are correct. The WEP key must be exactly the same as on the wireless access point. D-Link DAP-1360 User Manual...
-
Page 81: Con Gure Wpa-Psk
XP Wireless Utility by right-clicking on the wireless computer icon in your system tray (lower-right corner of screen). Select View Available Wireless Networks. 2. Highlight the wireless network (SSID) you would like to connect to and click Connect. D-Link DAP-1360 User Manual... - Page 82 It may take 20-30 seconds to connect to the wireless network. If the connection fails, please verify that the WPA-PSK settings are correct. The WPA-PSK passphrase must be exactly the same as on the wireless access point. D-Link DAP-1360 User Manual...
-
Page 83: Connect To A Wireless Network
Network and Sharing Center. The utility will display any available wireless networks in your area. Click on a network (displayed using the SSID) under Select a network to connect to and then click the Connect button. D-Link DAP-1360 User Manual... - Page 84 The utility will display the following window to indicate a connection is being made. The nal window indicates the establishment of a successful connection. The next two pages display the windows used to connect to either a WEP or a WPA-PSK wireless network. D-Link DAP-1360 User Manual...
-
Page 85: Con Gure Wep
Click on a network (displayed using the SSID) using WEP under Select a network to connect to and then click the Connect button. Enter the appropriate security key or passphrase in the eld provided and then click the Connect button. D-Link DAP-1360 User Manual... -
Page 86: Con Gure Wpa-Psk
Click on a network (displayed using the SSID) using WPA-PSK under Select a network to connect to and then click the Connect button. Enter the appropriate security key or passphrase in the field provided and then click the Connect button. D-Link DAP-1360 User Manual... -
Page 87: Troubleshooting
1. Why can’t I access the web-based con guration utility? When entering the IP address of the D-Link access point (192.168.0.50 for example), you are not connecting to a website on the Internet or have to be connected to the Internet. The device has the utility built-in to a ROM chip in the device itself. - Page 88 • Close your web browser (if open) and open it. • Access the web management. Open your web browser and enter the IP address of your D-Link access point in the address bar. This should open the login page for your the web management.
- Page 89 NT, 2000, and XP users type in cmd) and press Enter (or click OK). • Once the window opens, you’ll need to do a special ping. Use the following syntax: ping [url] [-f ] [-l] [MTU value] Example: ping yahoo.com -f -l 1472 D-Link DAP-1360 User Manual...
- Page 90 • To change the MTU enter the number in the MTU ield and click Save Settings to save your settings. • Test your email. If changing the MTU does not resolve the problem, continue changing the MTU in increments of ten. D-Link DAP-1360 User Manual...
-
Page 91: Wireless Basics
Strictly adhering to the IEEE standard, the D-Link wireless family of products will allow you to securely access the data you want, when and where you want it. You will be able to enjoy the freedom that wireless networking delivers. -
Page 92: What Is Wireless
D-Link is the worldwide leader and award winning designer, developer, and manufacturer of networking products. D-Link delivers the performance you need at a price you can a ord. D-Link has all the products you need to build your network. - Page 93 Who uses wireless? Wireless technology has become so popular in recent years that almost everyone is using it, whether it’s for home, o ce, business, D-Link has a wireless solution for it. Home • Gives everyone at home broadband access •...
-
Page 94: Tips
The wireless connection in public places is usually called “hotspots”. Using a D-Link Cardbus Adapter with your laptop, you can access the hotspot to connect to Internet from remote locations like: Airports, Hotels, Cofee Shops, Libraries, Restaurants, and Convention Centers. -
Page 95: Wireless Modes
An Infrastructure network contains an Access Point or wireless bridge. All the wireless devices, or clients, will connect to the wireless bridge or access point. An Ad-Hoc network contains only clients, such as laptops with wireless cardbus adapters. All the adapters must be in Ad-Hoc mode to communicate. D-Link DAP-1360 User Manual... -
Page 96: Networking Basics
Check your IP address After you install your new D-Link adapter, by default, the TCP/IP settings should be set to obtain an IP address from a DHCP server (i.e. wireless router) automatically. To verify your IP address, please follow the steps below. -
Page 97: Statically Assign An Ip Address
Windows 2000 - From the desktop, right-click My Network Places > Properties. Step 2 Right-click on the Local Area Connection which represents your D-Link network adapter and select Properties. Step 3 Highlight Internet Protocol (TCP/IP) and click Properties. Step 4 Click Use the following IP address and enter an IP address that is on the same subnet as your network or the LAN IP address on your access point. -
Page 98: Technical Speci Cations
Maximum wireless signal rate derived from IEEE Standard 802.11g and Draft 802.11n specifications. Actual data throughput will vary. Network conditions and environmental factors, including volume of network tra c, building materials and construction, and network overhead, lower actual data throughput rate. Environmental conditions will adversely a ect wireless signal range. Range varies depending on country’s regulation. D-Link DAP-1360 User Manual... -
Page 99: Contacting Technical Support
• Hardware Revision (located on the label on the bottom of the access point (e.g. rev A1)) • Serial Number (s/n number located on the label on the bottom of the access point). You can nd software updates and user documentation on the D-Link website as well as frequently asked questions and answers to technical issues. -
Page 100: Warranty
Any repair or replacement will be rendered by D-Link at an Authorized D-Link Service O ce. The replacement hardware need not be new or have an identical make, model or part. D-Link may, at its option, replace the defective Hardware or any part thereof with any reconditioned product that D-Link reasonably determines is substantially equivalent (or superior) in all material respects to the defective Hardware. - Page 101 Warranty Period and is subject to the same limitations and exclusions. If a material non-conformance is incapable of correction, or if D-Link determines in its sole discretion that it is not practical to replace the non-conforming Software, the price paid by the original licensee for the non-conforming Software will be refunded by D-Link;...
- Page 102 • The customer is responsible for all in-bound shipping charges to D-Link. No Cash on Delivery (“COD”) is allowed. Products sent COD will either be rejected by D-Link or become the property of D-Link. Products shall be fully insured by the customer and shipped to D-Link Systems, Inc., 17595 Mt.
- Page 103 RESULTING FROM THE USE OF THE PRODUC T, RELATING TO WARRANT Y SER VICE, OR ARISING OUT OF ANY BREACH OF THIS LIMITED WARRANTY, EVEN IF D-LINK HAS BEEN ADVISED OF THE POSSIBILITY OF SUCH DAMAGES. THE SOLE REMEDY FOR A BREACH OF THE FOREGOING LIMITED WARRANT Y IS REPAIR, REPLACEMENT OR REFUND OF THE DEFEC TIVE OR NONCONFORMING PRODUC T.
- Page 104 This equipment complies with FCC radiation exposure limits set forth for an uncontrolled environment. This equipment should be installed and operated with minimum distance 20cm between the radiator & your body. This transmitter must not be co-located or operating in conjunction with any other antenna or transmitter. D-Link DAP-1360 User Manual...
- Page 105 The rmware setting is not accessible by the end user. For detailed warranty information applicable to products purchased outside the United States, please contact the corresponding local D-Link o ce. D-Link DAP-1360 User Manual...
-
Page 106: Registration
Appendix F - Registration Registration Product registration is entirely voluntary and failure to complete or return this form will not diminish your warranty rights. Version 1.0 July 16, 2009 D-Link DAP-1360 User Manual...
Need help?
Do you have a question about the DAP-1360/B and is the answer not in the manual?
Questions and answers