Table of Contents
Advertisement
Quick Links
Advertisement
Table of Contents

Subscribe to Our Youtube Channel
Related Manuals for SWM SIX DAYS 2022


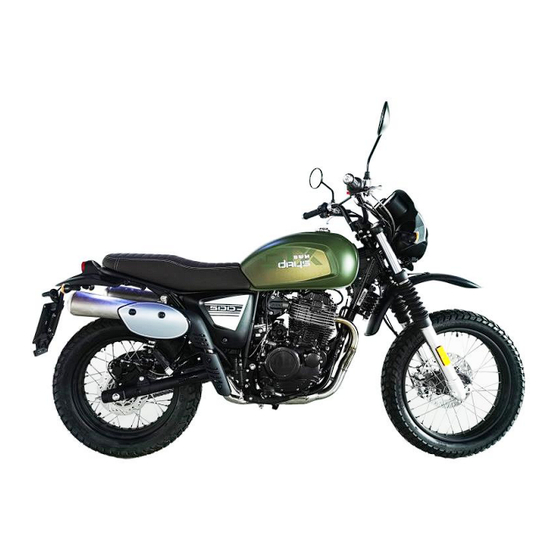
Summary of Contents for SWM SIX DAYS 2022
- Page 1 SIX DAYS-2022 Quick Reference Manual...
-
Page 2: Table Of Contents
SIX DAYS SUMMARY SIDE STAND ............................28 INSTRUCTIONS FOR USING THE MOTORCYCLE...............29 PRESENTATION ............................. 4 PRELIMINARY CHECKS ........................29 IMPORTANT NOTICES ......................... 4 INSTRUCTIONS FOR RUNNING-IN ....................29 IMPORTANT............................5 TROUBLESHOOTING ..........................29 PRECAUTIONS FOR CHILDREN ......................5 MOUNTING/DISMOUNTING OF RIDER AND PASSENGER ............31 SAFE RIDING AND MOTORCYCLE SAFETY ................... - Page 3 SIX DAYS REAR BRAKE PEDAL FREE PLAY ADJUSTMENT................44 APPENDIX A ............................63 FRONT SUSPENSION COMPRESSION ADJUSTMENT .............. 45 REAR SHOCK ABSORBER SPRING PRELOAD ADJUSTMENT ..........45 FORK FUNCTIONALITY CHECK ....................... 46 STEERING BEARING CHECK ......................46 CHAIN CLEANING AND LUBRICATION ..................47 CHAIN/FRONT SPROCKET/REAR SPROCKET WEAR CHECK ..........
-
Page 4: Presentation
Welcome to the SWM motorcycling Family! SIX DAYS models are ROAD use motorcycles; they are guaranteed exempt Your new SWM motorcycle is designed and manufactured to be the best in its from functional defects and covered with legal guarantee, as far as the field. -
Page 5: Important
WARNING*: After a crash, inspect the motor- spections at authorised SWM dealers. Even slight or involuntary bumps can cause the cycle carefully. Make sure that the throttle, The cost for changing parts and for the labour... -
Page 6: Safe Riding And Motorcycle Safety
SIX DAYS SAFE RIDING AND MOTORCYCLE When going uphill or on the flat when the gear your speed accordingly. SAFETY - Reduce speed if it is raining and especially if does not match the speed of the motorcycle there are puddles of water on the road. Here are some basic principles for riding your (high gear and low speed);... - Page 7 SIX DAYS Anti-lock braking system -ABS Risks related to carbon monoxide place both feet on the passenger footrests. - Never ride under the influence of alcohol or The ABS is an electromechanical braking-aid sys- Exhaust gas contains carbon monoxide, a color- drugs.
-
Page 8: Identification Data
SIX DAYS IDENTIFICATION DATA ENGINE NUMBER The engine identification number is stamped at the top of the crankcase, while vehicle serial number or Vehicle Identification Number is stamped on the steer- A30M????? ing tube of the frame. Always quote the number stamped on the frame when ordering spare parts or (... -
Page 9: Right-Hand Side View
SIX DAYS CONTROLS AND INSTRUMENTS RIGHT-HAND SIDE VIEW ) Fuel tank cap 2) Fuel tank 3) Instrument panel 4) Headlight 5) Taillight 6) Horn 7) Front turning indicators. 8) Rear turning indicators. 9) Rear brake disc 10) Rear brake calliper 11) Rear brake pedal 12) Rear brake pump 13) Engine oil filter... -
Page 10: Left-Hand Side View
SIX DAYS LEFT-HAND SIDE VIEW 1) Side stand 2) Front brake disc 3) Front brake calliper 4) Gear shift pedal 5) Battery 6) Fuses 7) Saddle 8) Canister 9) Transmission chain 10) Oil radiator 11) Contactor with main fuse 12) Rear shock absorber spring preload ad- justment ring nut EN-10... -
Page 11: Controls And Instruments
SIX DAYS CONTROLS AND INSTRUMENTS 1) Left-hand rear-view mirror 2) Right-hand rear-view mirror 3) Speedometer 4) Revolution counter 5) Ignition/steering lock block 6) Left-hand switch 7) Clutch control lever 8) Right-hand switch 9) Throttle twist grip 10) Front brake control lever 11) Front brake fluid reservoir 11- EN... - Page 12 SIX DAYS TECHNICAL DATA MOTORE PRIMARY DRIVE Type …………………………………………………………single cylinder, 4 stroke Air-cooled Drive pinion gear. ………………………………………………………………………………………24 B ore …………… …………… ……………… ………… ……………… …………… …… … 90mm . Clutch ring gear ………………………………………………………………………………………64 S t ro ke …… …… ……… …… ……… ……… …… …… ……… ……… …… ……… …… 7 0mm . Transmission ratio ………………………………………………………………………………...
- Page 13 SIX DAYS Transmission chain dimensions…………………………………………………………5/8" x 1/4" RIMS FINAL RATIOS Type……………………………………………………………………………………………steel -1,85”x19” 1st gear………………………………………………………………………………………………………20,749 Rear………………………………………………………….………………………………steel -3,00”x17” 2nd gear……………………………………………………………………………………………………14,703 TYRES 3rd gear…………………………………………………………………………………………………11.068 Front…………………………………………………………………………………………………100/90 -19" 4th gear………………………………………………………………………………………………………9,246 Rear……………………………………………………………………………………………………130/80 -17" 5th gear ………………………………………………………………………………………………………7,420 Cold tyre pressure 6th gear ………………………………………………………………………………………………………6.523 Front CHASSIS Rider only ………………………………………………………………………………………………… 1.8 psi Type ………………………………………………………………………single-beam, double craddle Rider and passenger …………………………………………………………………………………2.0 psi RONT SUSPENSION...
- Page 14 SIX DAYS Reserve fuel (warning light goes on) …………………………………………………………2,5L Transmission oil Oil and oil filter replacement ……………………………………………………………………2.7L Oil replacement …………………………………………………………………………………………2.5L TABLE FOR LUBRICATION, SUPPLIES Engine, gearbox and primary drive lubricating oil SHELL SL 10W40 Brake system fluid MOTUL DOT 4 Grease lubrication MOTUL GREASE 100 Final drive chain lubrication MOTUL CHAIN LUBE...
-
Page 15: Combined Instrument
If the light comes on while the engine is running, it means that there is an engine or injection system failure. -Stop and turn off the engine. -Wait a few minutes and restart the engine; if the light comes on again, contact your nearest SWM dealer to have the self-test system checked. EN-15... -
Page 16: Speedometer
(3a) Km***(ml) -wait for a few minutes and restart the engine. (3b) Km***(mi) If the light turns on again, see the closest SWM dealer to check the ABS system. REVOLUTION COUNTER SPEEDOMETER The rev. counter allows the driver to monitor the number of engine revs. -
Page 17: Abs Malfunction List
SIX DAYS ABS MALFUNCTION LIST Malfunction Possible Causes Possible Impact Recommended Measures Poor connect of battery termi- C1101 ECU Voltage supply: high voltage ABS alarms and not working. Clean the terminal. nal. Poor connect of battery termi- C1102 ECU Voltage supply: low voltage ABS alarms and not working. - Page 18 SIX DAYS Malfunction Possible Causes Possible Impact Recommended Measures Wheel-speed sensor, rear: general Too much gap between the Check the distance between the C1208 ABS alarms and not working. error sensor probe with tone wheel. sensor probe with tone wheel. ECU error (hardware, Micro-con- ABS internal damange and not C1604...
-
Page 19: Appendix: Dtc List
SIX DAYS APPENDIX: DTC LIST System or component Error code Error description Driver behavior Coolant/Oil Sensor P0118 Coolant/Oil Temperature Sensor Circuit High Volt- age or Open Stop the engine and check whether the cylinder P0117 Coolant/Oil Temperature Sensor Circuit Low Volt- temperature sensor is connected effectively. - Page 20 SIX DAYS System or component Error code Error description Driver behavior P00D1 Front oxygen sensor heating circuit low current Check if the front oxygen sensor is connected effec- tively. If the error still persist ask for assistance. Fuel Pump Relay (FPR) P0232 FPR Coil Circuit High Voltage Check if the fuel pump relay is connected effectively.
- Page 21 SIX DAYS System or component Error code Error description Driver behavior Sensor (IAT) P0112 IAT Circuit Low Voltage Intake Temperature P0111 Intake temperature sensor signal stuck Sensor P0650 MIL Circuit Malfunction Check if there's history error. Reset. If the error still persist ask for assistance.
- Page 22 SIX DAYS System or component Error code Error description Driver behavior P2258 Secondary air compensating valve short circuit high assistance. voltage Park Neutral Switch P0850 Park Neutral Switch Error Check if the park neutral switch is connected effec- Diag tively. If the error still persist ask for assistance. Tachometer P1693 Tachometer Circuit Low Voltage...
-
Page 23: Controls
SIX DAYS CONTROLS STEERING LOCK The motorcycle comes with a steering lock IGNITION SWITCH located on the ignition switch (1). Lock the The ignition switch has three positions: steering as follows: Motorcycle start position (key not remova- -Turn handlebar to the left ble). -
Page 24: Handlebar Switch
SIX DAYS R.H. HANDLEBAR SWITCH L.H. HANDLEBAR SWITCH THROTTLE CONTROL The throttle twistgrip (1) is located on the right- The left-hand switch features the following con- The right-hand switch features the following con- trols: trols: hand side of the handlebar. High beam flasher (self-cancelling) 1) Engine start button High beam... -
Page 25: Clutch Control
SIX DAYS CLUTCH CONTROL COMBINED BRAKING CONTROL The clutch control lever (1) is located on the left- The combined braking control pedal (1) is located hand side of the handlebar and is equipped with in the motorcycle right side. A stop switch, when a protection. -
Page 26: Gear Shift Control
SIX DAYS GEAR SHIFT CONTROL FUEL Recommended fuel: premium grade UNLEADED The lever (1) is placed on the left-hand side of the engine. The operator must release the lever after fuel (R.O.N. 95). each gear change to allow it to return to its central WARNING*: Fuel is extremely flammable and position. - Page 27 SIX DAYS Refit the cap (3) by following the removal in- structions in reverse order, then remove the key (2) and move the lock protective cover (1). Note*: To refit the fuel cap (3), the key must be into the lock; the key (2) can be removed from the cap (3) only if the cap it properly closed.
-
Page 28: Side Stand
SIX DAYS lowered and the gear in neutral. If a gear is SIDE STAND A side stand (1) is supplied with every motorcycle. engaged with the stand lowered, the engine turns Periodically check the side stand (see “Scheduled off. Maintenance Chart”); make sure that the springs are not damaged and the side stand moves freely. -
Page 29: Instructions For Using The Motorcycle
SIX DAYS INSTRUCTIONS FOR USING THE -Operate the turning indicators and check that -Do not ride for a long time without stopping; MOTORCYCLE the warning light comes on; -NEVER drive downhill with GEARBOX IN -Check if the rear stop light is functioning; NEUTRAL, but shift into gear to brake with the en- Note*: If you are not familiar with the motorcycle -Check that, after starting, the "... - Page 30 SIX DAYS The engine starts, but it is erratic -Faulty alternator coil: replace. -Dirty or worn out spark plug: clean or replace -De-magnetised alternator rotor: replace. -Faulty spark plug electrode gap: adjust; -Faulty voltage regulator: replace. The spark plug gets easily dirt: The battery overheats -Unfit spark plug: replace -Faulty voltage regulator: replace.
-
Page 31: Mounting/Dismounting Of Rider And Passenger
SIX DAYS MOUNTING/DISMOUNTING OF RIDER AND Mounting of rider PASSENGER With the motorcycle on the side stand, do the fol- General lowing: Carefully read the instructions below as they pro- -From the left side, hold the handlebar correctly vide important information for rider and passen- with both hands and extend your right leg over ger safety and to prevent harm to persons or the saddle. - Page 32 SIX DAYS Mounting of passenger Get the rider to mount first as described in the relevant section without starting the engine. -Get the passenger to put the passenger footrests (1) down. CAUTION*: When in a riding position, the rider must not pull out or attempt to pull out the rear passenger footrests since this may unbalance the vehicle.
-
Page 33: Adjusting The Rear-View Mirrors
SIX DAYS Dismounting the motorcycle ADJUSTING THE REAR-VIEW MIRRORS - Stop the vehicle and switch off the engine. Sit on the motorcycle as described in the relative paragraph. CAUTION*: Make sure that the area where Adjust both mirrors (1) so that you can clearly you want to park the vehicle is stable and level. -
Page 34: Starting The Engine
SIX DAYS STARTING THE ENGINE After getting on the motorcycle as described in the relative paragraph, operate as follows to start the engine: - Place ignition key (1) to position (the buzz that you hear when you turn the key to caused by the fuel pump which puts the feeding system under pressure);... -
Page 35: Important Note In Case Of Cold Starts At Low Temperatures
SIX DAYS gear lever (5) into the neutral position IMPORTANT NOTE IN CASE OF COLD STARTS AT LOW TEMPERATURES -Turn the ignition key (6) to the position (po- It is recommended to briefly warm up at idle sition for removing key). speed until you get a normal engine response to the accelerator openings. -
Page 36: Engine Emergency Stop
SIX DAYS ENGINE EMERGENCY STOP -Flick the red switch (7) to stop the engine and then flick it back to position When the bike is off, place it on its side stand. WARNING*: It can be useful to use the front brake independently or to use the combined braking depending on the situation. -
Page 37: Periodic Maintenance And Adjustments
SIX DAYS PERIODIC MAINTENANCE AND ENGINE-TRANSMISSION OIL LEVEL ENGINE OIL AND FILTER CHANGE Keeping the motorbike level and upright, check ADJUSTMENTS Note*: Carry out this operation with the engine the oil level through the inspection window (1) on REMOVING THE SIDE PANELS the right crankcase. - Page 38 SIX DAYS 20Nm). - Refit the filter (5) and the cap (4) replacing the seal (6). - Pour about 1.7 kg of oil into the oil tank through the filler neck (7). - Start the engine and let it run for a few minutes. - Pour in the remaining oil (1 kg) to top up to the correct level.
-
Page 39: Air Filter Check And/Or Replacement
SIX DAYS AIR FILTER CHECK AND/OR REPLACEMENT SPARK PLUG CHECK - Remove the right panel as described in the rel- Spark plug (3) gap shall be 0.6 -0.8 mm. evant paragraph. A wider gap may cause difficulties in starting the - Unscrew the five screws (1) and remove the filter engine and overload the coil. -
Page 40: Tyres
SIX DAYS WARNING*: A spark plug with too hot a heat TYRES range may lead to preignition and possible en- This motorcycle is equipped with tyres with inner gine damage. A spark plug with too cold a heat tube. range may foul as the result of too much carbon WARNING*: The wheels have been designed to buildup. -
Page 41: Throttle Control Cable Adjustment
SIX DAYS - Check the tyre pressure which should be as in- THROTTLE CONTROL CABLE ADJUSTMENT To check proper adjustment of the throttle control dicated under TECHNICAL DATA. transmission, operate as follows: WARNING*: The front and rear tyre must be of -Turn throttle twistgrip (1) and make sure it has about 2 mm free play;... -
Page 42: Front Brake Fluid Level Check
SWM Dealer. the SWM Dealer. LOWER EN-42... -
Page 43: Brake Pad Wear Check
If the pads cannot be cleaned properly, replace of brake pads have to be replaced. them. CAUTION*: Contact an SWM dealer to have the PAD INSTALLATION brake pads replaced. Refit the pads following the removal procedure in reverse order. -
Page 44: Brake Disc Wear
SIX DAYS BRAKE DISC WEAR COMBINED BRAKING PEDAL POSITION - loosen nut (4); Measure the thickness of each disc in the point of ADJUSTMENT - operate the pump rod (5) to increase or de- The position of the rear brake pedal with respect maximum wear. -
Page 45: Front Suspension Compression Adjustment
SIX DAYS FRONT SUSPENSION COMPRESSION REAR SHOCK ABSORBER SPRING PRELOAD ADJUSTMENT ADJUSTMENT You can adjust the hydraulics in the front suspen- The spring preload of rear shock absorbers (1) can sion. be adjusted; to make the adjustment, operate as Standard calibration: 16 clicks follows: - To make the adjustment, act on the adjusters (1) - Clean lock ring nut (2) and adjuster ring nut (3) -
Page 46: Fork Functionality Check
SWM dealer. - Get on the motorcycle; - Stand in front of the motorcycle. - Pull the front brake lever and forcefully push the... -
Page 47: Chain Cleaning And Lubrication
SIX DAYS CHAIN CLEANING AND LUBRICATION CHAIN/FRONT SPROCKET/REAR SPROCKET The motorcycle is equipped with a chain (1) with WEAR CHECK O-rings; to clean it, operate as follows; - Check the condition of the chain (1); there may - Position the motorcycle in such a way that the not be any damaged rollers, loosened pins or rear wheel is lifted from the ground and can turn. -
Page 48: Chain Adjustment
SIX DAYS CHAIN ADJUSTMENT BLOW-BY TUBE CLEANING Chain should be checked, adjusted and lubricated - Unscrew the two screws (1) and move the can- as per the Maintenance Chart to ensure safety ister (2) to the side. and prevent excessive wear. If the chain becomes - Periodically check the blow-by tube (3) accord- badly worn or is poorly adjusted (i.e., if it is too ing to the maintenance table. -
Page 49: Clutch Adjustment
SIX DAYS CLUTCH ADJUSTMENT Normally, the clutch is adjusted by only stretching the cable using the adjusting unit positioned on the handlebar. As a rule, it is sufficient to operate on the handlebar adjuster to restore the clearance due to the flexible transmission stretch. The control lever must always have a free play (C) (about 3 mm) before starting to disengage the clutch. -
Page 50: Removing The Front Wheel
SIX DAYS REMOVING THE FRONT WHEEL REFITTING THE FRONT WHEEL Position the motorcycle in such a way that the -Position the wheel between the legs, fit the ABS front wheel is lifted from the ground. sensor support (1) so that it correctly fits into -Loosen the bolts (1) holding the wheel axle (2) to place with the fork pin (2), then fit the brake disc the front fork mounts. -
Page 51: Removing The Rear Wheel
SIX DAYS REMOVING THE REAR WHEEL Note: Do not operate the rear brake pedal when Unscrew the nut (1) of the wheel shaft (2) and ex- the wheel has been removed; this causes the cal- tract it. It is not necessary to loosen the chain ten- liper pistons to move forwards. -
Page 52: Electrical Components Location
SIX DAYS ELECTRICAL COMPONENTS LOCATION IGNITION SYSTEM The ignition system includes the following ele- ments: Generator (1), on the inner side of left crankcase cover; Electronic coil (2) incorporated into the spark plug pipette; Voltage regulator (3) located on the front right side under the fuel tank;... - Page 53 SIX DAYS Battery (9) under the left panel; Flasher intermittence device (10) under the left panel; Fuses (11) located on the fuse holder plate under the left panel. Lambda sensor (12); LED headlight (13); LED tail light (14); LED turning indicators (15); Fuel pump (16) inside the tank.
- Page 54 SIX DAYS EN-54...
- Page 55 SIX DAYS Cable Colour Coding Y …………………………………………………………………Yellow L.H.Switch B………………………………………………………………………Blue Bk /Y………………………………………………… Black /Yellow Flash relay B/Bk ………………………………………………………Blue/Black Br/Y………………………………………………… Brown/Yellow Horn Bk………………………………………………………………… Black G /Y …………………………………………………Green /Yellow Ignition switch lock Br …………………………………………………………………Brown Y/R………………………………………………………Yellow/Red Stepping motor Br/R…………………………………………………… Brown/Red KEY TO WIRING DIAGRAM Poweroff switch Br/W…………………………………………………...
-
Page 56: Battery
-Remove the left-hand side panel. nance.If electrolyte leaks, or other failure of the -First remove the BLACK negative cable (2) and electrical system is detected, contact the SWM then the RED positive cable (3) (when refitting, first Dealer. connect the RED positive cable and then the If the vehicle remains unused for long periods (≥... - Page 57 SIX DAYS WARNING*: The battery contains sulphuric acid. Avoid contact with skin, eyes or clothing. REMEDIES: CONTACT WITH THE SKIN: Flush with plenty of water. INGESTION: Drink large quantities of water. Seek medical advice immediately. Do not induce vomiting. CONTACT WITH THE EYES: Flush with water for no less than 15 minutes and seek medical atten- tion WARNING*: If the battery is left unused, it has to...
-
Page 58: Fuses
SIX DAYS FUSES 9) 15A fuse Spare fuse. Fuse malfunction could cause problems for the 10)30A fuse motorcycle. General fuse. To access the fuse box, remove the left-hand 11)30A fuse side panel. Spare fuse. To prevent short circuits, turn the On/Off switch to OFF, BEFORE working on the fuses. -
Page 59: Headlight Bulb Replacement
SIX DAYS HEADLIGHT BULB REPLACEMENT TURNING INDICATOR BULB REPLACEMENT -The headlight (1) is LED type, replace it if it does -The direction indicators (1) are LED type, replace not work. them if they do not work. TAILLIGHT BULB REPLACEMENT / PLATE LIGHT -The taillight (1)/ plate light (2) is type LED;... -
Page 60: Headlight Adjustment
SIX DAYS HEADLIGHT ADJUSTMENT When checking the proper aiming of the head- light beam: inflate tyres at the right pressure, have a person sit astride the motorcycle and set the motorcycle perpendicular to its longitudinal axis at 10 metres from a wall or screen. Then trace a horizontal line at the height of headlight centre and a vertical one, in line with vehicle longitudinal axis. -
Page 61: Appendix
SIX DAYS APPENDIX To set the motorcycle back ready for use after CLEANING storage: LONG PERIOD OF INACTIVITY Before washing the motorcycle, it is necessary to -Make sure the spark plug is tight. When the motorcycle is to be stored for a certain duly protect the following parts: -Fill the fuel tank. -
Page 62: Pre-Delivery Inspection
SIX DAYS PRE-DELIVERY INSPECTION General lubricatio General test Description Operation Pre-delivery Engine oil Check level Spark plugs Check / Replace Throttle body Check and adjust Brakes / Clutch Check operation Brakes Check lines for leakage ... - Page 63 SIX DAYS APPENDIX A EN-63...
- Page 64 SIX DAYS SIX DAYS SCHEDULED MAINTENANCE CHART (TO BE CARRIED OUT AT THE SWM DEALER) ENGINE 1000Km 5000 Km 10000 Km 15000 Km 20000 Km VALVES C (*) C (*) C (*) C (*) C (*) DECOMPRESSOR TIMING CHAIN SPARK PLUG...
- Page 65 SIX DAYS SIX DAYS SCHEDULED MAINTENANCE CHART (TO BE CARRIED OUT AT THE SWM DEALER) CHASSIS 1000Km 5000 Km 10000 Km 15000 Km 20000 Km BRAKE FLUID BRAKE PADS WEAR BOWDEN CABLES THROTTLE TYRE PRESSURE AND WEAR HEADLAMP BEAM HEIGHT...
- Page 66 SIX DAYS SIX DAYS SCHEDULED MAINTENANCE CHART (TO BE CARRIED OUT AT THE SWM DEALER) LUBRICATION/GREASING EXHAUST SYSTEM LUBRICATION SYSTEM C: CHECK L: LUBRICATE R: FRONT FORK OVERHAUL S: CHANGE NOTE: Upon every removal replace the gaskets. Replace screws and nuts if worn.
Need help?
Do you have a question about the SIX DAYS 2022 and is the answer not in the manual?
Questions and answers