
Related Manuals for SCHUNK TENDO easyToolholder


Summary of Contents for SCHUNK TENDO easyToolholder
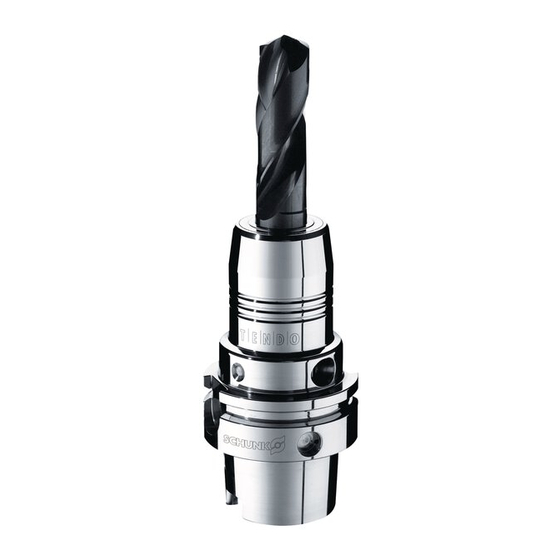
- Page 1 Assembly and Operating Manual easyToolholder TENDO hydraulic expansion toolholder Translation of Original Operating Manual...
- Page 2 Imprint Imprint Copyright: This manual is protected by copyright. The author is SCHUNK SE & Co. KG. All rights reserved. Technical changes: We reserve the right to make alterations for the purpose of technical improvement. Document number: 1573096 Version: 01.00 | 09/01/2024 | en...
-
Page 3: Table Of Contents
Table of Contents Table of Contents 1 General ..................... 5 About this manual................1.1.1 Presentation of Warning Labels ............. 1.1.2 Definition of Terms ..............1.1.3 Symbol definition............... 1.1.4 Applicable documents ..............1.2 Warranty ................... 1.3 Scope of delivery................. 1.4 Accessories ..................2 Basic safety notes ................ - Page 4 Table of Contents 4 Design and description ................20 4.1 Design ....................20 4.2 Functional description................21 5 Operation ................... 22 5.1 Basic information................22 5.2 Clamping the tool................24 5.3 Unclamping the tool ................25 5.4 Changing the tool................25 5.5 Adjusting the run-out accuracy - Equipment option Zero (run-out accuracy adjustment) ..................
-
Page 5: General
General 1 General 1.1 About this manual This manual contains important information for a safe and appropriate use of the product. This manual is an integral part of the product and must be kept accessible for the personnel at all times. Before starting work, the personnel must have read and understood this operating manual. -
Page 6: Definition Of Terms
1.1.4 Applicable documents Product-specific data sheet The General Terms and Conditions can be downloaded at schunk.com 1.2 Warranty The warranty is valid for 12 months from the date of delivery from the production facility if the product is used as intended and in compliance with the prescribed operating data. -
Page 7: Accessories
General 1.4 Accessories The following accessories for the product are available separately: Test shafts for checking the clamping force Hexagon socket wrench for the actuation of the clamping screw * Hexalobular socket wrench for adjusting the run-out accuracy Hexagon socket wrench for length adjustment GZB-S intermediate sleeves for clamping several different shank diameters GZB-S sleeve remover for removing intermediate sleeves... -
Page 8: Basic Safety Notes
Basic safety notes 2 Basic safety notes 2.1 Intended use The product is used to clamp rotationally symmetric tools. The product may only be used and applied within the scope of the information in the technical data, } 3 [/ 14]. The product is intended for industrial use. Appropriate use of the product includes compliance with all instructions in this manual. -
Page 9: Notes On Safe Operation
The product must not be clamped without a tool above 25°C. Never combine multiple product extensions. Only use SCHUNK intermediate sleeves and always insert up to the fixed backstop point. The use of intermediate sleeves can reduce the transmittable torque. -
Page 10: Personnel Qualification
Work on the product Necessary qualification Transport Qualified personnel/ instructed person Assembly/disassembly Specialist personnel Settings/functional testing Specialist personnel Operation Qualified personnel/ instructed person Maintenance/troubleshooting Specialist personnel/ SCHUNK service personnel Disposal Specialist personnel/ SCHUNK service personnel 01.00 | easyToolholder | Assembly and Operating Manual | en | 1573096... -
Page 11: Personal Protective Equipment
Basic safety notes 2.5 Personal protective equipment Personal protective equipment is necessary to protect staff in the event of a danger that may interfere with their health or safety at work. Observe the valid safety and accident prevention regulations and heath & safety at work rules. When working on and with the product, wear the required personal protective equipment. -
Page 12: Constructional Changes
Observe the information on troubleshooting in the assembly and operating manual. Faults not described in the assembly and operating manual may only be rectified after consultation with SCHUNK. After a malfunction, ensure that the product is able to function properly and no increased risks have arisen. -
Page 13: Hazardous Points On The Product
Basic safety notes 2.9 Hazardous points on the product NOTE: Illustration may differ from the actual design. Position Danger when Danger due to Assembling/disassembling Cutting the product/Clamping the tool Clamping the tool Crushing risk Clamping the tool The expansion sleeve bursting Assembling/disassembling Crushing risk... -
Page 14: Technical Data
Technical data 3 Technical data 3.1 General data Max. coolant pressure [bar] Tool shank tolerance Max. tightening torque of the clamping screw [Nm] 10 to 12 Adjustment travel of the length adjustment screw [mm] Adjustment travel of the length adjustment screw [mm] * Preload torque of the set-screw for run-out accuracy adjustment [Nm] *... - Page 15 Technical data Clamping Ø Min. transmittable Permissible radial force F [N] ** [mm] torque [Nm] 1410 1580 1860 4400 6500 Clamping Ø Min. transmittable Permissible radial force F [N] ** [inch] torque [Nm] 1410 1860 4400 1 1/4 6500 ** = at 2.5x clamping Ø, however, max. 50 mm projecting length of the tool 01.00 | easyToolholder | Assembly and Operating Manual | en | 1573096...
-
Page 16: Ambient Conditions And Operating Conditions
Technical data 3.2 Ambient conditions and operating conditions Relative air humidity 20-80% Range Temperature [°C] Operating temperature +20 to +50 Transport temperature -10 to +50 Storage temperature +10 to +30 Cleaning temperature 0 to +60 Test temperature clamping force control +20 to +25 Maximum temperature, clamping without tool NOTE: The temperatures refer to the product. -
Page 17: Minimum Clamping Depth
Technical data 3.4 Minimum clamping depth Clamping Ø Minimum clamping depth [mm] [mm] Clamping Ø Minimum clamping depth [inch] [mm] 1 1/4 01.00 | easyToolholder | Assembly and Operating Manual | en | 1573096... -
Page 18: Usable Tool Shank Types
Technical data 3.5 Usable tool shank types 1. Shank type according to DIN 1835-1 form A and DIN 6535 form 2. Shank type according to DIN 1835-1 form B and DIN 6535 form HB (up to Ø 20 mm) 3. Shank type according to DIN 1835-1 form B and DIN 6535 form HB (from Ø... -
Page 19: Further Information On The Product
NOTE: A separate app may be required to scan the Data Matrix code. Data matrix code Open the website schunk.com and enter the 8-digit serial number ("SN:") located on the product in the search field. For further information, visit schunk.com/serialisierung... -
Page 20: Design And Description
Design and description 4 Design and description 4.1 Design The product can be configured with various options. Zero option (adjustment of the run-out accuracy) Cool Flow option (tool cutting edge cooling) Coolant pipe mounting option NOTE: Illustration may differ from the actual design. Position Description Clamping screw Setscrews for concentricity adjustment (Zero option) *... -
Page 21: Functional Description
Design and description 4.2 Functional description This product clamps hydraulically by means of manual actuation. The piston with stroke limitation is actuated via a clamping screw. To achieve the full clamping force, the clamping screw must be screwed in until it reaches the stop. The stroke limitation protects the product against over-expansion. -
Page 22: Operation
Operation 5 Operation 5.1 Basic information WARNING Risk of injury from clothing or hair being pulled into the machine if caught on the product! Loose clothing or long hair can get caught on the product and drawn into the machine, resulting in serious injuries or even death! Only wear tight-fitting clothing and a hairnet when working on the machine and the product. - Page 23 Operation WARNING Risk of injury when the product is rotating, due to the possibility of parts flying off! Comply with the technical data. Make sure the attachments and operating components present are installed and fitted correctly. Check the clamping force regularly. Take appropriate protective measures to secure danger zones.
-
Page 24: Clamping The Tool
Operation 5.2 Clamping the tool The product must be unclamped when loading the tool. Initial tension inhibits loading and can damage the expansion sleeve. IMPORTANT! The tools to be clamped must be deburred at the surfaces that come into contact with the product, may not have sharp contours and must be free of oil, grease and dirt. -
Page 25: Unclamping The Tool
Operation 5.3 Unclamping the tool Disassemble the product } 9 [/ 34]. Loosen all set screws for the adjustment of the run-out accuracy (if present). Unscrew the clamping screw far enough to allow the tool to be easily removed. NOTE: The clamping screw is not secured against falling out. Remove tool. -
Page 26: Coolant Supply
Operation 5.6 Coolant supply Depending on the configuration, the product may be equipped with Cool Flow. This version enables peripheral cooling using cooling channels in the wall. The coolant is fed directly to the cutting edge of the tool. 01.00 | easyToolholder | Assembly and Operating Manual | en | 1573096... -
Page 27: Assembly
Assembly 6 Assembly 6.1 Basic information WARNING Risk of injury due to incorrect assembly! If assembled incorrectly, the product may be flung out during rotation, causing severe injuries. Regularly check the fastening of the product. Take suitable protective measures to secure the danger zone. Wear suitable protective equipment. -
Page 28: Assembly Of The Product
Assembly 6.2 Assembly of the product To ensure optimal machining results, the product must be precisely positioned and secured on the machine interface. NOTE: Only install the product on machines with the appropriate connection dimensions. Observe the mounting instructions from the manufacturer of the machine interface. -
Page 29: Maintenance
Maintenance 7 Maintenance 7.1 Basic information WARNING Risk of injury and material damage due to the expansion sleeve cracking. If the expansion sleeve cracks, oil may be emitted at high pressure and chips or broken pieces may fly off, causing severe injuries. -
Page 30: Intervals And Tasks
For trouble-free, long-lasting use, clean, maintain and check the functionality of the product regularly. Repair work may only be carried out by SCHUNK! If you have any questions regarding maintenance and servicing, our technical customer service is available during our business hours: Service telephone: +49-7133-103-2956 service.toolholder@de.schunk.com... -
Page 31: Cleaning The Product
The clamping force is no longer sufficient if the test shaft can be pulled out of the product with little effort using two fingers. In this case, send the product to SCHUNK for inspection. 01.00 | easyToolholder | Assembly and Operating Manual | en | 1573096... -
Page 32: Check And Lubricate The Clamping Screw
Maintenance 7.2.4 Check and lubricate the clamping screw CAUTION Allergic reactions if lubricating grease comes into contact with the skin. Wear protective gloves. In order to prevent wear to the clamping screw, we recommend that it be lubricated using a method suited to the ambient conditions and the conditions of use. -
Page 33: Troubleshooting
Tool is not lubrication of the clamped clamping screw Wear on the clamping Send the product to diameter SCHUNK for inspection Oil loss on the product Send the product to SCHUNK for inspection Product is not Unclamping the completely unclamped product } 5.3 [/ 25]... -
Page 34: Disassembly
Disassembly 9 Disassembly 9.1 Basic information WARNING Risk of injury if the product falls during transport, assembly or disassembly. Due to the oily surface required to preserve it, the product can slip through your hands, resulting in injury. Take appropriate safety measures to prevent the product from falling. -
Page 35: Storage
Storage 10 Storage When storing the product for a longer period of time, observe the following points: Ensure that the product is in an unclamped state. Clean the product and lubricate it lightly. Only store the product in dry rooms. Protect the product from major temperature fluctuations. -
Page 36: Disposal
Disposal 11 Disposal Follow local regulations on dispatching product components for recycling or proper disposal. Alternatively, you can return the product to SCHUNK for correct disposal. 01.00 | easyToolholder | Assembly and Operating Manual | en | 1573096... - Page 37 01.00 | easyToolholder | Assembly and Operating Manual | en | 1573096...
- Page 38 01.00 | easyToolholder | Assembly and Operating Manual | en | 1573096...
- Page 39 01.00 | easyToolholder | Assembly and Operating Manual | en | 1573096...
- Page 40 SCHUNK SE & Co. KG Toolholding and Workholding | Gripping Technology | Automation Technology Bahnhofstr. 106 – 134 D-74348 Lauffen/Neckar Tel. +49-7133-103-0 info@de.schunk.com schunk.com Folgen Sie uns I Follow us Wir drucken nachhaltig I We print sustainable...
Need help?
Do you have a question about the TENDO easyToolholder and is the answer not in the manual?
Questions and answers